在 Spring Boot 中,配置注解可能会让您感到困惑。这些注解包括@Configuration、@EnableConfigurationProperties、@ConfigurationPropertiesScan 等。这些注解实际上是什么,以及如何在代码中使用它们呢?
本文的目标是解释这些不同的选项,解释它们之间的差异,并通过示例展示如何使用它们。
简介
在 Spring Boot 中,配置属性是一种可以设置和配置应用程序的行为和设置的方式。这些属性可以被定义在不同的位置,如application.properties、application.yml、配置类中,也可以通过命令行参数或环境变量进行设置。
Spring Boot 提供了一个强大的属性配置系统,使得开发者可以轻松地设置和管理应用程序的配置。
通过实际的应用我们会很好理解,加上可以在官方 Spring Boot 文档(https://docs.spring.io/spring-boot/docs/current/reference/htmlsingle/)中找到(搜索配置)。然而,在我看来,它缺乏明确的例子。这就是本文的目标:解释不同的选项,解释差异,并通过示例展示如何使用它们。
本文中使用的源代码可以在GitHub上找到。(https://github.com/mydeveloperplanet/MySpringBootConfigurationPlanet)
申请样本
示例应用程序是使用start.spring.io(https://start.spring.io/)创建的,并利用Spring Web和Lombok依赖项。
本节概述如何设置存储库和基本应用程序。详细内容将在后面的章节中明确。
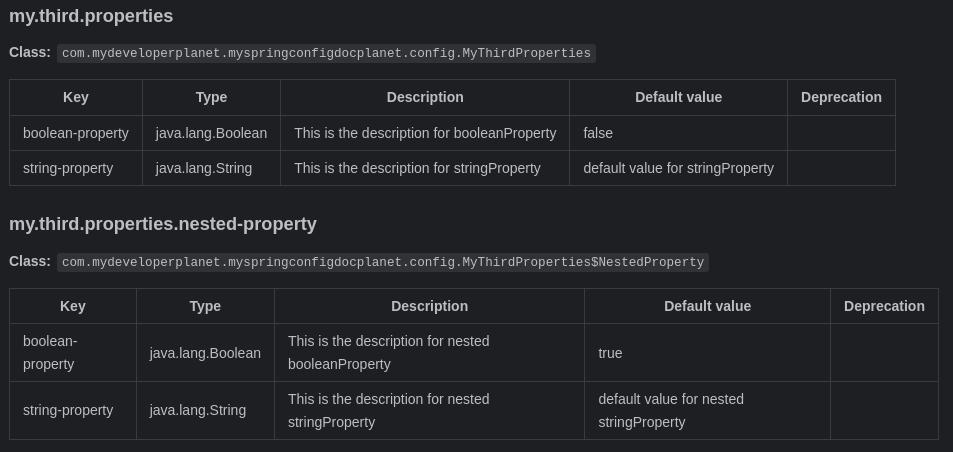
这些属性位于MyProperties类中,包括:
一个布尔值enabled;
一个字符串stringConfig;
嵌套additional配置项由以下部分组成:
一个布尔值addEnabled;
一个字符串addString。
布尔值包含其默认值,字符串值将在文件中指定一个值application.properties。属性的值addString还将包含对该stringConfig属性的引用。这样,您就可以组合属性值。
属性文件1
my.properties.string-config=First piece
my.properties.additional.add-string=${my.properties.string-config} Second piece
添加了一个ConfigurationController,它读取配置属性并返回它们。
@RequestMapping("/configuration")
public String configuration() {
    StringBuilder result = new StringBuilder();
    result.append("Value of enabled = ").append(myProperties.isEnabled()).append("\n");
    result.append("Value of stringConfig = ").append(myProperties.getStringConfig()).append("\n");
    if (myProperties.getAdditional() != null) {
        result.append("Value of additional.addEnabled = ").append(myProperties.getAdditional().isAddEnabled()).append("\n");
        result.append("Value of additional.addString = ").append(myProperties.getAdditional().getAddString()).append("\n");
    }
    return result.toString();
}
该应用程序由多个模块组成。每个模块对应于本文中涵盖的不同主题。
构建应用程序:
$ mvn clean verify
导航到模块的目录并运行应用程序:
$ mvn spring-boot:run
端点可以按如下方式调用:
$ curl http://localhost:8080/configuration
每个模块包含三个测试:
HttpRequestIT:此测试将使用注释启动一个完整的服务器@SpringBootTest;
WebLayerIT:此测试使用注释启动具有有限数量的 bean 的应用程序上下文@WebMvcTest;
WebLayerTestPropertiesIT:与 相同WebLayerIT,但这次使用特定的应用程序属性。
@ConfigurationProperties + @Component
在模块 config1 中,您将通过 @ConfigurationProperties 注释将属性映射到配置类 MyProperties。 为了在控制器中使用它,您还需要添加@Component注释。 另请注意,MyProperties 类中需要提供 setter 和 getter,它们是通过 @Getter 和 @Setter Lombok 注释生成的。
MyProperties 类如下:
@Getter
@Setter
@Component
@ConfigurationProperties("my.properties")
public class MyProperties {

    private boolean enabled;

    private String stringConfig;

    private final Additional additional = new Additional();

    @Getter
    @Setter
    public static class Additional {

        private boolean addEnabled;

        private String addString;

    }

}
在控制器中,您只需注入 MyProperties 组件即可。
@RestController
public class ConfigurationController {

    private final MyProperties myProperties;

    @Autowired
    public ConfigurationController(MyProperties myProperties) {
        this.myProperties = myProperties;
    }
   ...
}
在这种情况下,测试不需要任何特定的注释。
完整的 Spring 服务器测试
该测试(HttpRequestIT)使用@SpringBootTest进行注释,并确保使用随机端口,以防止运行测试时发生端口冲突。 调用端点并验证响应。 使用这些属性不需要额外的注释。
@SpringBootTest(webEnvironment = SpringBootTest.WebEnvironment.RANDOM_PORT)
public class HttpRequestIT {

    @Value(value="${local.server.port}")
    private int port;

    @Autowired
    private TestRestTemplate restTemplate;

    @Test
    public void configurationShouldReturnProperties() throws Exception {
        assertThat(this.restTemplate.getForObject("http://localhost:" + port + "/configuration",
                String.class)).contains("""
                Value of enabled = false
                Value of stringConfig = First piece
                Value of additional.addEnabled = false
                Value of additional.addString = First piece Second piece""");
    }
}
没有服务器测试的 Spring 应用程序上下文
此测试 (WebLayerIT) 使用 @WebMvcTest 进行注释,这意味着此测试使用有限数量的 bean 启动应用程序上下文。 因此,您需要添加
@EnableConfigurationProperties 注解才能使用这些属性。
@EnableConfigurationProperties 在配置类和测试之间创建绑定。
@WebMvcTest
@EnableConfigurationProperties(MyProperties.class)
public class WebLayerIT {

    @Autowired
    private MockMvc mockMvc;

    @Test
    public void configurationShouldReturnProperties() throws Exception {
        this.mockMvc.perform(get("/configuration")).andDo(print()).andExpect(status().isOk())
                .andExpect(content().string(containsString("""
                        Value of enabled = false
                        Value of stringConfig = First piece
                        Value of additional.addEnabled = false
                        Value of additional.addString = First piece Second piece""")));
    }

}
测试应用程序属性
上述测试使用应用程序中定义的应用程序属性。出于测试目的,通常需要使用特定于测试的应用程序属性。这些可以放在测试目录中。为了使用它们,您必须使用@TestPropertyResource注释。该测试WebLayerTestPropertiesIT与上面的测试相同WebLayerIT,除此之外,它使用测试应用程序属性。
@WebMvcTest
@EnableConfigurationProperties(MyProperties.class)
@TestPropertySource(locations = "/application-test.properties")
public class WebLayerTestPropertiesIT {

    @Autowired
    private MockMvc mockMvc;

    @Test
    public void configurationShouldReturnProperties() throws Exception {
        this.mockMvc.perform(get("/configuration")).andDo(print()).andExpect(status().isOk())
                .andExpect(content().string(containsString("""
                        Value of enabled = false
                        Value of stringConfig = First test piece
                        Value of additional.addEnabled = false
                        Value of additional.addString = First test piece Second piece""")));
    }

}
@ConfigurationProperties + @EnableConfigurationProperties
在模块config2中,您将再次使用,就像在模块config1@ConfigurationProperties中一样,但这次没有注释。为了使用控制器中的属性,您需要添加注释。@Component@EnableConfigurationProperties
MyProperties没有注释的类@Component:
@Getter
@Setter
@ConfigurationProperties("my.properties")
public class MyProperties {
...
}
带注释的控制器@EnableConfigurationProperties:
@RestController
@EnableConfigurationProperties(MyProperties.class)
public class ConfigurationController {

    private final MyProperties myProperties;

    @Autowired
    public ConfigurationController(MyProperties myProperties) {
        this.myProperties = myProperties;
    }
   ...
}
文章来源地址https://www.toymoban.com/diary/java/406.html
无需@EnableConfigurationProperties在测试中添加该注释,因为该注释已添加到控制器中。
@ConfigurationProperties + @Component
在模块 config3 中,您将使用与模块 config1 中相同的设置,但这次使用 @Configuration 注释。 @Configuration 注释创建配置构造型的 Spring bean。 @EnableConfigurationProperties 注释不应与 @Configuration 注释直接一起使用,另请参阅 Andy Wilkinson 的 Stack Overflow 回答。
MyProperties 类与模块 config2 中的类相同:
@Getter
@Setter
@ConfigurationProperties("my.properties")
public class MyProperties {
...
}
您引入了一个新类 ApplicationConfig ,它将充当配置 bean。 您可以使用@Configuration对其进行注释。 您还需要使用 @EnableConfigurationProperties 对其进行注释,以便该 bean 可以使用这些属性。
@Configuration
@EnableConfigurationProperties(MyProperties.class)
public class ApplicatonConfig {

}
控制器不需要任何额外的注释:
@RestController
public class ConfigurationController {

    private final MyProperties myProperties;

    @Autowired
    public ConfigurationController(MyProperties myProperties) {
        this.myProperties = myProperties;
    }
    ...
}
测试与config1的测试相同,需要在@WebMvcTest测试中添加@EnableConfigurationProperties注释。
@ConfigurationProperties + @ConfigurationPropertiesScan
在模块config4中,您可以@ConfigurationProperties将属性映射到 class MyProperties。这一次,您@ConfigurationPropertiesScan向该类添加注释MySpringBootConfigurationPlanetApplication,即用 注释的类@SpringBootApplication。通过@ConfigurationPropertiesScan注释,您还可以指定哪些包包含配置类。
主类定义如下:
@SpringBootApplication
@ConfigurationPropertiesScan("com.mydeveloperplanet.myspringbootconfigurationplanet.config4.config")
public class MySpringBootConfigurationPlanetApplication {

    public static void main(String[] args) {
        SpringApplication.run(MySpringBootConfigurationPlanetApplication.class, args);
    }

}
MyProperties 类只需要@ConfigurationProperties。
@Getter
@Setter
@ConfigurationProperties("my.properties")
public class MyProperties {
...
}
控制器不需要任何配置注释:
@RestController
public class ConfigurationController {

    private final MyProperties myProperties;

    @Autowired
    public ConfigurationController(MyProperties myProperties) {
        this.myProperties = myProperties;
    }
    ...
}
这些测试再次与config1的测试相同。
构造函数绑定
在模块config5中,您使用与之前的config4模块相同的设置。这次,您将在MyProperties类中使用构造函数绑定。差异是:
无需指定setter,属性可最终确定;
您需要添加一个构造函数来映射配置;
默认值需要通过@DefaultValue 构造函数参数列表中的注解来指定;
您可能需要使用 注释嵌套属性@DefaultValue,否则,当嵌套属性的任何属性都没有赋值时,它们将被视为不存在。
该类MyProperties如下:
@Getter
@ConfigurationProperties("my.properties")
public class MyProperties {

    private final boolean enabled;

    private final String stringConfig;

    private final Additional additional;

    public MyProperties(boolean enabled, String stringConfig, @DefaultValue Additional additional) {
        this.enabled = enabled;
        this.stringConfig = stringConfig;
        this.additional = additional;
    }

    @Getter
    public static class Additional {

        private final boolean addEnabled;

        private final String addString;

        public Additional(boolean addEnabled, String addString) {
            this.addEnabled = addEnabled;
            this.addString = addString;
        }
    }

}
如果您@DefaultValue在参数列表中省略参数additional并将属性放入my.properties.additional.add-string注释application.properties中,您会注意到输出是:
Value of enabled = false
Value of stringConfig = First test piece
代替 :
Value of enabled = false
Value of stringConfig = First test piece
Value of additional.addEnabled = false
Value of additional.addString = null
当你运行WebLayerIT测试时。
这些测试再次与config1的测试相同。
总结
有多个选项可用于在 Spring Boot 应用程序中配置属性。 这篇文章试图涵盖一些选项并通过示例解释差异。 构造函数绑定配置与其他选项不同,因为它不允许您在运行时修改属性。
选择哪一个? 在我看来,@ConfigurationProperties + @ConfigurationPropertiesScan 或构造函数绑定是可供选择的,因为它们需要最少的注释。 构造函数绑定更加安全,因为属性在运行时无法修改。 但是,您应该始终根据您的用例考虑选项。文章来源:https://www.toymoban.com/diary/java/406.html
到此这篇关于Spring Boot 配置属性解释的文章就介绍到这了,更多相关内容可以在右上角搜索或继续浏览下面的相关文章,希望大家以后多多支持TOY模板网!


