在我参与过的大多数大型应用程序和项目中,我经常发现自己构建了一堆组件,这些组件实际上是标准 HTML 元素之上的超集或抽象。一些示例包括自定义按钮元素,这些元素可能采用一个 prop 来定义该按钮是否应该是主按钮或辅助按钮,或者可能指示它将调用危险操作,例如从数据库中删除或删除项目。除了我想添加的道具之外,我仍然希望我的按钮具有按钮的所有属性。
另一个常见的情况是,我最终将创建一个允许我同时定义标签和输入字段的组件。我不想重新添加元素所<input />具有的所有属性。我希望我的自定义组件的行为就像输入字段一样,但也采用一个字符串作为标签,并自动连接htmlFor上的 prop<label />以与id上的相对应<input />。
在 JavaScript 中,我可以将{...props}任何 props 传递给底层 HTML 元素。这在 TypeScript 中可能有点棘手,我需要显式定义组件将接受哪些 props。虽然对组件接受的确切类型进行细粒度控制很好,但必须手动为每个属性添加类型信息可能很乏味。
在某些情况下,我需要一个可适应的组件,例如<div>,它可以根据当前主题更改样式。例如,也许我想根据用户是否手动启用 UI 的浅色或深色模式来定义应使用哪些样式。我不想为每个块元素(例如<section>、<article>、<aside>等)重新定义此组件。它应该能够表示不同语义的 HTML 元素,并且 TypeScript 自动调整以适应这些变化。
我们可以采用以下几种策略:
对于仅对一种元素创建抽象的组件,我们可以扩展该元素的属性。
对于想要定义不同元素的组件,我们可以创建多态组件。多态组件是设计为呈现为不同的 HTML 元素或组件,同时保持相同的属性和行为的组件。它允许我们指定一个 prop 来确定其渲染的元素类型。多态组件提供了灵活性和可重用性,而无需我们重新实现组件。举个具体的例子,你可以看看Radix 的多态组件的实现。(https://www.radix-ui.com/primitives/docs/utilities/polymorphic)
在本教程中,我们将了解第一个策略。
镜像和扩展 HTML 元素的属性
让我们从简介中提到的第一个示例开始。我们想要创建一个带有适当样式的按钮,以便在我们的应用程序中使用。在 JavaScript 中,我们也许可以做这样的事情:
镜像和扩展 HTML 元素的属性
让我们从简介中提到的第一个示例开始。我们想要创建一个带有适当样式的按钮,以便在我们的应用程序中使用。在 JavaScript 中,我们也许可以做这样的事情:
const Button = (props) => {
  return <button className="button" {...props} />;
};
在 TypeScript 中,我们只需添加我们知道需要的内容即可。例如,我们知道children如果我们希望自定义按钮的行为与 HTML 按钮相同,则需要:
const Button = ({ children }: React.PropsWithChildren) => {
  return <button className="button">{children}</button>;
};
您可以想象一次添加一个属性可能会有点乏味。<button>相反,我们可以告诉 TypeScript 我们想要匹配它在 React 中用于元素的相同属性:
const Button = (props: React.ComponentProps<'button'>) => {
  return <button className="button" {...props} />;
};
但我们有一个新问题。或者更确切地说,我们遇到了JavaScript 示例中也存在的问题,但我们忽略了它。如果有人使用我们的新Button组件传递一个classNameprop,它将覆盖我们的className. 我们可以(并且我们将会)添加一些代码来处理这个问题,但我不想错过向您展示如何在 TypeScript 中使用实用程序类型的机会,以表示“我想使用所有来自 HTML 按钮的 props,除了一个(或多个)”:
type ButtonProps = Omit<React.ComponentProps<'button'>, 'className'>;

const Button = (props: ButtonProps) => {
  return <button className="button" {...props} />;
};
现在,TypeScript 将阻止我们或其他任何人将className属性传递到我们的Button组件中。如果我们只想使用传入的内容扩展类列表,我们可以通过几种不同的方式来实现。我们可以将其附加到列表中:
type ButtonProps = React.ComponentProps<'button'>;

const Button = (props: ButtonProps) => {
  const className = 'button ' + props.className;

  return <button className={className.trim()} {...props} />;
};
我喜欢在处理类时使用clsx库,因为它代表我们处理大多数此类事情:
import React from 'react';
import clsx from 'clsx';

type ButtonProps = React.ComponentProps<'button'>;

const Button = ({ className, ...props }: ButtonProps) => {
  return <button className={clsx('button', className)} {...props} />;
};

export default Button;
我们学习了如何限制组件接受的 props。为了扩展 props,我们可以使用交集:
type ButtonProps = React.ComponentProps<'button'> & {
  variant?: 'primary' | 'secondary';
};
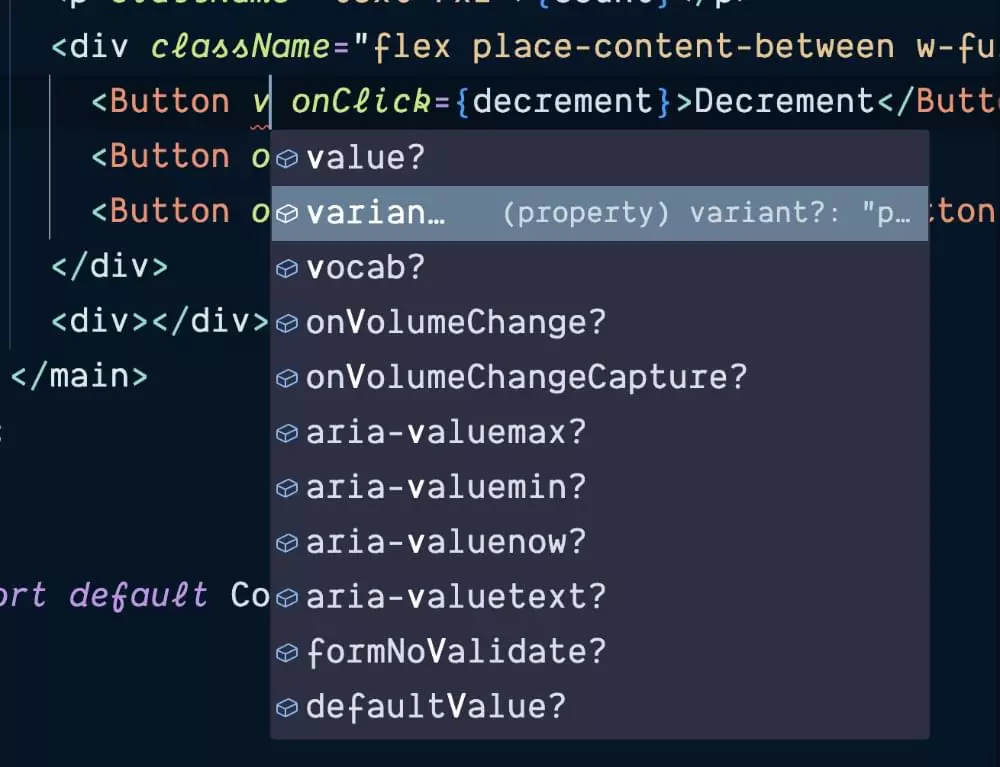
我们现在说的是Button接受元素接受的所有 props<button>加上一个:variant。该道具将与我们继承的所有其他道具一起显示HTMLButtonElement。

我们Button也可以添加对添加此类的支持:
const Button = ({ variant, className, ...props }: ButtonProps) => {
  return (
    <button
      className={clsx(
        'button',
        variant === 'primary' && 'button-primary',
        variant === 'secondary' && 'button-secondary',
        className,
      )}
      {...props}
    />
  );
};
我们现在可以更新src/application.tsx以使用新的按钮组件:
diff --git a/src/application.tsx b/src/application.tsx
index 978a61d..fc8a416 100644
--- a/src/application.tsx
+++ b/src/application.tsx
@@ -1,3 +1,4 @@
+import Button from './components/button';
 import useCount from './use-count';

 const Counter = () => {
@@ -8,15 +9,11 @@ const Counter = () => {
       <h1>Counter</h1>
       <p className="text-7xl">{count}</p>
       <div className="flex place-content-between w-full">
-        <button className="button" onClick={decrement}>
+        <Button onClick={decrement}>
           Decrement
-        </button>
-        <button className="button" onClick={reset}>
-          Reset
-        </button>
-        <button className="button" onClick={increment}>
-          Increment
-        </button>
+        </Button>
+        <Button onClick={reset}>Reset</Button>
+        <Button onClick={increment}>Increment</Button>
       </div>
       <div>
         <form
@@ -32,9 +29,9 @@ const Counter = () => {
         >
           <label htmlFor="set-count">Set Count</label>
           <input type="number" id="set-count" name="set-count" />
-          <button className="button-primary" type="submit">
+          <Button variant="primary" type="submit">
             Set
-          </button>
+          </Button>
         </form>
       </div>
     </main>
您可以在本教程的 GitHub 存储库分支中button找到上述更改。(https://github.com/stevekinney/polymorphic/tree/button)
创建复合组件
我通常最终为自己制作的另一个常见组件是分别使用正确的for和属性正确连接标签和输入元素的组件。id我往往会厌倦一遍又一遍地输入以下内容:
<label htmlFor="set-count">Set Count</label>
<input type="number" id="set-count" name="set-count" />
如果不扩展 HTML 元素的 props,我最终可能会根据需要慢慢添加 props:
type LabeledInputProps = {
  id?: string;
  label: string;
  value: string | number;
  type?: string;
  className?: string;
  onChange?: ChangeEventHandler<HTMLInputElement>;
};
正如我们在按钮中看到的那样,我们可以以类似的方式重构它:
type LabeledInputProps = React.ComponentProps<'input'> & {
  label: string;
};
除了label我们要传递给(呃)标签(我们经常希望将其与输入分组)之外,我们还手动将道具一一传递。我们要添加吗autofocus?最好添加另一个道具。最好做这样的事情:
import { ComponentProps } from 'react';

type LabeledInputProps = ComponentProps<'input'> & {
  label: string;
};

const LabeledInput = ({ id, label, ...props }: LabeledInputProps) => {
  return (
    <>
      <label htmlFor={id}>{label}</label>
      <input {...props} id={id} readOnly={!props.onChange} />
    </>
  );
};

export default LabeledInput;
我们可以在以下位置交换新组件src/application.tsx:
<LabeledInput
  id="set-count"
  label="Set Count"
  type="number"
  onChange={(e) => setValue(e.target.valueAsNumber)}
  value={value}
/>
我们可以取出需要使用的东西,然后将其他所有东西传递给组件<input />,然后在接下来的日子里假装它是一个标准HTMLInputElement。
TypeScript 并不关心,因为HTMLElement它非常灵活,因为 DOM 早于 TypeScript。如果我们把一些完全令人震惊的东西扔进去,它只会抱怨。
您可以在本教程的 GitHub 存储库分支中input查看上述所有更改。(https://github.com/stevekinney/polymorphic/tree/input)文章来源:https://www.toymoban.com/diary/js/424.html
文章来源地址https://www.toymoban.com/diary/js/424.html
到此这篇关于在 TypeScript中扩展HTML元素的属性的文章就介绍到这了,更多相关内容可以在右上角搜索或继续浏览下面的相关文章,希望大家以后多多支持TOY模板网!


