介绍
这里是小编成长之路的历程,也是小编的学习之路。希望和各位大佬们一起成长!
以下为小编最喜欢的两句话:
要有最朴素的生活和最遥远的梦想,即使明天天寒地冻,山高水远,路远马亡。
一个人为什么要努力? 我见过最好的答案就是:因为我喜欢的东西都很贵,我想去的地方都很远,我爱的人超完美。因此,小编想说:共勉!
目录
前言
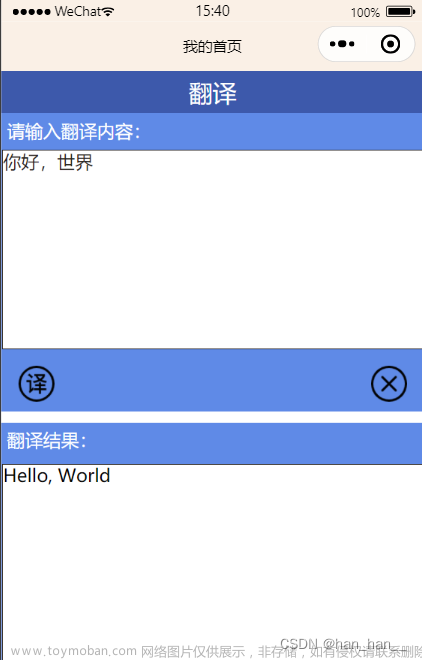
显示效果
一、注册和风天气的账号(具体过程就不演示了)
二、获取和风天气的key
1、创建项目
2、获取key
三、在小程序中的使用
第一步:创建包
第二步:示例代码
workweather.wxml
workweather.wxxs
workweather.js
显示效果

注意:如果各位大佬们,按照该博客不能出现自己想要的效果,那么可以去找其他的方法实现,可将该博客当做一个小小的参考。感谢各位大佬的观看!
一、注册和风天气的账号(具体过程就不演示了)
和风天气的官网
和风天气插件 | 和风天气插件产品,免费、跨终端。适配你的网站、APP、公众号 (qweather.com)
二、获取和风天气的key
1、创建项目
控制台===》项目管理===》创建项目 就可以看到以下页面(注意:如果页面不一样的话,可能是更新了)

这个地方注意一下,看你是做案例还是,公司使用,如果是做案例,可以和小编一样选择免费订阅。设置key的地方你可以选择Web API,如果你选择了 Android SDK / iOS SDK,那么生成的密钥只能使用官方的 SDK 进行数据访问,如果是 Web API的话,可以自己编程获取并解析数据。(当然WebAPI解析比较慢一点,可以稍微等一会)
2、获取key

三、在小程序中的使用
如果是小白的话,没有账号,建议注册一个小程序的账号,具体看小编的这篇文章。有账号跳过这个步骤
【微信小程序】注册小程序账号、做一个案例——你好我的小程序_determine ZandR的博客-CSDN博客
第一步:创建包

第二步:示例代码
workweather.wxml
<view class="header-modular" wx:if="{{now}}">
	<image class="bg-wave" src="https://codermoyv.gitee.io/coder-moyv/assets/images/wechat/bg_wave.gif"></image>
	<view class="row">
		<view class="row location-wrap" bindtap="selectLocation">
			<image class="icon" src=""></image>
			<view class="title">{{City}} {{County}}</view>
		</view>

	</view>
	<view class="row">
		<view class="tmp">{{now.temp}}°</view>
		<image class="icon-weather" src="https://codermoyv.gitee.io/coder-moyv/assets/images/wechat/weather_custom/{{now.icon}}.png"></image>
	</view>
	<view class="tips-wrap">
		<view class="tips ">{{now.windDir}} {{now.windScale}}级</view>
		<view class="tips ">湿度 {{now.humidity}}%</view>
		<view class="tips ">气压 {{now.pressure}}Pa</view>
	</view>
</view>

<view class="card-modular " wx:if="{{hourly}}">
	<view class="title">24小时预报</view>
	<view class="card-wrap">
		<block wx:for="{{hourly}}" wx:key="index">
			<view class="item hourly">
				<view class="text-gray">{{item.time}}</view>
				<image class="icon" src="https://codermoyv.gitee.io/coder-moyv/assets/images/wechat/weather_custom/{{item.icon}}.png"></image>
				<view class="text-primary mb-32">{{item.temp}}°</view>
				<view>{{item.windDir}}</view>
				<view class="text-gray">{{item.windScale}}级</view>
			</view>
		</block>
	</view>
</view>

<view class="card-modular" wx:if="{{daily}}">
	<view class="title">7天预报</view>
	<view class="card-wrap">
		<block wx:for="{{daily}}" wx:key="index">
			<view class="item daily">
				<view>{{item.dateToString}}</view>
				<view class="text-gray">{{item.date}}</view>
				<image class="icon" src="https://codermoyv.gitee.io/coder-moyv/assets/images/wechat/weather_custom/{{item.iconDay}}.png"></image>
				<view class="text-primary ">{{item.tempMin}}°~{{item.tempMax}}°</view>
				<image class="icon" src="https://codermoyv.gitee.io/coder-moyv/assets/images/wechat/weather_custom/{{item.iconNight}}.png"></image>
				<view>{{item.windDirDay}}</view>
				<view class="text-gray">{{item.windScaleDay}}级</view>
			</view>
		</block>
	</view>
</view>
workweather.wxxs
  page {
    background-color: linear-gradient(to bottom, #ffffff,#ffffff, #F6F6F6);
    padding-bottom: 60rpx;
  }

  /* 工具类 */
  .row {
    display: flex;
    align-items: center;
  }

  .mb-32{
    margin-bottom: 32rpx;
  }

  /* 页面样式 */
  .header-modular {
    height: 400rpx;
    background-color: #64C8FA;
    background: linear-gradient(to bottom, #56CCF2, #2F80ED);
    position: relative;
    padding: 30rpx;
  }

  .header-modular .bg-wave {
    width: 100vw;
    position: absolute;
    bottom: -2px;
    left: 0;
    right: 0;
    height: 120rpx;
    mix-blend-mode: screen;
  }

  .header-modular .location-wrap {
    color: #ffffff;
    font-weight: bold;
    font-size: 36rpx;
  }

  .header-modular .location-wrap .icon {
    width: 40rpx;
    height: 40rpx;
    margin-right: 8rpx;
  }

  .header-modular .tmp {
    font-size: 200rpx;
    /* font-weight: bold; */
    color: #ffffff;
    margin-right: auto;
  }

  .header-modular .icon-weather {
    width: 200rpx;
    height: 200rpx;
  }

  .header-modular .tips-wrap {
    display: flex;
    justify-content: space-between;
  }

  .header-modular .tips {
    font-size: 28rpx;
    opacity: 0.8;
    color: #ffffff;
    flex: 1;
  }

  .header-modular .tips:nth-child(3) {
    text-align: right;
  }

  .header-modular .tips:nth-child(2) {
    text-align: center;
  }

  .card-modular {
    padding:0 30rpx;
    margin-top: 30rpx;
  }

  .card-modular>.title {
    font-size: 40rpx;
    font-weight: bold;
    position: relative;
    margin-left: 14rpx;
    margin-bottom: 16rpx;
  }

  .card-modular>.title::before {
    content: "";
    position: absolute;
    left: -14rpx;
    top: 10rpx;
    bottom: 10rpx;
    width: 8rpx;
    border-radius: 10rpx;
    background-color: #2F80ED;
  }

  .card-modular .card-wrap {
    width: 690rpx;
    border-radius: 18rpx;
    background-color: #ffffff;
    box-shadow: 0 0 20rpx 0 rgba(0, 0, 0, 0.2);
    overflow-x: auto;
    white-space: nowrap;
  }

  .card-modular .card-wrap .item {
    display: inline-flex;
    flex-direction: column;
    align-items: center;
    font-size: 28rpx;
    padding: 18rpx 0;
  }
  .card-modular .card-wrap .item.hourly{
    width: 138rpx;
  }
  .card-modular .card-wrap .item.daily{
    width: 172.5rpx;
  }
  .card-modular .card-wrap .item .icon {
    width: 60rpx;
    height: 60rpx;
    margin: 64rpx 0;
  }

  .card-modular .card-wrap .item .text-gray {
    color: gray;
  }

  .card-modular .card-wrap .item .text-primary {
    color: #2F80ED;
  }
workweather.js
const APIKEY = "";// 填入你申请的KEY
Page({
/**
* 页面的初始数据
*/
data: {
},
/**
* 生命周期函数--监听页面加载
*/
onLoad: function (options) {
this.getLocation()
},
//选择定位
selectLocation() {
var that = this
wx.chooseLocation({
success(res) {
//console.log(res)
that.setData({
location: res.longitude + "," + res.latitude
})
that.getWeather()
that.getCityByLoaction()
}
, fail() {
wx.getLocation({
type: 'gcj02',
fail() {
wx.showModal({
title: '获取地图位置失败',
content: '为了给您提供准确的天气预报服务,请在设置中授权【位置信息】',
success(mRes) {
if (mRes.confirm) {
wx.openSetting({
success: function (data) {
if (data.authSetting["scope.userLocation"] === true) {
that.selectLocation()
} else {
wx.showToast({
title: '授权失败',
icon: 'none',
duration: 1000
})
}
}, fail(err) {
console.log(err)
wx.showToast({
title: '唤起设置页失败,请手动打开',
icon: 'none',
duration: 1000
})
}
})
}
}
})
}
})
}
})
},
/**
* 获取定位
*/
getLocation() {
var that = this
wx.getLocation({
type: 'gcj02',
success(res) {
that.setData({
location: res.longitude + "," + res.latitude
})
that.getWeather()
that.getCityByLoaction()
}, fail(err) {
wx.showModal({
title: '获取定位信息失败',
content: '为了给您提供准确的天气预报服务,请在设置中授权【位置信息】',
success(mRes) {
if (mRes.confirm) {
wx.openSetting({
success: function (data) {
if (data.authSetting["scope.userLocation"] === true) {
wx.showToast({
title: '授权成功',
icon: 'success',
duration: 1000
})
that.getLocation()
} else {
wx.showToast({
title: '授权失败',
icon: 'none',
duration: 1000
})
that.setData({
location: "地理位置"
})
that.getWeather()
that.getCityByLoaction()
}
}, fail(err) {
console.log(err)
wx.showToast({
title: '唤起设置页失败,请手动打开',
icon: 'none',
duration: 1000
})
that.setData({
location: "地理位置"
})
that.getWeather()
that.getCityByLoaction()
}
})
} else if (mRes.cancel) {
that.setData({
location: "地理位置"
})
that.getWeather()
that.getCityByLoaction()
}
}
})
}
})
},
/**
* 根据坐标获取城市信息
*/
getCityByLoaction() {
var that = this
wx.request({
url: 'https://geoapi.qweather.com/v2/city/lookup?key=' + APIKEY + "&location=" + that.data.location,
success(result) {
var res = result.data
if (res.code == "200") {
var data = res.location[0]
that.setData({
City: data.adm2,
County: data.name
})
} else {
wx.showToast({
title: '获取城市信息失败',
icon: 'none'
})
}
}
})
},
/**
* 获取天气
*/
getWeather() {
var that = this
wx.showLoading({
title: '加载中',
})
wx.request({
url: 'https://devapi.qweather.com/v7/weather/now?key=' + APIKEY + "&location=" + that.data.location,
success(result) {
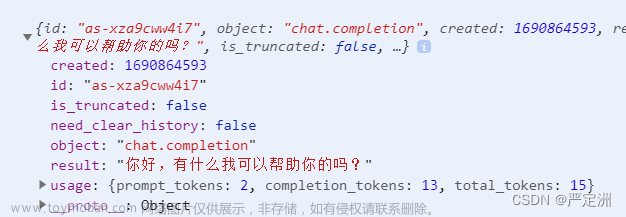
var res = result.data
//console.log(res)
that.setData({
now: res.now
})
}
})
wx.request({
url: 'https://devapi.qweather.com/v7/weather/24h?key=' + APIKEY + "&location=" + that.data.location,
success(result) {
var res = result.data
//console.log(res)
res.hourly.forEach(function (item) {
item.time = that.formatTime(new Date(item.fxTime)).hourly
})
that.setData({
hourly: res.hourly
})
}
})
wx.request({
url: 'https://devapi.qweather.com/v7/weather/7d?key=' + APIKEY + "&location=" + that.data.location,
success(result) {
var res = result.data
//console.log(res)
res.daily.forEach(function (item) {
item.date = that.formatTime(new Date(item.fxDate)).daily
item.dateToString = that.formatTime(new Date(item.fxDate)).dailyToString
})
that.setData({
daily: res.daily
})
wx.hideLoading()
}
})
},
// 格式时间
formatTime(date) {
const year = date.getFullYear()
const month = date.getMonth() + 1
const day = date.getDate()
const hour = date.getHours()
const minute = date.getMinutes()
const second = date.getSeconds()
const weekArray = ["周日", "周一", "周二", "周三", "周四", "周五", "周六"]
const isToday = date.setHours(0, 0, 0, 0) == new Date().setHours(0, 0, 0, 0)
return {
hourly: [hour, minute].map(this.formatNumber).join(":"),
daily: [month, day].map(this.formatNumber).join("-"),
dailyToString: isToday ? "今天" : weekArray[date.getDay()]
}
},
// 补零
formatNumber(n) {
n = n.toString()
return n[1] ? n : '0' + n
},
/**
* 生命周期函数--监听页面初次渲染完成
*/
onReady: function () {
},
/**
* 生命周期函数--监听页面显示
*/
onShow: function () {
},
/**
* 生命周期函数--监听页面隐藏
*/
onHide: function () {
},
/**
* 生命周期函数--监听页面卸载
*/
onUnload: function () {
},
/**
* 页面相关事件处理函数--监听用户下拉动作
*/
onPullDownRefresh: function () {
},
/**
* 页面上拉触底事件的处理函数
*/
onReachBottom: function () {
},
/**
* 用户点击右上角分享
*/
onShareAppMessage: function () {
}
})
注意: 如果复制上述代码,出现wx.getLocation need to be declared in the requiredPrivateInfos field in app.json的问题,查看两个地方
一、看全局json中是否有以下代码
  "requiredPrivateInfos": [
    "getLocation"
] 
二、看版本(2.6.0以上版本无法使用)
 文章来源:https://www.toymoban.com/news/detail-400015.html
以上就是小编做的一个小案例,希望各位大佬多多指教!!!文章来源地址https://www.toymoban.com/news/detail-400015.html
到了这里,关于【微信小程序】使用和风天气接口api(全过程)——获取天气的文章就介绍完了。如果您还想了解更多内容,请在右上角搜索TOY模板网以前的文章或继续浏览下面的相关文章,希望大家以后多多支持TOY模板网!