运行有问题或需要全部资源请点赞关注收藏后评论区留言~~~
一、通知推送Ntification
在APP的运行过程中,为了让用户及时收到某些消息,有必要由App主动向用户推送消息通知,以免错过有价值的信息。
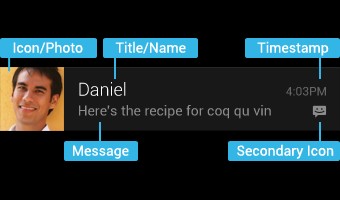
在手机屏幕的顶端下拉会弹出通知栏,里面存放的便是App主动推给用户的提醒消息,消息通知的组成内容由Notification类所描述,每条消息通知都有消息图标,消息标题,消息内容等基本元素,时不时还有附加文本,进度条,计时器等额外元素。
并且Notification仅仅描述了消息通知的组成内容,实际推送工作还需要由通知管理器NotificationManager执行。
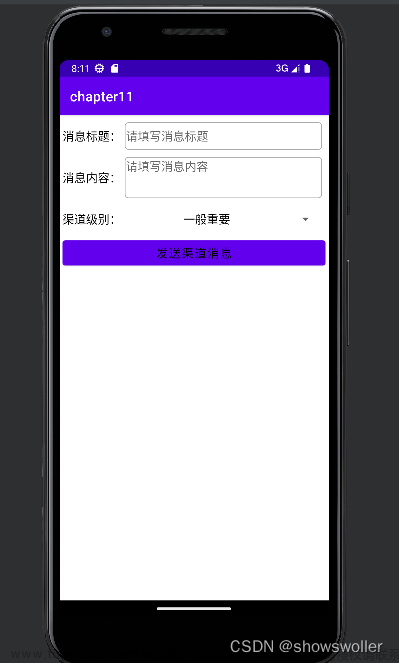
下面以发送简单消息为例 效果如下,如果你连接了真机则手机上会弹出所输入信息的弹框


代码如下
Java类
package com.example.chapter11;

import android.app.Notification;
import android.app.NotificationManager;
import android.app.PendingIntent;
import android.content.Context;
import android.content.Intent;
import android.graphics.BitmapFactory;
import android.os.Build;
import android.os.Bundle;
import android.text.TextUtils;
import android.view.View;
import android.widget.EditText;
import android.widget.Toast;

import androidx.appcompat.app.AppCompatActivity;

import com.example.chapter11.util.ViewUtil;

public class NotifySimpleActivity extends AppCompatActivity implements View.OnClickListener {
    private EditText et_title;
    private EditText et_message;

    @Override
    protected void onCreate(Bundle savedInstanceState) {
        super.onCreate(savedInstanceState);
        setContentView(R.layout.activity_notify_simple);
        et_title = findViewById(R.id.et_title);
        et_message = findViewById(R.id.et_message);
        findViewById(R.id.btn_send_simple).setOnClickListener(this);
    }

    @Override
    public void onClick(View v) {
        if (v.getId() == R.id.btn_send_simple) {
            ViewUtil.hideOneInputMethod(this, et_message); // 隐藏输入法软键盘
            if (TextUtils.isEmpty(et_title.getText())) {
                Toast.makeText(this, "请填写消息标题", Toast.LENGTH_SHORT).show();
                return;
            }
            if (TextUtils.isEmpty(et_message.getText())) {
                Toast.makeText(this, "请填写消息内容", Toast.LENGTH_SHORT).show();
                return;
            }
            String title = et_title.getText().toString();
            String message = et_message.getText().toString();
            sendSimpleNotify(title, message); // 发送简单的通知消息
        }
    }

    // 发送简单的通知消息(包括消息标题和消息内容)
    private void sendSimpleNotify(String title, String message) {
        // 发送消息之前要先创建通知渠道,创建代码见MainApplication.java
        // 创建一个跳转到活动页面的意图
        Intent clickIntent = new Intent(this, MainActivity.class);
        // 创建一个用于页面跳转的延迟意图
        PendingIntent contentIntent = PendingIntent.getActivity(this,
                R.string.app_name, clickIntent, PendingIntent.FLAG_UPDATE_CURRENT);
        // 创建一个通知消息的建造器
        Notification.Builder builder = new Notification.Builder(this);
        if (Build.VERSION.SDK_INT >= Build.VERSION_CODES.O) {
            // Android 8.0开始必须给每个通知分配对应的渠道
            builder = new Notification.Builder(this, getString(R.string.app_name));
        }
        builder.setContentIntent(contentIntent) // 设置内容的点击意图
                .setAutoCancel(true) // 点击通知栏后是否自动清除该通知
                .setSmallIcon(R.mipmap.ic_launcher) // 设置应用名称左边的小图标
                .setSubText("这里是副本") // 设置通知栏里面的附加说明文本
                // 设置通知栏右边的大图标
                .setLargeIcon(BitmapFactory.decodeResource(getResources(), R.drawable.ic_app))
                .setContentTitle(title) // 设置通知栏里面的标题文本
                .setContentText(message); // 设置通知栏里面的内容文本
        Notification notify = builder.build(); // 根据通知建造器构建一个通知对象
        // 从系统服务中获取通知管理器
        NotificationManager notifyMgr = (NotificationManager)
                getSystemService(Context.NOTIFICATION_SERVICE);
        // 使用通知管理器推送通知,然后在手机的通知栏就会看到该消息
        notifyMgr.notify(R.string.app_name, notify);
    }

}
XML文件
<LinearLayout xmlns:android="http://schemas.android.com/apk/res/android"
    android:layout_width="match_parent"
    android:layout_height="match_parent"
    android:orientation="vertical"
    android:padding="5dp" >

    <LinearLayout
        android:layout_width="match_parent"
        android:layout_height="50dp"
        android:orientation="horizontal">

        <TextView
            android:layout_width="wrap_content"
            android:layout_height="match_parent"
            android:gravity="center"
            android:text="消息标题:"
            android:textColor="@color/black"
            android:textSize="17sp" />

        <EditText
            android:id="@+id/et_title"
            android:layout_width="0dp"
            android:layout_height="match_parent"
            android:layout_weight="1"
            android:layout_margin="5dp"
            android:background="@drawable/editext_selector"
            android:hint="请填写消息标题"
            android:textColor="@color/black"
            android:textSize="17sp" />

    </LinearLayout>

    <LinearLayout
        android:layout_width="match_parent"
        android:layout_height="70dp"
        android:orientation="horizontal">

        <TextView
            android:layout_width="wrap_content"
            android:layout_height="match_parent"
            android:gravity="center"
            android:text="消息内容:"
            android:textColor="@color/black"
            android:textSize="17sp" />

        <EditText
            android:id="@+id/et_message"
            android:layout_width="0dp"
            android:layout_height="match_parent"
            android:layout_weight="1"
            android:gravity="top"
            android:layout_margin="5dp"
            android:background="@drawable/editext_selector"
            android:hint="请填写消息内容"
            android:textColor="@color/black"
            android:textSize="17sp" />

    </LinearLayout>

    <Button
        android:id="@+id/btn_send_simple"
        android:layout_width="match_parent"
        android:layout_height="wrap_content"
        android:gravity="center"
        android:text="发送简单消息"
        android:textColor="@color/black"
        android:textSize="17sp" />

</LinearLayout>
二、包含计时器与进度条
如果消息通知包含计时器与进度条,则需要调用消息建造器的setUsesChronometer与setProgress方法,效果如下
包含进度条不仅更加美观而且让用户能实时看见App的进展情况

代码如下文章来源:https://www.toymoban.com/news/detail-403501.html
Java类
package com.example.chapter11;

import android.app.Notification;
import android.app.NotificationManager;
import android.app.PendingIntent;
import android.content.Context;
import android.content.Intent;
import android.graphics.BitmapFactory;
import android.os.Build;
import android.os.Bundle;
import android.text.TextUtils;
import android.view.View;
import android.widget.EditText;
import android.widget.Toast;

import androidx.appcompat.app.AppCompatActivity;

import com.example.chapter11.util.ViewUtil;

public class NotifyCounterActivity extends AppCompatActivity implements View.OnClickListener {
    private EditText et_title;
    private EditText et_message;

    @Override
    protected void onCreate(Bundle savedInstanceState) {
        super.onCreate(savedInstanceState);
        setContentView(R.layout.activity_notify_counter);
        et_title = findViewById(R.id.et_title);
        et_message = findViewById(R.id.et_message);
        findViewById(R.id.btn_send_counter).setOnClickListener(this);
    }

    @Override
    public void onClick(View v) {
        if (v.getId() == R.id.btn_send_counter) {
            ViewUtil.hideOneInputMethod(this, et_message); // 隐藏输入法软键盘
            if (TextUtils.isEmpty(et_title.getText())) {
                Toast.makeText(this, "请填写消息标题", Toast.LENGTH_SHORT).show();
                return;
            }
            if (TextUtils.isEmpty(et_message.getText())) {
                Toast.makeText(this, "请填写消息内容", Toast.LENGTH_SHORT).show();
                return;
            }
            String title = et_title.getText().toString();
            String message = et_message.getText().toString();
            sendCounterNotify(title, message); // 发送计时的通知消息
        }
    }

    // 发送计时的通知消息
    private void sendCounterNotify(String title, String message) {
        // 发送消息之前要先创建通知渠道,创建代码见MainApplication.java
        // 创建一个跳转到活动页面的意图
        Intent cancelIntent = new Intent(this, MainActivity.class);
        // 创建一个用于页面跳转的延迟意图
        PendingIntent deleteIntent = PendingIntent.getActivity(this,
                R.string.app_name, cancelIntent, PendingIntent.FLAG_UPDATE_CURRENT);
        // 创建一个通知消息的建造器
        Notification.Builder builder = new Notification.Builder(this);
        if (Build.VERSION.SDK_INT >= Build.VERSION_CODES.O) {
            // Android 8.0开始必须给每个通知分配对应的渠道
            builder = new Notification.Builder(this, getString(R.string.app_name));
        }
        builder.setDeleteIntent(deleteIntent) // 设置内容的清除意图
                .setSmallIcon(R.mipmap.ic_launcher) // 设置应用名称左边的小图标
                // 设置通知栏右边的大图标
                .setLargeIcon(BitmapFactory.decodeResource(getResources(), R.drawable.ic_app))
                .setProgress(100, 60, false) // 设置进度条及其具体进度
                .setUsesChronometer(true) // 设置是否显示计时器
                .setContentTitle(title) // 设置通知栏里面的标题文本
                .setContentText(message); // 设置通知栏里面的内容文本
        Notification notify = builder.build(); // 根据通知建造器构建一个通知对象
        // 从系统服务中获取通知管理器
        NotificationManager notifyMgr = (NotificationManager)
                getSystemService(Context.NOTIFICATION_SERVICE);
        // 使用通知管理器推送通知,然后在手机的通知栏就会看到该消息
        notifyMgr.notify(R.string.app_name, notify);
    }

}
XML文件
<LinearLayout xmlns:android="http://schemas.android.com/apk/res/android"
    android:layout_width="match_parent"
    android:layout_height="match_parent"
    android:orientation="vertical"
    android:padding="5dp" >

    <LinearLayout
        android:layout_width="match_parent"
        android:layout_height="50dp"
        android:orientation="horizontal">

        <TextView
            android:layout_width="wrap_content"
            android:layout_height="match_parent"
            android:gravity="center"
            android:text="消息标题:"
            android:textColor="@color/black"
            android:textSize="17sp" />

        <EditText
            android:id="@+id/et_title"
            android:layout_width="0dp"
            android:layout_height="match_parent"
            android:layout_weight="1"
            android:layout_margin="5dp"
            android:background="@drawable/editext_selector"
            android:hint="请填写消息标题"
            android:textColor="@color/black"
            android:textSize="17sp" />

    </LinearLayout>

    <LinearLayout
        android:layout_width="match_parent"
        android:layout_height="70dp"
        android:orientation="horizontal">

        <TextView
            android:layout_width="wrap_content"
            android:layout_height="match_parent"
            android:gravity="center"
            android:text="消息内容:"
            android:textColor="@color/black"
            android:textSize="17sp" />

        <EditText
            android:id="@+id/et_message"
            android:layout_width="0dp"
            android:layout_height="match_parent"
            android:layout_weight="1"
            android:gravity="top"
            android:layout_margin="5dp"
            android:background="@drawable/editext_selector"
            android:hint="请填写消息内容"
            android:textColor="@color/black"
            android:textSize="17sp" />

    </LinearLayout>

    <Button
        android:id="@+id/btn_send_counter"
        android:layout_width="match_parent"
        android:layout_height="wrap_content"
        android:gravity="center"
        android:text="发送计时消息"
        android:textColor="@color/black"
        android:textSize="17sp" />

</LinearLayout>
创作不易 觉得有帮助请点赞关注收藏~~~文章来源地址https://www.toymoban.com/news/detail-403501.html
到了这里,关于Android Studio App开发之通知推送Notification的讲解及实战(给用户推送信息实战)的文章就介绍完了。如果您还想了解更多内容,请在右上角搜索TOY模板网以前的文章或继续浏览下面的相关文章,希望大家以后多多支持TOY模板网!


