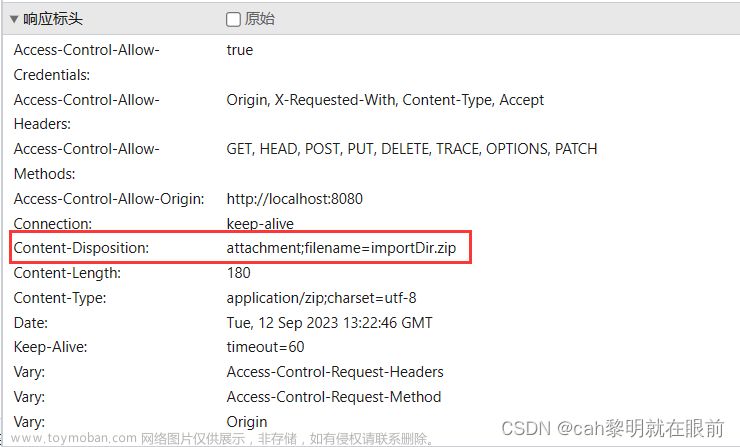
前后端分离架构中,前端调用后端提供的API接口来获取数据。由于浏览器的 同源策略要求当前请求与目标请求的域名、协议、端口都要相同,而前端服务与后端服务往往会被部署到不同的机器,不同端口上,因此会产生跨域问题。
1. 为什么产生跨域问题
(1)同源策略
同源策略是由 Netscape 提出的一个著名的安全策略,它是浏览器最核心也是最基本的安全功能,所有支持 JavaScript 的浏览器都会使用这个策略。在同源策略中,要求当前请求与目标请求的域名、协议、端口都要相同。 同源策略具体规则如下表:
(2)非跨域请求与跨域请求
非跨域请求,在请求头中会只包含请求的主机名。

跨域请求,在请求头中会既包含要请求的主机名还包括当前的源主机名。

2.浏览器对请求的分类
在 HTTP1.1 协议中,请求方法分为 GET、POST、PUT、DELETE、HEAD、TRACE、OPTIONS、CONNECT 八种。浏览器根据请求方法和请求类型将请求划分为 简单请求 和 非简单请求。
(1)简单请求:浏览器先发送请求再判断是否跨域
- 请求方法为
GET、POST、HEAD - Request Headers 中无自定义的请求头信息
- Content-Type 为
text/plain、multipart/form-data、application/x-www-form-urlencoded
(2)非简单请求:浏览器先发送预检命令(OPTIONS 请求方法),检查通过后才发送真正的数据请求
预检请求 Headers:
- Access-Control-Request-Headers: content-type,x-token
- 指明实际请求所携带的字段
- Access-Control-Request-Method: POST
- 指明实际请求所使用的 HTTP 方法
预检响应 Header:
- Access-Control-Allow-Origin: http://localhost:8080
- 指明允许访问的域。
- Access-Control-Allow-Methods: POST
- 指明允许的 HTTP 请求方法。
- Access-Control-Allow-Headers: content-type, x-token
- 指明允许携带的字段。
- Access-Control-Max-Age: 3600
- 指明该响应的有效时间,在有效时间内,浏览器无须为同一请求再次发起预检请求。浏览器检查预检响应信息,如果预检通过就发送实际请求。使用预检请求可以避免跨域请求对服务器的数据产生未预期的影响。
请求方法为 PUT、DELETE 的 AJAX 请求、发送 JSON 格式的 AJAX 请求、带自定义头的 AJAX 请求都是非简单请求。
3.解决跨域问题
Nginx部署: 195.128.10.1:8080
前端服务部署: 195.128.10.1:9528
后端服务1部署: 195.128.10.2:8989
后端服务2部署: 195.128.10.2:8999
后端服务3部署: 195.128.10.2:9999
(1)nginx中配置地址转发
用户访问 Nginx 地址http://195.128.10.1:8080,前端访问的后端地址为http://195.128.10.1:8080/resource1 ,http://195.128.10.1:8080/resource2,http://195.128.10.1:8080/resource3。Nginx根据url转发。
注意:proxy_set_header 是 nginx 设置请求头给上游server服务器
server
{
    listen       8080;
    server_name localhost;

    location /js {
        proxy_set_header Host $host;
        proxy_set_header X-Real-IP $remote_addr;
        proxy_set_header X-Forwarded-For $proxy_add_x_forwarded_for;
        proxy_pass http://192.168.137.189:8081/; # 转发地址
    }
	location /resource1 {
        proxy_pass http://195.128.10.2:8989; # 转发地址
        proxy_read_timeout 600s;
		proxy_set_header X-Real-IP $remote_addr;
		proxy_set_header X-Forwarded-For $proxy_add_x_forwarded_for;
		proxy_set_header Host $host:$se;
    }
	location /resource2 {
        proxy_pass http://195.128.10.2:8999; # 转发地址
        proxy_read_timeout 600s;
		proxy_set_header X-Real-IP $remote_addr;
		proxy_set_header X-Forwarded-For $proxy_add_x_forwarded_for;
		proxy_set_header Host $host:$se;
    }
    location /resource3 {
        proxy_pass http://195.128.10.2:9999; # 转发地址
        proxy_read_timeout 600s;
		proxy_set_header X-Real-IP $remote_addr;
		proxy_set_header X-Forwarded-For $proxy_add_x_forwarded_for;
		proxy_set_header Host $host:$se;
    }
}
(2)nginx中添加允许跨域请求头
用户访问前端地址http://195.128.10.1:9528,前端访问Nginx地址http://195.128.10.1:8080/resource1 ,http://195.128.10.1:8080/resource2,http://195.128.10.1:8080/resource3,Nginx根据URL转发。
注意:add_header是nginx设置响应头信息给浏览器
server {
    listen       8080;
    server_name  localhost;
    location  /resource1  {
        add_header Access-Control-Allow-Origin 'http://localhost:8080' always;
        add_header Access-Control-Allow-Headers '*';
        add_header Access-Control-Allow-Methods '*';
        add_header Access-Control-Allow-Credentials 'true';
        if ($request_method = 'OPTIONS') {
            return 204;
        }
        proxy_pass  http://195.128.10.2:8989;
    }
    location  /resource2  {
        add_header Access-Control-Allow-Origin 'http://localhost:8080' always;
        add_header Access-Control-Allow-Headers '*';
        add_header Access-Control-Allow-Methods '*';
        add_header Access-Control-Allow-Credentials 'true';
        if ($request_method = 'OPTIONS') {
            return 204;
        }
        proxy_pass  http://195.128.10.2:8999;
    }
    location  /resource3  {
        add_header Access-Control-Allow-Origin 'http://localhost:8080' always;
        add_header Access-Control-Allow-Headers '*';
        add_header Access-Control-Allow-Methods '*';
        add_header Access-Control-Allow-Credentials 'true';
        if ($request_method = 'OPTIONS') {
            return 204;
        }
        proxy_pass  http://195.128.10.2:9999;
    }
}
(3)后端解决跨域问题
https://blog.csdn.net/m0_71777195/article/details/126830773
通过配置文件跨域
创建一个新配置文件;添加 @Configuration 注解,实现 WebMvcConfigurer 接口;重写 addCorsMappings 方法,设置允许跨域的代码。文章来源:https://www.toymoban.com/news/detail-406674.html
@Configuration
public class InterceptorConfig implements WebMvcConfigurer {
    @Override
    public void addCorsMappings(CorsRegistry registry) {
        registry.addMapping("/**")
                .allowCredentials(true)
                .allowedOriginPatterns("*")
                .allowedMethods("POST", "GET", "PUT", "OPTIONS", "DELETE")
                .allowedHeaders("*")
                .exposedHeaders("*");
    }
}
通过 CorsFilter 跨域
@Configuration
public class CorsConfig {
    private CorsConfiguration buildConfig() {
        CorsConfiguration corsConfiguration = new CorsConfiguration();
        corsConfiguration.addAllowedOrigin("*");
        corsConfiguration.addAllowedHeader("*");
        corsConfiguration.addAllowedMethod("*");
        corsConfiguration.setAllowCredentials(true);
        corsConfiguration.setMaxAge(3600L);
        return corsConfiguration;
    }

	@Bean
    public CorsFilter corsFilter() {
        UrlBasedCorsConfigurationSource source = new UrlBasedCorsConfigurationSource();
        source.registerCorsConfiguration("/**", buildConfig());
        return new CorsFilter(source);
    }
}
ResponseBodyAdvice
通过重写 ResponseBodyAdvice 接口中的 beforeBodyWrite(返回之前重写)方法,可以对所有的接口进行跨域设置文章来源地址https://www.toymoban.com/news/detail-406674.html
@ControllerAdvice
public class ResponseAdvice implements ResponseBodyAdvice {
    /**
     * 内容是否需要重写(通过此方法可以选择性部分控制器和方法进行重写)
     * 返回 true 表示重写
     */
    @Override
    public boolean supports(MethodParameter returnType, Class converterType) {
        return true;
    }
    /**
     * 方法返回之前调用此方法
     */
    @Override
    public Object beforeBodyWrite(Object body, MethodParameter returnType, MediaType selectedContentType,
                                  Class selectedConverterType, ServerHttpRequest request,
                                  ServerHttpResponse response) {
        // 设置跨域
        response.getHeaders().set("Access-Control-Allow-Origin", "*");
        return body;
    }
}
到了这里,关于解决前后端分离架构中跨域问题的文章就介绍完了。如果您还想了解更多内容,请在右上角搜索TOY模板网以前的文章或继续浏览下面的相关文章,希望大家以后多多支持TOY模板网!


