1.PWM概念
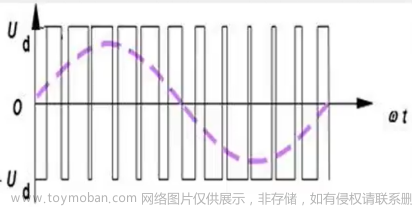
PWM叫脉冲宽度调制(Pulse Width Modulation),通过编程控制输出方波的频率和占空比(高低电平的比例),广泛应用在测量,通信,功率控制等领域(呼吸灯,电机)。

PWM由定时器驱动,PWM周期就是定时器的周期,为了调节占空比,需要在定时器的基础上加上一个比较计数器,同时需要GPIO输出波形。

——————————————————————————————————————————
2.stm32中的PWM
stm32中的PWM属于定时器功能,通过配置定时器就可以使用PWM,除了定时器的基本配置以外,还要加入一个比较计数值确定翻转电平的时机,还需要GPIO的复用功能输出PWM。
stm32中PWM高低电平的顺序是由极性,PWM模式和计数模式共同决定。极性决定默认电平(有效电平),PWM模式指的是一个周期内有效电平和无效电平的顺序。


—————————————————————————————————————————
3.使用库函数实现PWM配置D1为呼吸灯
(1)开启时钟
GPIOF时钟 TIM14时钟,函数略
(2)初始化GPIO为复用功能
GPIO_InitStruct.GPIO_Mode = GPIO_Mode_AF; GPIO_Init(...); 函数略
(3)将定时器14通道1的复用功能映射到PF9

void GPIO_PinAFConfig(GPIO_TypeDef* GPIOx, uint16_t GPIO_PinSource, uint8_t GPIO_AF);
参数:     GPIOx - 哪一组GPIO

           GPIO_PinSource - 哪个GPIO引脚

           GPIO_AF - 哪个复用功能(只能映射具有的复用功能)
(4)初始化定时器
TIM_TimeBaseInit(......); 函数略
(5)初始化PWM
void TIM_OC1Init(TIM_TypeDef* TIMx, TIM_OCInitTypeDef* TIM_OCInitStruct);

      参数:     TIMx - 哪个定时器

                TIM_OCInitStruct - 初始化结构
typedef struct {

  uint16_t TIM_OCMode;        /*!< PWM模式 */
  uint16_t TIM_OutputState;   /*!< 输出状态使能 */
  uint16_t TIM_OutputNState;  /*!< 忽略  */

  uint32_t TIM_Pulse;         /*!< 比较计数值 */

  uint16_t TIM_OCPolarity;    /*!< 极性  */
  uint16_t TIM_OCNPolarity;   /*!< 忽略 only for TIM1 and TIM8. */   uint16_t TIM_OCIdleState;   /*!< 忽略 only for TIM1 and TIM8. */   uint16_t TIM_OCNIdleState;  /*!< 忽略 only for TIM1 and TIM8. */
} TIM_OCInitTypeDef;
(6)使能PWM的预装载和重装载功能
TIM_OC1PreloadConfig(TIM14, TIM_OCPreload_Enable);
TIM_ARRPreloadConfig(TIM14, ENABLE);
(7)启动定时器
TIM_Cmd(...); //高级定时器(TIM1/TIM8),还需要开启另一个开关 void TIM_CtrlPWMOutputs(TIM_TypeDef* TIMx, FunctionalState NewState);

参数:     TIMx - 哪个定时器

           NewState - ENABLE/DISABLE
(8)运行时可调节占空比
void TIM_SetCompare1(TIM_TypeDef* TIMx, uint32_t Compare1);
 参数:     TIMx - 哪个定时器
            Compare1 - 新的比较值
__________________________________________________________________________________________________________________________________________________________
使用库函数配置GPIOF,通用定时器TIM14,使得D1灯呼吸闪烁,代码实现如下:
pwm.c
#include <stm32f4xx.h>
#include <pwm.h>

void timer14_pwm_init(void)
{
	GPIO_InitTypeDef GPIO_InitStruct;
	TIM_TimeBaseInitTypeDef TIM_TimeBaseInitStruct;
	TIM_OCInitTypeDef TIM_OCInitStruct;

	//1.开启GPIOF和TIM14时钟
	RCC_AHB1PeriphClockCmd(RCC_AHB1Periph_GPIOF,ENABLE);
	RCC_APB1PeriphClockCmd(RCC_APB1Periph_TIM14,ENABLE);

	//2.初始化PF9为复用功能
	GPIO_InitStruct.GPIO_Mode = GPIO_Mode_AF;//复用模式
	GPIO_InitStruct.GPIO_OType = GPIO_OType_PP;//推挽输出
	GPIO_InitStruct.GPIO_Speed = GPIO_Speed_50MHz;//高速
	GPIO_InitStruct.GPIO_PuPd = GPIO_PuPd_NOPULL;//无上下拉
	GPIO_InitStruct.GPIO_Pin = GPIO_Pin_9;//PF9
	GPIO_Init(GPIOF,&GPIO_InitStruct);

	//3.将PF9复用映射到TIM14
	GPIO_PinAFConfig(GPIOF,GPIO_PinSource9,GPIO_AF_TIM14);

	//4.初始化定时器14 84M / 84 = 1MHz 1M ------ 1000 ----- 1ms
	TIM_TimeBaseInitStruct.TIM_Prescaler = 84-1;//预分频系数
	TIM_TimeBaseInitStruct.TIM_Period = 1000-1;//初始计数值
	TIM_TimeBaseInitStruct.TIM_CounterMode = TIM_CounterMode_Down;//向下计数
	TIM_TimeBaseInitStruct.TIM_ClockDivision = TIM_CKD_DIV1;//时钟因子
	TIM_TimeBaseInit(TIM14,&TIM_TimeBaseInitStruct);

	//5.PWM初始化
	TIM_OCInitStruct.TIM_OCMode = TIM_OCMode_PWM1;//PWM模式1
	TIM_OCInitStruct.TIM_OCPolarity = TIM_OCPolarity_Low;//低电平有效
	TIM_OCInitStruct.TIM_OutputState = TIM_OutputState_Enable;//使能
	TIM_OCInitStruct.TIM_Pulse = 800;//比较计数值
	TIM_OC1Init(TIM14,&TIM_OCInitStruct);

	//6.使能PWM的预装载和重装载功能
	TIM_OC1PreloadConfig(TIM14, TIM_OCPreload_Enable);
	TIM_ARRPreloadConfig(TIM14, ENABLE);

	//7.使能定时器14
	TIM_Cmd(TIM14,ENABLE);
}
主函数main.c文章来源:https://www.toymoban.com/news/detail-407059.html
#include <stm32f4xx.h>
#include <includes.h>

int main()
{
	u32 comp = 0;

	//1.中断优先级分组 2:2
	NVIC_PriorityGroupConfig(NVIC_PriorityGroup_2);

	//初始化
	//led_init();
	//key_init();
	beep_init();
	exti_init();
	mq2_init();
	delay_init();
	//timer2_init();
	//timer10_init();
	timer14_pwm_init();

	//D1为呼吸灯
	while(1){
		//1s从最暗到最亮
		while(comp<1000){
			TIM_SetCompare1(TIM14,comp);
			comp++;
			delay_ms(1);
		}

		//1s从最亮到最暗
		while(comp>0){
			TIM_SetCompare1(TIM14,comp);
			comp--;
			delay_ms(1);
		}

		delay_ms(200);
	}

}
其余模块函数的实现代码看其他章节文章来源地址https://www.toymoban.com/news/detail-407059.html
到了这里,关于第六篇,STM32脉冲宽度调制(PWM)编程的文章就介绍完了。如果您还想了解更多内容,请在右上角搜索TOY模板网以前的文章或继续浏览下面的相关文章,希望大家以后多多支持TOY模板网!


![12.[STM32]PWM脉宽调制-舵机控制(一篇足以)](https://imgs.yssmx.com/Uploads/2024/01/414539-1.png)
