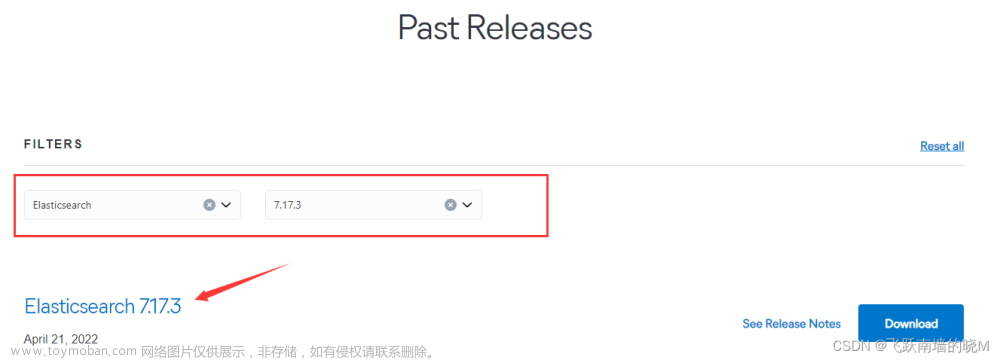
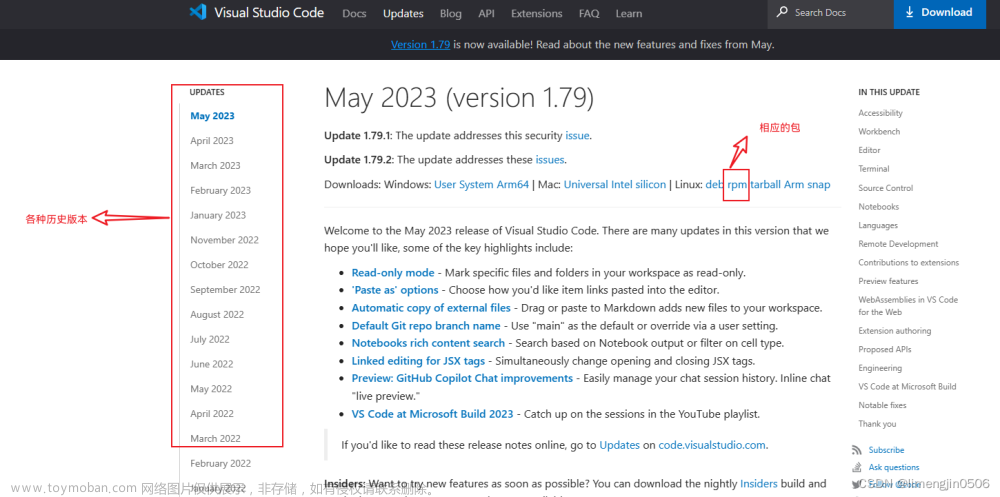
一、点击下载

二、上传安装包到虚拟机并解压
- 上传至 /usr/local/soft
- 解压
tar -zxvf elasticsearch-8.3.1-linux-x86_64.tar.gz
- 移动至 /usr/local 文件夹
mv elasticsearch-8.3.1 /usr/local/
三、es 目录介绍

- bin:可执行文件在里面,运行es的命令就在这个里面,包含了一些脚本文件等
- config:配置文件目录
- JDK:java环境
- lib:依赖的jar,类库
- logs:日志文件
- modules:es相关的模块
- plugins:可以自己开发的插件
- data:这个目录没有,自己新建一下,后面要用 mkdir data,这个作为索引目录
四、设置配置文件参数
配置详解参考:https://www.cnblogs.com/xiaochina/p/6855591.html
-
config 文件夹中存放着配置文件

1、编辑 elasticsearch.yml ,在文件最后添加
cluster.name: es-sassycoder   #配置elasticsearch的集群名称,默认是my-application。建议修改成一个有意义的名称。
node.name: es-node-230       #节点名,通常一台物理服务器就是一个节点,es会默认随机指定一个名字,建议指定一个有意义的名称,方便管理
network.host: 0.0.0.0      #绑定ip地址
http.port: 9200  	       #暴露的http端口
transport.profiles.default.port: 9300    #内部通信端口
path.data: /usr/local/elasticsearch-8.3.1/data   #索引目录
path.logs: /usr/local/elasticsearch-8.3.1/logs   #日志目录
# 允许通配符删除索引
action.destructive_requires_name: true
# 配置集群初始时,作为master的主机,单节点时配置本节点名称(node.name)
# 必须使用完整的 node.name
# 重新启动集群或向现有集群添加新节点时,不要使用此设置
cluster.initial_master_nodes: ["es-node-230"]
# 配置启动时要发现的master列表(IP 或 可解析的域名),端口默认为9300
# 单节点时不用配置或配置为本节点IP
discovery.seed_hosts: ["192.168.100.230:9300"]
#使用head等插件监控集群信息,需要打开以下配置项
http.cors.enabled: true
http.cors.allow-origin: "*"
http.cors.allow-headers: Authorization,X-Requested-With,Content-Length,Content-Type
这个为单机配置,之后还会介绍集群配置。
2、jvm.options文件
jvm配置这里我采用默认配置,没有修改,可根据自己虚拟机实际情况修改。
3、添加es用户
ES不允许使用root操作es,需要添加用户,操作如下:
useradd esuser
chown -R esuser:esuser /usr/local/elasticsearch-8.3.1
su esuser
五、启动es
1、切换到es的 /bin目录下执行:
./elasticsearch
如果出现以下错误:
ERROR: [3] bootstrap checks failed
[1]: max file descriptors [4096] for elasticsearch process is too low, increase to at least [65535]
[2]: max number of threads [3795] for user [esuser] is too low, increase to at least [4096]
[3]: max virtual memory areas vm.max_map_count [65530] is too low, increase to at least [262144]
或者:
[2022-07-04T05:26:15,845][INFO ][o.e.x.m.p.NativeController] [es-node-231] Native controller process has stopped - no new native processes can be started
ERROR: [1] bootstrap checks failed. You must address the points described in the following [1] lines before starting Elasticsearch.
2、需要切换到root用户修改配置:
-
修改 /etc/security/limits.conf 文件 添加以下内容:
* soft nofile 65536 * hard nofile 131072 * soft nproc 4096 * hard nproc 4096 -
修改 /etc/sysctl.conf 增加 vm.max_map_count=262145
3、修改完后 sysctl -p 刷新一下
4、再次切换到 esuser 进行启动
得到一下账户和密码:
━━━━━━━━━━━━━━━━━━━━━━━━━━━━━━━━━━━━━━━━━━━━━━━━━━━━━━━━━━━━━━━━━━━━━━━━━━━━━━━━━━━━━━━━━━━━━━━━━━━━━━━━━━━━━━━━━━
✅ Elasticsearch security features have been automatically configured!
✅ Authentication is enabled and cluster connections are encrypted.

ℹ️  Password for the elastic user (reset with `bin/elasticsearch-reset-password -u elastic`):
ogj-lWxYvUs6IzszUiHU

ℹ️  HTTP CA certificate SHA-256 fingerprint:
3c8d9a05ec2030077af734a876e87d0522dcd63007265e9ffc39a6cf32ec5f6e

ℹ️  Configure Kibana to use this cluster:
• Run Kibana and click the configuration link in the terminal when Kibana starts.
• Copy the following enrollment token and paste it into Kibana in your browser (valid for the next 30 minutes):
eyJ2ZXIiOiI4LjMuMSIsImFkciI6WyIxOTIuMTY4LjEwMC4yMzE6OTIwMCJdLCJmZ3IiOiIzYzhkOWEwNWVjMjAzMDA3N2FmNzM0YTg3NmU4N2QwNTIyZGNkNjMwMDcyNjVlOWZmYzM5YTZjZjMyZWM1ZjZlIiwia2V5IjoiYm9PTnlJRUJkRTVQZlhCT1V1Y2I6aGFxbm9ZQ3RTV3EzaW9YT2hiSTE0ZyJ9

ℹ️ Configure other nodes to join this cluster:
• Copy the following enrollment token and start new Elasticsearch nodes with `bin/elasticsearch --enrollment-token <token>` (valid for the next 30 minutes):
eyJ2ZXIiOiI4LjMuMSIsImFkciI6WyIxOTIuMTY4LjEwMC4yMzE6OTIwMCJdLCJmZ3IiOiIzYzhkOWEwNWVjMjAzMDA3N2FmNzM0YTg3NmU4N2QwNTIyZGNkNjMwMDcyNjVlOWZmYzM5YTZjZjMyZWM1ZjZlIiwia2V5IjoiY0lPTnlJRUJkRTVQZlhCT1V1Y2Q6dl9iYjlUMDhTdTJOazlsbERNMDhsZyJ9

If you're running in Docker, copy the enrollment token and run:
`docker run -e "ENROLLMENT_TOKEN=<token>" docker.elastic.co/elasticsearch/elasticsearch:8.3.1`
━━━━━━━━━━━━━━━━━━━━━━━━━━━━━━━━━━━━━━━━━━━━━━━━━━━━━━━━━━━━━━━━━━━━━━━━━━━━━━━━━━━━━━━━━━━━━━━━━━━━━━━━━━━━━━━━━━
5、启动后会发现 elasticsearch.yml多了以下内容
#----------------------- BEGIN SECURITY AUTO CONFIGURATION -----------------------
#
# The following settings, TLS certificates, and keys have been automatically
# generated to configure Elasticsearch security features on 04-07-2022 09:25:53
#
# --------------------------------------------------------------------------------

# Enable security features
xpack.security.enabled: true

xpack.security.enrollment.enabled: true

# Enable encryption for HTTP API client connections, such as Kibana, Logstash, and Agents
xpack.security.http.ssl:
  enabled: true
  keystore.path: certs/http.p12

# Enable encryption and mutual authentication between cluster nodes
xpack.security.transport.ssl:
  enabled: true
  verification_mode: certificate
  keystore.path: certs/transport.p12
  truststore.path: certs/transport.p12
#----------------------- END SECURITY AUTO CONFIGURATION -------------------------
在最下面加上 :
ingest.geoip.downloader.enabled: false #首次配置建议改成false
6、使用root用户修改账户密码
bin/elasticsearch-reset-password --username elastic -i
7、访问 https://192.168.100.231:9200 :
 文章来源:https://www.toymoban.com/news/detail-408784.html
8、如果不想用https,修改以下内容
配置ssl为false(首次启动后才会自动生成xpack相关配置项,改为false后重启)文章来源地址https://www.toymoban.com/news/detail-408784.html
xpack.security.http.ssl:
  enabled: false
到了这里,关于Elasticsearch实战:Centos 8 安装 Elasticsearch 8的文章就介绍完了。如果您还想了解更多内容,请在右上角搜索TOY模板网以前的文章或继续浏览下面的相关文章,希望大家以后多多支持TOY模板网!


