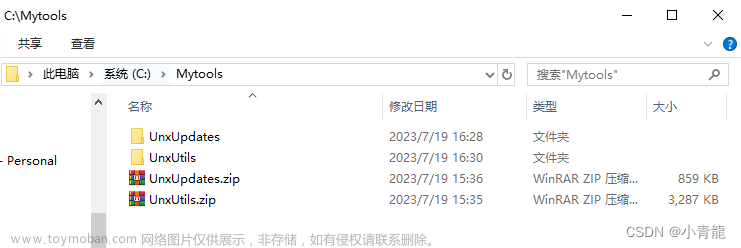
1 安装node.js
2 安装hardhat


3 编写智能合约
3.1编译
3.2修改部署脚本文件
const hre = require("hardhat");

async function main() {
  // 获取 MyContract合约
  const MyContract = await hre.ethers.getContractFactory("MyContract");
  // 部署, 传入初始化 storageValue 的值
  const myContract = await MyContract.deploy(666);


  // 等待 MyContract合约部署完成
  await myContract.deployed();


  // 输出 MyContract合约地址
  console.log("MyContract deployed to:", myContract.address);
}


// We recommend this pattern to be able to use async/await everywhere
// and properly handle errors.
main()
  .then(() => process.exit(0))
  .catch((error) => {
    console.error(error);
    process.exit(1);
});3.3启动本地节点
➜  npx hardhat node
Started HTTP and WebSocket JSON-RPC server at http://127.0.0.1:8545/


Accounts
========


WARNING: These accounts, and their private keys, are publicly known.
Any funds sent to them on Mainnet or any other live network WILL BE LOST.


Account #0: 0xf39Fd6e51aad88Fxxxxxxxxxxxxxxx (10000 ETH)
Private Key: 0xac097xxxxxxxxxxxxxxx6b4d238ff944bacb478xxxxxxxxxxxxxxx
..........
Account #19: 0x8626f6940E2exxxxxxxxxxxxxxxxxxxx (10000 ETH)
Private Key: 0xdf570xxxxxxxxxxxxxxx27dafbffa9fc08a93xxxxxxxxxxxxxxx23656e


WARNING: These accounts, and their private keys, are publicly known.
Any funds sent to them on Mainnet or any other live network WILL BE LOST.
# 这边是本地节点已经启动成功了
3.4部署
#终端2
root@ubuntu:/opt/uups/demo1# npx hardhat run --network localhost scripts/deploy.js
MyContract deployed to: 0x5FbDB2315678afecb367f032d93F642f64180aa3
root@ubuntu:/opt/uups/demo1#


#终端1
eth_chainId
eth_accounts
eth_blockNumber
eth_chainId (2)
eth_estimateGas
eth_getBlockByNumber
eth_feeHistory
eth_sendTransaction
  Contract deployment: MyContract
  Contract address:    0x5fbdb2315678afecb367f032d93f642f64180aa3
  Transaction:         0x6746c7b28d071a6ffbaf1923bc85fee73fc743a5870bad5c495563584c0d8550
  From:                0xf39fd6e51aad88f6f4ce6ab8827279cfffb92266
  Value:               0 ETH
  Gas used:            194354 of 194354
  Block #1:            0x8f874c13396d7a77dbc1cdbf1c783bea8df57370626401a062adec262d14f236


eth_chainId
eth_getTransactionByHash
eth_chainId
eth_getTransactionReceipt
4 与智能合约交互
# 打开控制台
root@ubuntu:/opt/uups/demo1# npx hardhat console --network localhost
Welcome to Node.js v16.15.1.
Type ".help" for more information.
>
# 获取MyContract合约
> const MyContract = await ethers.getContractFactory("MyContract")
undefined
# 获取myContract合约实例
> const myContract = await MyContract.attach("0x5FbDB2315678afecb367f032d93F642f64180aa3")
undefined
# 调用 getValue 方法
> await myContract.getValue()
BigNumber { value: "666" }
# 调用 setValue 方法
> await myContract.setValue(111)
{
  hash: '0x70f2e5baf434c3f15eb6618e54ecb7636a19c1d82f632cd27cd62f97c3d4c5fb',
  type: 2,
  accessList: [],
  blockHash: '0xf1b93fcf0a7b7c1ddaaedf74ec42bbb4a6b54f7748ce78fe8632b7c68cbd36ca',
  blockNumber: 2,
  transactionIndex: 0,
  confirmations: 1,
  from: '0xf39Fd6e51aad88F6F4ce6aB8827279cffFb92266',
  gasPrice: BigNumber { value: "767027553" },
  maxPriorityFeePerGas: BigNumber { value: "0" },
  maxFeePerGas: BigNumber { value: "970769246" },
  gasLimit: BigNumber { value: "26877" },
  to: '0x5FbDB2315678afecb367f032d93F642f64180aa3',
  value: BigNumber { value: "0" },
  nonce: 1,
  data: '0x5093dc7d000000000000000000000000000000000000000000000000000000000000006f',
  r: '0x35d5ecb1abf017d44f544e857546c781ce3af0fdc5d9d3b4c1ea7d18fcba34ca',
  s: '0x43bf5017ca7554071e7ebbacb75fb0e0a4934b49fa87bf3847c0bb38c3c73e06',
  v: 1,
  creates: null,
  chainId: 31337,
  wait: [Function (anonymous)]
}
# 再次调用 getValue 方法验证setValue执行结果
> await myContract.getValue()
BigNumber { value: "112" }文章来源地址https://www.toymoban.com/news/detail-410812.html
文章来源:https://www.toymoban.com/news/detail-410812.html
到了这里,关于Hardhat工具包1--安装使用的文章就介绍完了。如果您还想了解更多内容,请在右上角搜索TOY模板网以前的文章或继续浏览下面的相关文章,希望大家以后多多支持TOY模板网!

