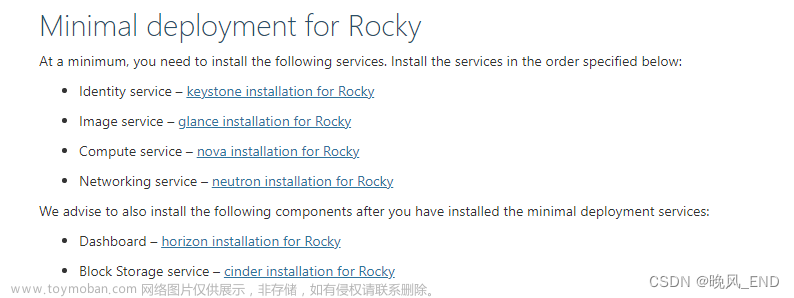
对于OpenStack初学者来说,由于OpenStack涉及的组件众多,直接阅读OpenStack代码较为困难,并且亟需一套OpenStack环境进行实际操作,在实践中学习OpenStack架构及原理。下面将介绍基于CentOS7.6 mini操作系统手动部署OpenStack Train版本环境步骤。
1:配置OpenStack Packages安装源
yum install centos-release-openstack-train
执行yum upgrade命令更新每个节点上的packages:
yum upgrade
2:安装并配置SQL
安装SQL相关的packages
yum install mariadb mariadb-server python2-PyMySQL
修改配置文件,在/etc/my.cnf…d/目录下创建openstack.cnf配置文件,其中bind-address配置为控制节点的VIP。
[mysqld]
bind-address = 192.168.86.137

default-storage-engine = innodb
innodb_file_per_table = on
max_connections = 4096
collation-server = utf8_general_ci
character-set-server = utf8
启动mariadb服务
systemctl enable mariadb.service
systemctl start mariadb.service
对数据库进行安全配置
mysql_secure_installation
NOTE: RUNNING ALL PARTS OF THIS SCRIPT IS RECOMMENDED FOR ALL MariaDB
      SERVERS IN PRODUCTION USE!  PLEASE READ EACH STEP CAREFULLY!

In order to log into MariaDB to secure it, we'll need the current
password for the root user.  If you've just installed MariaDB, and
you haven't set the root password yet, the password will be blank,
so you should just press enter here.

Enter current password for root (enter for none):
OK, successfully used password, moving on...

Setting the root password ensures that nobody can log into the MariaDB
root user without the proper authorisation.

Set root password? [Y/n] n
 ... skipping.

By default, a MariaDB installation has an anonymous user, allowing anyone
to log into MariaDB without having to have a user account created for
them.  This is intended only for testing, and to make the installation
go a bit smoother.  You should remove them before moving into a
production environment.

Remove anonymous users? [Y/n] y
 ... Success!

Normally, root should only be allowed to connect from 'localhost'.  This
ensures that someone cannot guess at the root password from the network.

Disallow root login remotely? [Y/n] y
 ... Success!

By default, MariaDB comes with a database named 'test' that anyone can
access.  This is also intended only for testing, and should be removed
before moving into a production environment.

Remove test database and access to it? [Y/n] n
 ... skipping.

Reloading the privilege tables will ensure that all changes made so far
will take effect immediately.

Reload privilege tables now? [Y/n] y
 ... Success!

Cleaning up...

All done!  If you've completed all of the above steps, your MariaDB
installation should now be secure.

Thanks for using MariaDB!
配置完成后校验数据库服务是否正常。
3:安装部署消息队列服务rabbitmq
安装rabbitmq packages
yum install rabbitmq-server
enable并启动rabbitmq服务
systemctl enable rabbitmq-server.service
systemctl start rabbitmq-server.service
创建openstack用户
rabbitmqctl add_user openstack openstack
修改配置,赋予openstack用户消息的读写权限
rabbitmqctl set_permissions openstack ".*" ".*" ".*"
4:安装部署memcached
安装memcached package
yum install memcached python-memcached
配置memechaced
vim /etc/sysconfig/memcached
PORT="11211"
USER="memcached"
MAXCONN="1024"
CACHESIZE="64"
OPTIONS="-l 192.168.86.137,::1"
enable并启动memcached服务
systemctl enable memcached.service
systemctl start memcached.service
5:安装部署etcd服务
安装etcd package
yum install etcd
配置etcd
#[Member]
ETCD_DATA_DIR="/var/lib/etcd/default.etcd"
ETCD_LISTEN_PEER_URLS="http://192.168.86.137:2380"
ETCD_LISTEN_CLIENT_URLS="http://192.168.86.137:2379"
ETCD_NAME="controller"
#[Clustering]
ETCD_INITIAL_ADVERTISE_PEER_URLS="http://192.168.86.137:2380"
ETCD_ADVERTISE_CLIENT_URLS="http://192.168.86.137:2379"
ETCD_INITIAL_CLUSTER="controller=http://192.168.86.137:2380"
ETCD_INITIAL_CLUSTER_TOKEN="etcd-cluster-01"
ETCD_INITIAL_CLUSTER_STATE="new"
enable并启动etcd服务
systemctl enable etcd
systemctl start etcd
6:安装部署keystone
使用root用户登录数据库
mysql -u root -p
创建keystone database
MariaDB [(none)]> CREATE DATABASE keystone;
设置权限
MariaDB [(none)]> GRANT ALL PRIVILEGES ON keystone.* TO 'keystone'@'localhost' \
IDENTIFIED BY 'cloud';
MariaDB [(none)]> GRANT ALL PRIVILEGES ON keystone.* TO 'keystone'@'%' \
IDENTIFIED BY 'cloud';
安装keystone相关的package
yum install openstack-keystone apache2 apache2-mod_wsgi
修改keystone配置文件
vim /etc/keystone/keystone.conf
[database]
connection= mysql+pymysql://keystone:cloud@admin@node0/keystone
同步keystone数据库
su -s /bin/sh -c "keystone-manage db_sync" keystone
初始化Fernet key
keystone-manage fernet_setup --keystone-user keystone --keystone-group keystone
keystone-manage credential_setup --keystone-user keystone --keystone-group keystone
Bootstrap the Identity service
keystone-manage bootstrap --bootstrap-password cloudadmin --bootstrap-admin-url http://node0:5000/v3/ --bootstrap-internal-url http://node0:5000/v3/ --bootstrap-public-url http://node0:5000/v3/ --bootstrap-region-id RegionOne
编辑/etc/sysconfig/apache2并配置APACHE_SERVERNAME
APACHE_SERVERNAME="node0"
创建/etc/apache2/conf.d/wsgi-keystone.conf配置文件
Listen 5000

<VirtualHost *:5000>
    WSGIDaemonProcess keystone-public processes=5 threads=1 user=keystone group=keystone display-name=%{GROUP}
    WSGIProcessGroup keystone-public
    WSGIScriptAlias / /usr/bin/keystone-wsgi-public
    WSGIApplicationGroup %{GLOBAL}
    WSGIPassAuthorization On
    ErrorLogFormat "%{cu}t %M"
    ErrorLog /var/log/apache2/keystone.log
    CustomLog /var/log/apache2/keystone_access.log combined

    <Directory /usr/bin>
        Require all granted
    </Directory>
</VirtualHost>
修改/etc/keystone目录权限
chown -R keystone:keystone /etc/keystone
enable并启动apache2服务
systemctl enable apache2.service
systemctl start apache2.service
export admin用户的环境变量
$ export OS_USERNAME=admin
$ export OS_PASSWORD=cloudadmin
$ export OS_PROJECT_NAME=admin
$ export OS_USER_DOMAIN_NAME=Default
$ export OS_PROJECT_DOMAIN_NAME=Default
$ export OS_AUTH_URL=http://node0:5000/v3
$ export OS_IDENTITY_API_VERSION=3
创建projects, users, and roles
 openstack project create --domain default --description "Service Project" service
+-------------+----------------------------------+
| Field       | Value                            |
+-------------+----------------------------------+
| description | Service Project                  |
| domain_id   | default                          |
| enabled     | True                             |
| id          | 24ac7f19cd944f4cba1d77469b2a73ed |
| is_domain   | False                            |
| name        | service                          |
| parent_id   | default                          |
| tags        | []                               |
+-------------+----------------------------------+
openstack project create --domain default  --description "Demo Project" myproject
+-------------+----------------------------------+
| Field       | Value                            |
+-------------+----------------------------------+
| description | Demo Project                     |
| domain_id   | default                          |
| enabled     | True                             |
| id          | 231ad6e7ebba47d6a1e57e1cc07ae446 |
| is_domain   | False                            |
| name        | myproject                        |
| parent_id   | default                          |
| tags        | []                               |
+-------------+----------------------------------+
openstack user create --domain default  --password-prompt myuser
User Password:
Repeat User Password:
+---------------------+----------------------------------+
| Field               | Value                            |
+---------------------+----------------------------------+
| domain_id           | default                          |
| enabled             | True                             |
| id                  | aeda23aa78f44e859900e22c24817832 |
| name                | myuser                           |
| options             | {}                               |
| password_expires_at | None                             |
+---------------------+----------------------------------+
openstack role create myrole
+-----------+----------------------------------+
| Field     | Value                            |
+-----------+----------------------------------+
| domain_id | None                             |
| id        | 997ce8d05fc143ac97d83fdfb5998552 |
| name      | myrole                           |
+-----------+----------------------------------+
openstack role add --project myproject --user myuser myrole
创建admin用户环境变量文件/roo/admin.rc
export OS_PROJECT_DOMAIN_NAME=Default
export OS_USER_DOMAIN_NAME=Default
export OS_PROJECT_NAME=admin
export OS_USERNAME=admin
export OS_PASSWORD=cloudadmin
export OS_AUTH_URL=http://node0:5000/v3
export OS_IDENTITY_API_VERSION=3
export OS_IMAGE_API_VERSION=2
7:安装部署glance
创建glance database
mysql -u root -p

MariaDB [(none)]> CREATE DATABASE glance;

MariaDB [(none)]> GRANT ALL PRIVILEGES ON glance.* TO 'glance'@'localhost' \
  IDENTIFIED BY 'cloud';
MariaDB [(none)]> GRANT ALL PRIVILEGES ON glance.* TO 'glance'@'%' \
  IDENTIFIED BY 'cloud';
创建glance user
# source /root/admin.rc
# openstack user create --domain default --password-prompt glance
User Password:
Repeat User Password:
+---------------------+----------------------------------+
| Field               | Value                            |
+---------------------+----------------------------------+
| domain_id           | default                          |
| enabled             | True                             |
| id                  | 3f4e777c4062483ab8d9edd7dff829df |
| name                | glance                           |
| options             | {}                               |
| password_expires_at | None                             |
+---------------------+----------------------------------+
# openstack role add --project service --user glance admin
# openstack service create --name glance --description "OpenStack Image" image
+-------------+----------------------------------+
| Field       | Value                            |
+-------------+----------------------------------+
| description | OpenStack Image                  |
| enabled     | True                             |
| id          | 8c2c7f1b9b5049ea9e63757b5533e6d2 |
| name        | glance                           |
| type        | image                            |
+-------------+----------------------------------
创建glance endpoint
 # openstack endpoint create --region RegionOne image public http://node0:9292
+--------------+----------------------------------+
| Field        | Value                            |
+--------------+----------------------------------+
| enabled      | True                             |
| id           | 340be3625e9b4239a6415d034e98aace |
| interface    | public                           |
| region       | RegionOne                        |
| region_id    | RegionOne                        |
| service_id   | 8c2c7f1b9b5049ea9e63757b5533e6d2 |
| service_name | glance                           |
| service_type | image                            |
| url          | http://controller:9292           |
+--------------+----------------------------------+
$ openstack endpoint create --region RegionOne image internal http://node0:9292
+--------------+----------------------------------+
| Field        | Value                            |
+--------------+----------------------------------+
| enabled      | True                             |
| id           | a6e4b153c2ae4c919eccfdbb7dceb5d2 |
| interface    | internal                         |
| region       | RegionOne                        |
| region_id    | RegionOne                        |
| service_id   | 8c2c7f1b9b5049ea9e63757b5533e6d2 |
| service_name | glance                           |
| service_type | image                            |
| url          | http://controller:9292           |
+--------------+----------------------------------+
$ openstack endpoint create --region RegionOne image admin http://node0:9292
+--------------+----------------------------------+
| Field        | Value                            |
+--------------+----------------------------------+
| enabled      | True                             |
| id           | 0c37ed58103f4300a84ff125a539032d |
| interface    | admin                            |
| region       | RegionOne                        |
| region_id    | RegionOne                        |
| service_id   | 8c2c7f1b9b5049ea9e63757b5533e6d2 |
| service_name | glance                           |
| service_type | image                            |
| url          | http://controller:9292           |
+--------------+----------------------------------+
安装glance package文章来源:https://www.toymoban.com/news/detail-412320.html
yum install glance
修改glance配置文章来源地址https://www.toymoban.com/news/detail-412320.html
[DEFAULT]
debug = True
bind_host = node0
workers = 2
public_endpoint = http://node0:9292
registry_host = node0
registry_port = 10191
show_image_direct_url = true
rpc_backend = rabbit
[database]
connection = mysql+pymysql://glance:cloud@node0@node0:3306/glance
[keystone_authtoken]
auth_uri = http://node0:5000
auth_url = http://node0:35357
auth_type = password
project_domain_name = default
user_domain_name = default
project_name = service
username = glance
password = cloudadmin
memcached_servers = node0:12211
[paste_deploy]
flavor = keystone
[oslo_messaging_notifications]
driver =
[oslo_messaging_rabbit]
heartbeat_timeout_threshold = 10
rabbit_userid = openstack
rabbit_password = openstack
rabbit_hosts = node0:5671
[glance_store]
stores = file,http
default_store = file
filesystem_store_datadir = /var/lib/glance/images/
到了这里,关于手动部署OpenStack社区Train版本非容器化单机环境操作步骤的文章就介绍完了。如果您还想了解更多内容,请在右上角搜索TOY模板网以前的文章或继续浏览下面的相关文章,希望大家以后多多支持TOY模板网!


