前言
网上关于实操性的文章普遍大部分都记录不全,要么只记录重点部分,对于刚学习的小伙伴来说看起来是比较困难的
所以,基于这一点。
该文章会详细介绍使用SpringBoot整合阿里云短信服务的每一步过程,同时会将验证码存放到Redis中并设置过期时间,尽量保证实战的同时也让没做过的同学也能实现发短信的功能~
关于阿里云短信服务介绍就不多说了,我们只要知道他能够帮我们实现短信发送就够了,直接上步骤~
1、开通阿里云短信服务
1、去到阿里云官方网址:https://www.aliyun.com/ 选择短信服务
2、点击开通即可
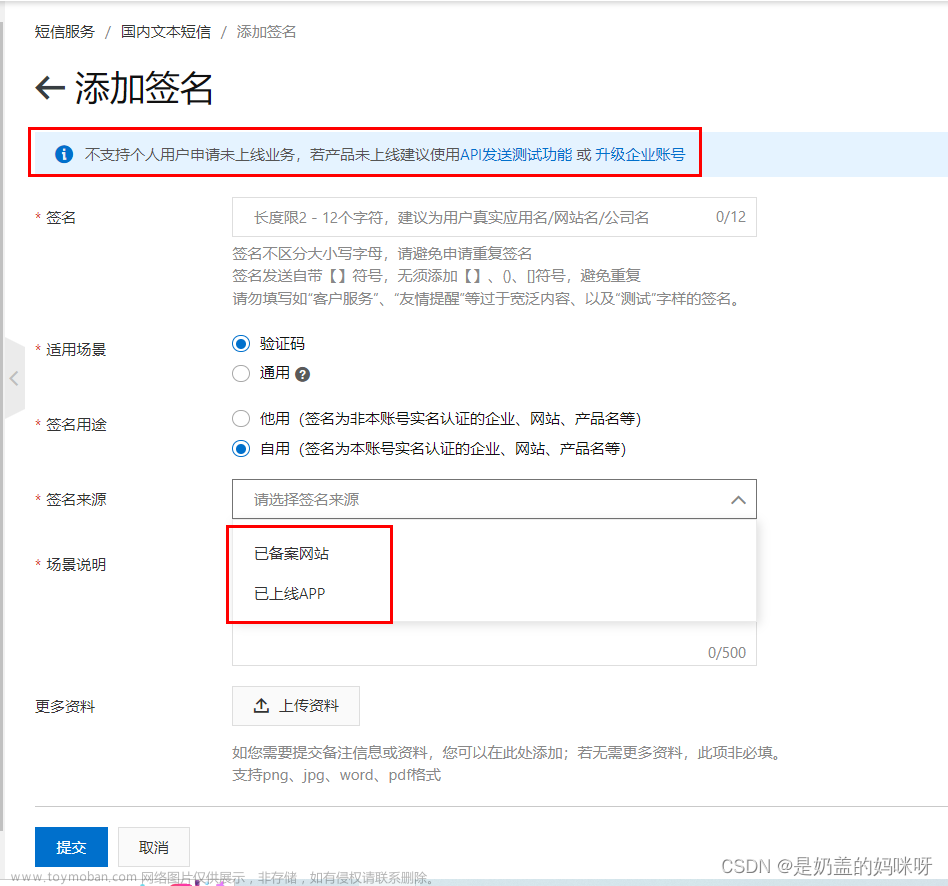
3、开通好后这里是需要申请:自己的模板和签名的,但现在申请的话需要有自己的域名和网站,对于刚学习的同学来说这些肯定是没有的,但好在阿里云也考虑到了这个问题,就给我们提供了一个专门测试的签名和模板
4、找到测试的签名和模板,开通短信服务成功之后,会进入到该页面,我们点击快速学习,再往下滑,找到调用API发短信。
找不到的小伙伴可以直接点击这个链接:阿里云短信服务测试的签名和模板地址
到了这里,阿里云短信服务基本就搞定了,接下来我们整合到项目中。(对了,记得充点钱在里面,不然发送不了哦,几毛就够了,一条短信0.045)
2、整合短信服务到项目中
1、创建一个SpringBoot项目
2、导入依赖(为了让大家看的更清楚,我这里就写完整依赖了)
 <dependencies>
        <dependency>
            <groupId>org.springframework.boot</groupId>
            <artifactId>spring-boot-starter-web</artifactId>
        </dependency>

        <dependency>
            <groupId>org.springframework.boot</groupId>
            <artifactId>spring-boot-starter-test</artifactId>
            <scope>test</scope>
        </dependency>

        <dependency>
            <groupId>com.alibaba</groupId>
            <artifactId>fastjson</artifactId>
            <version>1.2.28</version>
        </dependency>
        <dependency>
            <groupId>com.aliyun</groupId>
            <artifactId>aliyun-java-sdk-core</artifactId>
            <version>4.3.3</version>
        </dependency>

        <!-- redis -->
        <dependency>
            <groupId>org.springframework.boot</groupId>
            <artifactId>spring-boot-starter-data-redis</artifactId>
        </dependency>

        <!-- spring2.X集成redis所需common-pool2-->
        <dependency>
            <groupId>org.apache.commons</groupId>
            <artifactId>commons-pool2</artifactId>
            <version>2.6.0</version>
        </dependency>

        <!--swagger-->
        <dependency>
            <groupId>io.springfox</groupId>
            <artifactId>springfox-swagger2</artifactId>
            <version>2.7.0</version>
        </dependency>
        <!--swagger ui-->
        <dependency>
            <groupId>io.springfox</groupId>
            <artifactId>springfox-swagger-ui</artifactId>
            <version>2.7.0</version>
        </dependency>
    </dependencies>
注意:记得将SpringBoot版本修改为2.2.1.RELEASE(因为高版本的有可能不匹配)

3、配合application.properties文件
# 服务端口
server.port=8100

#Redis配置 这里填写的是装了redis的ip地址,我的redis装在虚拟机中
spring.redis.host=192.168.1.8
spring.redis.port=6379
spring.redis.database= 0
spring.redis.timeout=1800000

spring.redis.lettuce.pool.max-active=20
spring.redis.lettuce.pool.max-wait=-1
#最大阻塞等待时间(负数表示没限制)
spring.redis.lettuce.pool.max-idle=5
spring.redis.lettuce.pool.min-idle=0
#最小空闲
4、在启动类上加上对应注解
@EnableSwagger2
@ComponentScan({"com.gx"})
@SpringBootApplication(exclude = DataSourceAutoConfiguration.class)//取消数据源自动配置
public class BootMsmApplication {
    public static void main(String[] args) {
        SpringApplication.run(BootMsmApplication.class, args);
    }
}
5、创建service,编写业务
(1)接口
/**
 * @author Eric
 * @create 2022-05-22 15:08
 */
public interface MsmService {
    //发送验证码
    boolean send(Map<String, Object> param, String phone);
}
(2)实现类
package com.gx.bootmsm.service;

import com.alibaba.fastjson.JSONObject;
import com.aliyuncs.CommonRequest;
import com.aliyuncs.CommonResponse;
import com.aliyuncs.DefaultAcsClient;
import com.aliyuncs.IAcsClient;
import com.aliyuncs.http.MethodType;
import com.aliyuncs.profile.DefaultProfile;
import org.springframework.stereotype.Service;
import org.springframework.util.StringUtils;

import java.util.Map;

/**
 * @author Eric
 * @create  2022-05-22 15:09
 */
@Service
public class MsmServiceImpl implements MsmService{
    /**
     * 发送验证码
     * @param param     验证码
     * @param phone     手机号
     * @return
     */
    @Override
    public boolean send(Map<String, Object> param, String phone) {

        if(StringUtils.isEmpty(phone)) return false;

        //default 地域节点,默认就好  后面是 阿里云的 id和秘钥(这里记得去阿里云复制自己的id和秘钥哦)
        DefaultProfile profile = DefaultProfile.getProfile("default", "Q2AtKVxX1N3tOh3AWHHzXyx", "ZgmmX3vSlMF9GnxliXZrLxoD7053Hx");
        IAcsClient client = new DefaultAcsClient(profile);

        //这里不能修改
        CommonRequest request = new CommonRequest();
        //request.setProtocol(ProtocolType.HTTPS);
        request.setMethod(MethodType.POST);
        request.setDomain("dysmsapi.aliyuncs.com");
        request.setVersion("2017-05-25");
        request.setAction("SendSms");

        request.putQueryParameter("PhoneNumbers", phone);                    //手机号
        request.putQueryParameter("SignName", "阿里云短信测试");    //申请阿里云 签名名称(暂时用阿里云测试的,自己还不能注册签名)
        request.putQueryParameter("TemplateCode", "SMS_154950909"); //申请阿里云 模板code(用的也是阿里云测试的)
        request.putQueryParameter("TemplateParam", JSONObject.toJSONString(param));

        try {
            CommonResponse response = client.getCommonResponse(request);
            System.out.println(response.getData());
            return response.getHttpResponse().isSuccess();
        } catch (Exception e) {
            e.printStackTrace();
        }
        return false;
    }
}
6、创建一个生成随机验证码的工具类:RandomUtil
package com.gx.bootmsm.utils;

import java.text.DecimalFormat;
import java.util.ArrayList;
import java.util.HashMap;
import java.util.List;
import java.util.Random;

/**
 * 获取随机数
 *
 * @author qianyi
 *
 */
public class RandomUtil {

	private static final Random random = new Random();

	private static final DecimalFormat fourdf = new DecimalFormat("0000");

	private static final DecimalFormat sixdf = new DecimalFormat("000000");

	public static String getFourBitRandom() {
		return fourdf.format(random.nextInt(10000));
	}

	public static String getSixBitRandom() {
		return sixdf.format(random.nextInt(1000000));
	}

	/**
	 * 给定数组,抽取n个数据
	 * @param list
	 * @param n
	 * @return
	 */
	public static ArrayList getRandom(List list, int n) {

		Random random = new Random();

		HashMap<Object, Object> hashMap = new HashMap<Object, Object>();

		// 生成随机数字并存入HashMap
		for (int i = 0; i < list.size(); i++) {

			int number = random.nextInt(100) + 1;

			hashMap.put(number, i);
		}

		// 从HashMap导入数组
		Object[] robjs = hashMap.values().toArray();

		ArrayList r = new ArrayList();

		// 遍历数组并打印数据
		for (int i = 0; i < n; i++) {
			r.add(list.get((int) robjs[i]));
			System.out.print(list.get((int) robjs[i]) + "\t");
		}
		System.out.print("\n");
		return r;
	}
}
7、创建controller
package com.gx.bootmsm.controller;

import com.gx.bootmsm.service.MsmService;
import com.gx.bootmsm.utils.RandomUtil;
import io.swagger.annotations.Api;
import io.swagger.annotations.ApiOperation;
import org.springframework.beans.factory.annotation.Autowired;
import org.springframework.data.redis.core.RedisTemplate;
import org.springframework.util.StringUtils;
import org.springframework.web.bind.annotation.GetMapping;
import org.springframework.web.bind.annotation.PathVariable;
import org.springframework.web.bind.annotation.RequestMapping;
import org.springframework.web.bind.annotation.RestController;

import java.util.HashMap;
import java.util.Map;
import java.util.concurrent.TimeUnit;

/**
 * @author Eric
 * @create  2022-05-22 15:12
 */
@Api(tags = "阿里云短信服务")
@RestController
@RequestMapping("/api/msm")
public class MsmApiController {
    @Autowired
    private MsmService msmService;

    @Autowired
    private RedisTemplate<String, String> redisTemplate;    //注入redis

    //发送短信验证码
    @ApiOperation(value = "发送短信验证码")
    @GetMapping(value = "/send/{phone}")
    public Boolean code(@PathVariable String phone) {
        //1、从redis中获取验证码,如果获取到就直接返回
        String code = redisTemplate.opsForValue().get(phone);
        if(!StringUtils.isEmpty(code)) return false;

        //2、如果获取不到,就进行阿里云发送
        code = RandomUtil.getFourBitRandom();//生成验证码的随机值
        Map<String,Object> param = new HashMap<>();
        param.put("code", code);

        //调用方法
        boolean isSend = msmService.send(param,phone);
        if(isSend) {
            //往redis中设置数据:key、value、过期值、过期时间单位  MINUTES代表分钟
            redisTemplate.opsForValue().set(phone, code,5, TimeUnit.MINUTES);
            return true;
        } else {
            return false;
        }
    }
}
3、测试
1、启动项目
2、访问swagger地址:http://localhost:8100/swagger-ui.html
3、输入手机号,点击发送
返回结果为true,说明发送成功
这是手机收到的短信
因为我们用的是阿里云的模板,所以模板显示我们也就不能自定义啦~
然后我们也用到了redis,设置了验证码的过期时间,我们可以去到redis中查看是否有值
可以看到已经存放进来了~文章来源:https://www.toymoban.com/news/detail-414180.html
总结
该文章应该是每一步都有记录,也是帮自己回忆一下这个过程,当然,如果对你也有帮助,那也是我的荣幸~ ,如果在过程中有遇到问题,可在下方留言,作者看到会在第一时间回复。文章来源地址https://www.toymoban.com/news/detail-414180.html
到了这里,关于SpringBoot整合阿里云短信服务详细过程(保证初学者也能实现)的文章就介绍完了。如果您还想了解更多内容,请在右上角搜索TOY模板网以前的文章或继续浏览下面的相关文章,希望大家以后多多支持TOY模板网!


