第一种方法:
allen@jettech-WS-C621E-SAGE-Series:~$ sudo virsh domifaddr win10-01
 Name       MAC address          Protocol     Address
-------------------------------------------------------------------------------
 vnet0      52:54:00:b3:42:28    ipv4         192.168.122.118/24


第二种方式:
allen@jettech-WS-C621E-SAGE-Series:~$ sudo virsh dumpxml win10-01 | grep mac
    <partition>/machine</partition>
    <type arch='x86_64' machine='pc-i440fx-bionic'>hvm</type>
      <mac address='52:54:00:b3:42:28'/>
allen@jettech-WS-C621E-SAGE-Series:~$ arp -a | grep '52:54:00:b3:42:28'
? (192.168.122.118) 位于 52:54:00:b3:42:28 [ether] 在 virbr0


网卡arp清理:
arp缓存就是IP地址和MAC地址关系缓存列表。
在Windows下 arp -d [$ip] 不指定IP地址时清除所有arp缓存。
在Linux下 arp -d $ip 必须指定IP地址才能执行这条命令的此参数,所有在Linux系统下 arp -d $ip 命令只能清除一个IP地址的对应MAC地址缓存,当然可以使用组合命令操作,这也算是Linux的一个优点吧。

组合命令清除所有arp缓存:

arp -n|awk '/^[1-9]/{system("arp -d "$1)}'
其实Linux也有内部命令清除所有arp缓存,但是不太好记忆,用的人很少。以下命令清除eth0接口的所有arp缓存。

ip neigh flush  dev eth0
Linux 清除arp缓存是把列表标记为(incomplete),在下一次系统清理垃圾是会清除。
Linux 命令(199)—— arp 命令
1.命令简介
arp(Address Resolution Protocol)操作主机的 ARP 缓存。
arp 可以显示 arp 缓冲区中的所有条目、删除指定的条目或者添加静态的 IP 地址与 MAC 地址对应关系。
2.命令格式
arp [-vn] [-H <type>] [-i <if>] [-ae] [<hostname>]

arp [-v] [-i <if>] -d <hostname> [pub]

arp [-v] [-H <type>] [-i <if>] -s <hostname> <hw_addr> [temp]

arp [-v] [-H <type>] [-i <if>] -s <hostname> <hw_addr> [netmask <nm>] pub

arp [-v] [-H <type>] [-i <if>] -Ds <hostname> <ifname> [netmask <nm>] pub

arp [-vnD] [-H <type>] [-i <if>] -f [<filename>]
3.选项说明
-a
	使用备用 BSD 样式输出格式(没有固定列)。
-H, --hw-type, -t <type>
	指定arp指令使用的地址类型。
-d <address>
	从 arp 缓存中删除指定主机的 arp 条目。
-D, --use-device
	使用指定接口的硬件地址。
-e
	以 Linux 的显示风格显示 arp 缓存中的条目。
-i, --device <if>
	指定要操作 arp 缓存的网络接口。
-n, --numeric
	以数字方式显示 arp 缓存中的条目。
-v, --verbose
	显示详细的arp缓存条目,包括缓存条目的统计信息。
-f, --file <filename>
	设置主机的IP地址与 MAC 地址的静态映射。
4.常用示例
1)查看 arp 缓存表
arp
Address                  HWtype  HWaddress           Flags Mask            Iface
169.254.0.47             ether   fe:ee:7f:99:99:19   C                     eth0
169.254.0.4              ether   fe:ee:7f:99:99:19   C                     eth0
169.254.0.15             ether   fe:ee:7f:99:99:19   C                     eth0
(2)查看 arp 表,并且用 IP 显示而不是主机名称。
arp -n
Address                  HWtype  HWaddress           Flags Mask            Iface
169.254.0.47             ether   fe:ee:7f:99:99:19   C                     eth0
169.254.0.4              ether   fe:ee:7f:99:99:19   C                     eth0
169.254.0.15             ether   fe:ee:7f:99:99:19   C                     eth0
————————————————
(3)查看 arp 表,使用备用 BSD 样式输出格式(没有固定列)。
arp -a
? (169.254.0.47) at fe:ee:7f:99:99:19 [ether] on eth0
? (169.254.0.4) at fe:ee:7f:99:99:19 [ether] on eth0
? (169.254.0.15) at fe:ee:7f:99:99:19 [ether] on eth0
4)IP 和 MAC 地址绑定。
arp -s 172.16.0.76 00:50:56:26:d8:87(5)删除 ARP 缓存表中指定项。
arp -d 169.254.0.47(6)删除指定网卡的 arp 表。
arp -i eth0 -d 169.254.0.47)使用 eth1 的 MAC 地址回答 eth0 上的 192.168.60.2 的 arp 请求。
arp -i eth0 -Ds 192.168.60.2 eth1 pub
(8)显示详细的 arp 缓存条目,包括缓存条目的统计信息
arp -v
Address                  HWtype  HWaddress           Flags Mask            Iface
169.254.0.47             ether   fe:ee:7f:99:99:19   C                     eth0
169.254.0.4              ether   fe:ee:7f:99:99:19   C                     eth0
169.254.0.15             ether   fe:ee:7f:99:99:19   C                     eth0
169.254.0.3              ether   fe:ee:7f:99:99:19   C                     eth0
169.254.0.2              ether   fe:ee:7f:99:99:19   C                     eth0
169.254.128.8            ether   fe:ee:7f:99:99:19   C                     eth0
169.254.128.12           ether   fe:ee:7f:99:99:19   C                     eth0
169.254.0.138            ether   fe:ee:7f:99:99:19   C                     eth0
169.254.0.55             ether   fe:ee:7f:99:99:19   C                     eth0
10.0.0.1                 ether   fe:ee:7f:99:99:19   C                     eth0
169.254.0.23             ether   fe:ee:7f:99:99:19   C                     eth0
示例:
添加静态项。这个很有用,特别是局域网中中了arp病毒以后
# arp -s 192.168.100.81 00:15:C5:E1:D1:58
# arp -a .... 显示 ARP 表。
但是arp -s设置的静态项在用户登出之后或重起之后会失效,如果想要任何时候都不失效,可以将ip和mac的对应关系写入arp命令默认的配置文件/etc/ethers中例如:
root@ubuntu:/# vi /etc/ethers
192.168.100.81 00:15:C5:E1:D1:58
写入之后执行下面的命令就好了,引用:arp -f /etc/ethers
为保证重起之后绑定仍然有效,需要把上述命令写入/etc/ethers
ARP(Address Resolution Protocol),或称地址解析协议。
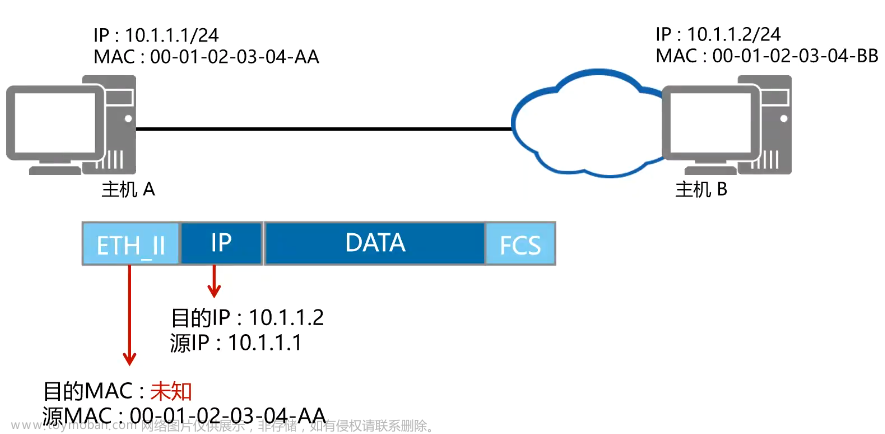
本地机向"某个IP地址 -- 目标机IP地址"发送数据时,先查找本地的ARP表,如果在ARP表中找到"目标机IP地址"的ARP表项,(网络协议)将把"目标机IP地址"对应的"MAC地址"放到MAC包的"目的MAC地址字段"直接发送出去;
如果在ARP表没有找到"目标机IP地址"的ARP表项,则向局域网发送广播ARP包("目的MAC地址字段" == FF:FF:FF:FF:FF:FF),目标机将向本地机回复ARP包(包含目标机的MAC地址)
############################################################################[root@firewall bin]# arp -a
? (192.168.100.83) at 00:15:58:A2:13: D0 [ether] on eth0
? (192.168.100.81) at 00:15:C5:E1: D1:58 [ether] PERM on eth0发现没有?多了一个PERM!
或者
[root@firewall bin]# cat /proc/net/arp
IP address HWtype Flags HWaddress Mask Device
192.168.100.83 0x1 0x2 00:15:58:A2:13:D0 * eth0
192.168.100.81 0x1 0x6 00:15:C5:E1:D1:58 * eth0[root@firewall bin]# arp -s 192.168.100.83 00:15:58:A2:13:D0
[root@firewall bin]# cat /proc/net/arp
IP address HW type Flags HW address Mask Device
192.168.100.83 0x1 0x6 00:15:58:A2:13:D0 * eth0
192.168.100.81 0x1 0x6 00:15:C5:E1: D1:58 * eth0发现没有?Flags改变了!
所以我们可以用两种方法找到arp的静态绑定地址:
#arp -a | grep PERM 或者
#cat /proc/net/arp | grep 0x6
但建议用后者比较快。
利用静态ARP表进行控制
我们知道,ARP(Address Resolution Protocol,地址转换协议)被当作底层协议,用于IP地址到物理地址的转换。在以太网中,所有对IP的访问最终都转化为对网卡MAC地址的访问。不妨设想一下,如果主机A的ARP列表中,到主机B的IP地址与MAC地址对应不正确,由A发往B数据包就会发向错误的MAC地址,当然无法顺利到达B,结 果是A与B根本不能进行通信。Linux可以通过arp命令控制ARP转换,即IP到MAC的转换。因此,也能利用这一功能对用户MAC地址进行匹配。下面我们就来看看arp命令的用法。
输入arp将显示当前所有ARP转换记录,类似于这样:Address HWtype HWaddress Flags Mask Iface
www.baidu.com ether 00:06:29:57:16:F5 C eth0
218.200.80.177 ether 00:01:30:F4:32:40 C eth1
192.168.100.25 ether 00:02:1E:F1:92:C2 C eth0由此可以看到,当前系统保留的IP地址与MAC地址一一对应,并指明了硬件类型(Hwtype)和通信所使用的接口(Iface)。不过这些都是动态生成的,无需手工干预。我们要做的恰恰是手工干预这一过程。
我们需要用到arp命令的另一重要功能,就是手工更改这一对应关系。此外,该命令还可以读取文本文件中的ARP记录,其默认文件是/etc/ethers。也就是说,当输入ARP-f的时候,系统就会读取/etc/ethers这个文件,并以其中的项目取代系统当前的ARP记录。假设/etc/ethers 文件内容如下:
192.168.100.25 00:02:01:50:BB:53
然后执行命令arp –f
这时,我们查看系统ARP表,会发现无论192.168.100.25原来对应的MAC地址是什么,都会被新的所取代:
www.baidu.com ether 00:06:29:57:16:F5 C eth0
218.200.80.177 ether 00:01:30:F4:32:40 C eth1
192.168.100.25 ether 00:02:01:50:BB:53 C eth0此时,本机发往192.168.100.25的数据包目标MAC地址将由原来的00:02:1E:F1:92:C2改为00:02:01:50:BB:53 显然,如果192.168.100.25所在网卡的MAC地址并非00:02:01:50:BB:53,数据包就无法到达正确的目的地,那么它们也就无法通信了,这样也达到了识别非法用户的目的。
当然,控制MAC地址的方法还不止这些,例如可以利用交换机的端口管理功能识别用户。根据交换机的原理,它是直接将数据发送到相应端口,那么就必须保有一个数据库,包含所有端口所连网卡的MAC地址,由此可见,控制每个端口使用的MAC地址理论上是完全可行的。大部分中高端交换机如3Com SuperStack系列等,都具有这种功能。具体操作与交换机型号有关,这里就不赘述。
最后,提醒一下,MAC地址控制并非绝对保险。正如这个世界上没有绝对解不开的密码一样,所谓安全都是相对于特定的环境而言。现在,很多网卡都支持MAC地址的软件修改,Linux和Windows本身也都有办法修改这一物理地址。不过由于这种方式相对稳定,摒弃了繁琐的客户端设置,对用户完全透明,而且具备很强的可操作性,所以在某种程度上说是安全的。
MAC记录与端口扫描脚本
(1) 需求描述
● 编写名为system.sh的脚本,记录局域网中各主机的MAC地址,保存到/etc/ethers文件中;若此文件已存在,应先转移进行备份;每行一条记录,第1列为IP地址,第2列为对应的MAC地址。
● 检查有哪些主机开启了匿名FTP服务,扫描对象为/etc/ethers文件中的所有IP地址,扫描的端口为21.
(2) 实现步骤
[root@localhost ~]#vim system.sh
    #!/bin/bash
    #定义网段地址、mac列表文件
    NADD="192.168.4."
    FILE="/etc/ethers"
    #发送ARP请求,并记录反馈信息
    [ -f $FILE ] && /bin/cp -f $FILE $FILE.old  #备份原有文件
    HADD=1        #定义起始扫描地址
    while [ $HADD -lt 254 ]
    do
        ping -c 2 -w 1 ${NADD}${HADD} &> /dev/null
        if [ $? -eq 0 ];then
            arp -n ${NADD}${HADD} | awk '{print $1,$3}' >> $FILE
        fi
        let HADD++
    done
    TARGET=$(awk '{print $1}' /etc/ethers)
    echo "以下主机已开放匿名FTP服务:"
    for IP in $TARGET
    do
        wget [ftp://$IP/](ftp://$IP/) &> /dev/null
        if [ $? -eq 0 ];then
            echo $IP
            rm -rf index.html  #事先在ftp服务器上准备下载文件,测试后删除
        fi
    done
# chmod +x system.sh
#./system.sh        #执行检测程序
#cat /etc/ethers  #确认记录结果
####/bin/cp相当于\cp,即使用原生cp命令,-f表示强制覆盖,不提示,不与用户交互
linux下arp协议-CSDN博客
arp(8) - Linux manual page
文章来源地址https://www.toymoban.com/news/detail-417383.html
========================
单网口ubuntu主机配置virt-manager传统桥接bridge网络_enaftgm1i0_krokodil98的博客-CSDN博客
单网口ubuntu主机配置virt-manager传统桥接bridge网络
虚拟机的网络桥接bridge模式往往需要物理宿主机有两个网口,一个网口1连接外网配置ip,另一个网口2空闲不配置ip,在virt-manager里配置虚拟机的网卡绑定网口2,从而实现虚拟机桥接网络模式。
由于办公环境只有一台单网口的主机,通过手动配置arp与路由的方式可实现下方的网络拓扑关系。如果单网口主机有相同配置虚拟机传统桥接网络需求的话,可以参考本文。
先贴下网络拓扑图:
主机A、B、C处于同一个内网172.30.120.0/24里,其中虚拟机C的宿主物理机是B。
按本文操作最终可实现A<->B、A<->C、B<->C互通。
- 宿主物理机B为ubuntu14.04系统,只有一个物理网口,网口信息如下:

2. 在物理机B上通过nm-connection-editor创建桥接网络

新建一项,类型选择网桥


3. 物理机B上,关闭nm-connection-editor后,再重新打开可见多了“bridge0 port1”和“网桥连接1”。ifconfig发现多了bridge0网口:

krokodil@krokodil-SY-ZL-H110N-D3V:~$ ifconfig
bridge0: flags=4099<UP,BROADCAST,MULTICAST>  mtu 1500
        inet 172.30.120.127  netmask 255.255.255.0  broadcast 172.30.120.255
        ether de:91:be:83:e7:72  txqueuelen 1000  (以太网)
        RX packets 0  bytes 0 (0.0 B)
        RX errors 0  dropped 0  overruns 0  frame 0
        TX packets 0  bytes 0 (0.0 B)
        TX errors 0  dropped 0 overruns 0  carrier 0  collisions 0

enp1s0: flags=4163<UP,BROADCAST,RUNNING,MULTICAST>  mtu 1500
        inet 172.30.120.125  netmask 255.255.255.0  broadcast 172.30.120.255
        inet6 fe80::10f4:3d60:14c5:c457  prefixlen 64  scopeid 0x20<link>
        ether 00:e0:4c:5a:03:01  txqueuelen 1000  (以太网)
        RX packets 8250  bytes 7874949 (7.8 MB)
        RX errors 0  dropped 84  overruns 0  frame 0
        TX packets 6888  bytes 1845403 (1.8 MB)
        TX errors 0  dropped 0 overruns 0  carrier 0  collisions 0
4.物理机B上通过virt-manager创建新虚拟机,步骤略过,网络配置如下,配置成桥接模式,设备绑定到bridge0上: 
5. 虚拟机C安装成功后,把虚拟机内网卡配置好ip

6. 首先需要确保虚拟机C网口与物理机B的bridge0和enp1s0这两个网口互通,当前状态虚拟机C向物理机B ping包不通:
由于桥接原理,可知任意从虚拟机C eth0发出的包必会在物理机B bridge0网口抓到。配置好后,在虚拟机C内部ping物理机B网桥bridge0,同时对物理机B的bridge0与enp1s0抓包

- 发现虚拟机C的icmp request发到了物理机B bridge0上,但由于物理机B不知道虚拟机C网口ip172.30.120.120的mac地址,所以reply包无法发出。
- 查询物理机B当前的arp规则,发现缺失网口enp1s0的ip为172.30.120.120的规则:
krokodil@krokodil-SY-ZL-H110N-D3V:~$ arp -n
地址                     类型    硬件地址            标志  Mask            接口
172.30.120.254                   (incomplete)                              bridge0
172.30.120.120                   (incomplete)                              enp1s0
172.30.120.120           ether   52:54:00:32:94:c2   C                     bridge0
172.30.120.254           ether   04:fe:8d:8e:31:e1   C                     enp1s0
- 在物理机B配置一条arp规则,将虚拟机C内eth0的mac地址52:54:00:32:94:c2与ip172.30.120.120关联起来
@krokodil-SY-ZL-H110N-D3V:~$ sudo arp -s 172.30.120.120 52:54:00:32:94:c2 -i enp1s0
krokodil@krokodil-SY-ZL-H110N-D3V:~$ arp -n
地址                     类型    硬件地址            标志  Mask            接口
172.30.120.254                   (incomplete)                              bridge0
172.30.120.120           ether   52:54:00:32:94:c2   CM                    enp1s0
172.30.120.120           ether   52:54:00:32:94:c2   C                     bridge0
172.30.120.254           ether   04:fe:8d:8e:31:e1   C                     enp1s0
再重复在虚拟机C内向ping 172.30.120.127 -c 1,同时在物理机B抓包,发现虚拟机C仍然ping不通物理机B

- 这次抓包没有抓到arp,发现物理机B上reply包并没有从enp1s0转发到bridge0网口。
- 查看物理机B路由:
内核 IP 路由表
目标            网关            子网掩码        标志  跃点   引用  使用 接口
0.0.0.0         172.30.120.254  0.0.0.0         UG    100    0        0 enp1s0
0.0.0.0         172.30.120.254  0.0.0.0         UG    20425  0        0 bridge0
10.10.100.0     0.0.0.0         255.255.255.0   U     0      0        0 virbr0
169.254.0.0     0.0.0.0         255.255.0.0     U     1000   0        0 virbr0
172.17.0.0      0.0.0.0         255.255.0.0     U     0      0        0 docker0
172.30.120.0    0.0.0.0         255.255.255.0   U     100    0        0 enp1s0
172.30.120.0    0.0.0.0         255.255.255.0   U     425    0        0 bridge0
关于172.30.120.0/24网段的包在物理机B上有两条路由,但因为100跳数小于425,所以默认向172.30.120.0/24网段的包向enp1s0转发。这就是为什么上面的reply包没有被转发到bridge0网口。
在物理机B添加一条关于172.30.120.120的路由规则,告知收到目的ip为172.30.120.120的包就直接转发给bridge0网口:
krokodil@krokodil-SY-ZL-H110N-D3V:~$ sudo route add 172.30.120.120 dev bridge0
krokodil@krokodil-SY-ZL-H110N-D3V:~$ route -n
内核 IP 路由表
目标            网关            子网掩码        标志  跃点   引用  使用 接口
0.0.0.0         172.30.120.254  0.0.0.0         UG    100    0        0 enp1s0
0.0.0.0         172.30.120.254  0.0.0.0         UG    20425  0        0 bridge0
10.10.100.0     0.0.0.0         255.255.255.0   U     0      0        0 virbr0
169.254.0.0     0.0.0.0         255.255.0.0     U     1000   0        0 virbr0
172.17.0.0      0.0.0.0         255.255.0.0     U     0      0        0 docker0
172.30.120.0    0.0.0.0         255.255.255.0   U     100    0        0 enp1s0
172.30.120.0    0.0.0.0         255.255.255.0   U     425    0        0 bridge0
172.30.120.120 0.0.0.0 255.255.255.255 UH 0 0 0 bridge0- 此时,虚拟机C内网口eth0可以和物理机B的bridge0网口、物理网口enp1s0互通。
- 虚拟机C内ping包结果:

7.
- 宿主机B与虚拟机C互通后,可以进一步配置同网段内(172.30.120.0/24)机器A与虚拟机C互通。此台机器A的ip为172.30.120.121,已验证可ping通物理机B的两个网口ip 172.30.120.125和172.30.120.127。
-
物理机A网口信息:tcpdump: listening on enaftgm1i0, link-type EN10MB (Ethernet), capture size 262144 bytes 15:09:54.554190 ARP, Ethernet (len 6), IPv4 (len 4), Request who-has 172.30.120.120 tell 172.30.120.121, length 28 15:09:55.580834 ARP, Ethernet (len 6), IPv4 (len 4), Request who-has 172.30.120.120 tell 172.30.120.121, length 28 15:09:56.600821 ARP, Ethernet (len 6), IPv4 (len 4), Request who-has 172.30.120.120 tell 172.30.120.121, length 28 ^C 3 packets captured 3 packets received by filter 0 packets dropped by kernel root@sujing-GW-001N1B-FTF:~#enaftgm1i0: flags=4163<UP,BROADCAST,RUNNING,MULTICAST> mtu 1500 inet 172.30.120.121 netmask 255.255.255.0 broadcast 172.30.120.255 inet6 fe80::54fe:45f6:974e:8db3 prefixlen 64 scopeid 0x20<link> ether 00:07:3e:9d:55:8f txqueuelen 1000 (以太网) RX packets 137322 bytes 43916437 (43.9 MB) RX errors 0 dropped 4476 overruns 0 frame 0 TX packets 188258 bytes 22199429 (22.1 MB) TX errors 0 dropped 0 overruns 0 carrier 0 collisions 0 device interrupt 7 base 0xc000 - 在当前状态下,在同网段机器A(172.30.120.121)上ping 172.30.120.120 -c 1,发包不通:
PING 172.30.120.120 (172.30.120.120) 56(84) bytes of data.
From 172.30.120.121 icmp_seq=1 Destination Host Unreachable

--- 172.30.120.120 ping statistics ---
1 packets transmitted, 0 received, +1 errors, 100% packet loss, time 0ms
- 在物理机A网口抓包,发现172.30.120.121不知道172.30.120.120的mac地址
tcpdump: listening on enaftgm1i0, link-type EN10MB (Ethernet), capture size 262144 bytes 15:09:54.554190 ARP, Ethernet (len 6), IPv4 (len 4), Request who-has 172.30.120.120 tell 172.30.120.121, length 28 15:09:55.580834 ARP, Ethernet (len 6), IPv4 (len 4), Request who-has 172.30.120.120 tell 172.30.120.121, length 28 15:09:56.600821 ARP, Ethernet (len 6), IPv4 (len 4), Request who-has 172.30.120.120 tell 172.30.120.121, length 28 ^C 3 packets captured 3 packets received by filter 0 packets dropped by kernel - 查询物理机A(172.30.120.121)的arp表,看到这一条:
地址 类型 硬件地址 标志 Mask 接口 172.30.120.254 ether 04:fe:8d:8e:31:e1 C enaftgm1i0 172.30.120.120 (incomplete) enaftgm1i0 ... ... - 在物理机A(172.30.120.121)上增加arp规则:注意!这里的mac地址要填写enp1s0的mac地址00:e0:4c:5a:03:01
@sujing-GW-001N1B-FTF:~# sudo arp -s 172.30.120.120 00:e0:4c:5a:03:01 -i enaftgm1i0
root@sujing-GW-001N1B-FTF:~# arp -n
地址                     类型    硬件地址            标志  Mask            接口
172.30.120.254           ether   04:fe:8d:8e:31:e1   C                     enaftgm1i0
172.30.120.120           ether   00:e0:4c:5a:03:01   CM                    enaftgm1i0
然后在物理机A上重新ping 172.30.120.120,同时对物理机B的两个网口抓包

-
这次icmp request成功到达了物理机B的enp1s0网口,但是在bridge0网口看到虚拟机C 172.30.120.120发出的arp查询包。
-
确认虚拟机C内arp表,确实缺少121的mac地址:

-
在虚拟机C内部配置arp规则172.30.120.121 de:91:be:83:e7:72 (注意!!这里要配置bridge0 mac地址)
-

- 此时再在物理机A 172.30.120.121上ping包,就可通了。
root@sujing-GW-001N1B-FTF:~# ping 172.30.120.120 -c 1
PING 172.30.120.120 (172.30.120.120) 56(84) bytes of data.
64 bytes from 172.30.120.120: icmp_seq=1 ttl=63 time=0.731 ms

--- 172.30.120.120 ping statistics ---
1 packets transmitted, 1 received, 0% packet loss, time 0ms
rtt min/avg/max/mdev = 0.731/0.731/0.731/0.000 ms
8.
至此,总结下:
172.30.120.121物理机A需要添加一条arp规则:172.30.120.120 enp1s0的mac地址
172.30.120.125与172.30.120.127物理机B需要添加一条路由规则:172.30.120.120 dev bridge0,以及一条arp规则172.30.120.120 eth0的mac地址
172.30.120.120虚拟机C需要添加一条arp规则:172.30.120.121 bridge0的mac地址
- 从物理机A 网口向 虚拟机C ping一个包,抓包看整个过程:
物理机A 172.30.120.121 enaftgm1i0(00:07:3e:9d:55:8f)向ip 172.30.120.120发request包,根据物理机A上的arp规则,向172.30.120.120发包的目的mac应配为00:e0:4c:5a:03:01(00:e0:4c:5a:03:01为物理机B 172.30.120.125 enp1s0的mac地址)。所以最终在网口enaftgm1i0抓到的request包,源mac地址是enaftgm1i0,目的mac地址是enp1s0。在通过内网的交换机与路由器时,此request包会被转发到00:e0:4c:5a:03:01所在的网口,即enp1s0网口。
root@sujing-GW-001N1B-FTF:~# tcpdump -i enaftgm1i0 -venn host 172.30.120.120
tcpdump: listening on enaftgm1i0, link-type EN10MB (Ethernet), capture size 262144 bytes
16:14:10.131325 00:07:3e:9d:55:8f > 00:e0:4c:5a:03:01, ethertype IPv4 (0x0800), length 98: (tos 0x0, ttl 64, id 51167, offset 0, flags [DF], proto ICMP (1), length 84)
    172.30.120.121 > 172.30.120.120: ICMP echo request, id 6552, seq 1, length 64
16:14:10.131851 00:e0:4c:5a:03:01 > 00:07:3e:9d:55:8f, ethertype IPv4 (0x0800), length 98: (tos 0x0, ttl 63, id 54622, offset 0, flags [none], proto ICMP (1), length 84)
    172.30.120.120 > 172.30.120.121: ICMP echo reply, id 6552, seq 1, length 64
^C
2 packets captured
2 packets received by filter
0 packets dropped by kernel
- 物理机B enp1s0(00:e0:4c:5a:03:01)抓包可看到request包(源mac地址是enaftgm1i0,目的mac地址是enp1s0)已到达物理机B。根据物理机B的路由规则,172.30.120.120的包应转发给bridge0网口:
tcpdump: listening on enp1s0, link-type EN10MB (Ethernet), snapshot length 262144 bytes
16:14:10.163279 00:07:3e:9d:55:8f > 00:e0:4c:5a:03:01, ethertype IPv4 (0x0800), length 98: (tos 0x0, ttl 64, id 51167, offset 0, flags [DF], proto ICMP (1), length 84)
    172.30.120.121 > 172.30.120.120: ICMP echo request, id 6552, seq 1, length 64
16:14:10.163690 00:e0:4c:5a:03:01 > 00:07:3e:9d:55:8f, ethertype IPv4 (0x0800), length 98: (tos 0x0, ttl 63, id 54622, offset 0, flags [none], proto ICMP (1), length 84)
    172.30.120.120 > 172.30.120.121: ICMP echo reply, id 6552, seq 1, length 64
^C
2 packets captured
2 packets received by filter
0 packets dropped by kernel
- bridge0(de:91:be:83:e7:72)抓包看到,获取到了request包(在enp1s0转发时,源mac地址替换成了bridge0,目的mac地址被替换成了eth0)。
cpdump: listening on bridge0, link-type EN10MB (Ethernet), snapshot length 262144 bytes
16:14:10.163315 de:91:be:83:e7:72 > 52:54:00:32:94:c2, ethertype IPv4 (0x0800), length 98: (tos 0x0, ttl 63, id 51167, offset 0, flags [DF], proto ICMP (1), length 84)
    172.30.120.121 > 172.30.120.120: ICMP echo request, id 6552, seq 1, length 64
16:14:10.163677 52:54:00:32:94:c2 > de:91:be:83:e7:72, ethertype IPv4 (0x0800), length 98: (tos 0x0, ttl 64, id 54622, offset 0, flags [none], proto ICMP (1), length 84)
    172.30.120.120 > 172.30.120.121: ICMP echo reply, id 6552, seq 1, length 64
^C
2 packets captured
2 packets received by filter
0 packets dropped by kernel
172.30.120.120虚拟机C网口eth0抓包,抓到request和reply(源和目的mac分别是bridge0和eth0):
reply包发送和路由原理相同,略,看抓包即可明白文章来源:https://www.toymoban.com/news/detail-417383.html
到了这里,关于virsh 获取虚机IP,网桥ip,brctl,arp使用 Linux 命令(199)—— arp 命令的文章就介绍完了。如果您还想了解更多内容,请在右上角搜索TOY模板网以前的文章或继续浏览下面的相关文章,希望大家以后多多支持TOY模板网!


