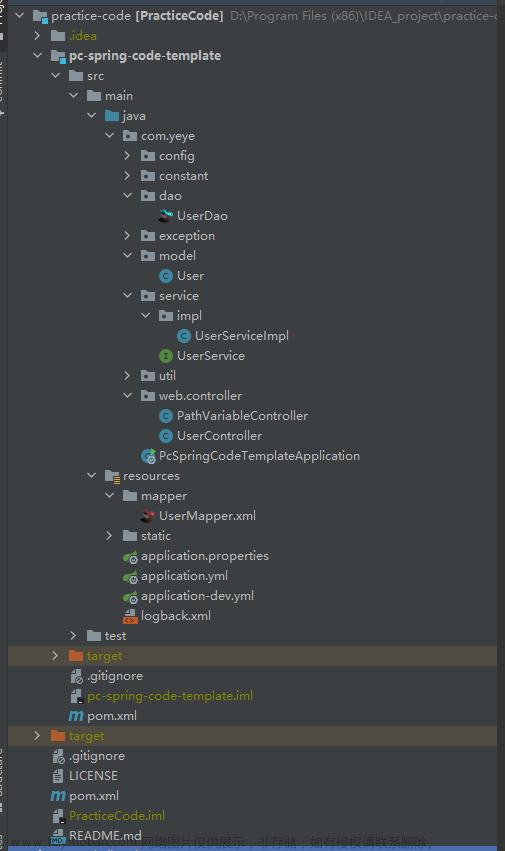
在深入理解mybatis源码之前,首先搭建mybatis的测试环境用于跟踪代码测试用。
下面介绍两种springboot集成mybatis运行环境的案例。一种是通过springboot包装mybatis的构建过程,一种是自行构建Mybatis的执行环境。
以查询user表为例,数据如下
1. springboot包装方式
1.1 创建表对应的bean
package com.lzj.bean;

public class User {
    private int id;
    private String name;
    private int age;

    public User(){}

    public User(int id, String name, int age){
        this.id = id;
        this.name = name;
        this.age = age;
    }

    public int getId() {
        return id;
    }

    public void setId(int id) {
        this.id = id;
    }

    public String getName() {
        return name;
    }

    public void setName(String name) {
        this.name = name;
    }

    public int getAge() {
        return age;
    }

    public void setAge(int age) {
        this.age = age;
    }

    @Override
    public String toString() {
        return "User{" +
                "id=" + id +
                ", name='" + name + '\'' +
                ", age=" + age +
                '}';
    }
}
1.2 创建查询接口dao
package com.lzj.dao;

import com.lzj.bean.User;

public interface UserDao {
    public User selectOne(int id);
}
1.3 在resources下创建mapper文件
<?xml version="1.0" encoding="UTF-8" ?>
<!DOCTYPE mapper PUBLIC "-//mybatis.org//DTD Mapper 3.0//EN" "http://mybatis.org/dtd/mybatis-3-mapper.dtd">

<!--namespace为UserDao接口的全类名-->
<mapper namespace="com.lzj.dao.UserDao">

    <!--selectOne要与UserDao接口中的接口方法名一致-->
    <!--parameterType和resultType指定的类型除了基本类型外,自定义的类要用全类名-->
    <select id="selectOne" parameterType="int" resultType="com.lzj.bean.User">
        select * from user where id=#{id}
    </select>

</mapper>
1.4 创建查询数据库的服务
package com.lzj.service;

import com.lzj.bean.User;
import com.lzj.dao.UserDao;
import org.springframework.beans.factory.annotation.Autowired;
import org.springframework.stereotype.Service;

@Service
public class UserService {
    @Autowired
    private UserDao userDao;

    public void query(int id){
        User user = userDao.selectOne(id);
        System.out.println("hello :" + user);
    }
}
1.5 创建springboot的配置文件
server:
  prot: 8004

spring:
  datasource:
    url: jdbc:mysql://localhost:3306/lzj?characterEncoding=utf8&serverTimezone=UTC
    username: root
    driver-class-name: com.mysql.cj.jdbc.Driver

#因为添加了mybatis-config.xml配置文件,所以此处就不用添加mybatis的配置了
#如果取消mybatis-config.xml配置文件,此处就要放开mybatis的配置
mybatis:
  mapper-locations: classpath*:mapper/*Mapper.xml
1.6 创建启动类
package com.lzj;

import com.lzj.service.UserService;
import org.mybatis.spring.annotation.MapperScan;
import org.springframework.boot.SpringApplication;
import org.springframework.boot.autoconfigure.SpringBootApplication;
import org.springframework.context.ConfigurableApplicationContext;
import java.sql.SQLException;

@SpringBootApplication
@MapperScan(basePackages={"com.lzj.dao"})
public class AppDemo
{
    public static void main( String[] args ) throws SQLException {
        ConfigurableApplicationContext app = SpringApplication.run(AppDemo.class);
        UserService userService = app.getBean(UserService.class);
        userService.query(1); //1表示数据库表user中id的值
    }
}
启动后会把查询结果输出如下所示
hello :User{id=1, name='xiaowang', age=20}
2. 自行构建mybatis执行环境
通过此种方式搭建mybatis环境,首先创建的类User、UserDao、UserMapper与上面的一致。
2.1 创建一个工具类,工具类用于构建mybatis运行环境
package com.lzj.example;

import org.apache.ibatis.session.Configuration;
import org.apache.ibatis.session.SqlSessionFactory;
import org.apache.ibatis.session.SqlSessionFactoryBuilder;
import org.apache.ibatis.transaction.jdbc.JdbcTransaction;
import org.springframework.stereotype.Component;
import java.sql.Connection;
import java.sql.DriverManager;
import java.sql.SQLException;

@Component
public class MybatisUtil {

    public static final String url = "jdbc:mysql://localhost:3306/lzj?characterEncoding=utf8&serverTimezone=UTC";
    public static final String usr = "root";

    public Configuration configuration;
    public JdbcTransaction jdbcTransaction;


    public void init() throws SQLException {
        SqlSessionFactoryBuilder factoryBuilder = new SqlSessionFactoryBuilder();
        SqlSessionFactory factory = factoryBuilder.build(MybatisUtil.class.getResourceAsStream("/mybatis-config.xml"));
        configuration = factory.getConfiguration();
        Connection connection = DriverManager.getConnection(url, usr, null);
        jdbcTransaction = new JdbcTransaction(connection);
    }

    public Configuration getConfiguration() {
        return configuration;
    }

    public void setConfiguration(Configuration configuration) {
        this.configuration = configuration;
    }

    public JdbcTransaction getJdbcTransaction() {
        return jdbcTransaction;
    }

    public void setJdbcTransaction(JdbcTransaction jdbcTransaction) {
        this.jdbcTransaction = jdbcTransaction;
    }
}
2.2 创建Executor执行器,用来执行查询数据库操作
此案例中创建的执行器为SimpleExecutor,具体该执行器用途会在后续文章中分析。
package com.lzj.example.executor;

import com.lzj.example.MybatisUtil;
import org.apache.ibatis.executor.SimpleExecutor;
import org.apache.ibatis.mapping.MappedStatement;
import org.apache.ibatis.session.Configuration;
import org.apache.ibatis.session.RowBounds;
import org.springframework.beans.factory.annotation.Autowired;
import org.springframework.stereotype.Component;
import java.sql.SQLException;
import java.util.List;

@Component
public class SimpleExecutorExample {

    @Autowired
    private MybatisUtil mybatisUtil;

    public void SimpleExecutorTest() throws SQLException {
        Configuration configuration = mybatisUtil.getConfiguration();
        MappedStatement ms = configuration.getMappedStatement("com.lzj.dao.UserDao.selectOne");
        SimpleExecutor executor = new SimpleExecutor(mybatisUtil.getConfiguration(), mybatisUtil.getJdbcTransaction());
        List<Object> lists = executor.doQuery(ms, 1, RowBounds.DEFAULT, SimpleExecutor.NO_RESULT_HANDLER, ms.getBoundSql(1));
        System.out.println(lists.get(0));
    }
}
2.3 创建springboot配置文件
application.yml
server:
  prot: 8004

spring:
  datasource:
    url: jdbc:mysql://localhost:3306/lzj?characterEncoding=utf8&serverTimezone=UTC
    username: root
    driver-class-name: com.mysql.cj.jdbc.Driver
2.4 创建mybatis的配置文件
mybatis-config.xml
<?xml version="1.0" encoding="UTF-8"?>
<!DOCTYPE configuration PUBLIC "-//mybatis.org//DTD Config 3.0//EN" "http://mybatis.org/dtd/mybatis-3-config.dtd">
<configuration>
	<!---配置要解析的mapper-->
    <mappers>
        <mapper resource="mapper/UserMapper.xml"></mapper>
    </mappers>
</configuration>
2.5 创建启动类
package com.lzj;

import com.lzj.example.MybatisUtil;
import com.lzj.example.executor.SimpleExecutorExample;
import org.springframework.boot.SpringApplication;
import org.springframework.boot.autoconfigure.SpringBootApplication;
import org.springframework.context.ConfigurableApplicationContext;
import java.sql.SQLException;

@SpringBootApplication
public class AppDemo
{
    public static void main( String[] args ) throws SQLException {
        ConfigurableApplicationContext app = SpringApplication.run(AppDemo.class);
        MybatisUtil mybatisUtil = app.getBean(MybatisUtil.class);
        SimpleExecutorExample simpleExecutorExample = app.getBean(SimpleExecutorExample.class);
        mybatisUtil.init();
        simpleExecutorExample.SimpleExecutorTest();
    }
}
启动测试类输出结果如下文章来源:https://www.toymoban.com/news/detail-418438.html
User{id=1, name='xiaowang', age=20}
上述两种方式用到的pom文件如下所示文章来源地址https://www.toymoban.com/news/detail-418438.html
<?xml version="1.0" encoding="UTF-8"?>
<project xmlns="http://maven.apache.org/POM/4.0.0"
         xmlns:xsi="http://www.w3.org/2001/XMLSchema-instance"
         xsi:schemaLocation="http://maven.apache.org/POM/4.0.0 http://maven.apache.org/xsd/maven-4.0.0.xsd">
  <modelVersion>4.0.0</modelVersion>

  <parent>
      <groupId>org.springframework.boot</groupId>
      <artifactId>spring-boot-starter-parent</artifactId>
      <version>2.3.11.RELEASE</version>
  </parent>

  <groupId>com.lzj</groupId>
  <artifactId>MybatisDemo</artifactId>
  <version>1.0-SNAPSHOT</version>

  <properties>
      <maven.compiler.source>8</maven.compiler.source>
      <maven.compiler.target>8</maven.compiler.target>
  </properties>

  <dependencies>
    <!--引人spring boot所需包-->
    <dependency>
      <groupId>org.springframework.boot</groupId>
      <artifactId>spring-boot-starter-web</artifactId>
    </dependency>
    <dependency>
      <groupId>org.springframework.boot</groupId>
      <artifactId>spring-boot-starter-test</artifactId>
    </dependency>
    <dependency>
      <groupId>org.mybatis.spring.boot</groupId>
      <artifactId>mybatis-spring-boot-starter</artifactId>
      <version>1.3.1</version>
    </dependency>
    <dependency>
      <groupId>mysql</groupId>
      <artifactId>mysql-connector-java</artifactId>
    </dependency>
    <dependency>
      <groupId>org.mybatis</groupId>
      <artifactId>mybatis</artifactId>
      <version>3.5.2</version>
    </dependency>

  </dependencies>

  <build>
    <plugins>
      <plugin>
        <groupId>org.springframework.boot</groupId>
        <artifactId>spring-boot-maven-plugin</artifactId>
      </plugin>
    </plugins>
  </build>

</project>
到了这里,关于1. Springboot集成Mybatis的文章就介绍完了。如果您还想了解更多内容,请在右上角搜索TOY模板网以前的文章或继续浏览下面的相关文章,希望大家以后多多支持TOY模板网!


