前言
本着程序员“拥抱变化”的思想,最近开始学Kotlin了。感觉还是得通过实战来入门一门新语言,所以打算写一个基于Kotlin语言的计算器,本文对开发过程以及学习Kotlin的一些知识进行了记录。
计算器的全部源码已经放到了我的Github中,需要的伙伴自取:Calculator
Kotlin学习tips
- Kotlin中文站:https://www.kotlincn.net/
这是Kotlin的官方中文网站,里面有Kotlin的介绍、入门使用以及Kotlin官方文档中文版等; - Android开发者平台内对Kotlin编程的介绍页面:https://developer.android.google.cn/kotlin/first
Kotlin目前已经是Android官方推荐的编程语言,因此在Android开发者平台也有对使用Kotlin进行Android编程的方法介绍以及使用入门等。
界面绘制及控件绑定
UI界面绘制
使用TextView控件进行输入以及结果展示,使用Button控件充当按键。由于时间限制,这里直接使用LinearLayout布局进行实现,缺点是布局层级嵌套太多,总共嵌套了三层LinearLayout,有空的小伙伴们可以自行优化一下。布局文件代码如下:
<?xml version="1.0" encoding="utf-8"?>
<LinearLayout xmlns:android="http://schemas.android.com/apk/res/android"
    android:layout_width="match_parent"
    android:layout_height="match_parent"
    android:orientation="vertical"
    android:padding="15dp"
    >

    <TextView
        android:layout_width="match_parent"
        android:layout_height="0dp"
        android:layout_weight="1"
        android:text="Hello World!"
        android:textAllCaps="false"
        android:textSize="30sp"
        android:gravity="right|bottom"
        android:background="@drawable/bg_frame"
        android:padding="15dp"
        android:id="@+id/mtv_result"
        />

    <LinearLayout
        android:layout_weight="3"
        android:layout_height="0dp"
        android:layout_width="match_parent"
        android:layout_marginTop="15dp"
        android:background="@drawable/bg_frame"
        android:orientation="vertical">

        <LinearLayout
            android:layout_height="0dp"
            android:layout_width="match_parent"
            android:layout_weight="1"
            android:orientation="horizontal">

            <Button
                android:textSize="28sp"
                android:layout_margin="5dp"
                android:padding="5dp"
                android:layout_width="0dp"
                android:layout_height="match_parent"
                android:layout_weight="1"
                android:background="@drawable/bg_frame"
                android:text="+"
                android:id="@+id/btn_add"/>

            <Button
                android:textSize="28sp"
                android:layout_margin="5dp"
                android:layout_width="0dp"
                android:layout_height="match_parent"
                android:layout_weight="1"
                android:background="@drawable/bg_frame"
                android:text="-"
                android:id="@+id/btn_subtract"/>

            <Button
                android:textSize="28sp"
                android:layout_margin="5dp"
                android:layout_width="0dp"
                android:layout_height="match_parent"
                android:layout_weight="1"
                android:background="@drawable/bg_frame"
                android:text="*"
                android:id="@+id/btn_multiply"/>

            <Button
                android:textSize="28sp"
                android:layout_margin="5dp"
                android:layout_width="0dp"
                android:layout_height="match_parent"
                android:layout_weight="1"
                android:background="@drawable/bg_frame"
                android:text="/"
                android:id="@+id/btn_divide"/>
        </LinearLayout>

        <LinearLayout
            android:layout_height="0dp"
            android:layout_width="match_parent"
            android:layout_weight="1"
            android:orientation="horizontal">

            <Button
                android:textSize="28sp"
                android:layout_margin="5dp"
                android:layout_width="0dp"
                android:layout_height="match_parent"
                android:layout_weight="1"
                android:background="@drawable/bg_frame"
                android:text="1"
                android:id="@+id/btn_one"/>

            <Button
                android:textSize="28sp"
                android:layout_margin="5dp"
                android:layout_width="0dp"
                android:layout_height="match_parent"
                android:layout_weight="1"
                android:background="@drawable/bg_frame"
                android:text="2"
                android:id="@+id/btn_two"/>

            <Button
                android:textSize="28sp"
                android:layout_margin="5dp"
                android:layout_width="0dp"
                android:layout_height="match_parent"
                android:layout_weight="1"
                android:background="@drawable/bg_frame"
                android:text="3"
                android:id="@+id/btn_three"/>

            <Button
                android:textSize="28sp"
                android:layout_margin="5dp"
                android:layout_width="0dp"
                android:layout_height="match_parent"
                android:layout_weight="1"
                android:background="@drawable/bg_frame"
                android:text="0"
                android:id="@+id/btn_zero"/>
        </LinearLayout>

        <LinearLayout
            android:layout_height="0dp"
            android:layout_width="match_parent"
            android:layout_weight="1"
            android:orientation="horizontal">

            <Button
                android:textSize="28sp"
                android:layout_margin="5dp"
                android:layout_width="0dp"
                android:layout_height="match_parent"
                android:layout_weight="1"
                android:background="@drawable/bg_frame"
                android:text="4"
                android:id="@+id/btn_four"/>

            <Button
                android:textSize="28sp"
                android:layout_margin="5dp"
                android:layout_width="0dp"
                android:layout_height="match_parent"
                android:layout_weight="1"
                android:background="@drawable/bg_frame"
                android:text="5"
                android:id="@+id/btn_five"/>

            <Button
                android:textSize="28sp"
                android:layout_margin="5dp"
                android:layout_width="0dp"
                android:layout_height="match_parent"
                android:layout_weight="1"
                android:background="@drawable/bg_frame"
                android:text="6"
                android:id="@+id/btn_six"/>

            <Button
                android:textSize="28sp"
                android:layout_margin="5dp"
                android:layout_width="0dp"
                android:layout_height="match_parent"
                android:layout_weight="1"
                android:background="@drawable/bg_frame"
                android:text="C"
                android:id="@+id/btn_clean"/>

        </LinearLayout>

        <LinearLayout
            android:layout_height="0dp"
            android:layout_width="match_parent"
            android:layout_weight="1"
            android:orientation="horizontal">

            <Button
                android:textSize="28sp"
                android:layout_margin="5dp"
                android:layout_width="0dp"
                android:layout_height="match_parent"
                android:layout_weight="1"
                android:background="@drawable/bg_frame"
                android:text="7"
                android:id="@+id/btn_seven"/>

            <Button
                android:textSize="28sp"
                android:layout_margin="5dp"
                android:layout_width="0dp"
                android:layout_height="match_parent"
                android:layout_weight="1"
                android:background="@drawable/bg_frame"
                android:text="8"
                android:id="@+id/btn_eight"/>

            <Button
                android:textSize="28sp"
                android:layout_margin="5dp"
                android:layout_width="0dp"
                android:layout_height="match_parent"
                android:layout_weight="1"
                android:background="@drawable/bg_frame"
                android:text="9"
                android:id="@+id/btn_nine"/>

            <Button
                android:textSize="28sp"
                android:layout_margin="5dp"
                android:layout_width="0dp"
                android:layout_height="match_parent"
                android:layout_weight="1"
                android:background="@drawable/bg_frame"
                android:text="="
                android:id="@+id/btn_calculate"/>
        </LinearLayout>

    </LinearLayout>

</LinearLayout>
控件绑定
在MainActivity内,首先对UI控件进行绑定。我们单独写一个init()方法,并在onCreate()里进行调用,init()方法代码如下:
/**
 * 对控件进行初始化
 * */
fun init() {
    mTvResult = findViewById(R.id.mtv_result)
    mBtnAdd = findViewById(R.id.btn_add)
    mBtnSubtract = findViewById(R.id.btn_subtract)
    mBtnMultiply = findViewById(R.id.btn_multiply)
    mBtnDivide = findViewById(R.id.btn_divide)
    mBtnCalculate = findViewById(R.id.btn_calculate)
    mBtnOne = findViewById(R.id.btn_one)
    mBtnTwo = findViewById(R.id.btn_two)
    mBtnThree = findViewById(R.id.btn_three)
    mBtnFour = findViewById(R.id.btn_four)
    mBtnFive = findViewById(R.id.btn_five)
    mBtnSix = findViewById(R.id.btn_six)
    mBtnSeven = findViewById(R.id.btn_seven)
    mBtnEight = findViewById(R.id.btn_eight)
    mBtnNine = findViewById(R.id.btn_nine)
    mBtnZero = findViewById(R.id.btn_zero)
    mBtnCln = findViewById(R.id.btn_clean)
}
Button点击事件
为了使代码简洁,我们使MainActivity实现View.OnClickListener接口并重写onClick()方法,在该方法内对每个Button的点击事件进行编程,代码如下:
/**
 * 点击事件的具体代码
 * */
override fun onClick(p0: View?) {
    Log.d("baowenbei", "click")
    when (p0?.id) {
        R.id.btn_zero -> addNum(0)
        R.id.btn_one -> addNum(1)
        R.id.btn_two -> addNum(2)
        R.id.btn_three -> addNum(3)
        R.id.btn_four -> addNum(4)
        R.id.btn_five -> addNum(5)
        R.id.btn_six -> addNum(6)
        R.id.btn_seven -> addNum(7)
        R.id.btn_eight -> addNum(8)
        R.id.btn_nine -> addNum(9)
        R.id.btn_calculate -> equal()
        R.id.btn_add -> addOperate('+')
        R.id.btn_subtract -> addOperate('-')
        R.id.btn_multiply -> addOperate('*')
        R.id.btn_divide -> addOperate('/')
        R.id.btn_clean -> cln()
    }
}
需要注意的是,Kotlin并不支持switch语句,但Kotlin的when关键字能够起到类似功能。
之后,我们给每个Button设置点击事件监听,为了代码美观,我们仍封装到单独的方法里,代码如下:
/**
 1. 设置点击事件
 2. */
fun setClickEvent() {
    mBtnCalculate.setOnClickListener(this)
    mBtnAdd.setOnClickListener(this)
    mBtnMultiply.setOnClickListener(this)
    mBtnSubtract.setOnClickListener(this)
    mBtnDivide.setOnClickListener(this)
    mBtnOne.setOnClickListener(this)
    mBtnTwo.setOnClickListener(this)
    mBtnThree.setOnClickListener(this)
    mBtnFour.setOnClickListener(this)
    mBtnFive.setOnClickListener(this)
    mBtnSix.setOnClickListener(this)
    mBtnSeven.setOnClickListener(this)
    mBtnEight.setOnClickListener(this)
    mBtnNine.setOnClickListener(this)
    mBtnZero.setOnClickListener(this)
    mBtnCln.setOnClickListener(this)
}
运算逻辑
整体逻辑
本计算器可以将按键分为数字、运算符、“=”、“clean”四个类型,根据四个类型分别编写对应的代码逻辑;同时,需要编写一个show()方法进行输入展示。我们新建一个mixList用于存储已经输入的运算符及数字。最后,在onCreate()方法里进行调用。
边界情况
首先需要考虑输入的合法性:
- 运算符合法性问题。包括表达式第1位必须是数字、不能连续输入多个运算符、表达式不能以运算符结尾等。我们通过设置两个变量
numCount与operateCount分别表示已输入的数字个数以及运算符个数,并确保operateCount < numCount来保证运算符合法性。 - 运算符优先级问题。不同的运算符具有不同的优先级。在本文提出的计算器中,只实现了加减乘除4个功能,因此优先级可以分为两步,即“先乘除、再加减”。我通过两个for循环实现。
- 除0问题。这也需要进行特殊判断。
输入展示
我们使用一个StringBuilder变量对mixList里的所有元素进行拼接,并进行显示,代码如下:
/**
 * 构建表达式的String形式并展示
 * */
fun show(list: ArrayList<String>) {
    if (list.size == 0) mTvResult.setText("0")
    var sb = StringBuilder()
    for (item in list) {
        sb.append(item)
    }
    mTvResult.setText(sb)
}
点击数字键
点击数字键,需要将情况区分为当前输入的是1位数字还是已经输入了多位数字两种情况,具体代码如下:
/**
 * 点击数字时调用此函数
 * */
fun addNum(num: Long) {
    if (operateCount == numCount) {
        // 当前为1位的数字
        numCount++
        mixList.add(num.toString())
    } else {
        // 当前为多位的数字
        val numPlus: Long = mixList.get(mixList.size - 1).toLong() * 10 + num
        mixList.set(mixList.size - 1, numPlus.toString())
    }
    // 实时展示界面变化
    show(mixList)
}
点击运算符键
点击运算符键,需要对运算符的输入合法性进行判断,具体代码如下:
/**
 * 点击运算符时调用此函数
 * */
fun addOperate(operate: Char) {
    if (numCount == 0) return
    if (operateCount < numCount) {
        operateCount++
        mixList.add(operate.toString())
    } else if (operateCount == numCount) {
        mixList.set(mixList.size - 1, operate.toString())
    }
    show(mixList)
}
点击“=”
点击“=”,即需要进行输入判断,具体代码如下:
/**
 * 点击“=”后调用此函数
 * */
fun equal() {
    // 当前只输入数字,不需要计算,直接返回
    if (operateCount == 0) return
    // 当前最后一位为运算符,不合法,对最后一位运算符进行删除
    if (operateCount == numCount) {
        mixList.removeAt(mixList.size - 1)
    }
    // 计算表达式的值
    calculate()
    // 进行界面展示
    show(mixList)
}
其中,calculate()为表达式计算方法,需要根据运算符优先级进行编程实现,具体代码如下:
/**
 * 具体的计算函数
 * */
fun calculate() {
    // 优先进行乘除运算
    for (i in mixList.indices) {
        // 兜底判断,防止后续的删除操作导致List长度减小,导致下标溢出
        if (i > mixList.size - 1) break;
        if (mixList.get(i).equals("*")) {
            // 计算“乘”
            val tmp: Long = mixList.get(i - 1).toLong() * mixList.get(i + 1).toLong()
            // 更新值并删除相关操作数
            mixList.set(i - 1, tmp.toString())
            mixList.removeAt(i)
            mixList.removeAt(i)
        } else if (mixList.get(i).equals("/")) {
            // 对非法输入“除0”进行判断
            if (mixList.get(i + 1).equals("0")) break;
            val tmp: Long = mixList.get(i - 1).toLong() / mixList.get(i + 1).toLong()
            mixList.set(i - 1, tmp.toString())
            mixList.removeAt(i)
            mixList.removeAt(i)
        }
    }

    // 进行加减运算
    for(i in mixList.indices) {
        // 兜底判断,防止后续的删除操作导致List长度减小,导致下标溢出
        if (i > mixList.size - 1) break;
        if (mixList.get(i).equals("+")) {
            val tmp: Long = mixList.get(i - 1).toLong() + mixList.get(i + 1).toLong()
            mixList.set(i - 1, tmp.toString())
            mixList.removeAt(i)
            mixList.removeAt(i)
        } else if (mixList.get(i).equals("-")) {
            val tmp: Long = mixList.get(i - 1).toLong() - mixList.get(i + 1).toLong()
            mixList.set(i - 1, tmp.toString())
            mixList.removeAt(i)
            mixList.removeAt(i)
        }
    }
}
点击“clean”键
点击“clean”键,即对程序进行重置,具体代码如下:
/**
 * 重置操作
 * */
fun cln() {
    operateCount = 0
    numCount = 0
    mixList.clear()
    mTvResult.setText("0")
}
在onCreate()方法里调用
所有子方法编写完成后,我们在onCreate()方法里调用init()方法以及为Button设置监听事件,具体代码如下:文章来源:https://www.toymoban.com/news/detail-426478.html
override fun onCreate(savedInstanceState: Bundle?) {
    super.onCreate(savedInstanceState)
    setContentView(R.layout.activity_main)
    // 进行控件绑定
    init()
    // 设置点击事件
    setClickEvent()
    // 首次进入,重置一次程序
    cln()
}
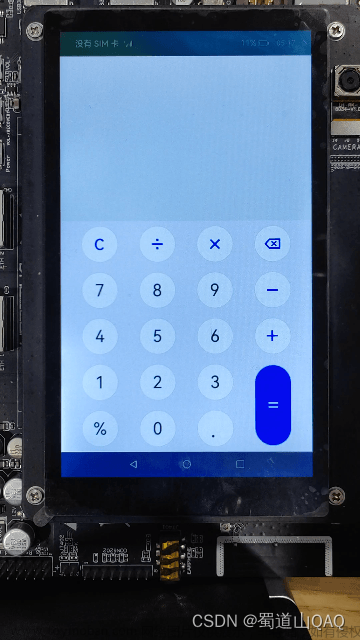
成果展示
 文章来源地址https://www.toymoban.com/news/detail-426478.html
后记
- 本文的运算逻辑部分参考了博文:https://blog.csdn.net/m0_46651408/article/details/117030022,并对它的一些边界情况进行了修改;
- 由于时间有限,这个计算器只实现了加减乘除4个功能,也没有添加退格等功能,感兴趣的小伙伴可以自行完善;
- 最后贴一下个人公众号:Android开发二三事 ,平时会发一些编程相关的推文,二维码如下,欢迎关注~

到了这里,关于Android开发:基于Kotlin编写一个简易计算器的文章就介绍完了。如果您还想了解更多内容,请在右上角搜索TOY模板网以前的文章或继续浏览下面的相关文章,希望大家以后多多支持TOY模板网!