测试机子配置:
1:AMD RX6600(显存8g)+i5 12600KF 16g内存 (台式机)
2:RTX 3070 laptop(显存8g)+i7 10870H 32g内存 (HP暗夜精灵笔记本)
两台电脑平均性能差不多,当然N卡肯定更好一点
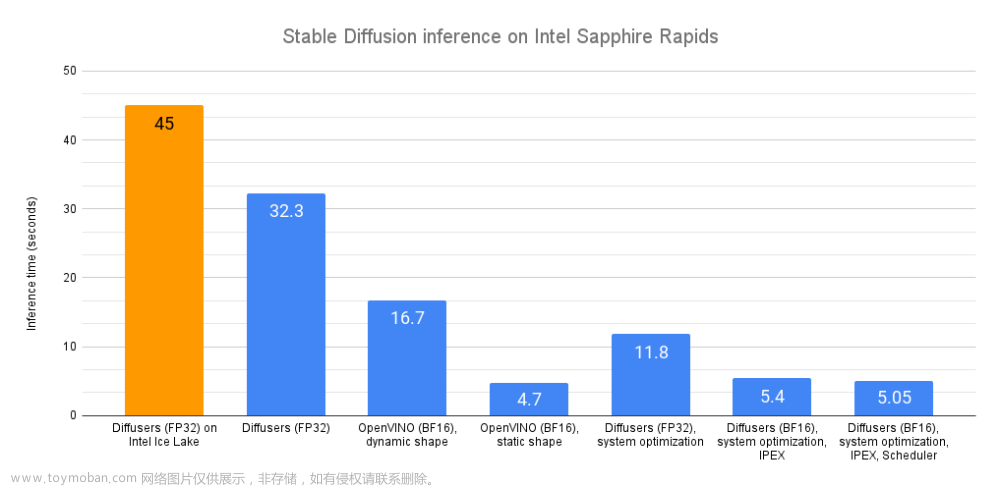
这边我们还是MS大发好,用MS的DirectML推理框架推理,虽然据小道消息反馈DML推理效率远不如Cuda,但是要知道DirectML的兼容性好啊,除了Vulkan之外就只有DML能用了,但是Vulkan没有独立的ML推理模块,目前只有一个ncnn比较亲民,最近看上MNN好像也不错
这边推理主要依赖DirectML provider的onnx

推理已经可以了,目前用fp16精度的onnx推理,效果还行,不过后期得用图片无损放大整一下,比如waif2x等
正在移植(抄)最后的text2ids的代码
官方源码:
from transformers import CLIPTokenizer, CLIPTextModel

vocab_file='./novelai_onnx/tokenizer/vocab.json'
merges_file='./novelai_onnx/tokenizer/merges.txt'

prompts='1girl'

tokenizer = CLIPTokenizer.from_pretrained('./novelai_onnx', subfolder="tokenizer")

maxlen = tokenizer.model_max_length
inp = tokenizer(prompts, padding="max_length", max_length=maxlen, truncation=True, return_tensors="pt")
ids = inp["input_ids"]
print('ids:',ids)
结果:
C#端结果:

对上了,此外是关于padding值的定义了,这里不做深入解释。
基本跑通,下面就是在ONNX里部署了,在sd中,8g显存只能用fp16精度的,超过就必定爆显存,fp32的onnx模型需要12g显存才能跑!

目前模型已经大部分移植成功,tag也可以添加权重支持!就等清理代码到c#或c++了
以下是关键代码:
第一步:转换原版Diffuser模型为fp16存储的onnx模型,因为fp32需要12g显存,普通电脑打不开
# Copyright 2022 The HuggingFace Team. All rights reserved.
#
# Licensed under the Apache License, Version 2.0 (the "License");
# you may not use this file except in compliance with the License.
# You may obtain a copy of the License at
#
#     http://www.apache.org/licenses/LICENSE-2.0
#
# Unless required by applicable law or agreed to in writing, software
# distributed under the License is distributed on an "AS IS" BASIS,
# WITHOUT WARRANTIES OR CONDITIONS OF ANY KIND, either express or implied.
# See the License for the specific language governing permissions and
# limitations under the License.

import argparse
import os
import shutil
from pathlib import Path

import torch
from torch.onnx import export

import onnx
from diffusers import OnnxStableDiffusionPipeline, StableDiffusionPipeline
from diffusers.onnx_utils import OnnxRuntimeModel
from packaging import version


is_torch_less_than_1_11 = version.parse(version.parse(torch.__version__).base_version) < version.parse("1.11")


def onnx_export(
    model,
    model_args: tuple,
    output_path: Path,
    ordered_input_names,
    output_names,
    dynamic_axes,
    opset,
    use_external_data_format=False,
):
    output_path.parent.mkdir(parents=True, exist_ok=True)
    # PyTorch deprecated the `enable_onnx_checker` and `use_external_data_format` arguments in v1.11,
    # so we check the torch version for backwards compatibility
    if is_torch_less_than_1_11:
        export(
            model,
            model_args,
            f=output_path.as_posix(),
            input_names=ordered_input_names,
            output_names=output_names,
            dynamic_axes=dynamic_axes,
            do_constant_folding=True,
            use_external_data_format=use_external_data_format,
            enable_onnx_checker=True,
            opset_version=opset,
        )
    else:
        export(
            model,
            model_args,
            f=output_path.as_posix(),
            input_names=ordered_input_names,
            output_names=output_names,
            dynamic_axes=dynamic_axes,
            do_constant_folding=True,
            opset_version=opset,
        )


@torch.no_grad()
def convert_models(model_path: str, output_path: str, opset: int, fp16: bool = False):
    dtype = torch.float16 if fp16 else torch.float32
    if fp16 and torch.cuda.is_available():
        device = "cuda"
    elif fp16 and not torch.cuda.is_available():
        raise ValueError("`float16` model export is only supported on GPUs with CUDA")
    else:
        device = "cpu"
    pipeline = StableDiffusionPipeline.from_pretrained(model_path, torch_dtype=dtype).to(device)
    output_path = Path(output_path)

    # TEXT ENCODER
    num_tokens = pipeline.text_encoder.config.max_position_embeddings
    text_hidden_size = pipeline.text_encoder.config.hidden_size
    text_input = pipeline.tokenizer(
        "A sample prompt",
        padding="max_length",
        max_length=pipeline.tokenizer.model_max_length,
        truncation=True,
        return_tensors="pt",
    )
    onnx_export(
        pipeline.text_encoder,
        # casting to torch.int32 until the CLIP fix is released: https://github.com/huggingface/transformers/pull/18515/files
        model_args=(text_input.input_ids.to(device=device, dtype=torch.int32)),
        output_path=output_path / "text_encoder" / "model.onnx",
        ordered_input_names=["input_ids"],
        output_names=["last_hidden_state", "pooler_output"],
        dynamic_axes={
            "input_ids": {0: "batch", 1: "sequence"},
        },
        opset=opset,
    )
    del pipeline.text_encoder

    # UNET
    unet_in_channels = pipeline.unet.config.in_channels
    unet_sample_size = pipeline.unet.config.sample_size
    unet_path = output_path / "unet" / "model.onnx"
    onnx_export(
        pipeline.unet,
        model_args=(
            torch.randn(2, unet_in_channels, unet_sample_size, unet_sample_size).to(device=device, dtype=dtype),
            torch.randn(2).to(device=device, dtype=dtype),
            torch.randn(2, num_tokens, text_hidden_size).to(device=device, dtype=dtype),
            False,
        ),
        output_path=unet_path,
        ordered_input_names=["sample", "timestep", "encoder_hidden_states", "return_dict"],
        output_names=["out_sample"],  # has to be different from "sample" for correct tracing
        dynamic_axes={
            "sample": {0: "batch", 1: "channels", 2: "height", 3: "width"},
            "timestep": {0: "batch"},
            "encoder_hidden_states": {0: "batch", 1: "sequence"},
        },
        opset=opset,
        use_external_data_format=False,  # UNet is > 2GB, so the weights need to be split
    )
    unet_model_path = str(unet_path.absolute().as_posix())
    unet_dir = os.path.dirname(unet_model_path)
    unet = onnx.load(unet_model_path)
    # clean up existing tensor files
    shutil.rmtree(unet_dir)
    os.mkdir(unet_dir)
    # collate external tensor files into one
    onnx.save_model(
        unet,
        unet_model_path,
        save_as_external_data=False,#
        all_tensors_to_one_file=True,
        # location="weights.pb",
        convert_attribute=False,
    )
    del pipeline.unet

    # VAE ENCODER
    vae_encoder = pipeline.vae
    vae_in_channels = vae_encoder.config.in_channels
    vae_sample_size = vae_encoder.config.sample_size
    # need to get the raw tensor output (sample) from the encoder
    vae_encoder.forward = lambda sample, return_dict: vae_encoder.encode(sample, return_dict)[0].sample()
    onnx_export(
        vae_encoder,
        model_args=(
            torch.randn(1, vae_in_channels, vae_sample_size, vae_sample_size).to(device=device, dtype=dtype),
            False,
        ),
        output_path=output_path / "vae_encoder" / "model.onnx",
        ordered_input_names=["sample", "return_dict"],
        output_names=["latent_sample"],
        dynamic_axes={
            "sample": {0: "batch", 1: "channels", 2: "height", 3: "width"},
        },
        opset=opset,
    )

    # VAE DECODER
    vae_decoder = pipeline.vae
    vae_latent_channels = vae_decoder.config.latent_channels
    vae_out_channels = vae_decoder.config.out_channels
    # forward only through the decoder part
    vae_decoder.forward = vae_encoder.decode
    onnx_export(
        vae_decoder,
        model_args=(
            torch.randn(1, vae_latent_channels, unet_sample_size, unet_sample_size).to(device=device, dtype=dtype),
            False,
        ),
        output_path=output_path / "vae_decoder" / "model.onnx",
        ordered_input_names=["latent_sample", "return_dict"],
        output_names=["sample"],
        dynamic_axes={
            "latent_sample": {0: "batch", 1: "channels", 2: "height", 3: "width"},
        },
        opset=opset,
    )
    del pipeline.vae

    # SAFETY CHECKER
    if pipeline.safety_checker is not None:
        safety_checker = pipeline.safety_checker
        clip_num_channels = safety_checker.config.vision_config.num_channels
        clip_image_size = safety_checker.config.vision_config.image_size
        safety_checker.forward = safety_checker.forward_onnx
        onnx_export(
            pipeline.safety_checker,
            model_args=(
                torch.randn(
                    1,
                    clip_num_channels,
                    clip_image_size,
                    clip_image_size,
                ).to(device=device, dtype=dtype),
                torch.randn(1, vae_sample_size, vae_sample_size, vae_out_channels).to(device=device, dtype=dtype),
            ),
            output_path=output_path / "safety_checker" / "model.onnx",
            ordered_input_names=["clip_input", "images"],
            output_names=["out_images", "has_nsfw_concepts"],
            dynamic_axes={
                "clip_input": {0: "batch", 1: "channels", 2: "height", 3: "width"},
                "images": {0: "batch", 1: "height", 2: "width", 3: "channels"},
            },
            opset=opset,
        )
        del pipeline.safety_checker
        safety_checker = OnnxRuntimeModel.from_pretrained(output_path / "safety_checker")
    else:
        safety_checker = None

    onnx_pipeline = OnnxStableDiffusionPipeline(
        vae_encoder=OnnxRuntimeModel.from_pretrained(output_path / "vae_encoder"),
        vae_decoder=OnnxRuntimeModel.from_pretrained(output_path / "vae_decoder"),
        text_encoder=OnnxRuntimeModel.from_pretrained(output_path / "text_encoder"),
        tokenizer=pipeline.tokenizer,
        unet=OnnxRuntimeModel.from_pretrained(output_path / "unet"),
        scheduler=pipeline.scheduler,
        safety_checker=safety_checker,
        feature_extractor=pipeline.feature_extractor,
    )

    onnx_pipeline.save_pretrained(output_path)
    print("ONNX pipeline saved to", output_path)

    del pipeline
    del onnx_pipeline
    _ = OnnxStableDiffusionPipeline.from_pretrained(output_path, provider="CPUExecutionProvider")
    print("ONNX pipeline is loadable")


if __name__ == "__main__":
    parser = argparse.ArgumentParser()

    parser.add_argument(
        "--model_path",
        default='CompVis/stable-diffusion-v1-4',
        type=str,
        help="Path to the `diffusers` checkpoint to convert (either a local directory or on the Hub).",
    )

    parser.add_argument(
        "--output_path",
        default='./onnx2',
        type=str,
        help="Path to the output model.")

    parser.add_argument(
        "--opset",
        default=14,
        type=int,
        help="The version of the ONNX operator set to use.",
    )
    parser.add_argument("--fp16", action="store_true", default=True, help="Export the models in `float16` mode")

    args = parser.parse_args()

    convert_models(args.model_path, args.output_path, args.opset, args.fp16)
以上代码是基于官方的代码修改的,修改了导出精度以及合并为单个onnx,不额外生成权重文件
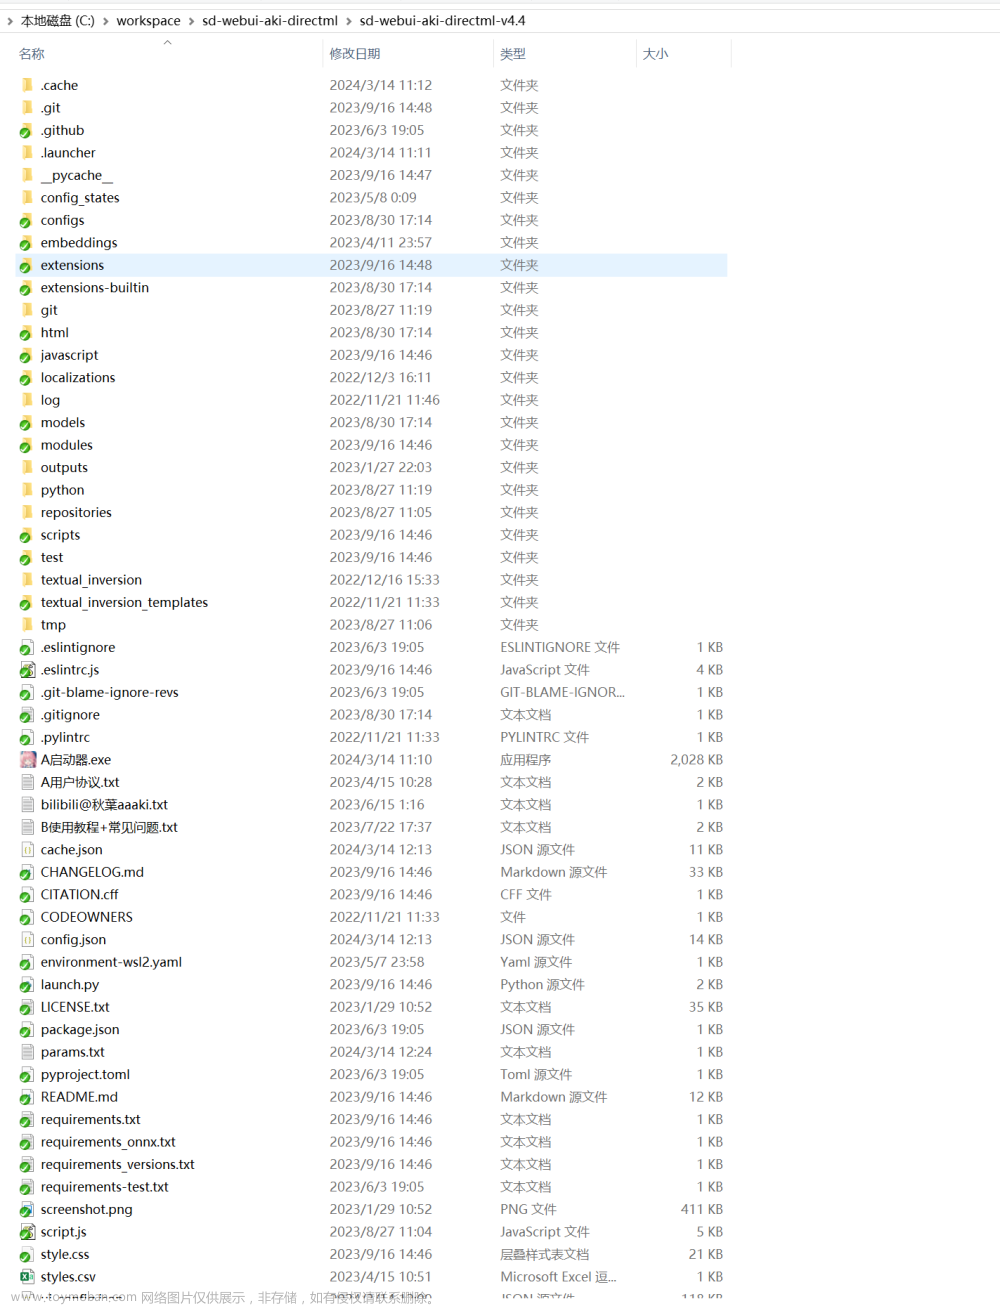
我们用sd官方的1.4模型为例,最终保存到onnx2目录下:

可以看到生成的fp16的onnx只有1.6g大小
这边我运行了onnx版的diffuser python程序,可以正常生成二刺猿图片
最终代码预计移植到MNN框架下,因为这个支持OpenCL加速(通用GPU加速)还有动态输入,主要是现在发展不错,SDK框架清晰有dll直接可以用(划重点)
MNN暂时不考虑,转换过去好像很多算子不支持,麻了

目前已经可以在Windows AMD显卡模式跑了,如上图,速度蛮快的,反正比cpu快,无需WSL。但是注意,onnx的DmlExecutionProvider对N卡目前不存在兼容性,切记!但是却对A卡有兼容性,所以如果想用N卡加速的,那么请用onnx的GPU版,对应Provider为CUDAExecutionProvider!待有空测试cuda版onnx,所以说,如果是用py环境的,得装两个环境,如果是用的c#版的,得分别编译dll调用
效果图:512x512
新配的python ort-gpu版本,用CUDAExecutionProvider跑,也可以正常出图,效果图:
速度显然是快很多,笔记本RTX3070,比台式机AMD RX6600开DirectML快一点
下一步测试C#端Windows AMD GPU Onnx
效果:
https://github.com/superowner/StableDiffusion.Sharp/blob/main/README.md
目前代码还不是很完善,这里仅供抛砖引玉文章来源:https://www.toymoban.com/news/detail-427740.html
这个制作这个的目的就是为了后面可以拓展使用,比如其他框架一起用,都用git上很火的webui其实是受制于人
。。。
敬请期待文章来源地址https://www.toymoban.com/news/detail-427740.html
到了这里,关于【Stable Diffusion/NovelAI Diffusion的AMD GPU加速推理探索】的文章就介绍完了。如果您还想了解更多内容,请在右上角搜索TOY模板网以前的文章或继续浏览下面的相关文章,希望大家以后多多支持TOY模板网!