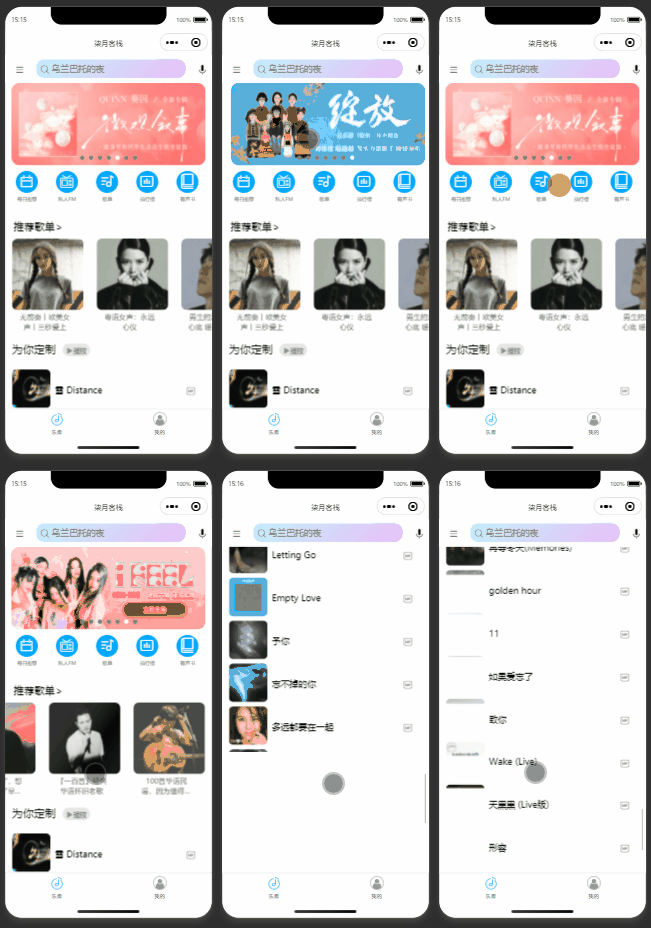
小伙伴们你们有没有想过自己搞一个播放器,播上自己喜欢的歌单,那是多么的惬意啊~
之前,小编遇到一个项目,语音导览的播放器。其实跟播放歌单一个道理。
但是一看微信开发文档里面的音频API又是那么多,我们该如何选择呢?在这里小编选择了使用wx.createAudioContext();这个API。
当然啊这个需要注意的是:从基础库 1.6.0 开始,这个接口就停止维护,推荐使用 wx.createInnerAudioContext 代替;并且需要小程序基础库版本不低于 1.9.6。
wx.createAudioContext()
那么这个接口该如何正确使用呢?
AudioContext 实例,可通过 wx.createAudioContext 获取。
AudioContext 通过 id 跟一个 audio 组件绑定,操作对应的 audio 组件。
效果图

可以看到该播放器有切换上下曲按钮、暂停按钮以及进度条
小编是这样实现的
wxml布局
<!-- 播放器样式 -->

<audio id="myAudio" class="audio_a" src="{{audio}}"  bindtimeupdate='bindtimeupdate'></audio>
<view class="audioV" wx:if="{{audio!=''}}">
  <view class="audioV_L_R">
    <!-- 左边的图片 -->
    <view class="audioV_left">
      <view class="audioV_left_v">
        <image class="audioV_left_img" src="{{detail.audio_cover}}"></image>
        <image class="audioV_left_play" src="/images/play1.png" wx:if="{{isplay==false}}" bindtap="clickplay"></image>
        <image class="audioV_left_play" src="/images/puse1.png" wx:if="{{isplay==true}}" bindtap="stop"></image>
      </view>
    </view>
    <!-- 右边的控制 -->
    <view class="audioV_right">
      <view class="audioV_right_top">
        <view class="audioV_right_top_name">{{CN==true?detail.name:detail.name_e}}</view>
        <view class="audioV_right_top_contro">
          <image class="audioV_right_top_last" src="../../../images/last.png" bindtap="getLast"></image>
          <image class="audioV_right_top_play" wx:if="{{isplay==false}}" bindtap="clickplay" src="../../../images/play2.png"></image>
          <image class="audioV_right_top_play" wx:if="{{isplay==true}}" bindtap="stop" src="../../../images/puse2.png"></image>
          <image class="audioV_right_top_next" src="../../../images/next.png" bindtap="getNext"></image>
        </view>
      </view>
      <!-- 拖动条--进度条 -->
      <view class="audioV_right_slider">
      	<!--slider 进度条的使用可以在微信开发文档上看看这些配置的用法哦-->
        <slider line-size="{{15}}" color="#000" blockColor="#944f4c" bindchange='sliderChange' activeColor='#944f4c' block-size="{{12}}" value='{{playP}}' />
      </view>

    </view>
  </view>
</view>
css样式
/* 播放器 */
.audioV{
  width: 100%;
  position: fixed;
  overflow: auto;
  bottom: 0rpx;
  background: #fff;
}
.audioV_L_R{
  width: 100%;
  position: relative;
  overflow: auto;
}
.audioV_left{
  width: 25%;
  padding: 15rpx 21rpx;
  box-sizing: border-box;
  float: left;
  height: 141rpx;
}
.audioV_left_v{
  position: relative;
  overflow: auto;
  height: 100%;
  display: flex;
  justify-content: center;
  align-items: center;
}
.audioV_left_img{
  width: 111rpx;
  height: 100%;
  position: absolute;
  /* background-color: red; */
  border-radius: 8rpx;
}
.audioV_left_play{
  width: 48rpx;
  height: 48rpx;
  z-index: 2;
}
.audioV_right{
  width: 75%;
  float: left;
  padding: 15rpx 36rpx 0rpx 0rpx;
  box-sizing: border-box;

}
.audioV_right_top{
  width: 100%;
  position: relative;
  overflow: auto;
  padding-top: 10rpx;
  box-sizing: border-box;
}
.audioV_right_top_name{
  width: max-content;
  float: left;
  font-size: 30rpx;
  font-family: SourceHanSansCN, SourceHanSansCN-Medium;
  font-weight: 500;
  color: #000000;
  margin-top: 10rpx;
}
.audioV_right_top_contro{
  width: max-content;
  float: right;
  display: flex;
  justify-content: center;
  align-items: center;
}
.audioV_right_top_last{
  width: 22rpx;
  height: 30rpx;
}
.audioV_right_top_play{
  width: 59rpx;
  height: 59rpx;
  margin-left: 30rpx;
  margin-right: 30rpx;
}
.audioV_right_top_next{
  width: 22rpx;
  height: 30rpx;
}
.audioV_right_contro{
  width: 100%;
  height: 6rpx;
  background: #000;
  position: relative;
  border-radius: 20rpx;
  margin-top: 19rpx;
}
.audioV_right_contro view:nth-child(1){
  height: 100%;
  background: #944f4c;
  border-radius: 3rpx;
  float: left;
}
.audioV_right_contro view:nth-child(2){
  width: 15rpx;
  height: 15rpx;
  opacity: 1;
  background: #944f4c;
  border-radius: 50%;
  float: left;
  margin-top: -5rpx;
}
.audioV_right_slider{
  box-sizing: border-box;
  width: 100%;
  position: relative;
  margin-top: -15rpx;
  text-align: center;
}
.audioV_right_slider slider{
  width: 96%;
  margin-left: 15rpx;
}
重点来了!!!!文章来源:https://www.toymoban.com/news/detail-430483.html
js控制
data: {
    // 判断是否播放,状态
    isplay:false,
    //总的进度
    playAll:0,
    //播放的秒数
    playS:0,
    // 播放的百分比
    playP:0,
	//音频链接
    audio:'',
  },
onLoad: function (options) {
	var that= this;
    that.audioCtx = wx.createAudioContext('myAudio')
    //请求完数据将赋值给data的参数
    //we.request以后
    that.setData({
		audio:e.data.data.data.c_audio,
		isplay:true
    })
    //这里使用的是
    //AudioContext.play()
	//播放音频。
    that.audioCtx.play()
},
//监听播放
//audio 组件的监听事件
bindtimeupdate(res) {
    var that = this;
    // console.log("播放信息",res)
    // console.log('bindtimeupdate', res.detail.currentTime, '时间总时长-->', res.detail.duration);
    that.setData({
      //播放进度
      playAll:res.detail.duration,
      //播放的秒数
      playS:res.detail.currentTime,
      //计算进度条的播放百分比
      playP:(res.detail.currentTime/res.detail.duration)*100,
    })
    //判断当前播放事件大于等于音频的总时长时
    //停止播放。进度条保留在100%
    if(res.detail.currentTime>=res.detail.duration){
      that.setData({
        isplay:false,
        playP:100
      })
      //设置定时器500毫秒以后进度条回到起点
      setTimeout(() => {
        that.setData({
          playP:0
        })
      }, 500);
    }
},


  //切换上一篇
  getLast:function(){
    var that = this;
    console.log("当前的id",that.data.detail)
    //这里是小编的一个全局的歌单-因为这里需求和歌单播放器有点不一样,但是原理一样的
    for(var i = 0;i<app.globalData.GuideMapId.length; i++){
      if(that.data.detail.mid == app.globalData.GuideMapId[i]){
        console.log("上一篇id:",app.globalData.GuideMapId[i-1])
        if(app.globalData.GuideMapId[i-1] == undefined||app.globalData.GuideMapId[i-1]=='undefined'||app.globalData.GuideMapId[i-1]==''||app.globalData.GuideMapId[i-1]==null){
          // wx.showModal({
          //   title: '提示',
          //   content: '无法再上一篇咯~',
          //   success: function(res) {
          //       if (res.confirm) {
          //       console.log('用户点击确定')
          //       } else if (res.cancel) {
          //       console.log('用户点击取消')
          //       }
          //   }
          // })
          that.setData({
            audio:''
          })
          var id = {
            id:app.globalData.GuideMapId[app.globalData.GuideMapId.length-1]
          }
          console.log(id)
          that.onLoad(id)
          // that.setData({
          //   showModel:true,
          //   showToast:true,
          //   modelMsg:'抱歉!这是第一篇咯',
          //   modelMsg_e:'Sorry!No more',
          // })
        }else{
          // that.audioCtx.destroy();
          that.setData({
            audio:''
          })
          var id = {
            id:app.globalData.GuideMapId[i-1]
          }
          console.log(id)
          that.onLoad(id)
        }
      }
    }
  },
  //获取下一篇
  getNext:function(){
    var that = this;
    console.log("当前的id",that.data.detail)
    for(var i = 0;i<app.globalData.GuideMapId.length; i++){
      if(that.data.detail.mid == app.globalData.GuideMapId[i]){
        console.log("下一篇id:",app.globalData.GuideMapId[i+1])
        if(app.globalData.GuideMapId[i+1] == undefined||app.globalData.GuideMapId[i+1]=='undefined'||app.globalData.GuideMapId[i+1]==''||app.globalData.GuideMapId[i+1]==null){
          // wx.showModal({
          //   title: '提示',
          //   content: '无法再下一篇咯~',
          //   success: function(res) {
          //       if (res.confirm) {
          //       console.log('用户点击确定')
          //       } else if (res.cancel) {
          //       console.log('用户点击取消')
          //       }
          //   }
          // })
          // that.setData({
          //   showModel:true,
          //   showToast:true,
          //   modelMsg:'抱歉!这是最后一篇咯',
          //   modelMsg_e:'Sorry!No more',
          // })
          console.log("这是最后一篇:",i,app.globalData.GuideMapId)
          that.setData({
            audio:''
          })
          var id = {
            id:app.globalData.GuideMapId[0]
          }
          console.log(id)
          that.onLoad(id)
        }else{
          // that.audioCtx.destroy();
          that.setData({
            audio:''
          })
          var id = {
            id:app.globalData.GuideMapId[i+1]
          }
          console.log(id)
          that.onLoad(id)
        }
      }
    }
  },
  //拖动进度条--监听进度条的拖动
  sliderChange:function(e){
    console.log("拖动到",e.detail.value)
    var that = this;
    //计算播放的秒数
    var gotoplay = e.detail.value/100*that.data.playAll
    that.setData({
      playS:gotoplay,
      //设置进度条到百分多少
      playP:e.detail.value,
    })
    //AudioContext.seek(number position)
	//跳转到指定播放的秒数位置。
    that.audioCtx.seek(gotoplay);
  },
  //播放
  clickplay: function () {
    var that= this;
    that.audioCtx.play();
    that.setData({
      isplay: true
    });
  },
  // 停止
  stop: function () {
    var that= this;
    //AudioContext.pause()
	//暂停音频
    that.audioCtx.pause()
    that.setData({
      isplay: false
    });
  },
当然,小伙伴们可以使用文档说的wx.createInnerAudioContext()接口试试,他的使用方法跟wx.createAudioContext()接口的使用方法大同小异。
好了,这是小编的一些开发思路,如果各位大佬有更好的方法,麻烦在下方评论或者私聊小编哦~
让小编一起学习。文章来源地址https://www.toymoban.com/news/detail-430483.html
到了这里,关于微信小程序——实现音乐播放器(上下切换歌曲、进度条拉动、暂停与继续播放)的文章就介绍完了。如果您还想了解更多内容,请在右上角搜索TOY模板网以前的文章或继续浏览下面的相关文章,希望大家以后多多支持TOY模板网!


