TLDR
在本文中,您将学习如何构建一个 Web 应用程序,该应用程序使用 ChatGPT 和 Stable Diffusion 为您提供的任何网站描述生成徽标和合适的域名。
介绍
人工智能正在接管世界。这些技术每天都在震撼着我们的世界:ChatGPT 和 Stable Diffusion。
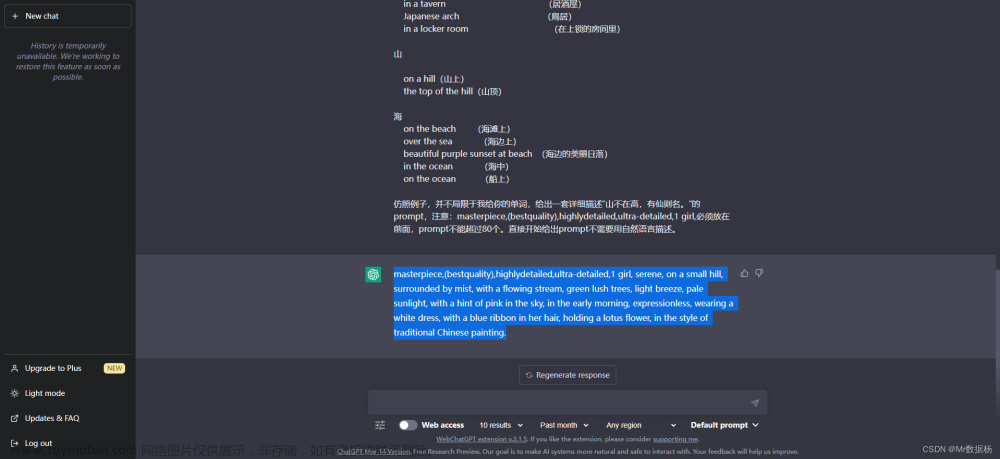
ChatGPT 可以使用其 GPT3.5 模型回答世界上的任何问题。
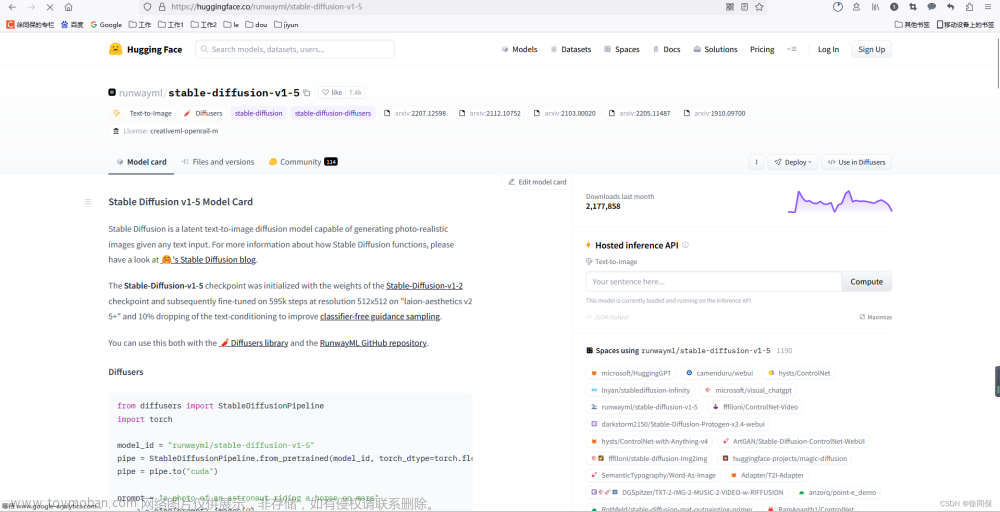
Stable Diffusion 是一种文本转图像模型,可以将任何文本转换为图片。
结合这两种技术是人工智能的未来。
在本文中,我将向您展示如何通过结合两者来创建整个网站品牌。
我对这个真的很兴奋 🤩
请点击“喜欢”按钮,这样我就知道你喜欢它并且想要更多。

Novu - 第一个开源通知基础设施
简单介绍一下我们的背景。Novu 是第一个开源通知基础设施。我们基本上帮助管理所有产品通知。它可以是应用程序内(像您在 Facebook - Websockets中的铃铛图标)、电子邮件、短信等。
动图

如果你能给我们一颗星,我会非常高兴!并在评论中让我知道❤️
https://github.com/novuhq/novu
什么是稳定扩散?
Stable Diffusion 是一种文本到图像的潜在扩散模型,使用户能够根据给定的文本输入在几秒钟内生成图像。它还用于诸如内画、外画和生成图像到图像的转换等过程。
ChatGPT 也是一种由 OpenAI训练的 AI 语言模型 ,可以生成文本并以类似人类的对话方式与用户进行交互。用户可以在几秒钟内提交请求并获得信息或问题的答案,主题范围广泛,例如历史、科学、数学和时事。
在本文结尾处,您将了解如何使用 Stable Diffusion WebUI从文本创建图像,以及如何从 Node.js 应用程序向 ChatGPT 发送消息。
安装和运行稳定的 Diffusion Web UI
您可以在Windows、 Linux和 Apple Silicon上安装 Stable Diffusion Web UI 。在这里,我将指导您完成在 Apple Silicon 上的安装。
先决条件: 确保 您的计算机上安装了Homebrew 。它是一个软件包,可让您安装 Apple 未提供的各种应用程序。
打开一个新的终端窗口并运行以下命令来安装 WebUI 依赖项。
苹果:
brew install cmake protobuf rust python@3.10 git wget基于 Debian:
sudo apt install wget git python3 python3-venv基于红帽:
sudo dnf install wget git python3基于 Arch:
sudo pacman -S wget git python3通过运行以下命令克隆 Web UI 存储库:
git clone https://github.com/AUTOMATIC1111/stable-diffusion-webui我们需要下载稳定扩散模型(大文件)。导航到 stable-diffusion-webui/models/Stable-diffusion
cd stable-diffusion-webui/models/Stable-diffusion下载模型 - 对于我们的用例,我们将使用 Stable Diffusion 1.5,但您可以随意下载您想要的任何其他版本。
下载使用:
wget https://huggingface.co/runwayml/stable-diffusion-v1-5/resolve/main/v1-5-pruned-emaonly.ckpt将模型从 v1-5-pruned-emaonly.ckpt 重命名为 model.ckpt
mv v1-5-pruned-emaonly.ckpt model.ckpt
导航到该stable-diffusion-webui文件夹并运行 Web UI 项目以创建虚拟环境并安装其依赖项。
cd stable-diffusion-webui
./webui.sh
访问本地 URL -http://127.0.0.1:7860通过其用户界面与 Web UI 交互。

要稍后重新启动 Web UI 进程,请导航到stable-diffusion-webui终端上的文件夹并运行命令./webui.sh。如果要使用Web UI API,在命令中添加flag api flag./webui.sh --api
构建网络应用程序
在本节中,我将指导您为 Web 应用程序创建项目环境。我们将在前端使用 React.js,在后端服务器使用 Node.js。
通过运行以下代码为 Web 应用程序创建项目文件夹:
mkdir stable-diffusion-app
cd stable-diffusion-app
mkdir client server
设置 React 应用程序
通过终端导航到客户端文件夹并创建一个新的 React.js 项目。
cd client
npx create-react-app ./
从 React 应用程序中删除多余的文件,例如徽标和测试文件,并更新文件App.js以显示“Hello World”,如下所示。
functionApp(){return(<div><p>Hello World!</p></div>);}exportdefaultApp;导航到该src/index.css文件并复制下面的代码。它包含设置此项目样式所需的所有 CSS。
@importurl("https://fonts.googleapis.com/css2?family=Space+Grotesk:wght@300;400;500;600;700&display=swap");*{box-sizing:border-box;margin:0;padding:0;font-family:"Space Grotesk",sans-serif;}.app,.loading,.result__container>div{display:flex;align-items:center;justify-content:center;}.app{width:100%;margin:50pxauto;flex-direction:column;}.app>h1{margin-bottom:30px;color:#2b3467;}form{display:flex;flex-direction:column;width:80%;}textarea{padding:20px;border:1pxsolid#ddd;outline:none;border-radius:5px;margin:5px0px;box-shadow:02px8px0rgba(99,99,99,0.2);}button{margin-top:15px;display:inline-block;width:200px;padding:20px;cursor:pointer;font-weight:bold;border:none;border-radius:5px;outline:none;font-size:18px;background-color:#f0dbdb;}.loading{width:100%;height:100vh;background-color:#fefcf3;}.result__container{display:flex;align-items:center;flex-wrap:wrap;margin-top:30px;}.result__container>div{margin:5px;flex-direction:column;}.image{width:400px;height:300px;margin-bottom:15px;}更新App.js文件以显示允许您输入建议的网站描述的输入字段。
importReact,{useState}from"react";constApp=()=>{const[description,setDescription]=useState("");consthandleSubmit=(e)=>{e.preventDefault();console.log({description});setDescription("");};return(<divclassName='app'><h1>Website Idea Generator</h1><formmethod='POST'onSubmit={handleSubmit}><labelhtmlFor='description'>Enter the description</label><textareaname='description'rows={6}value={description}onChange={(e)=>setDescription(e.target.value)}/><button>GENERATE</button></form></div>);};exportdefaultApp;
设置 Node.js 服务器
导航到终端中的服务器文件夹并创建一个package.json文件。
cd server & npm init -y安装 Express、Nodemon 和 CORS 库。
npm install express cors nodemonExpressJS是一个快速、极简的框架,它提供了在 Node.js 中构建 Web 应用程序的多种功能, CORS是一个允许不同域之间通信的 Node.js 包,而 Nodemon 是一个在检测到文件后自动重启服务器的 Node.js 工具变化。
创建index.js文件 - Web 服务器的入口点。
touch index.js使用 ExpressJS 设置 Node.js 服务器。当您在浏览器中访问时,下面的代码片段会返回一个 JSON 对象http://localhost:4000/api。
//👇🏻index.jsconstexpress=require("express");constcors=require("cors");constapp=express();constPORT=4000;app.use(express.urlencoded({extended:true}));app.use(express.json());app.use(cors());app.get("/api",(req,res)=>{res.json({message:"Hello world",});});app.listen(PORT,()=>{console.log(`Server listening on ${PORT}`);});安装 Axios、 非官方的 ChatGPT API 库和 Puppeteer。ChatGPT API 使用 Puppeteer 作为可选的对等依赖项来自动绕过 Cloudflare 保护。
npm install chatgpt puppeteer axios要在文件中使用 ChatGPT API server/index.js,您需要将文件配置为同时使用require和import关键字来导入库。
因此,更新server/package.json文件以包含type关键字。
{ "type": "module" }在文件顶部添加下面的代码片段server/index.js。
import{createRequire}from"module";constrequire=createRequire(import.meta.url);//...other code statements完成最后两个步骤后,您现在可以在index.js文件中使用 ChatGPT。
通过将启动命令添加到文件中的脚本列表来配置 Nodemon package.json。下面的代码片段使用 Nodemon 启动服务器。
//In server/package.json

"scripts": {
    "test": "echo \\"Error: no test specified\\" && exit 1",
    "start": "nodemon index.js"
  },
恭喜!您现在可以使用以下命令启动服务器。
npm start如何在 Node.js 应用程序中与 ChatGPT 通信
在本节中,您将学习如何通过 非官方的 ChatGPT 库从 Node.js 服务器与 ChatGPT 通信。
该库使用完全自动化的基于浏览器的解决方案,使我们能够进入——这意味着它执行完全的浏览器自动化,使我们能够登录到 OpenAI 网站、解决验证码并通过 OpenAI cookie 发送消息。
您已经在上一节中安装了库;接下来,将 ChatGPT API 库导入到index.js文件中,如下所示。ChatGPT API 使用 Puppeteer 作为可选的对等依赖项来自动绕过 Cloudflare 保护。
import { ChatGPTAPIBrowser } from "chatgpt";我们需要 ChatGPT 为用户指定的任何描述生成域名,并为 Stable Diffusion API 创建提示。
因此,在服务器上创建一个路由来接受来自 React 应用程序的描述。
app.post("/api",async(req,res)=>{const{prompt}=req.body;console.log(prompt);});/api在 React 应用程序中创建一个函数,该函数在用户提交表单后将描述发送到服务器上的端点。
asyncfunctionsendDescription(){try{constrequest=awaitfetch("http://localhost:4000/api",{method:"POST",body:JSON.stringify({prompt:description,}),headers:{Accept:"application/json","Content-Type":"application/json",},});constres=awaitrequest.json();console.log(res);}catch(err){console.error(err);}}在包含请求状态的 React 应用程序中添加一个加载状态,并在提交表单后调用异步函数。
const[description,setDescription]=useState("");const[loading,setLoading]=useState(false);consthandleSubmit=(e)=>{e.preventDefault();//👇🏻 calls the async functionsendDescription();setDescription("");setLoading(true);};更新/api端点以将描述发送到 ChatGPT 并生成域名和 Stable Diffusion 提示。
asyncfunctionchatgptFunction(content){try{constapi=newChatGPTAPIBrowser({email:"YOUR_CHATGPT_EMAIL_ADDRESS",password:"YOUR_CHATGPT_PASSWORD",});awaitapi.initSession();//👇🏻 sends the instruction for the domain name to ChatGPTconstgetDomainName=awaitapi.sendMessage(`Can you generate a domain name for a website about: ${content}`);letdomainName=getDomainName.response;//👇🏻 sends the instruction for the prompt to ChatGPTconstgeneratePrompt=awaitapi.sendMessage(`I have a website for ${content}, and I want to generate a logo for it, can you generate a prompt for dall-e for me? make it long like 50 words, you don't need to tell me why you generated the prompt`);constdiffusionPrompt=generatePrompt.response;console.log({domainName,diffusionPrompt});}catch(err){console.error(err);}}app.post("/api",async(req,res)=>{const{prompt}=req.body;constresult=awaitchatgptFunction(prompt);res.json({message:"Retrieved successfully!"});});上面的代码片段使用 Puppeteer 启动浏览器并使您能够自动登录到您的 ChatGPT 帐户。身份验证后,ChatGPT 处理请求并返回响应。
在接下来的部分中,我将指导您如何将生成的提示发送到 Stable Diffusion API。
如何与 Stable Diffusion API 交互
要与 Stable Diffusion API 交互,请通过运行以下命令重新启动 Web UI 进程:
cd stable-diffusion-webui
./webui.sh --apihttp://127.0.0.1:7860/docs您可以在我们将使用/sdapi/v1/txt2img端点进行文本到图像转换中查看可用的 API 端点。

/sdapi/v1/txt2img使用生成的提示作为负载向端点发出 POST 请求。
asyncfunctionchatgptFunction(content){try{constapi=newChatGPTAPIBrowser({email:"asaoludavid234@yahoo.com",password:"davidasaolu",});awaitapi.initSession();constgetDomainName=awaitapi.sendMessage(`Can you generate a domain name for a website about: ${content}`);letdomainName=getDomainName.response;constgeneratePrompt=awaitapi.sendMessage(`I have a website for ${content}, and I want to generate a logo for it, can you generate a prompt for dall-e for me? make it long like 50 words, you don't need to tell me why you generated the prompt`);constdiffusionPrompt=generatePrompt.response;//👇🏻 Makes a POST request via Axios with the prompt as the payloadconstrequest=awaitaxios.post("http://127.0.0.1:7860/sdapi/v1/txt2img",{prompt:diffusionPrompt,});//👇🏻 returns the generated logo and the domain nameletlogoImage=awaitrequest.data.images;return{logoImage,domainName};}catch(err){console.error(err);}}从上面的代码片段中,/sdapi/v1/txt2img端点接受一个名为 prompt 的必需参数 - 要生成的图像的文本描述。
更新/apiNode.js 服务器上的端点以保存结果并将其发送到 React.js 应用程序。
//👇🏻 holds the resultsconstdatabase=[];app.post("/api",async(req,res)=>{const{prompt}=req.body;constresult=awaitchatgptFunction(prompt);//👇🏻 saves the result to the database arraydatabase.push(result);//👇🏻 return the result as a responseres.json({message:"Retrieved successfully!",result:database});});使用 React 应用程序显示结果
更新sendDescription函数以接收来自服务器的响应。
//👇🏻 React state that holds the resultconst[result,setResult]=useState([]);asyncfunctionsendDescription(){try{constrequest=awaitfetch("http://localhost:4000/api",{method:"POST",body:JSON.stringify({prompt:description,}),headers:{Accept:"application/json","Content-Type":"application/json",},});constres=awaitrequest.json();if(res.message){//👇🏻 update the loading and result statessetLoading(false);setResult(res.result);}}catch(err){console.error(err);}}创建一个 Loading 组件,只要请求挂起,它就会显示给用户。
importReactfrom"react";constLoading=()=>{return(<divclassName='loading'><h1>Loading, please wait...</h1></div>);};exportdefaultLoading;添加下面的代码片段以在请求挂起时显示组件。
if(loading)return<Loading/>;更新组件以呈现如下所示生成的结果。
return(<divclassName='app'><h1>Website Idea Generator</h1><formmethod='POST'onSubmit={handleSubmit}><labelhtmlFor='description'>Enter the description</label><textareaname='description'rows={6}value={description}onChange={(e)=>setDescription(e.target.value)}/><button>GENERATE</button></form><divclassName='result__container'>{result.length>0&&result.map((item,index)=>(<divkey={index}><imgsrc={`data:image/png;base64,${item.logoImage}`}alt={item.domainName}className='image'/><p>Domain: {item.domainName}</p></div>))}</div></div>);上面的代码片段显示了为各种请求生成的徽标和域名。恭喜!🎉您已完成本教程的项目。
以下是鸡尾酒网站获得的结果示例:

结论
到目前为止,你已经学会了:
什么是稳定扩散,
如何在您的计算机上安装和设置 Stable Diffusion
如何从 Node.js 应用程序向 ChatGPT 发送消息,以及
如何通过 Stable Diffusion API 从文本生成图像。文章来源:https://www.toymoban.com/news/detail-431328.html
本教程将引导您完成一个应用程序示例,您可以使用 Stable Diffusion 和 ChatGPT 构建该应用程序。这些 AI 技术可用于创建适用于各个领域的强大应用程序。文章来源地址https://www.toymoban.com/news/detail-431328.html
到了这里,关于使用 ChatGPT、Stable Diffusion、React 和 NodeJS 构建网站画廊的文章就介绍完了。如果您还想了解更多内容,请在右上角搜索TOY模板网以前的文章或继续浏览下面的相关文章,希望大家以后多多支持TOY模板网!


