相比于Spring MVC,Spring Boot省去了繁琐的配置,提供了大部分场景下的默认配置,用户可以在不做任何配置的情况下使用Spring Boot框架进行开发。如果默认的参数并不能满足用户的需求,也只需创建一个配置文件并加上自定义的配置。Spring Boot的主导思想,想必大家也并不陌生,即:约定优于配置。
本文将简要介绍Spring Boot的自动配置原理,以及自动配置不能满足要求时,如何自定义配置。
一、Spring Boot的自动配置
Spring Boot之所以能做到自动配置,主要靠的是@EnableAutoConfiguration注解。这个注解集成于程序启动类注解@SpringBootApplication中。
@Target({ElementType.TYPE})
@Retention(RetentionPolicy.RUNTIME)
@Documented
@Inherited
@SpringBootConfiguration
@EnableAutoConfiguration
@ComponentScan(
    excludeFilters = {@Filter(
    type = FilterType.CUSTOM,
    classes = {TypeExcludeFilter.class}
), @Filter(
    type = FilterType.CUSTOM,
    classes = {AutoConfigurationExcludeFilter.class}
)}
)
public @interface SpringBootApplication {
	...
}
查看@EnableAutoConfiguration的源码,发现两个主要注解:@AutoConfigurationPackage和@Import。
@Target({ElementType.TYPE})
@Retention(RetentionPolicy.RUNTIME)
@Documented
@Inherited
@AutoConfigurationPackage
@Import({AutoConfigurationImportSelector.class})
public @interface EnableAutoConfiguration {
    String ENABLED_OVERRIDE_PROPERTY = "spring.boot.enableautoconfiguration";

    Class<?>[] exclude() default {};

    String[] excludeName() default {};
}
查看@AutoConfigurationPackage注解,发现也使用了@Import注解,所以有必要先搞懂这个注解的作用。这里推荐一篇博文,感兴趣的朋友可以看一下。
@Target({ElementType.TYPE})
@Retention(RetentionPolicy.RUNTIME)
@Documented
@Inherited
@Import({AutoConfigurationPackages.Registrar.class})
public @interface AutoConfigurationPackage {
    String[] basePackages() default {};

    Class<?>[] basePackageClasses() default {};
}
回到主题,@EnableAutoConfiguration中@Import注解通过引入ImportSelector实现类的方式将依赖中的默认配置加载到容器中。AutoConfigurationImportSelector类的具体内容在这里不做分析,这个过程简而言之就是:
查看Jar包中META-INF/spring.factories文件,获取其中EnableAutoConfiguration配置的value值。value值是由多个url组成,一个url表示一个配置类的全类名。然后通过@Import注解导入这些配置类。
@AutoConfigurationPackage中的@Import是通过引入ImportBeanDefinitionRegistrar实现类方式将各种组件和配置引入Spring容器的。简而言之,就是将标注了该注解的类所在的package设置成为自动配置package,这样主程序所在的包及其子包中的组件都能够被扫描到Spring容器中。
案例
下面将通过Tomcat端口配置举例,版本是spring-boot-actuator-autoconfigure-2.4.2.jar。解压之后打开META-INF/spring.factoryies文件,发现org.springframework.boot.autoconfigure.EnableAutoConfiguration配置中如下配置类:
# Auto Configure
org.springframework.boot.autoconfigure.EnableAutoConfiguration=\
...
org.springframework.boot.autoconfigure.web.servlet.HttpEncodingAutoConfiguration,\
...
查看该配置类源码:
@Configuration(proxyBeanMethods = false)
@EnableConfigurationProperties(ServerProperties.class)
@ConditionalOnWebApplication(type = ConditionalOnWebApplication.Type.SERVLET)
@ConditionalOnClass(CharacterEncodingFilter.class)
@ConditionalOnProperty(prefix = "server.servlet.encoding", value = "enabled", matchIfMissing = true)
public class HttpEncodingAutoConfiguration {
	...
}
我们重点关注@EnableConfigurationProperties(ServerProperties.class),这个注解的作用是使某个被@ConfigurationProperties标注的类生效,这里指的就是ServerProperties类,我们查看ServerProperties类的源码:
@ConfigurationProperties(prefix = "server", ignoreUnknownFields = true)
public class ServerProperties {

		/**
		 * Server HTTP port.
		 */
		private Integer port;

		/**
		 * Network address to which the server should bind.
		 */
		private InetAddress address;
		...
}
顺便提一句,@ConfigurationProperties是springboot提供读取配置文件的一个注解,它支持属性文件和bean的映射,一般和@component配合使用,不然容器无法获取。如果单独使用@ConfigurationProperties,需要结合@EnableConfigurationProperties(ServerProperties.class)将其注册到spring容器中。
prefix = "server"表示该配置使用server前缀,和属性port结合起来就是:server.port。我们都知道Tomcat的默认端口是8080,那么这个参数又是在哪里配置的呢?答案是META-INF/spring-configuration-metadata.json。
{
	"name": "server.port",
    "defaultValue": 8080
}
可以看到文件中有这么一条配置,这就是我们需要的server.port = 8080。
二、自定义配置
学习完以上内容,想要自定义配置就简单多了,还是以Tomcat为例,如果我想将端口改为8081,只需在application.properties文件中加上:
server.port = 8081
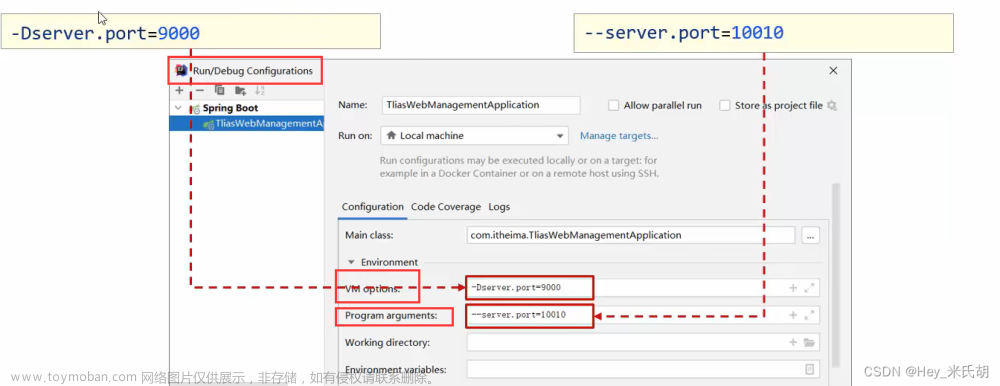
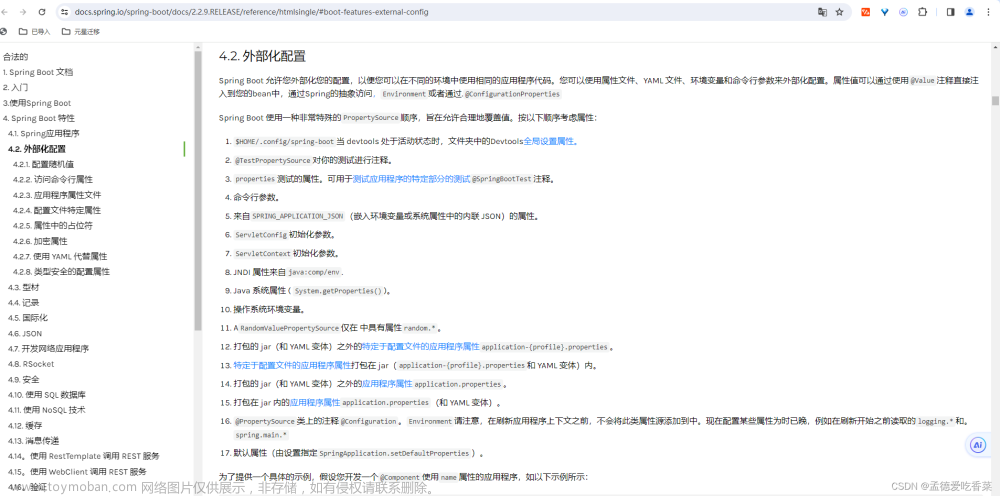
至于为什么最终生效的是server.port = 8081而非server.port = 8080,就要提到Spring Boot中的配置优先级了,Spring Boot会按照从上到下的顺序加载:
- 命令行参数;
- 来自 java:comp/env 的 JNDI 属性;
- Java 系统属性(System.getProperties()) ;
- 操作系统环境变量;
- RandomValuePropertySource 配置的 random.*属性值;
- jar 包外部的 application-{profile}.properties 或 application.yml(带 spring.profile)配置文件;
- jar 包内部的 application-{profile}.properties 或 application.ym(带 spring.profile)配置文件;
- jar 包外部的 application.properties 或 application.yml(不带 spring.profile)配置文件;
- jar 包内部的 application.properties 或 application.ym(不带 spring.profile)配置文件;
- @Configuration 注解类上的@PropertySource;
- 通过 SpringApplication.setDefaultProperties 指定的默认属性。
参考:文章来源:https://www.toymoban.com/news/detail-434191.html
《深入浅出Spring Boot 2.x》文章来源地址https://www.toymoban.com/news/detail-434191.html
到了这里,关于Spring Boot的自动配置与自定义配置(附配置优先级表)的文章就介绍完了。如果您还想了解更多内容,请在右上角搜索TOY模板网以前的文章或继续浏览下面的相关文章,希望大家以后多多支持TOY模板网!


