博客汇总:Python | 人脸识别系统 — 博客索引
GitHub地址:Su-Face-Recognition
注:阅读本博客前请先参考
工具安装、环境配置:Python | 人脸识别系统 — 简介
UI界面设计:Python | 人脸识别系统 — UI界面设计
UI事件处理:Python | 人脸识别系统 — UI事件处理
人脸识别:Python | 人脸识别系统 — 人脸识别
活体检测:Python | 人脸识别系统 — 活体检测
一、用户登录
1、登录逻辑
信息核验(数据库) -> 静默活体检测 -> 交互活体检测 -> 人脸识别
一旦用户超过三次没有登录成功(活体检测/人脸识别不成功),系统将当前用户进行锁定。用户需要通过管理员进行解锁。
    # 登录标志
    USER_LOGIN_MSG_FLAG = False # 用户信息核验成功标志
    USER_LOGIN_FLAG = False # 用户登录成功标志

    ... ...


    # 用户登录
    def user_login(self):
        if not self.cap.isOpened():
            QMessageBox.information(self, "提示", self.tr("请先打开摄像头"))
        else:
            global USER_LOGIN_FLAG
            if not USER_LOGIN_FLAG:
                QApplication.processEvents()
                login = LoginWindow(self) # 创建信息核验界面对象
                login.exec_()
                global USER_LOGIN_MSG_FLAG
                global USER_LOGIN_NAME
                if USER_LOGIN_MSG_FLAG:
                    # 登录信息成功,进行活体检测
                    QMessageBox.about(self, '提示', '登录成功,进行活体检测')
                    if self.detect_face():
                        # 活体检测成功,进行人脸识别
                        global ENCODING_TEMP
                        face_encoding = FaceEncodingUtil.decoding_FaceStr(ENCODING_TEMP)
                        if self.recognize_instant_face(face_encoding):
                            QMessageBox.about(self, '提示', '登陆成功')
                            self.save_record(USER_LOGIN_NAME, '使用摄像头进行登录') # 使用excel表格进行保存
                            USER_LOGIN_FLAG = True
                        else:
                            QMessageBox.about(self, '提示', '人脸识别失败,请重新登录')
                            if USER_LOGIN_NAME != "":
                                UserSqlUtil.add_name_warn(USER_LOGIN_NAME)
                            USER_LOGIN_MSG_FLAG = False
                    else:
                        QMessageBox.about(self, '提示', '活体检测失败,请重新登录')
                        if USER_LOGIN_NAME != "":
                            UserSqlUtil.add_name_warn(USER_LOGIN_NAME)
                        USER_LOGIN_MSG_FLAG = False
                login.destroy()
            else:
                QMessageBox.about(self, '提示', '用户已经登录')
2、信息核验
用户点击 [用户登录] 按钮,主界面弹出信息核验界面,要求用户输入账号、密码。点击确认后,系统访问数据库,判断输入信息是否正确。
信息核验界面相关代码:
# 用户登录界面
class LoginWindow(QDialog, LoginMsgUi):
    def __init__(self, parent=None):
        super(LoginWindow, self).__init__(parent)
        self.setupUi(self)

        self.minimize_button.clicked.connect(self.showMinimized)
        self.close_button.clicked.connect(self.cancel_login)

        self.confirm_button.clicked.connect(self.search_user)
        self.cancel_button.clicked.connect(self.cancel_login)

    # 点击确认,搜索用户
    def search_user(self):
        input_name = self.name_lineEdit.text()
        input_password = self.password_lineEdit.text()

        if input_name == "":
            QMessageBox.about(self, '提示', '姓名不能为空')
        elif input_password == "":
            QMessageBox.about(self, '提示', '密码不能为空')
        else:
            row = UserSqlUtil.search_by_name("\"" + input_name + "\"")
            if row:
                result = row[0]
                password = result[1]
                if input_password != password:
                    QMessageBox.about(self, '提示', '密码输入错误')
                else:
                    global USER_LOGIN_MSG_FLAG
                    count = UserSqlUtil.search_count_warn("\"" + input_name + "\"")
                    if count >= 3:
                        QMessageBox.about(self, '警告', '该账号目前已被锁定')
                        USER_LOGIN_MSG_FLAG = False
                    else:
                        global ENCODING_TEMP
                        global USER_LOGIN_NAME
                        USER_LOGIN_MSG_FLAG = True
                        ENCODING_TEMP = result[5]
                        USER_LOGIN_NAME = input_name
                    self.close_window()
            else:
                QMessageBox.about(self, '提示', '该用户不存在')

    # 点击取消按钮
    def cancel_login(self):
        global USER_LOGIN_MSG_FLAG
        USER_LOGIN_MSG_FLAG = False
        self.close_window()

    # 关闭窗口
    def close_window(self):
        self.name_lineEdit.setPlaceholderText("请输入姓名")
        self.password_lineEdit.setPlaceholderText("请输入密码")
        self.close()
数据库表结构(user表)

数据库代码
# -*- coding: utf-8 -*-
import pymysql


def init_conn():
    conn = pymysql.connect(
        host="127.0.0.1",  # 数据库的IP地址
        user="root",  # 数据库用户名称
        password="root",  # 数据库用户密码
        db="contest",  # 数据库名称
        port=3306,  # 数据库端口名称
        charset="utf8"  # 数据库的编码方式
    )
    return conn


def execute_with_bool(sql_str, args=()):
    conn = init_conn()
    cursor = conn.cursor()
    try:
        cursor.execute(sql_str, args)
        conn.commit()
        return True
    except Exception as e:
        conn.rollback()
        print(e)
        return False
    finally:
        cursor.close()


def execute_with_list(sql_str):
    conn = init_conn()
    cursor = conn.cursor()
    results = []
    try:
        cursor.execute(sql_str)
        results = cursor.fetchall()
    except Exception as e:
        conn.rollback()
        print(e)
    finally:
        cursor.close()
    return results


def insert_data(name, password, age, sex, more, face_encoding):
    return execute_with_bool(
        "insert into user(name,password,age,sex,more,face_encoding) values(%s,%s,%s,%s,%s,%s)",
        (name, password, age, sex, more, face_encoding))


def update_by_name(name, password, age, sex, more, face_encoding):
    return execute_with_bool(
        "update user set name=%s,password=%s,age=%s,sex=%s,more=%s,face_encoding=%s where name = %s",
        (name, password, age, sex, more, face_encoding, name))


def update_by_name_without_encoding(name, age, sex, more):
    return execute_with_bool("update user set name=%s,age=%s,sex=%s,more=%s where name = %s",
                             (name, age, sex, more, name))


def search_all_msg():
    return execute_with_list("select * from user")


def search_by_name(name):
    return execute_with_list("select * from user where name = " + name)


def search_count_name(name):
    return execute_with_list("select count(*) from user where name = " + name)[0][0]


def delete_by_name(name):
    return execute_with_bool("delete from user where name = %s", name)


def search_count_warn(name):
    return execute_with_list("select count(*) from warn where name = " + name)[0][0]


def add_name_warn(name):
    return execute_with_bool("insert into warn(name) values(%s)", name)
3、活体检测
活体检测函数 detect_face() 详见博客:
4、人脸识别
人脸识别函数 recognize_instant_face() 详见博客:
人脸识别使用的是函数 recognize_instant_face(),其中需要参数face_encoding,为1*128的矩阵。当我们从数据库取出当前登录用户的人脸编码时,为字符串类型,需要进行转换。编写工具类FaceEncodingUtil,调用编写的方法 decoding_FaceStr 进行转换。其工具类方法如下:
# -*- coding: utf-8 -*-
import numpy


def decoding_FaceStr(encoding_str):
    # 将字符串转为numpy ndarray类型,即矩阵
    # 转换成一个list
    decoding_list = encoding_str.strip(' ').split(',')
    # 将list中str转换为float
    decoding_float = list(map(float, decoding_list))
    face_encoding = numpy.array(decoding_float)
    return face_encoding
二、用户注册
1、判断器
摄像头截取当前人脸 -> 信息填写 -> 面部信息编码 -> 信息保存(数据库)
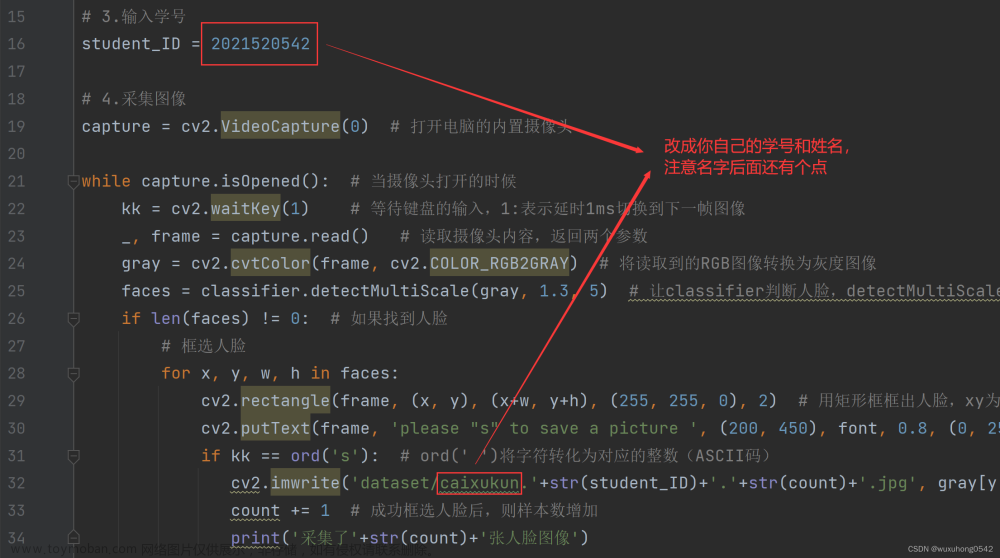
摄像头截取当前人脸照片,使用当前时间点作为照片名保存到photo目录下,面部信息编码成功后删除照片。
    signal_register = pyqtSignal()  # 用户注册 界面信号

    ... ...

    # 用户注册
    def user_register(self):
        isCapOpened_flag = self.cap.isOpened()
        if not isCapOpened_flag:
            QMessageBox.information(self, "提示", self.tr("请先打开摄像头!"))
        else:
            ret, frame = self.cap.read()
            frame_location = face_recognition.face_locations(frame)
            if len(frame_location) == 0:
                QMessageBox.information(self, "提示", self.tr("没有检测到人脸,请重新拍摄!"))
            else:
                QMessageBox.information(self, "提示", self.tr("拍照成功!"))

                global PHOTO_FOLDER_PATH
                global SHOT_TEMP_NAME
                SHOT_TEMP_NAME = datetime.now().strftime("%Y%m%d%H%M%S")
                self.show_image.save(PHOTO_FOLDER_PATH + SHOT_TEMP_NAME + ".jpg")
                self.send_signal_register()

    # 发射信号 打开注册用户界面
    def send_signal_register(self):
        self.signal_register.emit()
2、逻辑编写
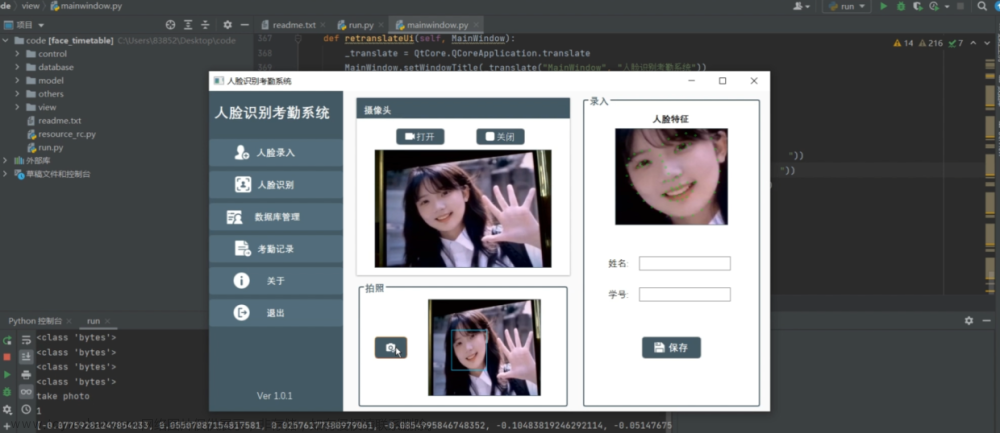
用户点击 [用户注册] 按钮,主界面弹出信息填写界面,要求用户输入账号、密码等信息。点击确认后,系统判断输入信息格式是否正确。
# 用户注册界面
class RegisterWindow(QMainWindow, RegisterMsgUi):
    def __init__(self, parent=None):
        super(RegisterWindow, self).__init__(parent)
        self.setupUi(self)

        self.minimize_button.clicked.connect(self.showMinimized)
        self.close_button.clicked.connect(self.close_window)
        self.cancel_button.clicked.connect(self.delete_shot)
        self.confirm_button.clicked.connect(self.fill_information)

    # 填写信息
    def fill_information(self):
        flag = 0
        name = self.name_lineEdit.text()
        password = self.password_lineEdit.text()
        age = self.age_lineEdit.text()
        sex = self.sex_lineEdit.text()
        more_infor = self.more_lineEdit.text()

        if self.judge_name_conflict(name):
            if name != '':
                # 输入密码
                if password != '':
                    # 输入年龄
                    if age == '':
                        age = '未知'
                    elif not str.isdigit(age):
                        flag = 1
                        QMessageBox.about(self, '提示', '请输入正确的年龄格式')
                    # 输入性别
                    if sex == '':
                        sex = '未知'
                    elif sex != '男' and sex != '女':
                        flag = 1
                        QMessageBox.about(self, '提示', '请输入正确的性别格式')
                        sex = '未知'
                    # 输入更多信息
                    if more_infor == '':
                        more_infor = '未知'

                    global PHOTO_FOLDER_PATH
                    global SHOT_TEMP_NAME
                    if flag == 0:
                        # 计算脸部数据并保存到数据库
                        QApplication.processEvents()
                        register_encoding = self.analyse_encoding(SHOT_TEMP_NAME)
                        if self.save_database(name, password, age, sex, more_infor, register_encoding):
                            QMessageBox.about(self, '提示', '完成注册')
                        else:
                            QMessageBox.about(self, '提示', '注册失败')
                        self.delete_shot()

                    elif flag == 1:
                        QMessageBox.about(self, '提示', '注册失败')
                else:
                    QMessageBox.about(self, '提示', '请输入密码')
            else:
                QMessageBox.about(self, '提示', '请输入姓名')
        else:
            QMessageBox.about(self, '提示', '用户' + name + '已经注册过')

    # 保存注册信息
    @staticmethod
    def save_database(name, password, age, sex, more, face_encoding):
        return UserSqlUtil.insert_data(name, password, age, sex, more, face_encoding)

    # 判断姓名是否冲突
    @staticmethod
    def judge_name_conflict(name):
        count = UserSqlUtil.search_count_name("\"" + name + "\"")
        if count != 0:
            return False
        else:
            return True

    # 分析截图
    @staticmethod
    def analyse_encoding(name):
        global PHOTO_FOLDER_PATH
        photo_path = PHOTO_FOLDER_PATH + name + ".jpg"
        register_images = face_recognition.load_image_file(photo_path)
        register_encoding = face_recognition.face_encodings(register_images)[0]
        return FaceEncodingUtil.encoding_FaceStr(register_encoding)

    # 删除截图
    def delete_shot(self):
        global PHOTO_FOLDER_PATH
        global SHOT_TEMP_NAME
        delete_shot_path = PHOTO_FOLDER_PATH + SHOT_TEMP_NAME + ".jpg"
        os.remove(delete_shot_path)
        SHOT_TEMP_NAME = ""
        self.close_window()

    # 关闭窗口
    def close_window(self):
        lineText = [self.age_lineEdit, self.sex_lineEdit, self.name_lineEdit, self.more_lineEdit]
        line = 0
        for lineEdit in lineText:
            lineEdit.setPlaceholderText(str(line))
            if 3 >= line >= 0:
                lineEdit.setPlaceholderText("请输入信息")
            line = line + 1
        self.close()
进行数据库保存的时候,面部编码数据为为1*128的矩阵,需要通过工具类FaceEncodingUtil的方法 encoding_FaceStr 进行转换。其工具类方法如下:
# -*- coding: utf-8 -*-
import numpy


def encoding_FaceStr(image_face_encoding):
    # 将numpy array类型转化为列表
    encoding__array_list = image_face_encoding.tolist()
    # 将列表里的元素转化为字符串
    encoding_str_list = [str(i) for i in encoding__array_list]
    # 拼接列表里的字符串
    encoding_str = ','.join(encoding_str_list)
    return encoding_str
三、用户登出
用户登出操作比较简单,将全局标志 USER_LOGIN_FLAG 设置为False即可。
判断器代码如下:
    # 用户登出
    def user_logout(self):
        global USER_LOGIN_FLAG
        global USER_LOGIN_NAME
        if not USER_LOGIN_FLAG:
            QMessageBox.about(self, '提示', '请先登录')
        else:
            USER_LOGIN_FLAG = False
            QMessageBox.about(self, '提示', '退出成功')
            self.save_record(USER_LOGIN_NAME, '退出登录') # 记录到excel表格中
四、Excel表格记录
将用户登录、登出的操作时间、设备、用户名等信息保存到系统excel表格中。可以通过管理员身份登录系统,导出系统的excel表格进行查看。导出excel表格的代码在管理员端编写。
保存信息到excel表格的代码如下:
    # 将记录保存到excel中
    @staticmethod
    def save_record(name, record):
        global DATA_FOLDER_PATH
        local_path = DATA_FOLDER_PATH + 'history.xls'

        old_book = xlrd.open_workbook(local_path)
        new_book = copy(old_book)

        sheet2 = new_book.get_sheet(0)
        sheet0 = old_book.sheet_by_index(0)
        n_rows = sheet0.nrows

        str_time = datetime.now().strftime("%Y-%m-%d %H:%M:%S")
        sheet2.write(n_rows + 1, 0, str_time)
        sheet2.write(n_rows + 1, 1, '摄像头')
        sheet2.write(n_rows + 1, 2, name)
        sheet2.write(n_rows + 1, 3, record)

        new_book.save('new_book.xls')
        os.remove(local_path)
        os.rename('new_book.xls', local_path)
继续阅读:
摄像头画面展示:人脸识别系统-摄像头画面展示
用户端逻辑:
- 人脸识别:Python | 人脸识别系统 — 人脸识别
- 活体检测:Python | 人脸识别系统 — 活体检测
- 背景模糊:Python | 人脸识别系统 — 背景模糊
- 姿态检测:Python | 人脸识别系统 — 姿态检测
- 人脸比对:Python | 人脸识别系统 — 人脸比对
管理员端逻辑:文章来源:https://www.toymoban.com/news/detail-434737.html
- 管理员操作:Python | 人脸识别系统 —— 管理员操作
注:以上代码仅供参考,如需运行,参考GitHub源代码: Su-Face-Recognition文章来源地址https://www.toymoban.com/news/detail-434737.html
到了这里,关于Python | 人脸识别系统 — 用户操作的文章就介绍完了。如果您还想了解更多内容,请在右上角搜索TOY模板网以前的文章或继续浏览下面的相关文章,希望大家以后多多支持TOY模板网!