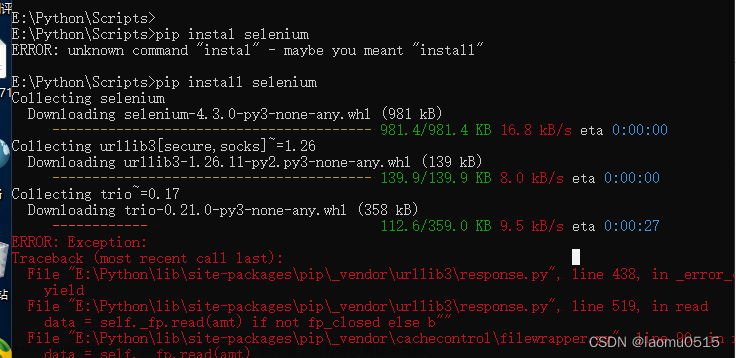
1 pip安装selenium
C:\Users\Administrator\AppData\Local\Programs\Python\wheel>pip install selenium
2 pycharm配置selenium
如不配置会提示【MODULENOTFOUNDERROR: NO MODULE NAMED ‘SELENIUM‘】
pycharm->左键双击打开->文件->设置->依次找到如下,如果存在selenuim则已配置成功。

如不存在,则点击上图蓝色的加号+,输入“selenium”->安装软件包。再返回上层就能看到了。

3 windows安装浏览器(谷歌)驱动
如不配置会提示【'chromedriver' executable needs to be in PATH】
(1)根据自己谷歌浏览器版本安装对应chromedriver的版本,目前更新很多代了。
Chrome驱动下载地址:http://chromedriver.storage.googleapis.com/index.html


(2)给chromedriver配置环境变量
chromedriver文件路径:C:\Users\Administrator\AppData\Local\Google\Chrome\Application

电脑/计算机->属性->高级系统设置->高级->环境变量->系统变量
【新增一个:】
变量名:CHROMEDRIVERHOME
变量值:C:\Program Files\Google\Chrome\Application

【编辑Path:】注意Path是编辑,在变量值后面新增,不要删掉前面的内容
变量名:Path
变量值:;";%CHROMEDRIVERHOME%;%CHROMEDRIVERHOME%\Scripts"

环境变量配置完成后,非安装路径也可执行chromedriver命令

4 验证
pycharm64执行如下python代码,能自动打开谷歌浏览器并访问“百度一下,你就知道”即说明以上均已经安装成功。
from selenium import webdriver
driver = webdriver.Chrome()
driver.get('https://www.baidu.com/')
5 模拟网站登录
python3代码文章来源:https://www.toymoban.com/news/detail-436663.html
#codind:utf8
#导入time
import time
#从selenium导入浏览器驱动webdriver
from selenium import webdriver
#从selenium导入find_element标识定位方法,由于selenium版本迭代,新版的selenium已经不再使用find_element_by_id方法
from selenium.webdriver.common.by import By

#查看webdriver支持的所有浏览器
#help(webdriver)
#打开谷歌浏览器,等号=前面的是自定义的名称
test = webdriver.Chrome()

#浏览器模拟打开一个url
test.get('http://192.168.1.1')

#获取并打印该url的所有html
#print(test.page_source)

#以ID为标识定位符,找到user_name并输入CMCCAdmin
username = test.find_element(By.ID,'user_name')
username.clear()
username.send_keys('CMCCAdmin')

#以ID为标识定位符,找到password并输入aDm8H%MdA
userpassword = test.find_element(By.ID,'password')
userpassword.clear()
userpassword.send_keys('aDm8H%MdA')

#以NAME为标识定位符,找到login并点击(模拟鼠标左键点击)
login = username = test.find_element(By.NAME,'login')
login.click()

#等待10秒继续执行程序
time.sleep(3)

#关闭浏览器
test.close()
标识定位符:分别以ID和NAME两种方法 文章来源地址https://www.toymoban.com/news/detail-436663.html
到了这里,关于python-selenium的文章就介绍完了。如果您还想了解更多内容,请在右上角搜索TOY模板网以前的文章或继续浏览下面的相关文章,希望大家以后多多支持TOY模板网!


