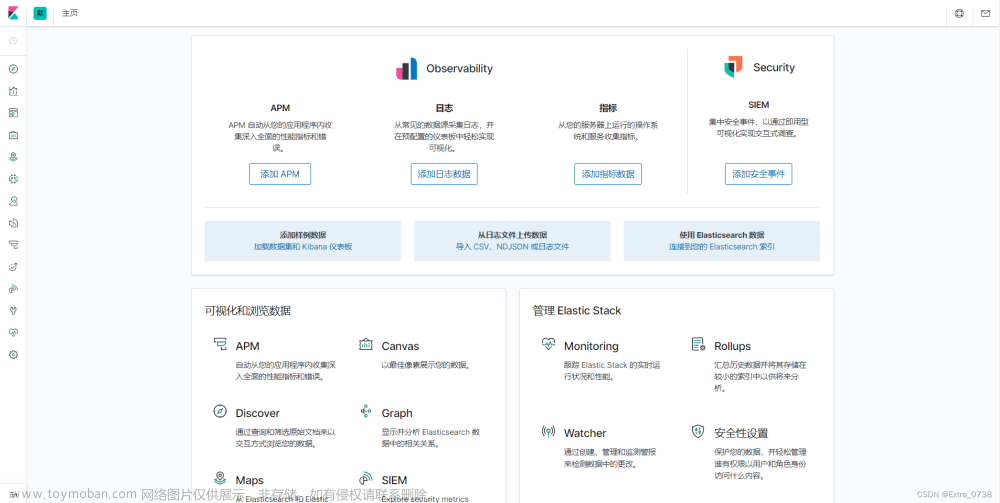
ElasticSearch-Kibana搭建手册
一、环境检查
1.1.服务器环境
-
(1)、Java环境检查
#执行命令: java -version -
(2)、安装Java(未安装jdk环境的需要如下操作)
#执行命令:
#更新本地仓库
sudo apt-get update
#安装jdk1.8
sudo apt-get install openjdk-8-jdk
二、ElasticSearch
2.1.安装包下载
-
(1)、方式一:连网情况下直接下载安装包
#执行命令: #创建下载安装目录 mkdir -p /opt/soft/elasticsearch #进入elasticsearch目录 cd /opt/soft/elasticsearch #更新本地仓库 sudo apt-get update #安装elasticsearch sudo apt-get install elasticsearch -
(2)、方式二:离线安装官网下载安装包
#执行命令:
#官网地址:选择需要的版本进行下载(同一套环境所有的组件版本必须一致)
https://www.elastic.co/cn/downloads/past-releases#elasticsearch
#上传至服务器如下目录:(安装目录自定义)
/opt/soft/elasticsearch
#解压安装包(解压即安装)
tar -zxvf elasticsearch-6.8.1.tar.gz
2.2.修改配置
-
(1)、修改elasticsearch.yml配置文件
#执行命令: #进入配置目录 cd /opt/soft/elasticsearch/elasticsearch-6.8.1/config #编辑elasticsearch.yml配置文件 vim elasticsearch.yml #设置如下配置: #集群名称: (应用连接配置需要) cluster.name: 自定义 #数据存放目录:(需要提前创建好) path.data: /opt/soft/elasticsearch/elasticsearch-6.8.10/data #日志存放目录:(需要提前创建好) path.logs: /opt/soft/elasticsearch/elasticsearch-6.8.10/logs #当前节点地址: network.host: 当前服务的ip地址 #开始http访问端口 http.port: 9200 #关闭程序内存锁定器和程序系统调用筛选器(视情况而定) bootstrap.memory_lock: false bootstrap.system_call_filter: false -
(2)、创建elasticsearch的专属操作用户
#执行命令: #创建系统用户:(不用设置密码) adduser esuser #授权用户访问操作权限 chown esuser:esuser /opt/soft/elasticsearch/elasticsearch-6.8.10 -
(3)、修改elasticsearch默认分配内存配置
#执行命令
#进入配置目录:
cd /opt/soft/elasticsearch/elasticsearch-6.8.1/config
#编辑内存配置文件:jvm.options (根据服务器情况设置如下值)
#将JVM堆大小改为最合适,一般建议不超过当前服务器内存的1/2
-Xms2g
-Xmx2g
2.3.启动ES
-
(1)、启动elasticsearch
#执行命令 #切换用户:(从root用户切换到ES用户) su esuser #进入bin目录 cd /opt/soft/elasticsearch/elasticsearch-6.8.10/bin #启动es并且后台运行 ./elasticsearch -d -
(2)、访问elasticsearch组件
#通过浏览器访问ES组件
http://ip:9200
2.4.账号与密码
-
(1)、开启x-pack验证
#执行命令 #修改elasticsearch.yml配置 vim /elasticsearch-6.8.10/config/elasticsearch.yml #开启安全验证功能 xpack.security.enabled: true #重启elasticsearch服务 #找到elasticsearch进程杀掉 ps -ef|grep elasticsearch #杀掉对应进程 kill -9 PID #启动ES #先切换用户 su esuser #再启动 /opt/soft/elasticsearch/elasticsearch-6.8.10/bin/elasticsearch -d -
(2)、设置用户密码
#执行命令
#进入bin目录:
cd /opt/soft/elasticsearch/elasticsearch-6.8.10/bin
#执行设置密码命令:(会对所有es的用户进行密码设置,一直输入密码直到设置完所有)
./elasticsearch-setup-passwords interactive
#设置完密码后,再次打开浏览器访问即可发现需要密码登录
#账号默认为:elastic;密码为刚设置的值
http://ip:9200
2.5.X-pack秘钥
-
(1)、创建证书
#执行命令 #进入elasticsearch-6.8.10目录 cd /opt/soft/elasticsearch/elasticsearch-6.8.10 #开始生成ca.crt证书 会生成ca.zip文件 并且设置有效期100年 /opt/soft/elasticsearch/elasticsearch-6.8.10/bin/elasticsearch-certutil ca --pem --out ca.zip --days 36500 -s #解压文件验证有效期 unzip ca.zip # 查看证书有效期 openssl x509 -in ca/ca.crt -noout -dates #开始生成instance.crt证书 会生成instance.zip 并且设置有效期100年 /opt/soft/elasticsearch/elasticsearch-6.8.10/bin/elasticsearch-certutil cert --ca-cert ca/ca.crt --ca-key ca/ca.key --pem --name instance --out instance.zip --days 36500 -s #解压文件 unzip instance.zip # 查看证书有效期 openssl x509 -in instance/instance.crt -noout -dates -
(2)、修改配置
#执行命令 #进入config目录 cd /opt/soft/elasticsearch/elasticsearch-6.8.10/config #编辑elasticsearch.yml配置文件 #新增配置如下: cluster.routing.allocation.disk.threshold_enabled: false http.cors.enabled: true http.cors.allow-origin: "*" http.cors.allow-headers: Authorization xpack.security.transport.ssl.enabled: true xpack.security.transport.ssl.key: instance/instance.key xpack.security.transport.ssl.certificate: instance/instance.crt xpack.security.transport.ssl.certificate_authorities: ca/ca.crt xpack.ssl.verification_mode: certificate xpack.ssl.client_authentication: required -
(3)、将证书拷贝到对应的目录
-
elasticsearch组件所在的目录
#执行命令 #进入elasticsearch目录 cd /opt/soft/elasticsearch/elasticsearch-6.8.10 #将证书拷贝到config目录下 cp ca config/ cp instance config/ -
应用所加载证书的目录
#执行命令
#将证书拷贝到部署应用的服务器,放到应用配置中加载证书的目录下,例如:
/opt/x-pack/ca
/opt/x-pack/instance
-
-
(4)、重启ES服务
三、Kibana
3.1.下载安装包
-
(1)、方式一:离线安装,官网下载(下载与ES对应版本的安装包)
#官网下载地址
https://www.elastic.co/cn/downloads/past-releases#kibana
3.2.安装
-
(1)、上传安装包到服务器elasticsearch目录下
-
(2)、解压kibana安装包
#执行命令 #解压kibana安装包 tar -zxvf kibana-6.8.10-linux-x86_64.tar.gz #修改解压包的名称 mv kibana-6.8.10-linux-x86_64 kibana-6.8.10 -
(3)、修改配置
#执行命令
#进入kibana的配置目录
cd /opt/soft/kibana-6.8.10/config
#编辑配置
vim kibana.yml
#修改配置如下
#kibana端口
server.port: 5601
#当前部署kibana的服务器ip
server.host: "ip"
#部署elasticsearch的服务器连接
elasticsearch.hosts: ["http://ip:9200"]
#elasticsearch的账号,一般默认为如下
elasticsearch.username: "elastic"
#elasticsearch的密码,如之前设置的密码
elasticsearch.password: "密码"
#设置kibana的页面中文化
i18n.locale: "zh-CN"
3.3.启动
-
(1)、启动kibana文章来源:https://www.toymoban.com/news/detail-441123.html
#执行命令 #进入kibana的bin目录 cd /opt/soft/kibana-6.8.10/bin #执行启动命令:第一种方式:直接运行 ./kibana #执行启动命令:第二种方式:后台运行 nohup ./kibana & -
(2)、访问kibana文章来源地址https://www.toymoban.com/news/detail-441123.html
#访问地址
http://ip:5601
#使用ES的账号密码登录即可
到了这里,关于【ES-Kibana】ElasticSearch-Kibana搭建手册的文章就介绍完了。如果您还想了解更多内容,请在右上角搜索TOY模板网以前的文章或继续浏览下面的相关文章,希望大家以后多多支持TOY模板网!


