目录
1. MVC架构模式简介
2. maven的配置和使用
3. 项目总述🐻
3.1 🍎Controller层
3.2 🍎Model层
3.3 🍎View层
4. 页面的主要功能实现🐻
4.1 🍎登陆页面(login.html)
4.2 🍎博客列表页面(blog_index.html)
4.3 🍎博客详情页面(blog_detail.html)
4.4 🍎博客编辑页(blog_editor.html)
5.Contorller层(控制层)🐻
5.1 🍎UserServlet
5.2 🍎UserRemLoginServlet
5.3 🍎UserLoginOutServlet
5.4 🍎LoadAuthorInfoServlet
5.5 🍎BlogServlet
5.6 🍎BlogDeleteServlet
6. Model层(模型层)🐻
6.1 🍎Bean对象
📕Userbean
📕BlogBean
6.2 🍎BlogDao类
6.3 🍎UserDao类
6.4 🍎JDBC工具类
7. View层(视图层源码)🐻
7.1 🍎公共样式文件
7.1 🍎登陆页面login的实现
7.2 🍎博客列表页blog_index的实现
7.3 🍎博客详情页blog_detail的实现
7.4 🍎博客编辑页面blog_editor的实现
8. 配置文件🐻
8.1 🍎maven配置文件
1. MVC架构模式简介
MVC是 Model、View、和Controller的缩写,是软件工程中的一种架构模式,把软件系统分为模型、视图、控制器三部分。这三部分的作用如下:
- Model(模型)
使应用程序中用于处理数据逻辑的部分,通常负责在数据库中存取数据 - View(视图层)
是应用程序中处理数据显示的部分,通常视图是依据模型数据来创建的 - Controller(控制器)
是应用程序中用于处理用户交互的部分,通常控制器负责从视图读取数据,控制用户输入并向模型响应数据

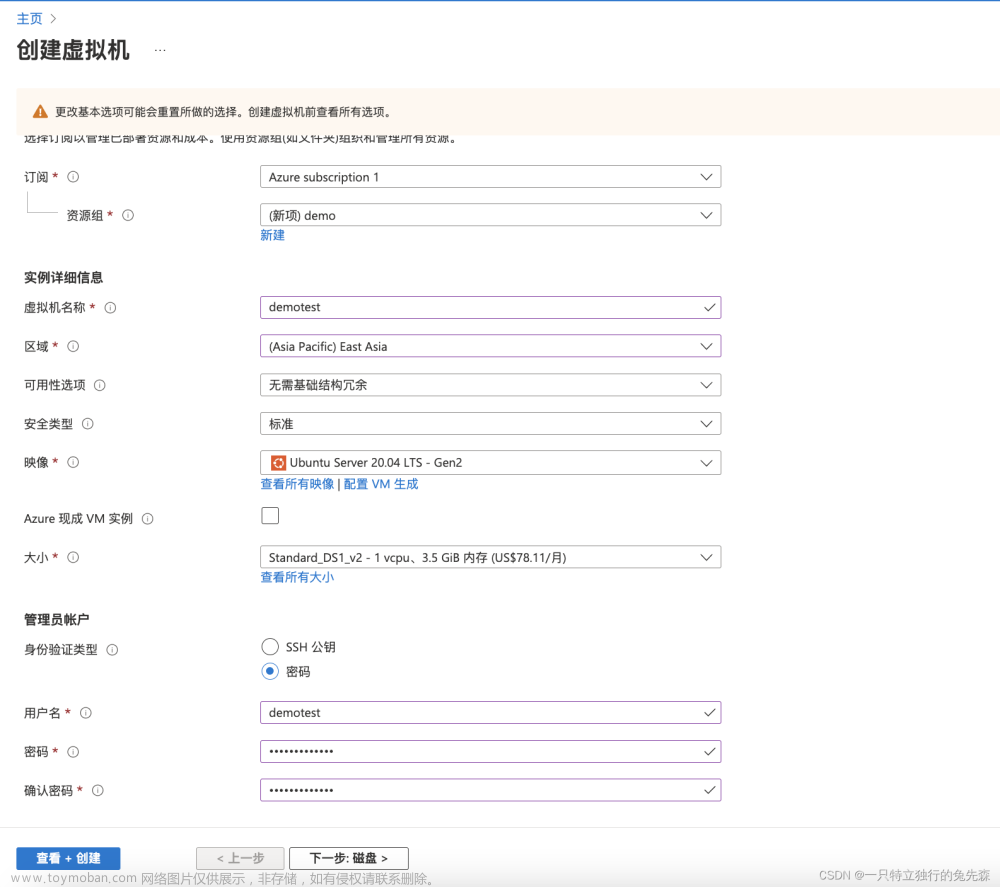
2. maven的配置和使用
Idea内置了maven,在我们创建maven项目后可以直接使用。下面我们主要介绍自定义maven配置。

创建maven项目,导入依赖文件

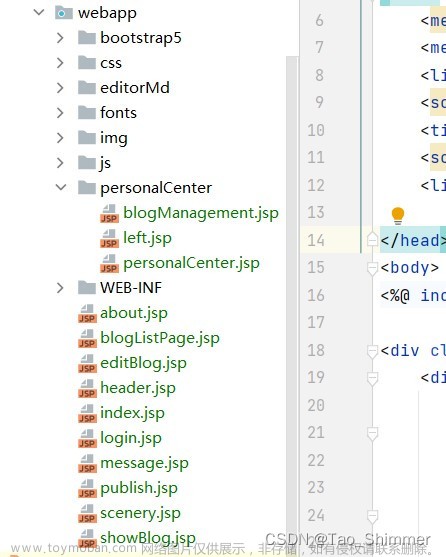
3. 项目总述🐻
博客系统共包含登陆页面、博客列表页、博客详情页和博客编辑页四个页面。


3.1 🍎Controller层
这个包里边主要存放了一些Servlet小程序,对应着用户的指定请求路径,调用Model层进行数据的读写,调用View层进行数据的展示,处理用户特定的请求。
3.2 🍎Model层
在这个包中封装了一些bean对象和Dao(Data Access Object)类。DAO层对象负责数据的读取和存储,读取到的数据将会倍封装成一个个bean对象。这些bean对象会返回给Controller层通过特定操作转换为指定的格式响应给View页面供用户体验。
3.3 🍎View层
这个层次中主要存放了一些用户展示数据的页面,进行交互的响应,向HTML,CSS,JS...

4. 页面的主要功能实现🐻
4.1 🍎登陆页面(login.html)

实现的主要功能:
- 发送ajax请求验证用户的账号和密码是否正确并根据返回的数据进行弹窗提示,如果用户信息正确,则跳转进入blog_index.html页面
当用户勾选了十天内免登录的复选框在服务器端会创建cookie信息添加了客户端中,实现十天内免登录的效果
点击注销按钮,后台清除该用户的会话对象,前端页面跳转到登陆页面,用户即可退出登录
4.2 🍎博客列表页面(blog_index.html)

实现的主要功能:
- 在进行页面加载时会先发送ajax请求验证用户的登陆状态,如果用户的身份信息不合法,则弹窗提示并跳转到登陆页面让用户进行登录;如果身份信息合法,则继续向服务器请求博客列表信息和登录用户信息
- 根据登录用户的不同显示不同的用户信息,包括文章数、用户名、头像信息
- 点击注销按钮,后台清除该用户的会话对象,前端页面跳转到登陆页面,用户即可退出登录
4.3 🍎博客详情页面(blog_detail.html)

实现的主要功能:
- 页面加载时验证用户的登录状态
- 通过注册携带查询字符串跳转到详情页面携带的博客ID,查询数据库,显示当前博客的详细信息
- 当用户信息和当前页面作者信息一致时,用户点击删除按钮可以对当前博客进行删除操作
- 对markdown语法进行解析,显示到博客详情区域
- 点击注销按钮,后台清除该用户的会话对象,前端页面跳转到登陆页面,用户即可退出登录
4.4 🍎博客编辑页(blog_editor.html)

实现的主要功能:
- 验证用户身份信息的合法性
- 引用开源插件editor.md实现博客的markdown语法编辑功能
- 用户提交博客信息,跳转博客列表页面
- 点击注销按钮,后台清除该用户的会话对象,前端页面跳转到登陆页面,用户即可退出登录
5.Contorller层(控制层)🐻
5.1 🍎UserServlet
该后台小程序用户处理用户的普通登录请求和验证用户身份信息的合法性。其中的doPost方法接受来自login.html中登录的ajax——Post请求,这个登录的HTTP请求将用户的登录信息携带在请求体发送给服务器,服务器中的UserServlet对其中的登陆数据进行解析并根据用户是否选择一定时期内免登录选择性创建cookie对象返回给客户端;并且调用Model层的UserDao对象查询底层数据路判断是否有该用户的信息,如果用户身份信息合法,则创建该用户的session会话对象,将该用户的信息添加用户本次的会话域当中并在查询结束后返回一个字符串格式的登录判定结果,前端负责登录的ajax请求在接收到这个登陆结果后进行弹窗提示和页面跳转。其中的doGet方法用于处理前端页面验证用户身份信息合法性的ajax请求,当前端发送这个请求时,后端的UserServlet试图获取该用户对应的session会话对象,如果获取成功,则说明用户身份信息合法;如果因非法登录和session过期等原因导致的用户身份信息失效,则会返回一个JSON格式的对象,前端页面解析这个JSON对象并且在用户身份信息不合法时给出弹窗提示并强制页面跳转到登陆页面;在身份信息合法时将用户信息加载到页面左侧的用户信息上。其中返回的JSON格式的数据前后端约定如下:

package com.shuai.blogapp.controller.servlet;

import com.fasterxml.jackson.databind.ObjectMapper;
import com.shuai.blogapp.model.bean.User;
import com.shuai.blogapp.model.dao.BlogDao;
import com.shuai.blogapp.model.dao.UserDao;

import javax.servlet.ServletException;
import javax.servlet.annotation.WebServlet;
import javax.servlet.http.*;
import java.io.IOException;

@WebServlet({"/user/loginIn", "/user/verify"})
public class UserServlet extends HttpServlet {
    private ObjectMapper objectMapper = new ObjectMapper();

    @Override
    protected void doPost(HttpServletRequest request, HttpServletResponse response)
            throws ServletException, IOException {
        response.setContentType("text/html;charset=UTF-8");
        String username = request.getParameter("username");
        String password = request.getParameter("password");
        String remember = request.getParameter("remember");
        if (username == null || password == null || "".equals(username) || "".equals(password)) {
            response.getWriter().write("empty");
            return;
        }
        //检查用户名和密码是否正确
        UserDao userDao = new UserDao();
        User user = userDao.selectByName(username);
        if (user == null || !password.equals(user.getPassword())) {
            response.getWriter().print("error");
            return;
        }
        //登陆成功了
        //创建和该用户关联的session信息
        HttpSession session = request.getSession(true);
        session.setMaxInactiveInterval(60 * 60 * 12);
        Cookie usernameCookie = new Cookie("username", username);
        Cookie passwordCookie = new Cookie("password",password);
        usernameCookie.setMaxAge(60*60*24*10);
        passwordCookie.setMaxAge(60*60*24*10);
        //将cookie信息保存在客户端
        response.addCookie(usernameCookie);
        response.addCookie(passwordCookie);
        session.setAttribute("user", user);
        response.getWriter().print("success");
    }

    @Override
    protected void doGet(HttpServletRequest request, HttpServletResponse response)
            throws ServletException, IOException {
        HttpSession session = request.getSession(false);    //获取该用户绑定的session信息
        response.setContentType("application/json;charset=utf8");
        User user = new User();
        if (session == null || session.getAttribute("user") == null) {
            user.setUsername("");
            user.setPassword("");
            response.getWriter().print(objectMapper.writeValueAsString(user));
            return;
        }
        user = (User) session.getAttribute("user");
        user.setPassword("");   //用户密码就不要返回给前端了
        long blogNum = new BlogDao().getBlogNumByUserId(user.getUserId());
        user.setBlogNum(blogNum);
        response.getWriter().write(objectMapper.writeValueAsString(user));  //用户信息存在,就返回这个用户信息
    }
}
5.2 🍎UserRemLoginServlet
该小程序用于处理用户的记忆登录功能,在登陆页面加载时会先发送一个记忆登录的ajax请求,如果之前用户选择了一定时期内免登录的这个按钮,则这次的请求会携带之前服务器返回的用户信息的cookie。后台的UserRemLoginServlet尝试获取这些cookie对象并解析出包含用户信息的cookie,并将创建UserDao对象从数据库查询该用户信息,返回用户记忆登录的结果,前后端之间的约定如下:

package com.shuai.blogapp.controller.servlet;

import com.shuai.blogapp.model.bean.User;
import com.shuai.blogapp.model.dao.UserDao;

import javax.servlet.ServletException;
import javax.servlet.annotation.WebServlet;
import javax.servlet.http.*;
import java.io.IOException;

@WebServlet({"/user/remLogin"})
public class UserRemLoginServlet extends HttpServlet {
    @Override
    protected void doGet(HttpServletRequest request, HttpServletResponse response)
            throws ServletException, IOException {
        Cookie[] cookies = request.getCookies();
        response.setContentType("application/json;charset=utf8"); //以json的形式返回数据
        String username = null;
        String password = null;
        //遍历cookie信息,寻找用户保存的用户名和密码
        if (cookies != null) {
            for (Cookie cookie : cookies) {
                if ("username".equals(cookie.getName())) {
                    username = cookie.getValue();
                }
                if ("password".equals(cookie.getName())) {
                    password = cookie.getValue();
                }
            }
        }
        //如果username或者password为空,说明没有保存用户登录信息的cookie
        if (username == null || password == null) {
            response.getWriter().write("{\"ok\":\"0\"}");
            return;
        }
        //如果有用户名和密码,就连接数据库验证这个用户信息是否正确
        UserDao userDao = new UserDao();
        User user = userDao.selectByName(username);
        if (user == null || !password.equals(user.getPassword())) {
            //说明cookie中保存的用户信息不正确
            response.getWriter().write("{\"ok\":\"0\"}");
            return;
        }

        //用户信息正确
        //创建包含用户信息的session
        HttpSession session = request.getSession(true);
        session.setAttribute("user", user);
        //响应登录成功的结果给前端
        response.getWriter().write("{\"ok\":\"1\"}");
    }
}
5.3 🍎UserLoginOutServlet
该后台小程序接收用户点击注销按钮时通过超链接发送的GET请求,当接收到请求后,会创建包含用户登录信息的同名cookie对象,并设置cookie对象的生命周期为0,将这些cookie添加到客户端更新原来的包含用户信息的cookie(即使得原来包含用户登录信息的cookie信息失效)。并且会从request对象中获取到该用户对应的session对象,并将会话域中的用户信息删除并使当前用户的session对象失效。然后重定向到登陆页面。页面得处理逻辑如下:

package com.shuai.blogapp.controller.servlet;

import javax.servlet.ServletException;
import javax.servlet.annotation.WebServlet;
import javax.servlet.http.*;
import java.io.IOException;

@WebServlet({"/user/loginOut"})
public class UserLoginOutServlet extends HttpServlet {
    @Override
    protected void doGet(HttpServletRequest request, HttpServletResponse response)
            throws ServletException, IOException {
        HttpSession session = request.getSession(false);
        if (session != null) {
            session.removeAttribute("user");
            Cookie usernameCookie = new Cookie("username", "");
            Cookie passwordCookie = new Cookie("password", "");
            usernameCookie.setMaxAge(0);
            passwordCookie.setMaxAge(0);
            response.addCookie(usernameCookie);
            response.addCookie(passwordCookie);
            session.invalidate();   //使该session对象失效
        }
        response.sendRedirect(request.getContextPath()+"/login.html");
    }
}
5.4 🍎LoadAuthorInfoServlet
该Servlet用于在博客详情页面加载用户的详细信息,包括用户名、文章数,头像。当用户在博客列表页点击查看全文时会在查询字符串里携带待查寻博客的id跳转到详情页面,在详情页面加载时还是会先发送验证用户身份信息的ajax请求。通过后,将该当前页面URL中的blogId取出,携带这个参数发送请求到该Servlet,该小程序创建BlogDao对象查询改编号对应的blog是否存在,如果存在,则再根据查询到博客的作者信息去查询作者表中该作者的信息,并将查询结果响应给前端;如果不存在,则直接响应。该接口前后端之间的约定和响应流程如下:

package com.shuai.blogapp.controller.servlet;

import com.fasterxml.jackson.databind.ObjectMapper;
import com.shuai.blogapp.model.bean.Blog;
import com.shuai.blogapp.model.bean.User;
import com.shuai.blogapp.model.dao.BlogDao;
import com.shuai.blogapp.model.dao.UserDao;

import javax.servlet.ServletException;
import javax.servlet.annotation.WebServlet;
import javax.servlet.http.HttpServlet;
import javax.servlet.http.HttpServletRequest;
import javax.servlet.http.HttpServletResponse;
import java.io.IOException;
import java.io.PrintWriter;

@WebServlet({"/author/authorInfo"})
public class LoadAuthorInfoServlet extends HttpServlet {
    private ObjectMapper objectMapper = new ObjectMapper();
    @Override
    protected void doGet(HttpServletRequest request, HttpServletResponse response)
            throws ServletException, IOException {
        response.setContentType("application/json,charset=UTF-8");
        PrintWriter out = response.getWriter();
        String blogId = request.getParameter("blogId");
        //从数据库查询这篇博客的详细信息,返回这篇博客的作者编号
        BlogDao blogDao = new BlogDao();
        Blog blog = blogDao.queryBlogById(Integer.parseInt(blogId));
        User user = new User();
        if(blog == null) {
            user.setUserId(-1);
            out.write(objectMapper.writeValueAsString(user));
            return;
        }
        UserDao userDao = new UserDao();
        user = userDao.selectById(blog.getUserId());
        if(user == null) {
            User user1 = new User();
            user1.setUserId(0);
            out.write(objectMapper.writeValueAsString(user1));
            return;
        }
        user.setPassword("");
        //显示该用户的博客数量
        long blogNum = blogDao.getBlogNumByUserId(user.getUserId());
        user.setBlogNum(blogNum);
        out.write(objectMapper.writeValueAsString(user));
    }
}
5.5 🍎BlogServlet
该小程序主要用于处理请求博客列表、加载博客详情内容以及进行博客的保存。其中,不论前端发送何种请求,都是先验证用户身份信息的合法性。通过验证后,当前端发送博客列表请求时,该Servlet中的doGet方法会从blog表中查询所有的blog信息,并对每一篇长度大于50的blog进行截取加工(优化前端页面博客列表的博客概要的显示)。将查询并加工后的所有博客信息响应给前端。该请求和响应接口的数据约定如下:
当前端发送博客详情请求时,该Servlet根据前端发送过来的blogId船舰BlogDao对象查询数据库并返回该blogId对应的博客全文。
当前端发送博客提交请求时,该Servlet的doPsot方法执行,在进行一系列用户以及用户博客信息的合法性验证后将该篇博客插入到底层数据库,其中该篇博客的用户编号从该用户的会话域中获取即可。

package com.shuai.blogapp.controller.servlet;

import com.fasterxml.jackson.databind.ObjectMapper;
import com.shuai.blogapp.model.bean.Blog;
import com.shuai.blogapp.model.bean.User;
import com.shuai.blogapp.model.dao.BlogDao;

import javax.servlet.ServletException;
import javax.servlet.annotation.WebServlet;
import javax.servlet.http.HttpServlet;
import javax.servlet.http.HttpServletRequest;
import javax.servlet.http.HttpServletResponse;
import javax.servlet.http.HttpSession;
import java.io.IOException;
import java.util.List;


@WebServlet(value = {"/blog/list","/blog/detail","/blog/save"})
public class BlogServlet extends HttpServlet {
    private ObjectMapper objectMapper = new ObjectMapper();

    @Override
    protected void doGet(HttpServletRequest request, HttpServletResponse response)
            throws ServletException, IOException {
        response.setContentType("application/json;charset=UTF-8");
        String servletPath = request.getServletPath();
        BlogDao blogDao = new BlogDao();
        String responseJson = null;
        if("/blog/list".equals(servletPath)) {
            List<Blog> blogs = blogDao.queryAll();
            for (Blog blog : blogs) {
                String content = blog.getContent();
                if (content.length() > 100) {
                    blog.setContent(content.substring(0, 100) + "...");
                }
            }
            responseJson = objectMapper.writeValueAsString(blogs);
        } else if("/blog/detail".equals(servletPath)) {
            String blogId = request.getParameter("blogId");
            int id = Integer.parseInt(blogId);
            Blog blog = blogDao.queryBlogById(id);
            responseJson = objectMapper.writeValueAsString(blog);
        }
        response.getWriter().write(responseJson);

    }


    @Override
    protected void doPost(HttpServletRequest request, HttpServletResponse response)
            throws ServletException, IOException {
        request.setCharacterEncoding("utf8");
        HttpSession session = request.getSession(false);
        //这里要优化。万一用户编辑博客时间长,session过期,就会市区编辑的博客的内容了
        if(session == null) {
            //重定向到登录页面
            response.sendRedirect(request.getContextPath()+"/login.html");
            return;
        }
        User user = (User)session.getAttribute("user");
        if(user == null) {
            //重定向到登录页面
            response.sendRedirect(request.getContextPath()+"/login.html");
            return;
        }
        //保存客户端发送过来的内容
        String title = request.getParameter("title");
        String content = request.getParameter("content");
        int userId = user.getUserId();  //获取编辑这篇博客的作者编号
        BlogDao blogDao = new BlogDao();
        Blog blog = new Blog();
        blog.setContent(content);
        blog.setUserId(userId);
        blog.setTitle(title);
        blogDao.insertBlog(blog);
        //保存成功后跳转到博客列表页面
        response.sendRedirect(request.getContextPath() + "/blog_index.html");
    }
}
5.6 🍎BlogDeleteServlet
根据前端页面发送过来的blogId,该Servlet创建BlogDao对象从blog表中将该篇blog删除,相应删除结果然后跳转到博客列表页。该接口的响应数据约定如下:

package com.shuai.blogapp.controller.servlet;


import com.shuai.blogapp.model.bean.Blog;
import com.shuai.blogapp.model.bean.User;
import com.shuai.blogapp.model.dao.BlogDao;

import javax.servlet.ServletException;
import javax.servlet.annotation.WebServlet;
import javax.servlet.http.HttpServlet;
import javax.servlet.http.HttpServletRequest;
import javax.servlet.http.HttpServletResponse;
import javax.servlet.http.HttpSession;
import java.io.IOException;

@WebServlet({"/blog/delete"})
public class BlogDeleteServlet extends HttpServlet {
    @Override
    protected void doGet(HttpServletRequest request, HttpServletResponse response)
            throws ServletException, IOException {
        request.setCharacterEncoding("UTF-8");
        response.setContentType("text/html;charset=utf8");
        String blogId = request.getParameter("blogId");
        HttpSession session = request.getSession(false);    //验证用户登陆状态
        if (session == null) {
            response.getWriter().print("login_out_of_date");
            return;
        }
        User user = (User) session.getAttribute("user");
        if (user == null) {
            response.getWriter().print("login_out_of_date");
            return;
        }
        BlogDao blogDao = new BlogDao();
        Blog blog = blogDao.queryBlogById(Integer.parseInt(blogId));
        if(blog == null) {
            response.getWriter().print("blog_not_exists");
            return;
        }
        if(user.getUserId() != blog.getUserId()) {
            response.getWriter().print("user_info_mismatching");
            return;
        }
        //到这里,初步确定信息无误,进行删除
        Blog blog1 = blogDao.deleteBlog(blog.getBlogId());
        if(blog1 != null) {
            response.getWriter().print("delete_success");
        } else {
            response.getWriter().print("delete_fault");
        }

    }
}
6. Model层(模型层)🐻
6.1 🍎Bean对象
📕Userbean
对应数据库中的user表,作为载体封装了user表中每一条博客的信息存在,并且提供了相应的属性的getter和setter方法。
package com.shuai.blogapp.model.bean;

public class User {
    private int userId;


    private String username;
    private String password;
    private long blogNum;

    public int getUserId() {
        return userId;
    }

    public void setUserId(int userId) {
        this.userId = userId;
    }

    public String getUsername() {
        return username;
    }

    public void setUsername(String username) {
        this.username = username;
    }

    public String getPassword() {
        return password;
    }

    public void setPassword(String password) {
        this.password = password;
    }

    public long getBlogNum() {
        return blogNum;
    }

    public void setBlogNum(long blogNum) {
        this.blogNum = blogNum;
    }

    @Override
    public String toString() {
        return "User{" +
                "userId=" + userId +
                ", username='" + username + '\'' +
                ", password='" + password + '\'' +
                '}';
    }
}
📕BlogBean
对应数据库中的blog表,作为载体封装了blog表中每一条博客的信息存在,并且提供了相应的属性的getter和setter方法。
package com.shuai.blogapp.model.bean;

import java.sql.Timestamp;
import java.text.SimpleDateFormat;

public class Blog {
    private int blogId;
    private String title;
    private String content;
    private int userId;
    private Timestamp postTime;

    public int getBlogId() {
        return blogId;
    }

    public void setBlogId(int blogId) {
        this.blogId = blogId;
    }

    public String getTitle() {
        return title;
    }

    public void setTitle(String title) {
        this.title = title;
    }

    public String getContent() {
        return content;
    }

    public void setContent(String content) {
        this.content = content;
    }

    public int getUserId() {
        return userId;
    }

    public void setUserId(int userId) {
        this.userId = userId;
    }

    public void setPostTime(Timestamp postTime) {
        this.postTime = postTime;
    }

    /**
     * 重写postTime的get方法,来做格式化输出
     */
    public String getPostTime() {
        SimpleDateFormat simpleDateFormat = new SimpleDateFormat("yyyy-MM-dd HH:mm:ss");
        return simpleDateFormat.format(postTime);
    }

    @Override
    public String toString() {
        return "Blog{" +
                "blogId=" + blogId +
                ", title='" + title + '\'' +
                ", content='" + content + '\'' +
                ", userId=" + userId +
                ", postTime=" + postTime +
                '}';
    }
}
6.2 🍎BlogDao类
该类作为博客的数据逻辑处理类,对插入博客、删除博客、查询博客(根据blogId查询单个以及查询全部)和获取指定用户对应博客数目的方法进行了封装供controller层Servlet调用处理数据。
package com.shuai.blogapp.model.dao;

import com.shuai.blogapp.model.bean.Blog;
import com.shuai.blogapp.model.bean.User;
import com.shuai.utils.BaseDaoUtil;

import java.sql.SQLException;
import java.util.List;

/**
 * Date Access Object which handle the request of blog from user
 */
public class BlogDao {
    /**
     * The method which insert the blog which was written by user
     * @param blog
     */
    public void insertBlog(Blog blog) {
        if(blog == null) {
            return;
        }
        String sql = "insert into blog(title,content,userId,postTime) values(?,?,?,now())";
        try {
            BaseDaoUtil.executeUpdate(sql,blog.getTitle(),blog.getContent(),blog.getUserId());
        } catch (SQLException e) {
            throw new RuntimeException(e);
        }
    }

    /**
     * The method which is used to delete the blog by blogId and return the blog object which is deleted
     * @param id
     * @return The blg object which is deleted
     */
    public Blog deleteBlog(int id) {
        List<Blog> blogs = null;
        Blog res = null;
        String sqlQuery = "select blogId,title,content,userId,postTime from blog where blogId=?";
        try {
            blogs = BaseDaoUtil.executeQuery(Blog.class,sqlQuery,id);
        } catch (SQLException e) {
            throw new RuntimeException(e);
        } catch (NoSuchFieldException e) {
            throw new RuntimeException(e);
        } catch (InstantiationException e) {
            throw new RuntimeException(e);
        } catch (IllegalAccessException e) {
            throw new RuntimeException(e);
        }
        if((res = blogs.get(0)) == null) {
            return null;
        }
        String sqlDelete = "delete from blog where blogId=?";
        try {
            BaseDaoUtil.executeUpdate(sqlDelete,id);
        } catch (SQLException e) {
            throw new RuntimeException(e);
        }
        if(blogs.get(0) != null) {
            return blogs.get(0);
        }
        return res;
    }

    /**
     * User can through this method to query the blog by blogId
     * @param id a count which deputy a blog
     * @return return an object which is queried by user
     */
    public Blog queryBlogById(int id) {
        List<Blog> blogs = null;
        String sql = "select blogId,title,content,userId,postTime from blog where blogId=?";
        try {
            blogs = BaseDaoUtil.executeQuery(Blog.class, sql, id);
        } catch (SQLException e) {
            throw new RuntimeException(e);
        } catch (InstantiationException e) {
            throw new RuntimeException(e);
        } catch (IllegalAccessException e) {
            throw new RuntimeException(e);
        } catch (NoSuchFieldException e) {
            throw new RuntimeException(e);
        }
        if((blogs.size()>0)) {
            return blogs.get(0);
        }
        return null;
    }

    public List<Blog> queryAll() {
        String sql = "select blogId,title,content,userId,postTime from blog order by postTime desc" ;
        List<Blog> blogs = null;
        try {
            blogs = BaseDaoUtil.executeQuery(Blog.class,sql);
        } catch (SQLException e) {
            throw new RuntimeException(e);
        } catch (InstantiationException e) {
            throw new RuntimeException(e);
        } catch (IllegalAccessException e) {
            throw new RuntimeException(e);
        } catch (NoSuchFieldException e) {
            throw new RuntimeException(e);
        }
        return blogs;
    }

    public long getBlogNumByUserId(int userId) {
        String sql = "select count(*) as blogNum from blog where userId=?";
        List<User> users = null;
        try {
            users = BaseDaoUtil.executeQuery(User.class, sql, userId);
        } catch (SQLException e) {
            throw new RuntimeException(e);
        } catch (InstantiationException e) {
            throw new RuntimeException(e);
        } catch (IllegalAccessException e) {
            throw new RuntimeException(e);
        } catch (NoSuchFieldException e) {
            throw new RuntimeException(e);
        }
        return users.get(0).getBlogNum();
    }
}
6.3 🍎UserDao类
该类作为User数据的逻辑处理类,对向数据库中添加用户、删除用户、查询用户(重载方法)的功能进行了封装,供controller层调用。文章来源:https://www.toymoban.com/news/detail-445515.html
package com.shuai.blogapp.model.dao;

import com.shuai.blogapp.model.bean.User;
import com.shuai.utils.BaseDaoUtil;

import java.sql.SQLException;
import java.util.List;

/**
 * The method which counters the service for users
 */
public class UserDao{
    /**
     * The method which is used to add user
     * @param user
     */
    public void addUser(User user) {
        if(user == null) {
            return;
        }
        String sql = "insert into user(username,password) values(?,?);";
        try {
            BaseDaoUtil.executeUpdate(sql,user.getUsername(),user.getPassword());
        } catch (SQLException e) {
            throw new RuntimeException(e);
        }
    }

    /**
     * The method which is used to delete user from user table by userId
     * @param user
     * @return The user object which is deleted
     */
    public User deleteUser(User user) {
        if(user == null) {
            return null;
        }
        List<User> users = null;
        User res = null;
        String sqlQuery = "select userId,username,password from user where userId=?;";
        try {
            users = BaseDaoUtil.executeQuery(User.class,sqlQuery,user.getUserId());
        } catch (SQLException e) {
            throw new RuntimeException(e);
        } catch (InstantiationException e) {
            throw new RuntimeException(e);
        } catch (IllegalAccessException e) {
            throw new RuntimeException(e);
        } catch (NoSuchFieldException e) {
            throw new RuntimeException(e);
        }

        if(users.size() == 0) {
            return null;
        }
        String sqlDelete = "delete from user where userId=?;";
        try {
            BaseDaoUtil.executeUpdate(sqlDelete,user.getUserId());
        } catch (SQLException e) {
            throw new RuntimeException(e);
        }
        return users.get(0);
    }

    public User selectByName(String username) {
        List<User> users = null;
        String sql = "select userId,username,password from user where username=?";
        try {
            users = BaseDaoUtil.executeQuery(User.class,sql,username);
        } catch (SQLException e) {
            throw new RuntimeException(e);
        } catch (InstantiationException e) {
            throw new RuntimeException(e);
        } catch (IllegalAccessException e) {
            throw new RuntimeException(e);
        } catch (NoSuchFieldException e) {
            throw new RuntimeException(e);
        }
        if(users.size()>0) {
            return users.get(0);
        }
        return null;
    }

    public User selectById(int id) {
        List<User> users = null;
        String sql = "select userId,username,password from user where userId=?";
        try {
            users = BaseDaoUtil.executeQuery(User.class,sql,id);
        } catch (SQLException e) {
            throw new RuntimeException(e);
        } catch (InstantiationException e) {
            throw new RuntimeException(e);
        } catch (IllegalAccessException e) {
            throw new RuntimeException(e);
        } catch (NoSuchFieldException e) {
            throw new RuntimeException(e);
        }
        if(users.size()> 0) {
            return users.get(0);
        }
        return null;
    }

}
6.4 🍎JDBC工具类
我对于mysql连接的获取和数据的增删改查基于JDBC原生操作封装了两个工具类。其中的JDBCUtil提供了获取连接和回收连接的方法;BaseDaoUtil提供了对数据库中数据进行增删改查操作的封装。文章来源地址https://www.toymoban.com/news/detail-445515.html
//JDBCUtil.java
package com.shuai.utils;


import com.alibaba.druid.pool.DruidDataSourceFactory;

import javax.sql.DataSource;
import java.io.IOException;
import java.io.InputStream;
import java.sql.Connection;
import java.sql.SQLException;
import java.util.Properties;

public class JDBCUtil {
    private static DataSource dataSource;
    private static ThreadLocal<Connection> th = new ThreadLocal<>();
    static {
        Properties properties = new Properties();
        InputStream inputStream = JDBCUtil.class.getClassLoader().getResourceAsStream("jdbc.properties");
        try {
            properties.load(inputStream);
        } catch (IOException e) {
            throw new RuntimeException(e);
        }
        try {
            dataSource = DruidDataSourceFactory.createDataSource(properties);
        } catch (Exception e) {
            throw new RuntimeException(e);
        }

    }

    public static Connection getConnection() throws SQLException {
        Connection connection = th.get();
        if(connection == null) {
            synchronized (JDBCUtil.class) {
                connection = dataSource.getConnection();
                th.set(connection);
            }
        }
        return connection;
    }


    public static void close() throws SQLException {
        Connection connection = th.get();
        if(connection != null) {
            connection.setAutoCommit(true);
            connection.close();
            th.remove();
        }
    }
}
//BaseDaoUtil.java
package com.shuai.utils;

import java.lang.reflect.Field;
import java.sql.*;
import java.util.ArrayList;
import java.util.List;

public class BaseDaoUtil {
    /**
     * The method which package the operation to delete,update or insert the blog
     *
     * @param sql
     * @param param
     * @return
     */
    public static int executeUpdate(String sql, Object... param) throws SQLException {
        Connection connection = JDBCUtil.getConnection();
        PreparedStatement preparedStatement = connection.prepareStatement(sql);
        if (param != null) {
            //设置sql语句中的参数
            for (int i = 0; i < param.length; i++) {
                preparedStatement.setObject(i + 1, param[i]);
            }
        }
        int i = preparedStatement.executeUpdate();
        if(preparedStatement != null) {
            preparedStatement.close();
        }
        if(connection.getAutoCommit()) {    //如果没有开启事务,就关闭连接。否则让服务层关闭
            JDBCUtil.close();
        }
        return i;
    }


    public static <T> List<T> executeQuery(Class<T> clazz, String sql, Object... param) throws SQLException, InstantiationException, IllegalAccessException, NoSuchFieldException {
        Connection connection = JDBCUtil.getConnection();
        List<T> beans = new ArrayList<>();
        PreparedStatement preparedStatement = connection.prepareStatement(sql);
        if (param != null) {
            for (int i = 0; i < param.length; i++) {
                preparedStatement.setObject(i + 1, param[i]);
            }
        }
        ResultSet resultSet = preparedStatement.executeQuery();
        ResultSetMetaData metaData = resultSet.getMetaData();
        int columnCount = metaData.getColumnCount();
        while (resultSet.next()) {
            //通过反射创建对象实例
            T t = clazz.newInstance();
            for (int i = 0; i < columnCount; i++) {
                Object object = resultSet.getObject(i + 1);
                Field declaredField = clazz.getDeclaredField(metaData.getColumnLabel(i + 1));
                declaredField.setAccessible(true);
                declaredField.set(t, object);
            }
            beans.add(t);
        }
        if(resultSet != null) {
            resultSet.close();
        }
        if(preparedStatement != null) {
            preparedStatement.close();
        }
        if(connection.getAutoCommit()) {
            JDBCUtil.close();
        }
        return beans;
    }
}
7. View层(视图层源码)🐻
7.1 🍎公共样式文件
<!-- commom.css -->
* {
    margin: 0;
    padding: 0;
    box-sizing: border-box;
}

html,
body {
    width: 100%;
    height: 100%;
}

body {
    background-image: url(../images/bgi.png);
    background-repeat: no-repeat;
    background-position: center center;
    background-size: cover;
}

.nav {
    height: 40px;
    font-size: 14px;
    display: flex;
    align-items: center;
    background-color: rgba(51, 51, 51, 0.8);
    color: white;
    text-decoration: none;
}

.nav p {
    padding: 0px 10px;
    margin-right: 1050px;
    cursor: default;
}

.nav a {
    display: block;
    color: white;
    text-decoration: none;
    float: right;
    padding: 0 16px;
}

.nav img {
    width: 32px;
    height: 32px;
    border-radius: 50%;
    margin-left: 40px;
}


.container {
    display: flex;
    width: 1000px;
    margin: 0 auto;
    height: calc(100vh - 40px);
    justify-content: space-between;
}

.container .left {
    cursor: default;
    /* background-color: green; */
    width: 200px;
    height: 360px;
    border-radius: 10px;
    padding: 30px;
    background-color: rgba(255, 255, 255, 0.6);
}


.container .left img {
    width: 140px;
    height: 140px;
    border-radius: 50%;
    padding: 10px;
}

.container .left p {
    font-size: 22px;
    text-align: center;
    font-weight: bold;
    padding: 10px;
}

.container .left a {
    display: block;
    text-decoration: none;
    text-align: center;
    color: rgb(114, 102, 218);
    padding: 10px;
}

.container .left .counter {
    display: flex;
    justify-content: space-around;
    padding: 4px;
}


.container .right {
    width: 795px;
    height: 100%;
    background-color: rgba(255, 255, 255, 0.6);
    border-radius: 10px;
}

.container .right {
    overflow: auto;
}

.container .right .content {
    text-indent: 2em;
}
7.1 🍎登陆页面login的实现
<!-- login.html -->
<!DOCTYPE html>
<html lang="en">

<head>
    <meta charset="UTF-8">
    <meta http-equiv="X-UA-Compatible" content="IE=edge">
    <meta name="viewport" content="width=device-width, initial-scale=1.0">
    <title>登陆页面</title>
    <link rel="stylesheet" href="./CSS/login.css">
</head>

<body>
<!-- 导航栏 -->
<div class="nav">
    <img src="./images/logo.png" alt="">
    <p>我的博客系统</p>
    <a href="./blog_index.html">主页</a>
    <a href="">写博客</a>
</div>
<div class="container">
    <p>登录</p>
    <div class="login"><span>用户名:</span><input type="text" id="username" placeholder="请输入用户名"></div>
    <div class="login"><span>密码:</span><input type="password" id="password" placeholder="请输入密码"></div>
    <div id="rem"><input type="checkbox" id="remember">十天内免登录</div>
    <button id="submit" type="button">登录</button>
</div>
<script type="text/javascript" src="./JS/login.js"></script>
<script src="./JS/jquery.min.js"></script>
<!--    为了能够实现登录时弹窗的效果,这里登录我们使用ajax请求-->
<script>
    $(function () {

        document.querySelector("#rem").addEventListener('click', function () {
            let myCheckbox = document.querySelector("#rem input")
            if (myCheckbox.hasAttribute("checked")) {
                myCheckbox.removeAttribute("checked")
            } else {
                myCheckbox.setAttribute("checked", "checked")
            }
        })
        let isRemLogin = function () {
            $.ajax({
                type: "get",
                url: "user/remLogin",
                success: function (jsonObj) {
                    console.log(jsonObj.ok)
                    if (jsonObj.ok === "1") {   //cookie信息登录
                        document.location.href = 'blog_index.html'
                    }
                }, error: function () {
                    console.log("error.......")
                }
            })
        }

        let doLoginRequest = function () {
            let $username = $("#username").val()
            let $password = $("#password").val()
            let $remember = $("#remember").attr("checked") ? "1" : "0"
            $.ajax({
                type: "post",
                url: "user/loginIn",
                data: {
                    username: $username,
                    password: $password,
                    remember: $remember
                },
                success: function (reqRes) {
                    console.log("接收登录响应成功")
                    if (reqRes === "error") {
                        alert('账号或密码错误!')
                        return
                    } else if (reqRes === "empty") {
                        alert("请补全账号或密码!")
                        return
                    } else {
                        alert("登录成功!")
                        //登录成功
                        document.location.href = "blog_index.html"
                    }
                }, errno: function () {
                    alert('请求失败')
                }
            })
        }
        $('#submit').click(function () {
            doLoginRequest()
        })

        isRemLogin()    //判断是否保存了用户信息进行登录

    })
</script>
</body>

</html>
<!-- login.css -->
html,
body {
height: 100%;
}
* {
margin: 0;
padding: 0;
box-sizing: border-box;
}
body {
background-image: url(../images/bgi.png);
background-position: center center;
background-repeat: no-repeat;
background-size: cover;
}
.nav {
height: 40px;
display: flex;
align-items: center;
background-color: rgba(51, 51, 51, 0.8);
color: white;
font-size: 14px;
}
.nav img {
width: 32px;
height: 32px;
border-radius: 50%;
margin-left: 40px;
}
.nav p {
padding: 10px;
margin-right: 1050px;
}
.nav a {
display: block;
padding: 25px;
text-decoration: none;
color: white;
}
.container {
user-select: none;
width: 400px;
height: 500px;
border-radius: 15px;
margin: 0 auto;
margin-top: 80px;
background-color: rgba(255, 255, 255, 0.6);
}
.container p {
text-align: center;
padding: 30px;
font-size: 36px;
font-weight: bold;
padding-bottom: 150px;
}
.container input {
height: 30px;
background-color: rgba(236, 194, 104, 0.4);
padding: 5px 10px;
border-radius: 4px;
transition: all .3s;
border: none;
outline: none;
}
.container input:focus {
box-shadow: 2px 2px 2px 2px;
}
.container span {
display: inline-block;
width: 80px;
font-size: 18px;
font-weight: 400;
}
.container .login {
text-align: center;
padding: 10px;
}
.container button {
display: block;
padding: 6px 15px;
background-color: rgb(143, 175, 143);
border-radius: 6px;
margin: 0 auto;
position: relative;
top: 60px;
width: 120px;
cursor: pointer;
user-select: none;
transition: all .5s;
border: none;
outline: none;
}
.container button:hover {
background-color: #809c21;
}
#rem {
width: 110px;
text-align: center;
background-color: rgba(143, 175, 143, 0.4);
border-radius: 6px;
position: relative;
top: 10px;
padding: 0;
font-size: 11px;
left: 250px;
cursor: pointer;
user-select: none;
transition: all .3s;
}
#rem input {
display: inline-block;
/* height: 14px; */
margin-right: 3px;
vertical-align: middle;
}7.2 🍎博客列表页blog_index的实现
<!-- blog_index.html -->
<!DOCTYPE html>
<html lang="en">
<head>
<meta charset="UTF-8">
<meta http-equiv="X-UA-Compatible" content="IE=edge">
<meta name="viewport" content="width=device-width, initial-scale=1.0">
<title>博客首页</title>
<link rel="stylesheet" href="./CSS/common.css">
<link rel="stylesheet" href="./CSS/blogIndex.css">
</head>
<body>
<!-- 导航栏 -->
<div class="nav">
<img src="./images/logo.png" alt="">
<p>我的博客系统</p>
<a href="./blog_index.html">主页</a>
<a href="blog_editor.html">写博客</a>
<a href="user/loginOut">注销</a>
</div>
<div class="container">
<div class="left">
<div class="card">
<img src="./images/touxiang.jpg" alt="">
<p></p>
<a href="#">GitHub地址</a>
<div class="counter">
<div>文章</div>
<div>分类</div>
</div>
<div class="counter">
<div id="blog_num">2</div>
<div>1</div>
</div>
</div>
</div>
<div class="right">
</div>
</div>
<script src="./JS/jquery.min.js"></script>
<!--验证用户身份信息的合法性-->
<script src="./JS/verify_user_legal.js"></script>
<script>
$(function () {
//发送异步ajax获取所有的博客列表信息
let getBlogList = function () {
$.ajax({
type: "GET",
url: "blog/list",
async: true,
success: function (jsonArr) {
let right = document.querySelector('.right')
right.innerHTML = ''
for (const json of jsonArr) {
let textDiv = document.createElement('div')
textDiv.className = 'text'
//创建标题节点
let h3 = document.createElement('h3')
h3.innerHTML = json.title
textDiv.appendChild(h3)
//创建date节点
let dateDiv = document.createElement('div')
dateDiv.className = 'date'
dateDiv.innerHTML = json.postTime
textDiv.appendChild(dateDiv)
//创建内容节点
let contentDiv = document.createElement('div')
contentDiv.className = 'content'
contentDiv.innerHTML = json.content
textDiv.appendChild(contentDiv)
//创建超链接节点
let a = document.createElement('a')
a.href = 'blog_detail.html?blogId=' + json.blogId
a.innerHTML = '查看全文>>'
textDiv.appendChild(a)
//将text节点挂到dom树上
right.appendChild(textDiv)
//作者的编号信息还没有用上
let hr = document.createElement('hr');
right.appendChild(hr)
}
}, errno: function () {
alert('获取博客列表失败!')
}
})
}
getUserInfo("blog_index.html") //获取用户登录信息,这是一个异步请求
getBlogList()
})
</script>
</body>
</html><!-- blog_index.css -->
.container .right .text {
padding: 25px;
width: 100%;
}
.container .right h3 {
text-align: center;
padding: 10px 0;
}
.container .right .date {
text-align: center;
padding-bottom: 10px;
}
.container .right .content {
display: block;
width: 100%;
word-break: break-all;
padding: 10px 0;
}
.container .right .text a {
text-decoration: none;
display: block;
width: 110px;
border-radius: 10px;
text-align: center;
padding: 5px;
margin: 0 auto;
border: 2px solid black;
transition: all .3s;
color: black;
}
.container .right .text a:hover {
background-color: pink;
}7.3 🍎博客详情页blog_detail的实现
<!-- blog_detail.html -->
<!DOCTYPE html>
<html lang="en">

<head>
    <meta charset="UTF-8">
    <meta http-equiv="X-UA-Compatible" content="IE=edge">
    <meta name="viewport" content="width=device-width, initial-scale=1.0">
    <title>博客详情页</title>

    <link rel="stylesheet" href="./CSS/common.css">
    <link rel="stylesheet" href="./CSS/blogIndex.css">
    <link rel="stylesheet" href="./CSS/blogDetail.css">
    <!--    引入editor.md相关文件,将普通的字符串内容渲染成md语法解析后的内容显示-->
    <link rel="stylesheet" href="./editor.md/css/editormd.min.css">
    <script src="./JS/jquery.min.js"></script>
    <script src="./editor.md/lib/marked.min.js"></script>
    <script src="./editor.md/lib/prettify.min.js"></script>
    <script src="./editor.md/editormd.js"></script>
</head>

<body>
<!-- 导航栏 -->
<div class="nav">
    <img src="./images/logo.png" alt="">
    <p>我的博客系统</p>
    <a href="./blog_index.html">主页</a>
    <a href="blog_editor.html">写博客</a>
    <a href="user/loginOut">注销</a>
</div>
<div class="container">
    <div class="left">
        <div class="card">
            <img src="./images/touxiang.jpg" alt="">
            <p></p>
            <a href="#">GitHub地址</a>
            <div class="counter">
                <div>文章</div>
                <div>分类</div>
            </div>
            <div class="counter">
                <div id="blog_num">2</div>
                <div>1</div>
            </div>
        </div>
    </div>
    <div class="right">
        <div class="text">
            <h3>我的第一篇博客</h3>
            <div class="date">2023-04-08</div>
            <div id="content">

            </div>
        </div>
    </div>
</div>
<script>
    $(function () {

        let getAuthorInfo = function (user) {
            $.ajax({
                type: "get",
                url: "author/authorInfo" + location.search,
                success: function (userJson) {
                    if (userJson.userId === -1) {
                        alert("访问的博客不存在...")
                        document.location.href = "blog_index.html"
                        return
                    }
                    if (userJson.userId === 0) {
                        setUserInfo("[该用户已注销...]", "XXX")
                        return
                    }
                    //能执行到这里,说明作者信息已经加载完成了
                    setUserInfo(userJson.username, userJson.blogNum)
                    isShowDeleteBtn(userJson.username, user.username)  //将作者信息传入,判断当前作者信息和登录的用户的信息是否相同
                }
            })
        }

        let setUserInfo = function (username, blogNum) {
            $(".card p").html(username)
            $(".card #blog_num").html(blogNum)
        }
        let getUserInfo = function (path) {
            $.ajax({
                type: "get",
                url: "user/verify",
                async: false,
                success: function (jsonObj) {
                    if (jsonObj.userId === 0) {
                        alert('您还未登录,请登录后访问...')
                        document.location.href = 'login.html'   //如果不存在用户信息,就跳转到登录页面
                        return
                    }

                    getAuthorInfo(jsonObj)

                }
            })

        }
        let doGetRequest = function () {
            $.ajax({
                type: "get",
                url: "blog/detail" + location.search,    //得到blog_list页面的blogId查询对应博客的详细信息
                success: function (json) {
                    $(".text h3").html(json.title)
                    $(".date").html(json.postTime)
                    //将后端相应的普通字符串数据经过markdown语法解析后显示
                    editormd.markdownToHTML("content", {
                        markdown: json.content
                    })
                }, error: function () {
                    alert('内容加载失败!')
                }
            })
        }
        //发送同步请求,验证用户身份信息的合法性
        getUserInfo("blog_detail.html")
        //执行函数,发送请求
        doGetRequest()

        let isShowDeleteBtn = function (authorName, username) {
            console.log(authorName + "    " + username)
            if (username === authorName) {
                //显示按钮信息
                let navDiv = document.querySelector(".nav")
                let a = document.createElement('a')
                a.innerHTML = '删除'
                navDiv.appendChild(a)   //将创建的a标签挂到dom树上
                a.addEventListener('click', function () {
                    if (!window.confirm("确定删除吗?")) {
                        return;
                    }
                    $.ajax({
                        type: "get",
                        url: "blog/delete" + location.search,
                        success: function (delRes) {
                            //接收删除的返回信息
                            switch (delRes) {
                                case "login_out_of_date":
                                    alert("丢失登陆状态,请重新登录...")
                                    document.location.href = 'login.html'
                                    break;
                                case "blog_not_exists":
                                    alert("blog信息不存在,请检查")
                                    break
                                case "user_info_mismatching":
                                    alert("无法删除他人的文章...")
                                    break
                                case "delete_success":
                                    alert("删除成功!")
                                    document.location.href = 'blog_index.html'
                                    break
                                case "delete_fault":
                                    alert("删除失败,未知错误...")
                                    break
                            }
                        }
                    })
                })
            }

        }


    })
</script>
</body>

</html>
<!-- blog_deatil.css -->
#content {
opacity: 70%;
}
.nav a {
cursor: pointer;
padding: 0 10px;
}7.4 🍎博客编辑页面blog_editor的实现
<!-- blog_editor.html -->
<!DOCTYPE html>
<html lang="en">

<head>
    <meta charset="UTF-8">
    <meta http-equiv="X-UA-Compatible" content="IE=edge">
    <meta name="viewport" content="width=device-width, initial-scale=1.0">
    <title>博客编辑页面</title>
    <link rel="stylesheet" href="./CSS/common.css">
    <link rel="stylesheet" href="./CSS/blog_editor.css">
    <link rel="stylesheet" href="./editor.md/css/editormd.min.css">
    <script src="./JS/jquery.min.js"></script>
    <script src="./editor.md/lib/marked.min.js"></script>
    <script src="./editor.md/lib/prettify.min.js"></script>
    <script src="./editor.md/editormd.js"></script>
</head>

<body>
<!-- 导航栏 -->
<div class="nav">
    <img src="./images/logo.png" alt="">
    <p>我的博客系统</p>
    <a href="./blog_index.html">主页</a>
    <a href="">写博客</a>
    <a href="user/loginOut">注销</a>
</div>
<div class="content_editor">
    <form action="blog/save" method="post">
        <div class="title_content">
            <input type="text" placeholder="请输入文章标题" name="title" id="ipt">
            <input type="submit" id="subm" value="发布">
        </div>
        <div id="editor">
            <textarea name="content" cols="30" rows="10" style="display: none"></textarea>
        </div>
    </form>
</div>
<!-- 验证用户身份信息的合法性 -->
<script src="./JS/verify_user_legal.js"></script>
<script>
    let editor = editormd("editor", {
        width: "100%",
        height: "calc(100% - 40px)",
        markdown: "# 在这里写下一篇博客",
        path: "./editor.md/lib/",
        saveHTMLToTextarea: true         //将editor编辑的内容保存在textarea文本框中,方便form表单的提交
    })
    $(function () {
        getUserInfo("blog_editor.html") //验证用户身份信息的合法性
    })
</script>
</body>

</html>
<!-- blog_editor.css -->
.content_editor {
margin: 0 auto;
width: 1000px;
height: calc(100vh - 40px);
}
.content_editor .title_content {
width: 100%;
height: 40px;
display: flex;
justify-content: space-between;
align-items: center;
}
.title_content #ipt {
width: 890px;
height: 30px;
border: none;
outline: none;
padding-left: 15px;
font-size: 16px;
border-radius: 10px;
transition: all .3s;
}
.title_content #subm {
width: 100px;
height: 30px;
background-color: pink;
border: none;
outline: none;
cursor: pointer;
transition: all .3s;
border-radius: 10px;
font-size: 12px;
padding-left: -10px;
}
.title_content #ipt:hover,
.title_content #sub:hover {
box-shadow: 3px 5px 3px;
}
.content_editor #editor {
opacity: 80%;
border-radius: 10px;
}
.content_editor form {
width: 100%;
height: 100%;
}8. 配置文件🐻
8.1 🍎maven配置文件
<?xml version="1.0" encoding="UTF-8"?>
<project xmlns="http://maven.apache.org/POM/4.0.0"
         xmlns:xsi="http://www.w3.org/2001/XMLSchema-instance"
         xsi:schemaLocation="http://maven.apache.org/POM/4.0.0 http://maven.apache.org/xsd/maven-4.0.0.xsd">
    <modelVersion>4.0.0</modelVersion>


    <groupId>org.example</groupId>
    <artifactId>BlogSystem</artifactId>
    <version>1.0-SNAPSHOT</version>

    <properties>
        <maven.compiler.source>8</maven.compiler.source>
        <maven.compiler.target>8</maven.compiler.target>
        <project.build.sourceEncoding>UTF-8</project.build.sourceEncoding>
    </properties>

    <dependencies>

        <!-- https://mvnrepository.com/artifact/javax.servlet/javax.servlet-api -->
        <dependency>
            <groupId>javax.servlet</groupId>
            <artifactId>javax.servlet-api</artifactId>
            <version>3.1.0</version>
            <scope>provided</scope>
        </dependency>

        <!-- https://mvnrepository.com/artifact/com.fasterxml.jackson.core/jackson-databind -->
        <dependency>
            <groupId>com.fasterxml.jackson.core</groupId>
            <artifactId>jackson-databind</artifactId>
            <version>2.12.6.1</version>
        </dependency>


        <!-- https://mvnrepository.com/artifact/mysql/mysql-connector-java -->
        <dependency>
            <groupId>mysql</groupId>
            <artifactId>mysql-connector-java</artifactId>
            <version>5.1.47</version>
        </dependency>

        <!-- https://mvnrepository.com/artifact/com.alibaba/druid -->
        <dependency>
            <groupId>com.alibaba</groupId>
            <artifactId>druid</artifactId>
            <version>1.1.10</version>
        </dependency>

    </dependencies>
    <packaging>war</packaging>

    <build>
        <finalName>test_last</finalName>
    </build>


</project>
到了这里,关于Servlet-搭建个人博客系统(MVC架构模式简介,maven的配置和使用)的文章就介绍完了。如果您还想了解更多内容,请在右上角搜索TOY模板网以前的文章或继续浏览下面的相关文章,希望大家以后多多支持TOY模板网!