一、布局界面
1、记事本界面布局
main_notepad.xml
<RelativeLayout xmlns:android="http://schemas.android.com/apk/res/android"
    android:layout_width="match_parent"
    android:layout_height="match_parent"
    android:background="#fefefe">

    <TextView
        android:id="@+id/note_name"
        android:layout_width="match_parent"
        android:layout_height="45dp"
        android:background="@android:color/darker_gray"
        android:text="记事本"
        android:gravity="center"
        android:textStyle="bold"
        android:textColor="@android:color/black"
        android:textSize="20sp" />

    <ListView
        android:id="@+id/listview"
        android:layout_width="match_parent"
        android:layout_height="match_parent"
        android:cacheColorHint="#00000000"
        android:divider="#E4E4E4E4"
        android:dividerHeight="1dp"
        android:fadingEdge="horizontal"
        android:listSelector="#00000000"
        android:scrollbars="none"
        android:layout_below="@+id/note_name">

    </ListView>

    <ImageView
        android:id="@+id/add"
        android:layout_width="60dp"
        android:layout_height="60dp"
        android:background="@drawable/add"
        android:layout_marginBottom="30dp"
        android:layout_alignParentBottom="true"
        android:layout_centerHorizontal="true"/>

</RelativeLayout>
2、记事本Item布局界面
activity_item.xml
<LinearLayout xmlns:android="http://schemas.android.com/apk/res/android"
    android:layout_width="match_parent"
    android:layout_height="match_parent"
    android:orientation="vertical"
    android:paddingLeft="12dp">
    <TextView
        android:id="@+id/ietm_content"
        android:textColor="@android:color/black"
        android:layout_width="match_parent"
        android:layout_height="wrap_content"
        android:maxLines="2"
        android:ellipsize="end"
        android:lineSpacingExtra="3dp"
        android:paddingTop="10dp"/>

    <TextView
        android:id="@+id/item_time"
        android:textColor="#fb7a6a"
        android:layout_width="match_parent"
        android:layout_height="wrap_content"
        android:paddingTop="5dp"
        android:paddingBottom="7dp"/>

</LinearLayout>
3、添加、修改界面布局
activity_record.xml
<LinearLayout xmlns:android="http://schemas.android.com/apk/res/android"
    android:layout_width="match_parent"
    android:layout_height="match_parent"
    android:orientation="vertical"
    android:background="#fefefe">

    <RelativeLayout
        android:layout_width="match_parent"
        android:layout_height="45dp"
        android:background="#E4E4E4"
        android:orientation="horizontal">
        <ImageView
            android:id="@+id/note_back"
            android:layout_width="45dp"
            android:layout_height="wrap_content"
            android:layout_centerVertical="true"
            android:paddingLeft="10dp"
            android:background="@drawable/back"/>
        <TextView
            android:id="@+id/note_name"
            android:layout_width="wrap_content"
            android:layout_height="wrap_content"
            android:layout_centerInParent="true"
            android:gravity="center"
            android:text="记事本"
            android:textColor="@android:color/black"
            android:textSize="15sp"
            android:textStyle="bold" />
    </RelativeLayout>
    <TextView
        android:id="@+id/tv_time"
        android:layout_width="match_parent"
        android:layout_height="wrap_content"
        android:textSize="15sp"
        android:paddingTop="10dp"
        android:paddingBottom="10dp"
        android:gravity="center"
        android:visibility="gone"
        android:textColor="#fb7a6a"/>
    <EditText
        android:id="@+id/note_content"
        android:layout_width="match_parent"
        android:layout_height="match_parent"
        android:layout_weight="1"
        android:gravity="top"
        android:hint="请输入要添加的内容"
        android:paddingLeft="5dp"
        android:textColor="@android:color/black"
        android:background="#fefefe"/>
    <View
        android:layout_width="match_parent"
        android:layout_height="1dp"
        android:background="#fb7a6a"/>
    <LinearLayout
        android:layout_width="match_parent"
        android:layout_height="55dp"
        android:orientation="horizontal">

        <ImageView
            android:layout_width="match_parent"
            android:layout_height="wrap_content"
            android:layout_weight="1"
            android:background="@android:color/white"
            android:paddingBottom="15dp"
            android:paddingTop="9dp"/>
        <ImageView
            android:layout_width="match_parent"
            android:layout_height="wrap_content"
            android:layout_weight="1"
            android:background="@android:color/white"
            android:paddingBottom="15dp"
            android:paddingTop="9dp"/>
        <ImageView
            android:id="@+id/delete"
            android:layout_width="match_parent"
            android:layout_height="wrap_content"
            android:layout_weight="1"
            android:background="@drawable/delete"
            android:paddingBottom="15dp"
            android:paddingTop="9dp"/>
        <ImageView
            android:layout_width="match_parent"
            android:layout_height="wrap_content"
            android:layout_weight="1"
            android:background="@android:color/white"
            android:paddingBottom="15dp"
            android:paddingTop="9dp"/>
        <ImageView
            android:layout_width="match_parent"
            android:layout_height="wrap_content"
            android:layout_weight="1"
            android:background="@android:color/white"
            android:paddingBottom="15dp"
            android:paddingTop="9dp"/>

        <ImageView
            android:id="@+id/note_save"
            android:layout_width="match_parent"
            android:layout_height="wrap_content"
            android:layout_weight="1"
            android:background="@drawable/save"
            android:paddingTop="9dp"
            android:paddingBottom="15dp" />
        <ImageView
            android:id="@+id/none2"
            android:layout_width="match_parent"
            android:layout_height="wrap_content"
            android:layout_weight="1"
            android:background="@android:color/white"
            android:paddingBottom="15dp"
            android:paddingTop="9dp"/>
        <ImageView
            android:layout_width="match_parent"
            android:layout_height="wrap_content"
            android:layout_weight="1"
            android:background="@android:color/white"
            android:paddingBottom="15dp"
            android:paddingTop="9dp"/>

    </LinearLayout>
</LinearLayout>
二、封装记录信息实体类
记事本的每个记录都会有记录内容和记录时间这两个属性,因此需要建立一个实体类用于存放这些属性。
NotepadBean.java
public class NotepadBean {
    private String id;
    private String notepadContent;
    private String notepadTime;

    public String getId() {
        return id;
    }

    public void setId(String id) {
        this.id = id;
    }

    public String getNotepadContent() {
        return notepadContent;
    }

    public void setNotepadContent(String notepadContent) {
        this.notepadContent = notepadContent;
    }

    public String getNotepadTime() {
        return notepadTime;
    }

    public void setNotepadTime(String notepadTime) {
        this.notepadTime = notepadTime;
    }
}
三、编写记事本界面列表适配器
因为记事本的纪录列表是使用ListView控件展示的,因此需要建立一个数据适配器对ListView控件进行数据适配。
NotepadAdapter.java
public class NotepadAdapter extends BaseAdapter {
    private LayoutInflater layoutInflater;
    private List<NotepadBean> list;
    public NotepadAdapter(Context context, List<NotepadBean> list){
        this.layoutInflater=LayoutInflater.from(context);
        this.list=list;
    }
    @Override
    //获取Item条目的总数
    public int getCount(){
        return list==null? 0: list.size();
    }
    @Override
    //根据position(位置)获取某个Item的对象
    public Object getItem(int position){
        return list.get(position);
    }
    @Override
    //根据position(位置)获取某个Item的id
    public long getItemId(int position){
        return position;
    }
    @Override
    //获取相应position对应的Item视图,position是当前Item的位置,convertView用于复用旧视图,parent用于加载xml布局
    public View getView(int position, View convertView, ViewGroup parent){
        ViewHolder viewHolder;
        //通过inflate()方法加载Item布局,并将获取的数据显示到对应的控件上,并判断旧视图是否为空,若为空,则创建一个ViewHolder对象
        //通过set.Tag()方法将该对象添加到convertView中进行缓存,否则把获取的旧视图进行缓存
        if(convertView==null){
            convertView=layoutInflater.inflate(R.layout.activity_item,null);
            viewHolder=new ViewHolder(convertView);
            convertView.setTag(viewHolder);
        }
        else{
            viewHolder=(ViewHolder) convertView.getTag();
        }
        NotepadBean noteInfo=(NotepadBean) getItem(position);
        viewHolder.tvNoteoadContent.setText(noteInfo.getNotepadContent());
        viewHolder.tvNotepadTime.setText(noteInfo.getNotepadTime());
        return convertView;
    }
    class ViewHolder{
        TextView tvNoteoadContent;
        TextView tvNotepadTime;
        public ViewHolder(View view){
            tvNoteoadContent=(TextView) view.findViewById(R.id.ietm_content);
            tvNotepadTime=(TextView) view.findViewById((R.id.item_time));
        }
    }
}
四、创建数据库
因为记事本的存储和读取记录的数据都是通过数据库完成的,因此需要创建数据库
1、先创建一个DBUtils类,在该类中定义数据库的名称、表名、数据库版本、数据库表中的列名以及获取当前日期等信息。
DBUtils.java
public class DBUtils {
    public static final String DATABASE_NAME="Notepad";
    public static final String DATABASE_TABLE="Note";
    public static final int DATABASE_VERSION=1;
    //数据库表中的列名
    public static final String NOTEPAD_ID="id";
    public static  final String NOTEPAD_CONTENT="content";
    public static final String NOTEPAD_TIME="notetime";
    //获取当前日期
    public static final String getTime(){
        SimpleDateFormat simpleDateFormat=new SimpleDateFormat("yyyy年MM月dd日HH:mm;ss");
        Date date=new Date(System.currentTimeMillis());
        return simpleDateFormat.format(date);
    }
}
2、创建SQLiteHelper类,在该类中实现增删改查操作
SQLiteHelper.java
public class SQLiteHelper extends SQLiteOpenHelper {
    private SQLiteDatabase sqLiteDatabase;

    //创建数据库
    public SQLiteHelper(Context context){
        super(context, DBUtils.DATABASE_NAME,null,DBUtils.DATABASE_VERSION);
        sqLiteDatabase=this.getWritableDatabase();
    }
    //创建表
    @Override
    public void onCreate(SQLiteDatabase db){
        db.execSQL("create table "+DBUtils.DATABASE_TABLE+"("+DBUtils.NOTEPAD_ID+" integer primary key autoincrement,"+DBUtils.NOTEPAD_CONTENT+" text,"+DBUtils.NOTEPAD_TIME+ " text)");
    }
    @Override
    public void onUpgrade(SQLiteDatabase db,int oldVersion,int newVersion){}
    //添加数据
    public boolean insertData(String userContent,String userTime){
        ContentValues contentValues=new ContentValues();
        contentValues.put(DBUtils.NOTEPAD_CONTENT,userContent);
        contentValues.put(DBUtils.NOTEPAD_TIME,userTime);
        return sqLiteDatabase.insert(DBUtils.DATABASE_TABLE,null,contentValues)>0;
    }
    //删除数据
    public boolean deleteData(String id){
        String sql=DBUtils.NOTEPAD_ID+"=?";
        String [] contentValuesArray=new String[]{String.valueOf(id)};
        return sqLiteDatabase.delete(DBUtils.DATABASE_TABLE,sql,contentValuesArray)>0;
    }
    //修改数据
    public boolean updateData(String id,String content,String userYear){
        ContentValues contentValues=new ContentValues();
        contentValues.put(DBUtils.NOTEPAD_CONTENT,content);
        contentValues.put(DBUtils.NOTEPAD_TIME,userYear);
        String sql=DBUtils.NOTEPAD_ID+"=?";
        String [] strings=new String[] {id};
        return sqLiteDatabase.update(DBUtils.DATABASE_TABLE,contentValues,sql,strings)>0;
    }
    //查询数据
    public List<NotepadBean> query(){
        List<NotepadBean> list =new ArrayList<NotepadBean>();
        Cursor cursor=sqLiteDatabase.query(DBUtils.DATABASE_TABLE,null,null,null,null,null,DBUtils.NOTEPAD_ID+" desc");
        if(cursor!=null){
            while(cursor.moveToNext()){
                NotepadBean noteInfo=new NotepadBean();
                @SuppressLint("range")
                String id=String.valueOf(cursor.getInt(cursor.getColumnIndex(DBUtils.NOTEPAD_ID)));
                @SuppressLint("range")
                String content=cursor.getString(cursor.getColumnIndex(DBUtils.NOTEPAD_CONTENT));
                @SuppressLint("range")
                String time=cursor.getString(cursor.getColumnIndex(DBUtils.NOTEPAD_TIME));
                noteInfo.setId(id);
                noteInfo.setNotepadContent(content);
                noteInfo.setNotepadTime(time);
                list.add(noteInfo);
            }
            cursor.close();
        }
        return list;
    }
}
五、实现添加记录界面功能
因为添加记录界面有保存和删除按钮,因此创建记录类实现点击事件,将编写的内容添加到数据库中。
RecordActivity.java
public class RecordActivity extends AppCompatActivity implements View.OnClickListener{
    ImageView delete,note_save,note_back;
    TextView noteName,note_time;
    EditText content;
    SQLiteHelper mSQLiteHelper;
    String id;


    @Override
    protected void onCreate(Bundle savedInstanceState) {
        super.onCreate(savedInstanceState);
        setContentView(R.layout.activity_record);
        //通过findViewById获取界面控件
        note_back=(ImageView) findViewById(R.id.note_back);
        note_save=(ImageView) findViewById(R.id.note_save);
        delete=(ImageView) findViewById(R.id.delete);
        noteName=(TextView) findViewById(R.id.note_name);
        note_time=(TextView) findViewById(R.id.tv_time);
        content=(EditText) findViewById(R.id.note_content);
        //设置启动器
        note_back.setOnClickListener(this);
        delete.setOnClickListener(this);
        note_save.setOnClickListener(this);
        //初始化
        initData();
    }
    protected void initData(){
        //创建数据库
        mSQLiteHelper=new SQLiteHelper(this);
        noteName.setText("添加记录");
        //接收记事本传来的消息
        //getIntent()方法获取Intent对象
        Intent intent=getIntent();
        if(intent!=null){
            //获取传递的记录id
            id=intent.getStringExtra("id");
            if(id!=null){
                noteName.setText("修改记录");
                content.setText(intent.getStringExtra("content"));
                note_time.setText(intent.getStringExtra("time"));
                note_time.setVisibility(View.VISIBLE);
            }
        }
    }
    public void onClick(View v){
        switch (v.getId()){
            //后退,删除,保存事件
            case R.id.note_back:
                finish();
                break;
            case R.id.delete:
                content.setText("");
                break;
            case R.id.note_save:
                //通过getText()获取输入内容
                String noteContent=content.getText().toString().trim();
                if(id!=null){
                    if(noteContent.length()>0){
                        if(mSQLiteHelper.updateData(id,noteContent,DBUtils.getTime())){
                            showToast("修改成功");
                            setResult(2);
                            finish();
                        }
                        else{
                            showToast("保存失败");
                        }
                    }
                    else{
                        showToast("保存内容不能为空");
                    }
                }
             //向数据库添加数据
                else{
                    if(noteContent.length()>0){
                        if(mSQLiteHelper.insertData(noteContent,DBUtils.getTime())){
                            showToast("保存成功");
                            setResult(2);
                            finish();
                        }
                        else{
                            showToast("保存失败");
                        }
                    }
                    else{
                        showToast("修改内容不能为空");
                    }
                }
                break;
            }
    }
    public void showToast(String Message){
        Toast.makeText(RecordActivity.this,Message,Toast.LENGTH_SHORT).show();
    }
}
六、实现记事本界面的显示功能
等于就是刚进入程序的界面的选择与操作
MainActivity.java
public class MainActivity extends Activity {
    ListView listView;
    List<NotepadBean> list;
    SQLiteHelper mSQLiteHelper;
    NotepadAdapter adapter;
    @Override
    protected void onCreate(Bundle savedInstanceState) {
        super.onCreate(savedInstanceState);
        setContentView(R.layout.activity_notepad);
        //用于显示记录的列表
        listView=(ListView) findViewById(R.id.listview);
        ImageView add=(ImageView) findViewById(R.id.add);
        //设置添加按钮事件
        add.setOnClickListener(new View.OnClickListener() {
            @Override
            public void onClick(View v) {
                //使用显示Intent指定要跳转的目标Activity,并通过startActivityForResult()方法开启目标Activity
                Intent intent=new Intent(MainActivity.this,RecordActivity.class);
                startActivityForResult(intent,1);
            }
        });
        initData();
    }
    protected void initData() {
        //创建数据库
        mSQLiteHelper = new SQLiteHelper(this);
        showQueryData();
        //处理查看记事本详细信息
        listView.setOnItemClickListener(new AdapterView.OnItemClickListener() {
            @Override
            public void onItemClick(AdapterView<?> parent, View view, int position, long id) {
                //通过get方法获取对应的Item数据
                NotepadBean notepadBean=list.get(position);
                //通过putExtra()方法封装到Intent对象中
                Intent intent=new Intent(MainActivity.this,RecordActivity.class);
                intent.putExtra("id",notepadBean.getId());
                intent.putExtra("time",notepadBean.getNotepadTime());
                intent.putExtra("content",notepadBean.getNotepadContent());
                MainActivity.this.startActivityForResult(intent,1);
            }
        });
        //删除记事本记录
        listView.setOnItemLongClickListener(new AdapterView.OnItemLongClickListener() {
            @Override
            public boolean onItemLongClick(AdapterView<?> parent, View view, int position, long id) {
                AlertDialog dialog;
                AlertDialog.Builder builder=new AlertDialog.Builder(MainActivity.this)
                        .setMessage("是否删除此纪录?")
                        .setPositiveButton("确定", new DialogInterface.OnClickListener() {
                            @Override
                            public void onClick(DialogInterface dialog, int which) {
                                //获取Item对象
                                NotepadBean notepadBean=list.get(position);
                                if(mSQLiteHelper.deleteData(notepadBean.getId())){
                                    //删除对应的Item
                                    list.remove(position);
                                    //更新记事本界面
                                    adapter.notifyDataSetChanged();
                                    Toast.makeText(MainActivity.this,"删除成功",Toast.LENGTH_SHORT).show();
                                }
                            }
                        })
                        .setPositiveButton("取消", new DialogInterface.OnClickListener() {
                            @Override
                            public void onClick(DialogInterface dialog, int which) {
                                dialog.dismiss();
                            }
                        });
                dialog=builder.create();
                dialog.show();
                return true;
            }
        });
    }
    private void showQueryData(){
        if(list!=null){
            list.clear();
        }
        //从数据库中查询数据
        list=mSQLiteHelper.query();
        adapter=new NotepadAdapter(this,list);
        listView.setAdapter(adapter);
    }
    @Override
    //重写,当关闭添加记录界面时,程序回调该方法
    // 并在该方法中调用showQueryData()方法重新获取数据库中保存的记录数据并显示到记录列表中
    protected void onActivityResult(int requestCode,int resultCode,Intent data){
        super.onActivityResult(requestCode,resultCode,data);
        if(requestCode==1&&resultCode==2){
            showQueryData();
        }
    }
}
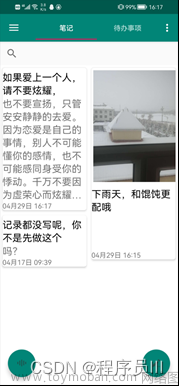
七、运行结果截图
主界面

选择添加按钮之后进入编写界面


修改界面文章来源:https://www.toymoban.com/news/detail-448637.html

 文章来源地址https://www.toymoban.com/news/detail-448637.html
到了这里,关于Android Studio——记事本案例的文章就介绍完了。如果您还想了解更多内容,请在右上角搜索TOY模板网以前的文章或继续浏览下面的相关文章,希望大家以后多多支持TOY模板网!

