前言
本文介绍vue项目里引入百度Ueditor富文本编辑器,集成135编辑器和秀米编辑器,使内容编辑更加丰富,跳转体验更加丝滑。再封装成组件,使用更加快捷。
效果预览
编辑器主界面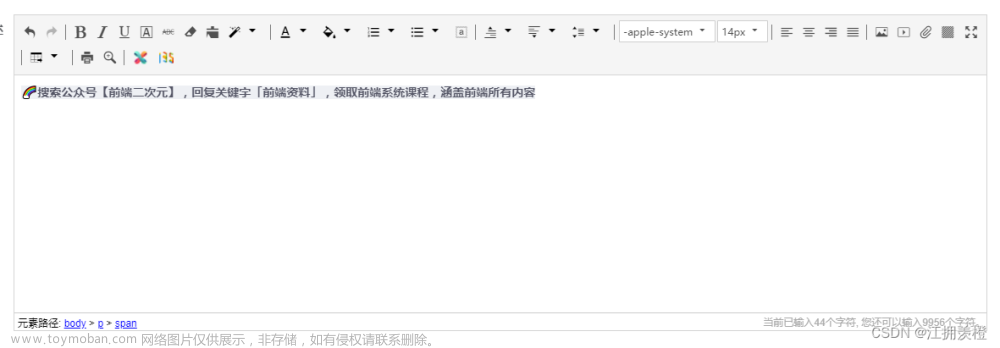
弹框打开135编辑器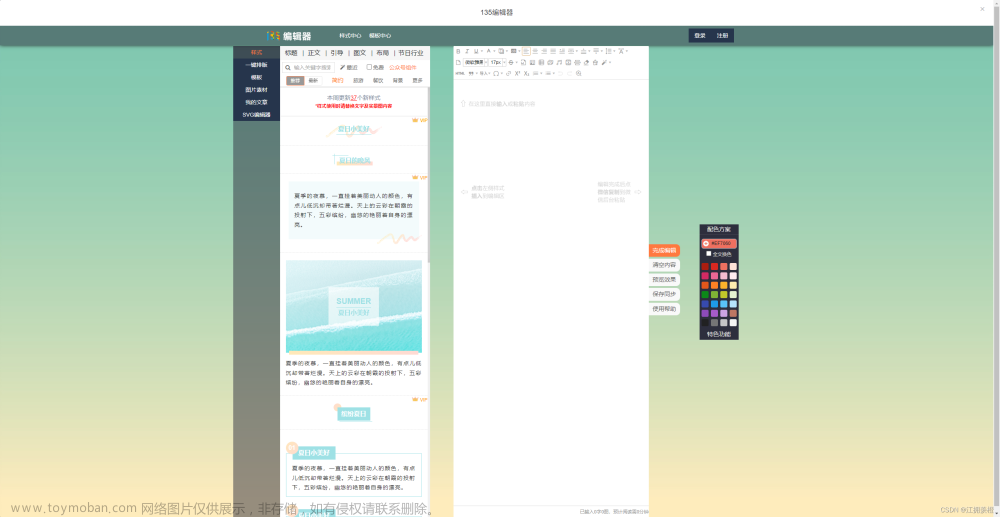
弹框打开秀米编辑器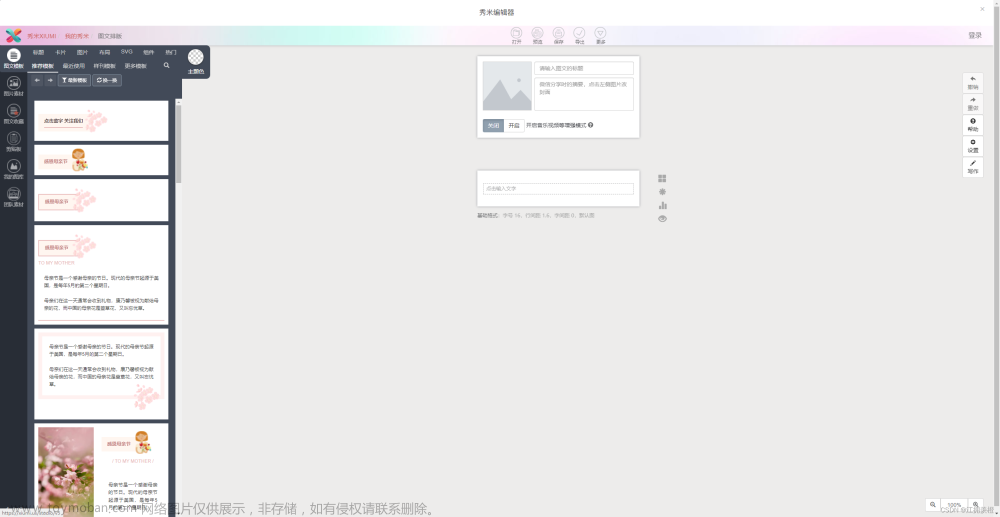
操作说明:ueditor编辑器菜单栏集成135和秀米图标,点击分别弹框打开,完成编辑后内容带回到ueditor编辑器,另外引入了主题文件,对样式进行了美化。
Ueditor原始样式如下图: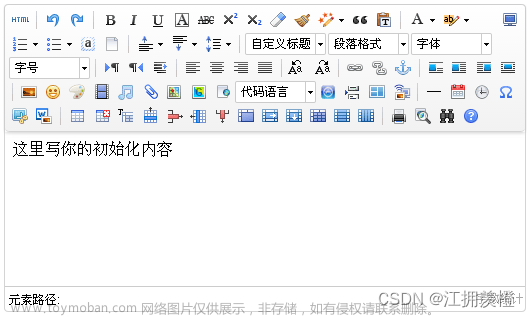
说实话是有点丑,emm…,还是10年前的图标样式,这也是为什么要美化样式的原因。
Tips:当然也可以用网上的封装组件vue-ueditor-wrap,这个用的人也比较多,文档地址:https://hc199421.gitee.io/vue-ueditor-wrap/#/home,不过使用过程中会有一点小坑,这里不做过多说明。
回到正题,本文介绍使用源码集成方式,下面开始教程!
教程
1. 首先下载主题美化插件
地址:https://pan.quark.cn/s/ce9519209fcd注:本次下载的即ueditor编辑器源码,是引入主题样式美化后的源码。
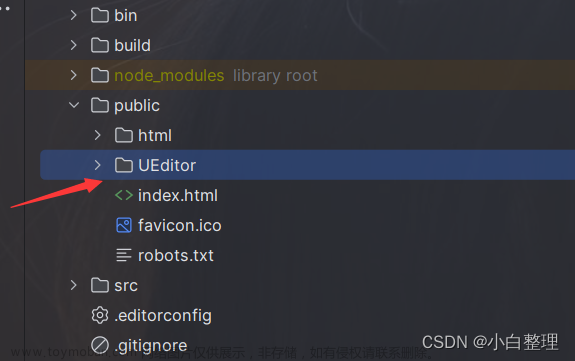
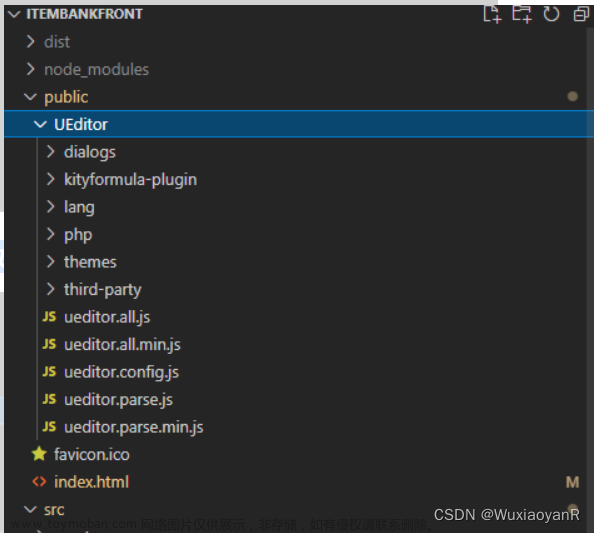
下载完解压后放到public文件夹下,下图是目录结构(和下载的有些不一样,图片是已经继集成了135个秀米的):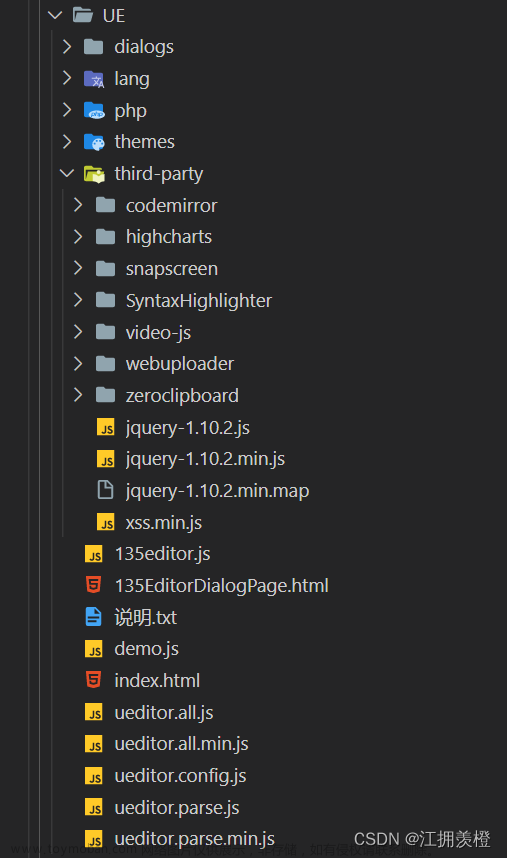
2. 接入135编辑器
地址:http://www.135plat.com/135_ueditor_plugin.html
操作参考文档配置即可,本文省略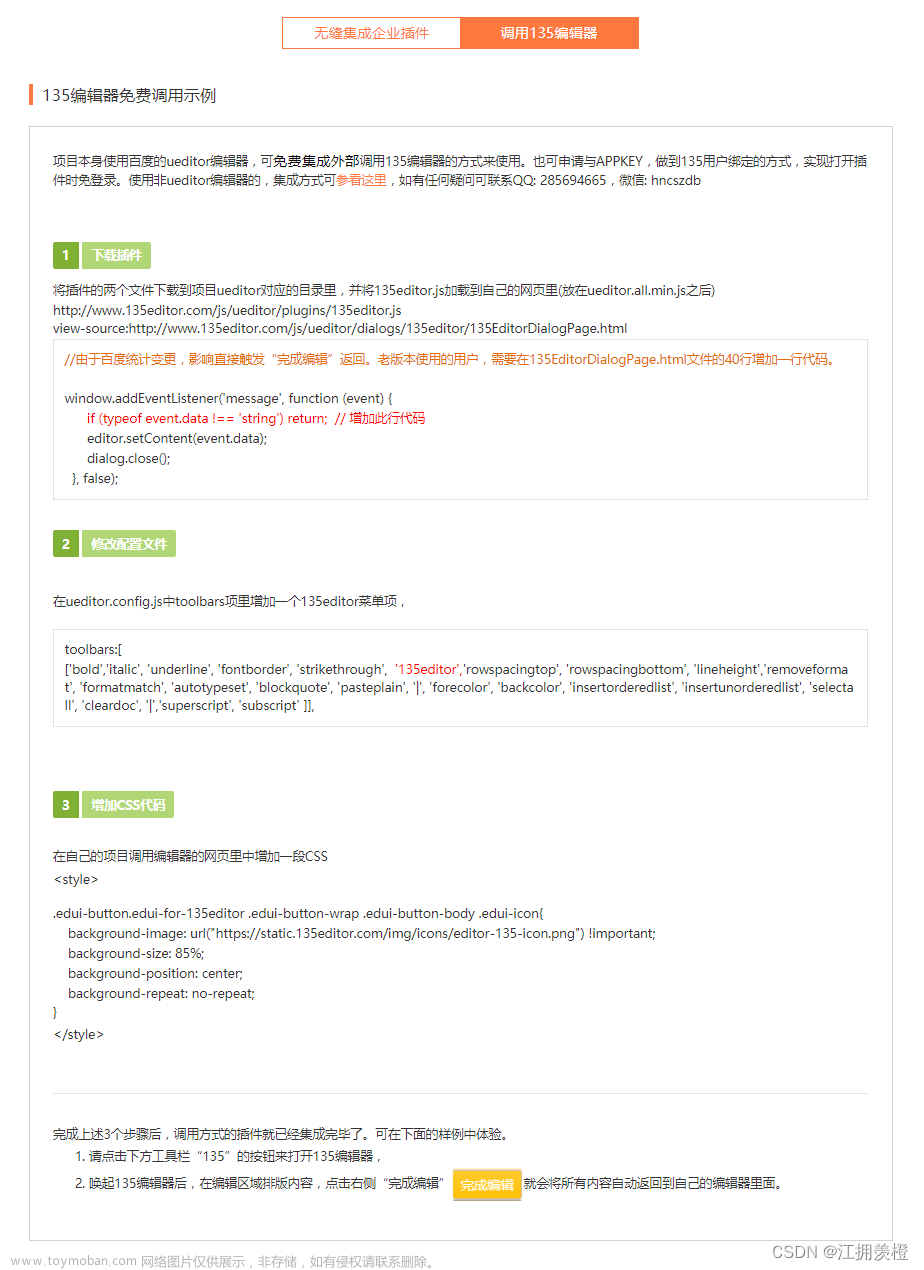
3. 接入秀米编辑器
地址:https://ent.xiumi.us/ue/文章来源:https://www.toymoban.com/news/detail-450485.html
4. 组件封装
  <div>
    <script :id="id" type="text/plain"></script>
    <el-dialog
      :visible.sync="dialog"
      :destroy-on-close="true"
      :title="title"
      :center="true"
      :fullscreen="true">
      <iframe :src="url" width="100%" :height="(fullheight - 150)+'px'"></iframe>
    </el-dialog>
  </div>
</template>

<script>
export default {
  name: "UE",
  data() {
    return {
      editor: null,
      dialog: false,
      url: '',
      fullheight: document.documentElement.clientHeight,
      title:'',
    };
  },
  props: {
    defaultMsg: {
      type: String
    },
    config: {
      type: Object
    },
    id: {
      type: String
    }
  },


  created() {
    let that = this;
    //  ------------------秀米------------------------
    window.UE.registerUI('dialog', function (editor, uiName) {
      var btn = new UE.ui.Button({
        name: 'xiumi-connect',
        title: '秀米',
        onclick: function () {
          that.url = editor.ui.UEDITOR_HOME_URL+'dialogs/xiumi-ue-dialog-v5.html';
          that.title = "秀米编辑器";
          window.setRichText = that.setRichText;
          window.getHtml = that.getUEContent;
          that.dialog = true;
          that.editor = editor;
        }
      });
      return btn;
    });


    //------------------- 135editor-------------------------
    window.UE.registerUI('135editor', function (editor, uiName) {
      var btn = new UE.ui.Button({
        name: 'btn-dialog-' + uiName,
        className: 'edui-for-135editor',
        title: '135编辑器',
        onclick: function () {
          that.url = editor.ui.UEDITOR_HOME_URL + 'dialogs/135EditorDialogPage.html?callback=true&appkey=';
          that.title = "135编辑器";
          window.setRichText = that.setRichText;
          window.getHtml = that.getUEContent;
          that.dialog = true;
          that.editor = editor;
        }
      });
      return btn;
    });

  },


  mounted() {
    const _this = this;
    this.editor = window.UE.getEditor(this.id, this.config); // 初始化UE
    this.editor.addListener("ready", function () {
      _this.editor.setContent(_this.defaultMsg); // 确保UE加载完成后,放入内容。
    });
  },
  methods: {

    setRichText(text) {
      this.editor.setContent(text); // 确保UE加载完成后,放入内容。
      this.dialog = false
    },
    getUEContent() {
      // 获取内容方法
      return this.editor.getContent();
    },
    getUEContentTxt() {
      // 获取纯文本内容方法
      return this.editor.getContentTxt();
    },

  },
  destroyed() {
    this.editor.destroy();
  }
};
</script>

<style lang="scss" scoped>
iframe{
  width: 100%;
  height: 100%;
  border: none!important;
}
::v-deep .el-dialog__header{
  // display: none;
  padding: 0;
  height: 5vh;
  line-height: 5vh!important;
}
::v-deep .el-dialog__body{
  padding: 0;
  margin: 0;
  height: 95vh;
}
::v-deep .el-dialog__headerbtn {
  top: 15px;
}
</style>
5. main.js引入样式和js文件
import '../public/static/UE/ueditor.config.js'
import '../public/static/UE/ueditor.all.min.js'
import '../public/static/UE/lang/zh-cn/zh-cn.js'
import '../public/static/UE/ueditor.parse.js'
import '../public/static/UE/dialogs/xiumi-ue-dialog-v5.js'
import '../public/static/UE/dialogs/xiumi-ue-v5.css'
import '../public/static/UE/dialogs/135editor.js'
import '../public/static/UE/dialogs/135-ue-v5.css'
import '../public/static/UE/themes/default/css/ueditor.css'
6. 页面使用
 //模板
 <UE :defaultMsg="form.noticeContent" :config="config" ref="ue" :id="ue1" ></UE>


//引入
import UE from "@/components/Ueditor/index";
//注册
components: { UE }

//data数据定义
 form: {
        noticeContent:''
 },
 config: {
        initialFrameWidth: null,
        initialFrameHeight: 280
     },
ue1: "ue1", // 每个编辑器有不同的id
完成!

🌈文末福利:搜索公众号【前端二次元】回复关键字「前端资料」,领取前端系统课程,涵盖前端所有内容。文章来源地址https://www.toymoban.com/news/detail-450485.html
到了这里,关于vue项目百度ueditor编辑器集成135和秀米,主题图标美化的文章就介绍完了。如果您还想了解更多内容,请在右上角搜索TOY模板网以前的文章或继续浏览下面的相关文章,希望大家以后多多支持TOY模板网!

