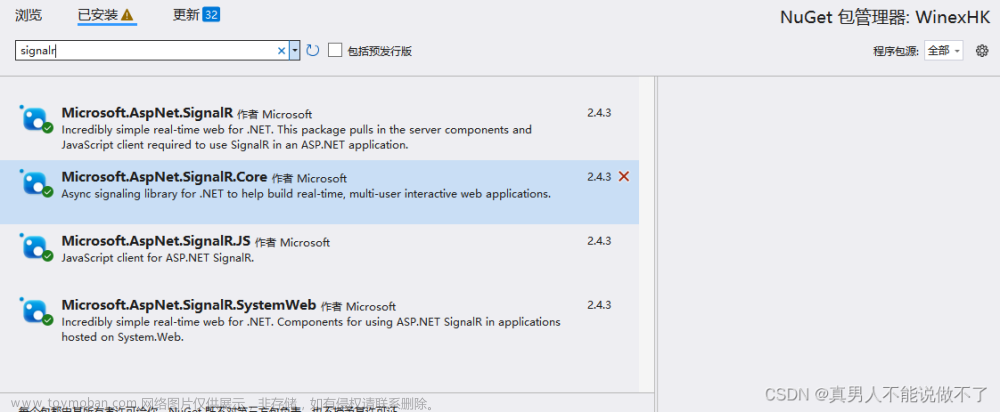
1、什么是SignalR
ASP.NET SignalR 是一个面向 ASP.NET 开发人员的库,可简化向应用程序添加实时 Web 功能的过程。 实时 Web 功能是让服务器代码在可用时立即将内容推送到连接的客户端,而不是让服务器等待客户端请求新数据。
SignalR使用的三种底层传输技术分别是Web Socket, Server Sent Events 和 Long Polling, 它让你更好的关注业务问题而不是底层传输技术问题。
WebSocket是最好的最有效的传输方式, 如果浏览器或Web服务器不支持它的话(IE10之前不支持Web Socket), 就会降级使用SSE, 实在不行就用Long Polling。
(现在也很难找到不支持WebSocket的浏览器了,所以我们一般定义必须使用WebSocket)
文章来源地址https://www.toymoban.com/news/detail-456026.html
2、我们做一个聊天室,实现一下SignalR前后端通讯
由简入深,先简单实现一下
2.1 服务端Net5
using Microsoft.AspNetCore.Authorization;
using Microsoft.AspNetCore.SignalR;
using System;
using System.Threading.Tasks;

namespace ServerSignalR.Models
{
    public class ChatRoomHub:Hub
    {
        public override Task OnConnectedAsync()//连接成功触发
        {
            return base.OnConnectedAsync();
        }

        public Task SendPublicMsg(string fromUserName,string msg)//给所有client发送消息
        {
            string connId = this.Context.ConnectionId;
            string str = $"[{DateTime.Now}]{connId}\r\n{fromUserName}:{msg}";
            return this.Clients.All.SendAsync("ReceivePublicMsg",str);//发送给ReceivePublicMsg方法,这个方法由SignalR机制自动创建
        }
    }
}
Startup添加
        static string _myAllowSpecificOrigins = "MyAllowSpecificOrigins";
        public void ConfigureServices(IServiceCollection services)
        {

            services.AddControllers();
            services.AddSwaggerGen(c =>
            {
                c.SwaggerDoc("v1", new OpenApiInfo { Title = "ServerSignalR", Version = "v1" });
            });
            services.AddSignalR();
            services.AddCors(options =>
            {
                options.AddPolicy(_myAllowSpecificOrigins, policy =>
                {
                    policy.WithOrigins("http://localhost:4200")
                    .AllowAnyHeader().AllowAnyMethod().AllowCredentials();
                });
            });
        }

        // This method gets called by the runtime. Use this method to configure the HTTP request pipeline.
        public void Configure(IApplicationBuilder app, IWebHostEnvironment env)
        {
            if (env.IsDevelopment())
            {
                app.UseDeveloperExceptionPage();
                app.UseSwagger();
                app.UseSwaggerUI(c => c.SwaggerEndpoint("/swagger/v1/swagger.json", "ServerSignalR v1"));
            }
            app.UseCors(_myAllowSpecificOrigins);
            app.UseHttpsRedirection();
            app.UseRouting();
            app.UseAuthorization();
            app.UseEndpoints(endpoints =>
            {
                endpoints.MapControllers();
                endpoints.MapHub<ChatRoomHub>("/Hubs/ChatRoomHub");
            });
        }
2.2 前端Angular
引入包
npm i --save @microsoft/signalr
ts:
import { Component, OnInit } from '@angular/core';
import * as signalR from '@microsoft/signalr';
import { CookieService } from 'ngx-cookie-service';

@Component({
  selector: 'app-home',
  templateUrl: './home.component.html',
  styleUrls: ['./home.component.scss']
})
export class HomeComponent implements OnInit {
  msg = '';
  userName='kxy'
  public messages: string[] = [];
  public hubConnection: signalR.HubConnection;

  constructor(
    private cookie: CookieService
  ) {this.hubConnection=new signalR.HubConnectionBuilder()
    .withUrl('https://localhost:44313/Hubs/ChatRoomHub',
      {
        skipNegotiation:true,//跳过三个协议协商
        transport:signalR.HttpTransportType.WebSockets,//定义使用WebSocket协议通讯
      }
    )
    .withAutomaticReconnect()
    .build();
    this.hubConnection.on('ReceivePublicMsg',msg=>{
      this.messages.push(msg);
      console.log(msg);
    });
  }
  ngOnInit(): void {
  }
  JoinChatRoom(){
    this.hubConnection.start()
    .catch(res=>{
      this.messages.push('连接失败');
      throw res;
    }).then(x=>{
      this.messages.push('连接成功');
    });
  }
  SendMsg(){
    if(!this.msg){
      return;
    }
    this.hubConnection.invoke('SendPublicMsg', this.userName,this.msg);
  }
}
这样就简单实现了SignalR通讯!!!
有一点值得记录一下
问题:强制启用WebSocket协议,有时候发生错误会被屏蔽,只是提示找不到/连接不成功
解决:可以先不跳过协商,调试完成后再跳过
3、引入Jwt进行权限验证
安装Nuget包:Microsoft.AspNetCore.Authentication.JwtBearer
Net5的,注意包版本选择5.x,有对应关系
Startup定义如下
using Microsoft.AspNetCore.Builder;
using Microsoft.AspNetCore.Hosting;
using Microsoft.Extensions.Configuration;
using Microsoft.Extensions.DependencyInjection;
using Microsoft.Extensions.Hosting;
using Microsoft.OpenApi.Models;
using ServerSignalR.Models;
using System;
using System.Collections.Generic;
using System.Linq;
using System.Threading.Tasks;
using System.Text;
using Microsoft.AspNetCore.Authentication.JwtBearer;
using Microsoft.IdentityModel.Tokens;
using JwtHelperCore;

namespace ServerSignalR
{
    public class Startup
    {
        public Startup(IConfiguration configuration)
        {
            Configuration = configuration;
        }

        public IConfiguration Configuration { get; }

        // This method gets called by the runtime. Use this method to add services to the container.
        static string _myAllowSpecificOrigins = "MyAllowSpecificOrigins";
        public void ConfigureServices(IServiceCollection services)
        {

            services.AddControllers();
            services.AddSwaggerGen(c =>
            {
                c.SwaggerDoc("v1", new OpenApiInfo { Title = "ServerSignalR", Version = "v1" });
            });
            services.AddAuthentication(JwtBearerDefaults.AuthenticationScheme)
                .AddJwtBearer(options =>
                {
                    options.RequireHttpsMetadata = false;//是否需要https
                    options.TokenValidationParameters = new TokenValidationParameters
                    {
                        ValidateIssuer = false,//是否验证Issuer
                        ValidateAudience = false,//是否验证Audience
                        ValidateLifetime = true,//是否验证失效时间
                        ValidateIssuerSigningKey = true,//是否验证SecurityKey
                        IssuerSigningKey = new SymmetricSecurityKey(Encoding.UTF8.GetBytes("VertivSecurityKey001")),//拿到SecurityKey
                    };
                    options.Events = new JwtBearerEvents()//从url获取token
                    {
                        OnMessageReceived = context =>
                        {
                            if (context.HttpContext.Request.Path.StartsWithSegments("/Hubs/ChatRoomHub"))//判断访问路径
                            {
                                var accessToken = context.Request.Query["access_token"];//从请求路径获取token
                                if (!string.IsNullOrEmpty(accessToken))
                                    context.Token = accessToken;//将token写入上下文给Jwt中间件验证
                            }
                            return Task.CompletedTask;
                        }
                    };
                }
            );

            services.AddSignalR();

            services.AddCors(options =>
            {
                options.AddPolicy(_myAllowSpecificOrigins, policy =>
                {
                    policy.WithOrigins("http://localhost:4200")
                    .AllowAnyHeader().AllowAnyMethod().AllowCredentials();
                });
            });
        }

        // This method gets called by the runtime. Use this method to configure the HTTP request pipeline.
        public void Configure(IApplicationBuilder app, IWebHostEnvironment env)
        {
            if (env.IsDevelopment())
            {
                app.UseDeveloperExceptionPage();
                app.UseSwagger();
                app.UseSwaggerUI(c => c.SwaggerEndpoint("/swagger/v1/swagger.json", "ServerSignalR v1"));
            }

            app.UseCors(_myAllowSpecificOrigins);
            app.UseHttpsRedirection();

            app.UseRouting();

            //Token  授权、认证
            app.UseErrorHandling();//自定义的处理错误信息中间件
            app.UseAuthentication();//判断是否登录成功
            app.UseAuthorization();//判断是否有访问目标资源的权限

            app.UseEndpoints(endpoints =>
            {
                endpoints.MapHub<ChatRoomHub>("/Hubs/ChatRoomHub");
                endpoints.MapControllers();
            });
        }
    }
}
红色部分为主要关注代码!!!
因为WebSocket无法自定义header,token信息只能通过url传输,由后端获取并写入到上下文
认证特性使用方式和http请求一致:
using Microsoft.AspNetCore.Authorization;
using Microsoft.AspNetCore.SignalR;
using System;
using System.Linq;
using System.Threading.Tasks;

namespace ServerSignalR.Models
{
    [Authorize]//jwt认证
    public class ChatRoomHub:Hub
    {

        public override Task OnConnectedAsync()//连接成功触发
        {
            return base.OnConnectedAsync();
        }

        public Task SendPublicMsg(string msg)//给所有client发送消息
        {
            var roles = this.Context.User.Claims.Where(x => x.Type.Contains("identity/claims/role")).Select(x => x.Value).ToList();//获取角色
            var fromUserName = this.Context.User.Identity.Name;//从token获取登录人,而不是传入(前端ts方法的传入参数也需要去掉)
            string connId = this.Context.ConnectionId;
            string str = $"[{DateTime.Now}]{connId}\r\n{fromUserName}:{msg}";
            return this.Clients.All.SendAsync("ReceivePublicMsg",str);//发送给ReceivePublicMsg方法,这个方法由SignalR机制自动创建
        }
    }
}
然后ts添加
  constructor(
    private cookie: CookieService
  ) {
    var token  = this.cookie.get('spm_token');
    this.hubConnection=new signalR.HubConnectionBuilder()
    .withUrl('https://localhost:44313/Hubs/ChatRoomHub',
      {
        skipNegotiation:true,//跳过三个协议协商
        transport:signalR.HttpTransportType.WebSockets,//定义使用WebSocket协议通讯
        accessTokenFactory:()=> token.slice(7,token.length)//会自动添加Bearer头部,我这里已经有Bearer了,所以需要截掉
      }
    )
    .withAutomaticReconnect()
    .build();
    this.hubConnection.on('ReceivePublicMsg',msg=>{
      this.messages.push(msg);
      console.log(msg);
    });
  }
4、私聊
Hub
using Microsoft.AspNetCore.Authorization;
using Microsoft.AspNetCore.SignalR;
using System;
using System.Collections.Generic;
using System.Threading.Tasks;

namespace ServerSignalR.Models
{
    [Authorize]//jwt认证
    public class ChatRoomHub:Hub
    {
        private static List<UserModel> _users = new List<UserModel>();
        public override Task OnConnectedAsync()//连接成功触发
        {
            var userName = this.Context.User.Identity.Name;//从token获取登录人
            _users.Add(new UserModel(userName, this.Context.ConnectionId));
            return base.OnConnectedAsync();
        }
        public override Task OnDisconnectedAsync(Exception exception)
        {
            var userName = this.Context.User.Identity.Name;//从token获取登录人
            _users.RemoveRange(_users.FindIndex(x => x.UserName == userName), 1);
            return base.OnDisconnectedAsync(exception);
        }

        public Task SendPublicMsg(string msg)//给所有client发送消息
        {
            var fromUserName = this.Context.User.Identity.Name;
            //var ss = this.Context.User!.FindFirst(ClaimTypes.Name)!.Value;
            string str = $"[{DateTime.Now}]\r\n{fromUserName}:{msg}";
            return this.Clients.All.SendAsync("ReceivePublicMsg",str);//发送给ReceivePublicMsg方法,这个方法由SignalR机制自动创建
        }

        public Task SendPrivateMsg(string destUserName, string msg)
        {
            var fromUser = _users.Find(x=>x.UserName== this.Context.User.Identity.Name);
            var toUser = _users.Find(x=>x.UserName==destUserName);
            string str = $"";
            if (toUser == null)
            {
                msg = $"用户{destUserName}不在线";
                str = $"[{DateTime.Now}]\r\n系统提示:{msg}";
                return this.Clients.Clients(fromUser.WebScoketConnId).SendAsync("ReceivePrivateMsg", str);
            }
            str = $"[{DateTime.Now}]\r\n{fromUser.UserName}-{destUserName}:{msg}";
            return this.Clients.Clients(fromUser.WebScoketConnId,toUser.WebScoketConnId).SendAsync("ReceivePrivateMsg", str);
        }
    }
}
TS:
//加一个监听
    this.hubConnection.on('ReceivePublicMsg', msg => {
      this.messages.push('公屏'+msg);
      console.log(msg);
    });
    this.hubConnection.on('ReceivePrivateMsg',msg=>{
      this.messages.push('私聊'+msg);
      console.log(msg);
    });

//加一个发送
    if (this.talkType == 1)
      this.hubConnection.invoke('SendPublicMsg', this.msg);
    if (this.talkType == 3){
      console.log('11111111111111');
      this.hubConnection.invoke('SendPrivateMsg',this.toUserName, this.msg);
    }
5、在控制器中使用Hub上下文
Hub链接默认30s超时,正常情况下Hub只会进行通讯,而不再Hub里进行复杂业务运算
如果涉及复杂业务计算后发送通讯,可以将Hub上下文注入外部控制器,如
namespace ServerSignalR.Controllers
{
    //[Authorize]
    public class HomeController : Controller
    {
        private IHubContext<ChatRoomHub> _hubContext;
        public HomeController(IHubContext<ChatRoomHub> hubContext)
        {
            _hubContext = hubContext;
        }
        [HttpGet("Welcome")]
        public async Task<ResultDataModel<bool>> Welcome()
        {
            await _hubContext.Clients.All.SendAsync("ReceivePublicMsg", "欢迎");
            return new ResultDataModel<bool>(true);
        }
    }
}
6、SignalR传输图片和文件
原理十分简单,是把图片转成blob进行传输
html核心代码
    <form>
      <input class="col-md-9" id="file" type="file" name='file' (change)="SelFile($event)">
      <div class="btn btn-outline-success col-md-2" (click)="SendFile()">SendFile</div>
    </form>

    <ul>
      <li class="list-group-item" *ngFor="let item of messages">
        <ng-container *ngIf="item.Type=='String'"> <!-文字消息->
          {{item.FromUser}}-{{item.SendDateTime}}<br />
          {{item.Value}}
        </ng-container>
        <ng-container *ngIf="item.Type=='Images'">
          {{item.FromUser}}-{{item.SendDateTime}}<br />
          <img [src]="item.Value" name="图片" style="width: 100px;">
        </ng-container>
        <ng-container *ngIf="item.Type=='File'">
          {{item.FromUser}}-{{item.SendDateTime}}<br />
          <a [href]="item.Value" [download]="item.FileName">{{item.FileName}}</a>
        </ng-container>
      </li>
    </ul>
ts:选择和发送
  blob: string = ''
  selFileName: string = ''
  SelFile(e: any) {
    console.log(e);
    if (e.target.files.length != 0) {      let file = e.target.files[0];
      const reader = new FileReader();
      reader.readAsDataURL(file);
      reader.onload = () => {
        this.blob = reader.result as string;
        this.selFileName = file.name
      }    }
    if (e.target.files.length == 0) {
      this.blob = ''
      this.selFileName = ''
    }
  }

  SendFile() {
    if (!this.blob)
      return;
    if (this.blob.split(';')[0].indexOf('image') != -1){
      this.hubConnection.invoke('SendFile', this.blob, 'Images',this.selFileName);
      return;
    }
    this.hubConnection.invoke('SendFile', this.blob, 'File', this.selFileName);
  }
ts:监听后端数据
    this.hubConnection.on('FileMsg', (datetime, fromUserAccount, msg, type,fileName) => {
      this.messages.push(new MsgInfo(datetime, fromUserAccount, msg).setType(type).setFileName(fileName));
    });
Net:后端hub
        public Task SendFile(string msg, string type, string fileName)
        {
            var fromUserAccount = this.Context.User.Identity.Name;
            return this.Clients.All.SendAsync("FileMsg", DateTime.Now.ToString(), fromUserAccount, msg, type, fileName);
        }
Net:SignalR默认接收字符串只有1000字节,正常会超过此范围,需要修改接受字符串长度
            services.AddSignalR(hubOptions =>
            {
                hubOptions.MaximumReceiveMessageSize = 10 * 1024 * 1024;//10M
            });
至此,感谢关注!!文章来源:https://www.toymoban.com/news/detail-456026.html
到了这里,关于SignalR WebSocket通讯机制的文章就介绍完了。如果您还想了解更多内容,请在右上角搜索TOY模板网以前的文章或继续浏览下面的相关文章,希望大家以后多多支持TOY模板网!


