最近项目用到定位,但是又不想重新画PCB,因此打算做一个仅通过WIFI来定位的小硬件,但找了很多家,比如高德、百度这些都没有面向个人开发者的硬件网络定位接口,兜兜转转还是找到了一家做物联网全域定位的公司叫维智科技,他们的物联网定位平台是这个https://lotboard.newayz.com/,个人开发者注册的话配额还是挺充裕的,特别是每日100次请求,很适合我们这些做智能硬件的。
根据开发手册体验了一下,只需要最少4个WiFi信息或者通过定位模块解析的坐标就可以返回详细的信息了,返回的数据是这样的。
{
    "id": "38efe26e-************************",
    "asset": "d1c09200-9254-11ed-*******************",
    "location": {
        "timestamp": 1673513233302,
        "address": {
            "name": "湖北省武汉市*************************************",
            "context": [
                {
                    "type": "Country",
                    "name": "中国",
                    "code": "CN"
                },
                {
                    "type": "Province",
                    "name": "湖北省",
                    "code": "420000"
                },
                {
                    "type": "City",
                    "name": "武汉市",
                    "code": "420100"
                },
                {
                    "type": "District",
                    "name": "****",
                    "code": "42****"
                },
                {
                    "type": "Township",
                    "name": "****",
                    "code": "42****"
                },
                {
                    "type": "Road",
                    "name": "****"
                },
                {
                    "type": "Building",
                    "name": "*********"
                },
                {
                    "type": "Floor",
                    "name": "*********"
                }
            ],
            "level": 14
        },
        "place": {
            "type": "Food",
            "name": "***********",
            "categories": [
                {
                    "id": 30200,
                    "name": "*****"
                }
            ],
            "distance": {
                "line": 15.863497
            }
        },
        "position": {
            "timestamp": 1673513234166,
            "source": "wifi",
            "point": {
                "longitude": 114.4*******,
                "latitude": 30.5******
            },
            "spatialReference": "gcj02",
            "accuracy": 29
        }
    }
}
可以看到还是挺详细的,配合第三方json库直接就可以解析得到当前地址和坐标了,对于无定位模块的设备来说简直是个福音,这样一下子能做的事情就变得多起来了,话不多说就拿这个平台做个定位硬件出来玩玩。
这个平台的注册和设备注册我另外一个帖子已经写了,这里就不写了。STM32-ESP8266WIFI定位_fbuilke的博客-CSDN博客_esp8266定位
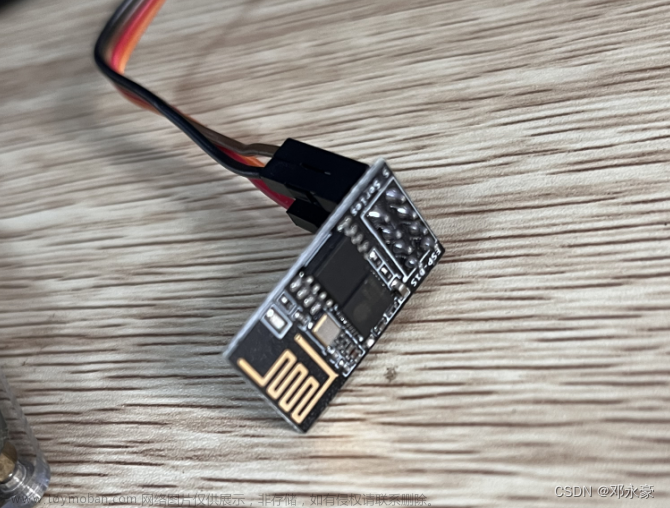
我手上的话就是有一块ESP32-S2,如下图:

因为全程不需要其它引脚所以其它就不介绍了,直接开始。
整个流程就是:

可以看到还是非常简单的,首先引入头文件
#include <WiFi.h>接着在setup()中添加WiFi初始化和连接函数
void setup() {
  Serial.begin(115200);
  WiFi.mode(WIFI_STA);
  WiFi.begin(id,psw);
  while(WiFi.status()!=WL_CONNECTED){
    delay(500);
    Serial.println("正在连接...");
  }
  Serial.println("连接成功!");
  delay(100);
  Serial.println("Setup done");
}
因为需要上传各个扫描到的WiFi 信息,所以我们定义一个结构体来装
typedef struct ap_info
{
  unsigned char count;
  String mac;
  signed char rssi;
}apinfo;
然后在最前面定义一个新函数用来控制WiFi扫描并赋值到刚刚创建的结构体上,也可以在最后面定义但是要声明。为了方便所以写前面,但代码多还是要写后面为妙。
void wifi_scan()
{
  int n = WiFi.scanNetworks();
  ApInfo.count =n;
  Serial.println("scan done");
  if (n == 0) {
    Serial.println("no networks found");
  } else {
    Serial.print(n);
    Serial.println(" networks found");
    for (int i = 0; i < n; ++i) {
      ApInfo.rssi = WiFi.RSSI(i);
      ApInfo.mac = WiFi.BSSIDstr(i);
      delay(10);
    }
  }
}
接下来就是进行封装Json了,首先引入头文件和初始化封装和解析用到的部分,之所以设置这么大是因为有些地方WiFi较多如果设置很小会导致上传不全,接收也是一样的道理。
#include <ArduinoJson.h>

DynamicJsonDocument doc(8192);
DynamicJsonDocument rep(4096);
如果报错的话需要去下载,期间可能会因为网络波动多次失败,实在不行就科学上网或者本地安装,这个教程很多就不叙述了。

定义一个Json封装函数用来构建post请求体,这个请求体的格式可以参考全域定位平台的API手册或者根据我下面这个格式去构建:
{
    "timestamp": 1670987434289,
    "id": "1675840238995-****************",
    "asset": {
        "id": "ea32ce50-9323-****************",
        "manufacturer": "esp32-s2"
    },
    "location": {
        "timestamp": 1670987434289,
        "wifis": [
            {
                "macAddress": "9E:2B:A6:89:40:D2",
                "signalStrength": -34
            },
            {
                "macAddress": "9E:2B:A6:99:40:D2",
                "signalStrength": -34
            },
            {
                "macAddress": "9E:2B:A6:A9:40:D2",
                "signalStrength": -34
            },
            {
                "macAddress": "40:67:9B:AD:12:5E",
                "signalStrength": -41
            }
        ]
    }
}
arduino这个json库跟python一样操作简单,用惯了CJson库的这个简直是福音。
String JsonSerialization()
{
  String message;
  doc["timestamp"] = tmp_ll;
  doc["id"] = "1675840238995-****************";
  doc["asset"]["id"] = "ea32ce50-9323-****************";
  doc["asset"]["manufacturer"] = "esp32-s2";
  doc["location"]["timestamp"] = tmp_ll;
  for(int i = 0;i < ApInfo.count;i++)
  {
    doc["location"]["wifis"][i]["macAddress"] = WiFi.BSSIDstr(i);
    doc["location"]["wifis"][i]["signalStrength"] = WiFi.RSSI(i);
  }
  serializeJson(doc, message);  // 序列化JSON数据并导出字符串
  return message;
}
完成上述后,就可以开始写请求部分了,首先需要引入头文件
#include <HTTPClient.h>ESP32的httpclient是这个

然后就是写请求,这部分还是很简单的,几行代码搞定
void get_location(String postMessage)
{
  HTTPClient http;
  http.begin("https://api.newayz.com/location/hub/v1/track_points?access_key=***********");
  http.addHeader("Content-Type", "application/json");
  http.addHeader("Host", "api.newayz.com");
  http.addHeader("Connection", "keep-alive");
  int httpCode = http.POST(postMessage);
  String payload = http.getString();
  Serial.println(httpCode);
  PraseJson(payload);
  http.end();
}
完成上述后,就是用相同的方式去解析请求回调的数据
void PraseJson(String json)
{
  DeserializationError error = deserializeJson(rep, json);
  if (error)
  {
    Serial.print(F("prase failed: "));
    Serial.println(error.f_str());
    return;
  }
  const char * source = rep["location"]["position"]["source"];
  const char * spatialReference = rep["location"]["position"]["spatialReference"];
  double longitude = rep["location"]["position"]["point"]["longitude"];
  double latitude = rep["location"]["position"]["point"]["latitude"];
  const char * name = rep["location"]["address"]["name"];
  Serial.print("当前地址:\t");
  Serial.println(name);
  Serial.print("当前经纬度坐标:\t");
  Serial.print(longitude,6);
  Serial.print("\t");
  Serial.println(latitude,6);
  Serial.print("定位获取来源:\t");
  Serial.print(source);
  Serial.print("\t坐标格式:\t");
  Serial.println(spatialReference);
}
最后一步就是在loop调用上述的函数去实现定位效果了
void loop() {
  wifi_scan();
  postMessage = JsonSerialization();
  get_location(postMessage);
  delay(5000);
  // 重新连接
  if (WiFi.status() != WL_CONNECTED) {
    Serial.println("Reconnecting to WiFi...");
    WiFi.disconnect();
    WiFi.reconnect();
  }
}
到这里就一切准备就绪了,全程不到100行代码轻松实现WiFi定位,解析定位效果如下

来到全域定位平台,他自带了监控大屏,上面可以看到当前设备所在位置文章来源:https://www.toymoban.com/news/detail-456688.html
 该平台还有电子围栏,轨迹查询等功能还需要各位自己去慢慢摸索,相应的API手册也很齐全,如果有什么问题欢迎留言,我会尽快回复。文章来源地址https://www.toymoban.com/news/detail-456688.html
到了这里,关于Arduino ESP32 WiFi定位的文章就介绍完了。如果您还想了解更多内容,请在右上角搜索TOY模板网以前的文章或继续浏览下面的相关文章,希望大家以后多多支持TOY模板网!


