realsense D455深度相机+YOLO V5结合实现目标检测(二)第二篇链接
可以实现将D435,D455深度相机和yolo v5结合到一起,在识别物体的同时,还能测到物体相对与相机的距离。
说明一下为什么需要做这个事情?1.首先为什么需要用到realsense D455深度相机? 因为他是普通的相机还加了一个红外测距的东西,所以其他二维图像一样,能够得到三维世界在二维像素平面的投影,也就是图片,但是我们损失了一个深度的维度以后得到的都是投影的东西,比如说苹果可以和足球一样大,因为我们不知道深度也就是物体距离相机的距离信息,所以我们需要一个深度相机来实现测距离。2.为什么需要用到yolo算法?因为他在实时性和准确率方面都可以,可以应用于工农业生产当中,所以肯定很需要。所以才会有这二者的结合的必要性!
1.代码来源
首先感谢github上的yuanyuanyuan killnice大佬将自己的代码开源出来,这是我第一次用realsense深度相机去实现将其与目标检测的yolo v5 算法结合在一起,实现2.5维的检测吧。首先大家如果想用这个代码的话可以去这里git clone yuanyuanyuan killnice大佬的代码 (为了防止链接不过去还是再写在这里 https://github.com/killnice/yolov5-D435i.git)。
2.环境配置
首选clone下yuanyuanyuan killnice大佬的代码后,在命令行运行:
pip install -r requirements.txt
pip install pyrealsense2
然后cd到进入工程文件夹下执行:
python main_debug.py
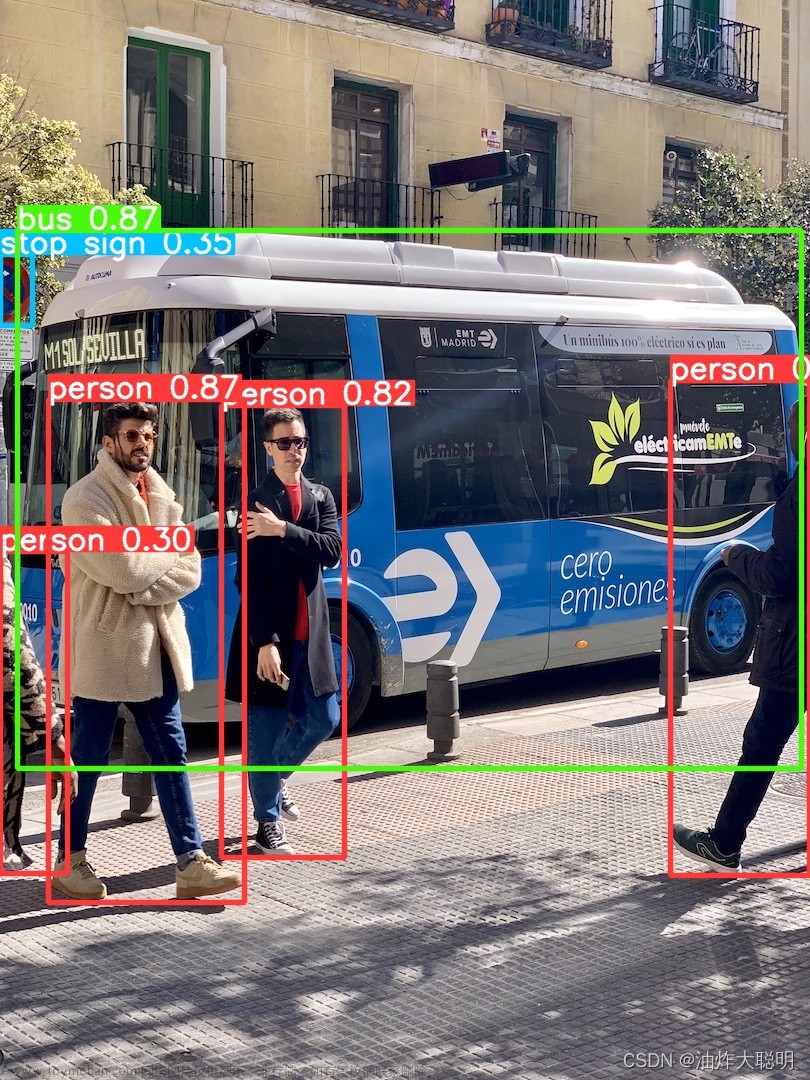
第一次运行会自动下载yolov5l6.pt文件,大约140MB左右,如果由于网速原因不能自动下载,请手动在yolo v5的github上自己下载。运行结果如下: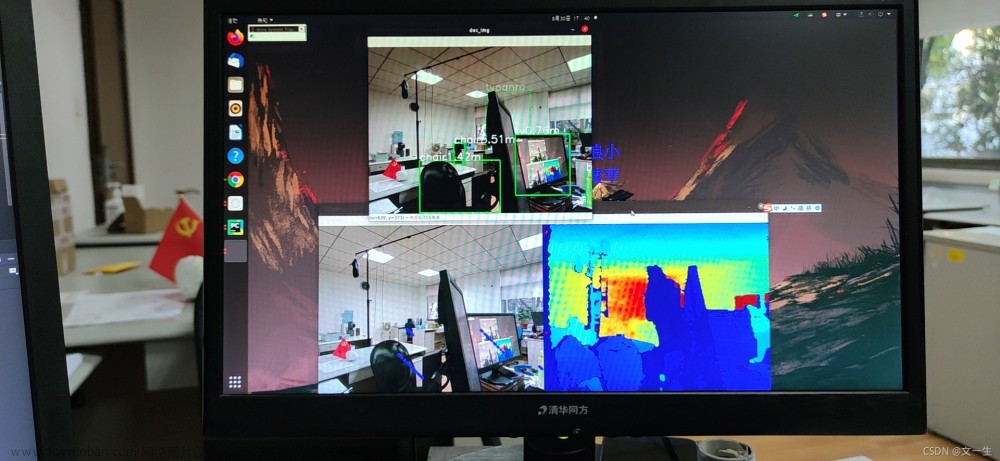
3.代码分析:
3.1如何用realsense在python下面调用的问题:
这个的来源是从realsense的官方文档中来的 realsense的官方python文档,如果你对他的其他应用感兴趣可以去这里看一看。
import pyrealsense2 as rs
import numpy as np
import cv2

# Configure depth and color streams
pipeline = rs.pipeline()
config = rs.config()
# config.enable_stream(rs.stream.depth, 640, 480, rs.format.z16, 30)
# config.enable_stream(rs.stream.color, 640, 480, rs.format.bgr8, 30)

config.enable_stream(rs.stream.depth, 640, 480, rs.format.z16, 30)
config.enable_stream(rs.stream.color, 640, 480, rs.format.bgr8, 30)

# Start streaming
pipeline.start(config)

try:
    while True:

        # Wait for a coherent pair of frames: depth and color
        frames = pipeline.wait_for_frames()
        # 深度图
        depth_frame = frames.get_depth_frame()
        # 正常读取的视频流
        color_frame = frames.get_color_frame()
        if not depth_frame or not color_frame:
            continue

        # Convert images to numpy arrays
        depth_image = np.asanyarray(depth_frame.get_data())
        color_image = np.asanyarray(color_frame.get_data())
        # print(f"depth_image shape: {depth_image.shape} color_image shape: {color_image.shape}")
        print(f"depth_image value: {depth_image}")   # 里面0值很多,还有很多1900左右的值      300mm 单位是毫米=30厘米=0.3米
        # depth_image shape: (480, 640) color_image shape: (480, 640, 3)
        # 深度图是单通道  颜色图是三通道的

        # Apply colormap on depth image (image must be converted to 8-bit per pixel first)
        # 在深度图像上应用colormap(图像必须先转换为每像素8位)
        depth_colormap = cv2.applyColorMap(cv2.convertScaleAbs(depth_image, alpha=0.03), cv2.COLORMAP_JET)

        # Stack both images horizontally
        images = np.hstack((color_image, depth_colormap))

        # Show images
        cv2.namedWindow('RealSense', cv2.WINDOW_AUTOSIZE)
        cv2.imshow('RealSense', images)
        key = cv2.waitKey(1)
        if key & 0xFF == ord('q') or key == 27:
            cv2.destroyAllWindows()
            break

finally:

    # Stop streaming
    pipeline.stop()
这就是用python调用realsense D455深度相机的程序。文章来源:https://www.toymoban.com/news/detail-456913.html
3.2 对main_debug.py文件的分析:
import pyrealsense2 as rs
import numpy as np
import cv2
import random
import torch
import time
#调用各种库
#从文件的构造中不难看出是用了下面的几个函数:分别是get_mid_pos(frame,box,depth_data,randnum),dectshow(org_img, boxs,depth_data),
#主函数。
# model = torch.hub.load('ultralytics/yolov5', 'yolov5s')
#
model = torch.hub.load('ultralytics/yolov5', 'yolov5l6')
model.conf = 0.5

def get_mid_pos(frame,box,depth_data,randnum):
#这个函数就是简单的从给出的图片、框、深度数据、可以选择的迭代次数
    distance_list = []
    mid_pos = [(box[0] + box[2])//2, (box[1] + box[3])//2] #确定索引深度的中心像素位置左上角和右下角相加在/2
    min_val = min(abs(box[2] - box[0]), abs(box[3] - box[1])) #确定深度搜索范围
    #print(box,)
    for i in range(randnum):
        bias = random.randint(-min_val//4, min_val//4)
        dist = depth_data[int(mid_pos[1] + bias), int(mid_pos[0] + bias)]
        cv2.circle(frame, (int(mid_pos[0] + bias), int(mid_pos[1] + bias)), 4, (255,0,0), -1)
        #print(int(mid_pos[1] + bias), int(mid_pos[0] + bias))
        if dist:
            distance_list.append(dist)
    distance_list = np.array(distance_list)
    distance_list = np.sort(distance_list)[randnum//2-randnum//4:randnum//2+randnum//4] #冒泡排序+中值滤波
    #print(distance_list, np.mean(distance_list))
    return np.mean(distance_list)
def dectshow(org_img, boxs,depth_data):
#在原图像上画框和深度信息写在图像上
    img = org_img.copy()
    for box in boxs:
        cv2.rectangle(img, (int(box[0]), int(box[1])), (int(box[2]), int(box[3])), (0, 255, 0), 2)
        dist = get_mid_pos(org_img, box, depth_data, 24)
        cv2.putText(img, box[-1] + str(dist / 1000)[:4] + 'm',
                    (int(box[0]), int(box[1])), cv2.FONT_HERSHEY_SIMPLEX, 1, (255, 255, 255), 2)
    cv2.imshow('dec_img', img)

if __name__ == "__main__":
    # Configure depth and color streams
#这是主要是将上面1中提到的realsense在python中的调用。
    pipeline = rs.pipeline()
    config = rs.config()
    config.enable_stream(rs.stream.depth, 640, 480, rs.format.z16, 60)
    config.enable_stream(rs.stream.color, 640, 480, rs.format.bgr8, 60)
    # Start streaming
    pipeline.start(config)
    try:
        while True:
            # Wait for a coherent pair of frames: depth and color
            frames = pipeline.wait_for_frames()
            depth_frame = frames.get_depth_frame()
            color_frame = frames.get_color_frame()
            if not depth_frame or not color_frame:
                continue
            # Convert images to numpy arrays

            depth_image = np.asanyarray(depth_frame.get_data())

            color_image = np.asanyarray(color_frame.get_data())

            results = model(color_image)
            boxs= results.pandas().xyxy[0].values
            #boxs = np.load('temp.npy',allow_pickle=True)
            dectshow(color_image, boxs, depth_image)

            # Apply colormap on depth image (image must be converted to 8-bit per pixel first)
            depth_colormap = cv2.applyColorMap(cv2.convertScaleAbs(depth_image, alpha=0.03), cv2.COLORMAP_JET)
            # Stack both images horizontally
            images = np.hstack((color_image, depth_colormap))
            # Show images
            cv2.namedWindow('RealSense', cv2.WINDOW_AUTOSIZE)
            cv2.imshow('RealSense', images)
            key = cv2.waitKey(1)
            # Press esc or 'q' to close the image window
            if key & 0xFF == ord('q') or key == 27:
                cv2.destroyAllWindows()
                break
    finally:
        # Stop streaming
        pipeline.stop()
4. 结束语
从以前在csdn上查找到自己写,这是第一次,觉得这是一种进步,希望能够帮助到别人,也感谢yuanyuanyuan killnice大佬,还有yolo v5的作者,反正就是感谢开源吧。对我感兴趣的童鞋可以关注我,说不定那一天就可以帮到您!文章来源地址https://www.toymoban.com/news/detail-456913.html
到了这里,关于realsense D455深度相机+YOLO V5结合实现目标检测(一)的文章就介绍完了。如果您还想了解更多内容,请在右上角搜索TOY模板网以前的文章或继续浏览下面的相关文章,希望大家以后多多支持TOY模板网!

