参考文章
- 整体思路
前端点击开始对话按钮后,将监听麦克风,获取到当前的音频,将其装化为二进制数据,通过websocket发送到webscoket服务端,服务端在接收后,将消息写入给指定客户端,客户端拿到发送过来的二进制音频后再转化播放
-
注意事项
由于音频转化后的二进制数据较大,websocket默认的消息传输大小不能被接收,所以需要通过 @OnMessage(maxMessageSize=5242880)注解进行调整 -
Vue代码
<template>
<div class="play-audio">
<el-button @click="startCall" ref="start">开始对讲</el-button>
<el-button @click="stopCall" ref="stop">结束对讲</el-button>
</div>
</template>
<script>
export default {
data() {
return {
ws: null,
mediaStack: null,
audioCtx: null,
scriptNode: null,
source: null,
play: true
}
},
methods: {
initWs1() {
//设置好友ID
let recipientId=localStorage.getItem('userId')=="2"?"1":"2";
this.ws = new WebSocket('ws://192.168.206.204:8081/video/'+localStorage.getItem('userId')+"/"+recipientId)
this.ws.onopen = () => {
console.log('socket 已连接')
}
this.ws.binaryType = 'arraybuffer'
this.ws.onmessage = ({ data }) => {
console.log("接收到的数据--》"+ data)
// 将接收的数据转换成与传输过来的数据相同的Float32Array
const buffer = new Float32Array(data)
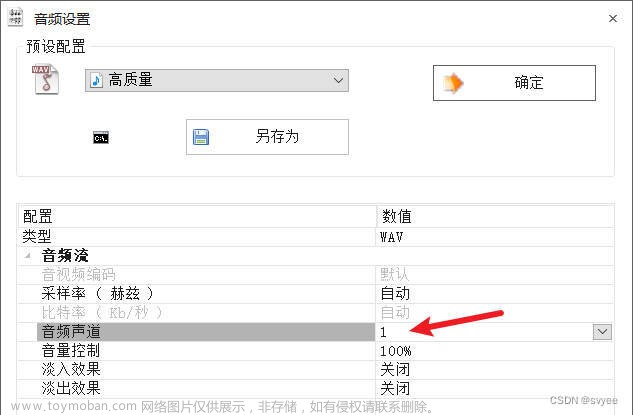
// 创建一个空白的AudioBuffer对象,这里的4096跟发送方保持一致,48000是采样率
const myArrayBuffer = this.audioCtx.createBuffer(1, 4096, 48000)
// 也是由于只创建了一个音轨,可以直接取到0
const nowBuffering = myArrayBuffer.getChannelData(0)
// 通过循环,将接收过来的数据赋值给简单音频对象
for (let i = 0; i < 4096; i++) {
nowBuffering[i] = buffer[i]
}
// 使用AudioBufferSourceNode播放音频
const source = this.audioCtx.createBufferSource()
source.buffer = myArrayBuffer
const gainNode = this.audioCtx.createGain()
source.connect(gainNode)
gainNode.connect(this.audioCtx.destination)
var muteValue = 1
if (!this.play) { // 是否静音
muteValue = 0
}
gainNode.gain.setValueAtTime(muteValue, this.audioCtx.currentTime)
source.start()
}
this.ws.onerror = (e) => {
console.log('发生错误', e)
}
this.ws.onclose = () => {
console.log('socket closed')
}
},
// 开始对讲
startCall() {
this.play = true
this.audioCtx = new AudioContext()
this.initWs1()
// 该变量存储当前MediaStreamAudioSourceNode的引用
// 可以通过它关闭麦克风停止音频传输
// 创建一个ScriptProcessorNode 用于接收当前麦克风的音频
this.scriptNode = this.audioCtx.createScriptProcessor(4096, 1, 1)
navigator.mediaDevices
.getUserMedia({ audio: true, video: false })
.then((stream) => {
this.mediaStack = stream
this.source = this.audioCtx.createMediaStreamSource(stream)
this.source.connect(this.scriptNode)
this.scriptNode.connect(this.audioCtx.destination)
})
.catch(function (err) {
/* 处理error */
console.log('err', err)
})
// 当麦克风有声音输入时,会调用此事件
// 实际上麦克风始终处于打开状态时,即使不说话,此事件也在一直调用
this.scriptNode.onaudioprocess = (audioProcessingEvent) => {
const inputBuffer = audioProcessingEvent.inputBuffer
// console.log("inputBuffer",inputBuffer);
// 由于只创建了一个音轨,这里只取第一个频道的数据
const inputData = inputBuffer.getChannelData(0)
console.log("调用")
// 通过socket传输数据,实际上传输的是Float32Array
if (this.ws.readyState === 1) {
// console.log("发送的数据",inputData);
this.ws.send(inputData)
}
}
},
// 关闭麦克风
stopCall() {
this.play = false
this.mediaStack.getTracks()[0].stop()
this.scriptNode.disconnect()
}
}
}
</script>
-java代码webscoket配置类
package com.example.software.config;
import org.springframework.context.annotation.Bean;
import org.springframework.context.annotation.Configuration;
import org.springframework.web.socket.config.annotation.EnableWebSocket;
import org.springframework.web.socket.server.standard.ServerEndpointExporter;


/**
 * @Description: websocket配置
 */
@Configuration
@EnableWebSocket
public class WebSocketConfig {
    @Bean
    public ServerEndpointExporter serverEndpointExporter() {
        return new ServerEndpointExporter();
    }
}
webscoket服务类
package com.example.software.service.webscoket;


import cn.hutool.core.map.MapUtil;
import cn.hutool.core.util.StrUtil;
import cn.hutool.json.JSONUtil;
import lombok.extern.slf4j.Slf4j;
import org.springframework.beans.factory.annotation.Autowired;
import org.springframework.stereotype.Controller;

import javax.websocket.*;
import javax.websocket.server.PathParam;
import javax.websocket.server.ServerEndpoint;
import java.io.BufferedInputStream;
import java.io.IOException;
import java.io.InputStream;
import java.nio.ByteBuffer;
import java.util.ArrayList;
import java.util.HashMap;
import java.util.List;
import java.util.Map;
import java.util.concurrent.ConcurrentHashMap;

/**
 * @Author:wf
 * @Date 2023/5/14 13:55
 * 消息收发
 **/
@Controller
@ServerEndpoint(value = "/video/{senderID}/{recipientId}")
@Slf4j
public class WebSocketServer {


    /** 当前在线连接数。应该把它设计成线程安全的 */
    private static  int onlineCount = 0;
    /** 存放每个客户端对应的MyWebSocket对象。实现服务端与单一客户端通信的话,其中Key可以为用户标识 */
    private static ConcurrentHashMap<String, Session> webSocketSet = new ConcurrentHashMap<String, Session>();

    /** 与某个客户端的连接会话,需要通过它来给客户端发送数据 */
    private Session WebSocketsession;
    /** 当前发消息的人员编号 */
    private String senderID = "";


    /**
     * 连接建立成功调用的方法
     * @param param 发送者ID,是由谁发送的
     * @param WebSocketsession 可选的参数。session为与某个客户端的连接会话,需要通过它来给客户端发送数据
     */
    @OnOpen
    public void onOpen(@PathParam(value = "senderID") String param, @PathParam(value = "recipientId") String recipientId,Session WebSocketsession) {
        System.out.println("人员-------**-------编号:"+param+":加入聊天");
        System.out.println("盆友是:"+recipientId+"");

        //接收到发送消息的人员编号
        senderID = param;
        System.out.println("senderID:"+senderID);
        //设置消息大小最大为10M,这种方式也可以达到效果,或者使用下面的    @OnMessage(maxMessageSize=5242880)
        //The default buffer size for text messages is 8192 bytes.消息超过8192b,自动断开连接

//        WebSocketsession.setMaxTextMessageBufferSize(10*1024*1024);
//        WebSocketsession.setMaxBinaryMessageBufferSize(10*1024*1024);


        //加入map中,绑定当前用户和socket
        webSocketSet.put(param, WebSocketsession);
        //在线数加1
        addOnlineCount();
    }


    /**
     * 连接关闭调用的方法
     */
    @OnClose
    public void onClose() {
        if (StrUtil.isNotBlank(senderID)) {
            //从set中删除
            webSocketSet.remove(senderID);
            //在线数减1
            subOnlineCount();
        }
    }


    /**
     * 收到客户端消息后调用的方法
     *
     *设置最大接收消息大小
     */
    @OnMessage(maxMessageSize=5242880)
    public void onMessage(@PathParam(value = "senderID") String senderID ,@PathParam(value = "recipientId") String recipientId,InputStream inputStream) {
        System.out.println(senderID+":发送给"+recipientId+"的消息-->"+inputStream);

        try {
            byte[] buff = new byte[inputStream.available()];
            inputStream.read(buff, 0, inputStream.available());
            Session session = webSocketSet.get("2");
            synchronized (session) {
                //给2号发送
                session.getBasicRemote().sendBinary(ByteBuffer.wrap(buff));
            }
        } catch (Exception e) {
            e.printStackTrace();
        }
    }


    /**
     * 发生错误时调用
     *
     * @param session
     * @param error
     */
    @OnError
    public void onError(Session session, Throwable error) {
        error.printStackTrace();
    }


    /**
     * 为指定用户发送消息
     *
     * @param message 消息内容
     * @throws IOException
     */
    public void sendMessage(String message) throws IOException {
        //加同步锁,解决多线程下发送消息异常关闭
        synchronized (this.WebSocketsession){
            this.WebSocketsession.getBasicRemote().sendText(message);
        }
    }

    /**
     * 获取当前在线人数
     * @return 返回当前在线人数
     */
    public static synchronized int getOnlineCount() {
        return onlineCount;
    }

    /**
     * 增加当前在线人数
     */
    public static synchronized void addOnlineCount() {
        WebSocketServer.onlineCount++;
    }

    /**
     * 减少当前在线人数
     */
    public static synchronized void subOnlineCount() {
        WebSocketServer.onlineCount--;
    }

}
-
测试方法
1.使用两个浏览器模拟两个用户,首先在浏览器本地存储一个用户ID
用户A–谷歌浏览器:
用户B–火狐浏览器
2.点击按钮,进行测试
3.关于谷歌浏览器提示TypeError: Cannot read property ‘getUserMedia’ of undefined
原因:chrome下获取浏览器录音功能,因为安全性问题,需要在localhost或127.0.0.1或https下才能获取权限
解决方案:
1.网页使用https访问,服务端升级为https访问,配置ssl证书
2.使用localhost或127.0.0.1 进行访问
3.修改浏览器安全配置(最直接、简单)
a.首先在chrome浏览器中输入如下指令
chrome://flags/#unsafely-treat-insecure-origin-as-secure

b.然后开启 Insecure origins treated as secure
在下方输入栏内输入你访问的地址url,然后将右侧Disabled 改成 Enabled即可 文章来源:https://www.toymoban.com/news/detail-457653.html
c.然后浏览器会提示重启, 点击Relaunch即可 文章来源地址https://www.toymoban.com/news/detail-457653.html
到了这里,关于WebSocket+Vue+SpringBoot实现语音通话的文章就介绍完了。如果您还想了解更多内容,请在右上角搜索TOY模板网以前的文章或继续浏览下面的相关文章,希望大家以后多多支持TOY模板网!