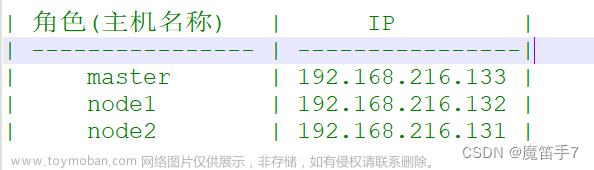
环境信息
在AWS上启动3台Amazon Linux2的服务器,服务器配置为2vcpu 和2GB内存
部署K8S集群
1. 修改主机名(可选步骤)
sudo hostnamectl set-hostname master2.导入k8s的yum仓库密钥
sudo rpm --import https://packages.cloud.google.com/yum/doc/yum-key.gpg
3. 配置kubernetes源
cat <<EOF | sudo tee /etc/yum.repos.d/kubernetes.repo
[kubernetes]
name=Kubernetes
baseurl=https://packages.cloud.google.com/yum/repos/kubernetes-el7-x86_64
enabled=1
gpgcheck=1
repo_gpgcheck=1
gpgkey=https://packages.cloud.google.com/yum/doc/yum-key.gpg
       https://packages.cloud.google.com/yum/doc/rpm-package-key.gpg
EOF
4. 部署安装kubeadm、kubectl、docker,并且启动docker
sudo yum install -y kubeadm kubectl docker
sudo systemctl enable docker --now
sudo systemctl status docker
5. 在master节点上执行初始化
kubeadm init --apiserver-advertise-address=172.31.1.86 --service-cidr=10.1.0.0/16 --pod-network-cidr=10.244.0.0/16具体初始化过程如下
[init] Using Kubernetes version: v1.27.1
[preflight] Running pre-flight checks
[WARNING FileExisting-tc]: tc not found in system path
[WARNING Hostname]: hostname "master" could not be reached
[WARNING Hostname]: hostname "master": lookup master on 172.31.0.2:53: no such host
[preflight] Pulling images required for setting up a Kubernetes cluster
[preflight] This might take a minute or two, depending on the speed of your internet connection
[preflight] You can also perform this action in beforehand using 'kubeadm config images pull'
W0423 06:37:02.471385 10481 images.go:80] could not find officially supported version of etcd for Kubernetes v1.27.1, falling back to the nearest etcd version (3.5.7-0)
W0423 06:37:10.618968 10481 checks.go:835] detected that the sandbox image "registry.k8s.io/pause:3.6" of the container runtime is inconsistent with that used by kubeadm. It is recommended that using "registry.k8s.io/pause:3.9" as the CRI sandbox image.
[certs] Using certificateDir folder "/etc/kubernetes/pki"
[certs] Generating "ca" certificate and key
[certs] Generating "apiserver" certificate and key
[certs] apiserver serving cert is signed for DNS names [kubernetes kubernetes.default kubernetes.default.svc kubernetes.default.svc.cluster.local master] and IPs [10.1.0.1 172.31.1.86]
[certs] Generating "apiserver-kubelet-client" certificate and key
[certs] Generating "front-proxy-ca" certificate and key
[certs] Generating "front-proxy-client" certificate and key
[certs] Generating "etcd/ca" certificate and key
[certs] Generating "etcd/server" certificate and key
[certs] etcd/server serving cert is signed for DNS names [localhost master] and IPs [172.31.1.86 127.0.0.1 ::1]
[certs] Generating "etcd/peer" certificate and key
[certs] etcd/peer serving cert is signed for DNS names [localhost master] and IPs [172.31.1.86 127.0.0.1 ::1]
[certs] Generating "etcd/healthcheck-client" certificate and key
[certs] Generating "apiserver-etcd-client" certificate and key
[certs] Generating "sa" key and public key
[kubeconfig] Using kubeconfig folder "/etc/kubernetes"
[kubeconfig] Writing "admin.conf" kubeconfig file
[kubeconfig] Writing "kubelet.conf" kubeconfig file
[kubeconfig] Writing "controller-manager.conf" kubeconfig file
[kubeconfig] Writing "scheduler.conf" kubeconfig file
[kubelet-start] Writing kubelet environment file with flags to file "/var/lib/kubelet/kubeadm-flags.env"
[kubelet-start] Writing kubelet configuration to file "/var/lib/kubelet/config.yaml"
[kubelet-start] Starting the kubelet
[control-plane] Using manifest folder "/etc/kubernetes/manifests"
[control-plane] Creating static Pod manifest for "kube-apiserver"
[control-plane] Creating static Pod manifest for "kube-controller-manager"
[control-plane] Creating static Pod manifest for "kube-scheduler"
[etcd] Creating static Pod manifest for local etcd in "/etc/kubernetes/manifests"
W0423 06:37:19.434528 10481 images.go:80] could not find officially supported version of etcd for Kubernetes v1.27.1, falling back to the nearest etcd version (3.5.7-0)
[wait-control-plane] Waiting for the kubelet to boot up the control plane as static Pods from directory "/etc/kubernetes/manifests". This can take up to 4m0s
[apiclient] All control plane components are healthy after 8.501748 seconds
[upload-config] Storing the configuration used in ConfigMap "kubeadm-config" in the "kube-system" Namespace
[kubelet] Creating a ConfigMap "kubelet-config" in namespace kube-system with the configuration for the kubelets in the cluster
[upload-certs] Skipping phase. Please see --upload-certs
[mark-control-plane] Marking the node master as control-plane by adding the labels: [node-role.kubernetes.io/control-plane node.kubernetes.io/exclude-from-external-load-balancers]
[mark-control-plane] Marking the node master as control-plane by adding the taints [node-role.kubernetes.io/control-plane:NoSchedule]
[bootstrap-token] Using token: 51vh1y.t1aswu9squ1fbstb
[bootstrap-token] Configuring bootstrap tokens, cluster-info ConfigMap, RBAC Roles
[bootstrap-token] Configured RBAC rules to allow Node Bootstrap tokens to get nodes
[bootstrap-token] Configured RBAC rules to allow Node Bootstrap tokens to post CSRs in order for nodes to get long term certificate credentials
[bootstrap-token] Configured RBAC rules to allow the csrapprover controller automatically approve CSRs from a Node Bootstrap Token
[bootstrap-token] Configured RBAC rules to allow certificate rotation for all node client certificates in the cluster
[bootstrap-token] Creating the "cluster-info" ConfigMap in the "kube-public" namespace
[kubelet-finalize] Updating "/etc/kubernetes/kubelet.conf" to point to a rotatable kubelet client certificate and key
[addons] Applied essential addon: CoreDNS
[addons] Applied essential addon: kube-proxyYour Kubernetes control-plane has initialized successfully!
To start using your cluster, you need to run the following as a regular user:
mkdir -p $HOME/.kube
sudo cp -i /etc/kubernetes/admin.conf $HOME/.kube/config
sudo chown $(id -u):$(id -g) $HOME/.kube/configAlternatively, if you are the root user, you can run:
export KUBECONFIG=/etc/kubernetes/admin.conf
You should now deploy a pod network to the cluster.
Run "kubectl apply -f [podnetwork].yaml" with one of the options listed at:
https://kubernetes.io/docs/concepts/cluster-administration/addons/Then you can join any number of worker nodes by running the following on each as root:
kubeadm join 172.31.1.86:6443 --token 51vh1y.t1aswu9squ1fbstb \
--discovery-token-ca-cert-hash sha256:b090433d2121dd5cfba2e28d9da1219c2c38debfa15550e866de35f42b143600
6. 根据提示创建kubeconfig配置文件
mkdir -p $HOME/.kube
sudo cp -i /etc/kubernetes/admin.conf $HOME/.kube/config
sudo chown $(id -u):$(id -g) $HOME/.kube/config7. 验证集群是否初始化正常
[ec2-user@master ~]$ kubectl get svc
NAME         TYPE        CLUSTER-IP   EXTERNAL-IP   PORT(S)   AGE
kubernetes   ClusterIP   10.1.0.1     <none>        443/TCP   56s
[ec2-user@master ~]$
8. 查看集群节点
$ kubectl get nodes
NAME     STATUS     ROLES           AGE     VERSION
master   NotReady   control-plane   9m51s   v1.27.1
9. 在master上下载flannel网络配置文件
curl -O https://raw.githubusercontent.com/coreos/flannel/master/Documentation/kube-flannel.yml

[ec2-user@master ~]$ kubectl apply -f kube-flannel.yml
namespace/kube-flannel created
clusterrole.rbac.authorization.k8s.io/flannel created
clusterrolebinding.rbac.authorization.k8s.io/flannel created
serviceaccount/flannel created
configmap/kube-flannel-cfg created
daemonset.apps/kube-flannel-ds created
[ec2-user@master ~]$
10. 部署好网络插件之后此时再次查看节点可以看到状态变成了ready
[ec2-user@master ~]$ kubectl get nodes
NAME     STATUS   ROLES           AGE   VERSION
master   Ready    control-plane   16m   v1.27.1
[ec2-user@master ~]$
11. 将其他两个节点加入到集群中去
sudo kubeadm join 172.31.1.86:6443 --token 51vh1y.t1aswu9squ1fbstb --discovery-token-ca-cert-hash sha256:b090433d2121dd5cfba2e28d9da1219c2c38debfa15550e866de35f42b143600
具体执行过程如下
[ec2-user@node1 ~]$ sudo kubeadm join 172.31.1.86:6443 --token t9v92n.phs28c3pxmzb0ftc --discovery-token-ca-cert-hash sha256:b090433d2121dd5cfba2e28d9da1219c2c38debfa15550e866de35f42b143600
[preflight] Running pre-flight checks
        [WARNING FileExisting-tc]: tc not found in system path
        [WARNING Hostname]: hostname "node1" could not be reached
        [WARNING Hostname]: hostname "node1": lookup node1 on 172.31.0.2:53: no such host
[preflight] Reading configuration from the cluster...
[preflight] FYI: You can look at this config file with 'kubectl -n kube-system get cm kubeadm-config -o yaml'
[kubelet-start] Writing kubelet configuration to file "/var/lib/kubelet/config.yaml"
[kubelet-start] Writing kubelet environment file with flags to file "/var/lib/kubelet/kubeadm-flags.env"
[kubelet-start] Starting the kubelet
[kubelet-start] Waiting for the kubelet to perform the TLS Bootstrap...

This node has joined the cluster:
* Certificate signing request was sent to apiserver and a response was received.
* The Kubelet was informed of the new secure connection details.

Run 'kubectl get nodes' on the control-plane to see this node join the cluster.

[ec2-user@node1 ~]$ kubectl get nodes
NAME     STATUS   ROLES           AGE   VERSION
master   Ready    control-plane   51m   v1.27.1
node1    Ready    <none>          6s    v1.27.1
[ec2-user@node1 ~]$
kubectl常用命令
1. 查看节点
kubectl get nodes -owide
2. 查看pod信息
[ec2-user@master ~]$ kubectl get pods -n kube-system
NAME                             READY   STATUS    RESTARTS   AGE
coredns-5d78c9869d-68pw4         1/1     Running   0          6m32s
coredns-5d78c9869d-hds64         1/1     Running   0          5m31s
etcd-master                      1/1     Running   0          55m
kube-apiserver-master            1/1     Running   0          55m
kube-controller-manager-master   1/1     Running   0          55m
kube-proxy-kxhgc                 1/1     Running   0          4m9s
kube-proxy-rtzqt                 1/1     Running   0          54m
kube-scheduler-master            1/1     Running   0          55m
[ec2-user@master ~]$
3. 查看namespace信息
[ec2-user@master ~]$ kubectl get ns
NAME              STATUS   AGE
default           Active   55m
kube-flannel      Active   39m
kube-node-lease   Active   55m
kube-public       Active   55m
kube-system       Active   55m
[ec2-user@master ~]$
4. 查看deployment
[ec2-user@master ~]$ kubectl get deploy -A
NAMESPACE     NAME      READY   UP-TO-DATE   AVAILABLE   AGE
kube-system   coredns   2/2     2            2           56m
[ec2-user@master ~]$
kubeadm常用命令
1. 查看加入集群使用的命令
kubeadm token create --print-join-command
2. 将某个节点从集群中做下线
- 在要下线的节点上执行如下命令
sudo kubeadm reset
- 在集群中的其他节点上运行以下命令,将移除的节点从集群中删除
kubectl delete node <node-name>
实现kubectl命令自动补齐功能
常用的插件是bash-completion和zsh-completion
1. 部署安装bash-completion
sudo yum install -y bash-completion2. 将kubectl自动补齐脚本拷贝到bash_completion.d目录下
sudo kubectl completion bash > /etc/bash_completion.d/kubectl
3. 重启bash shell
exec bash或者执行如下命令
source /etc/bash_completion.d/kubectl文章来源:https://www.toymoban.com/news/detail-459468.html
之后即可使用table键继续命令的补齐文章来源地址https://www.toymoban.com/news/detail-459468.html
到了这里,关于Amazon Linux2使用kubeadm部署安装K8S集群的文章就介绍完了。如果您还想了解更多内容,请在右上角搜索TOY模板网以前的文章或继续浏览下面的相关文章,希望大家以后多多支持TOY模板网!