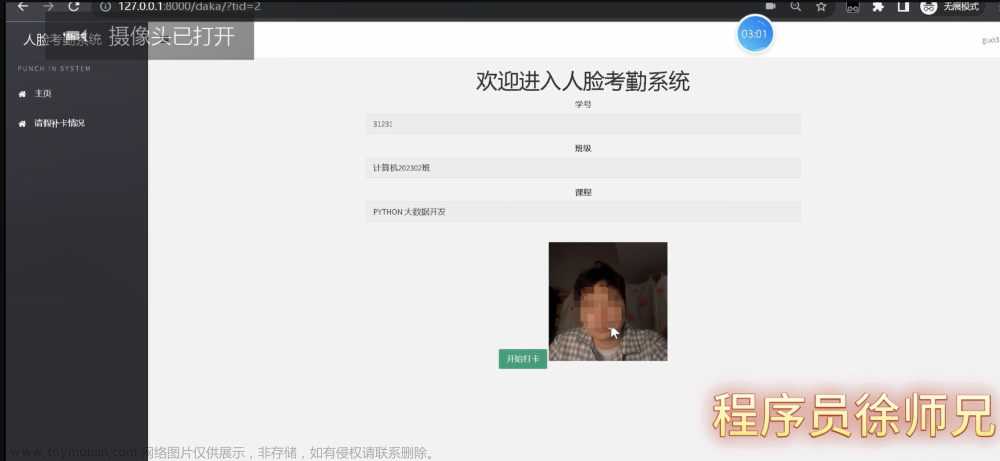
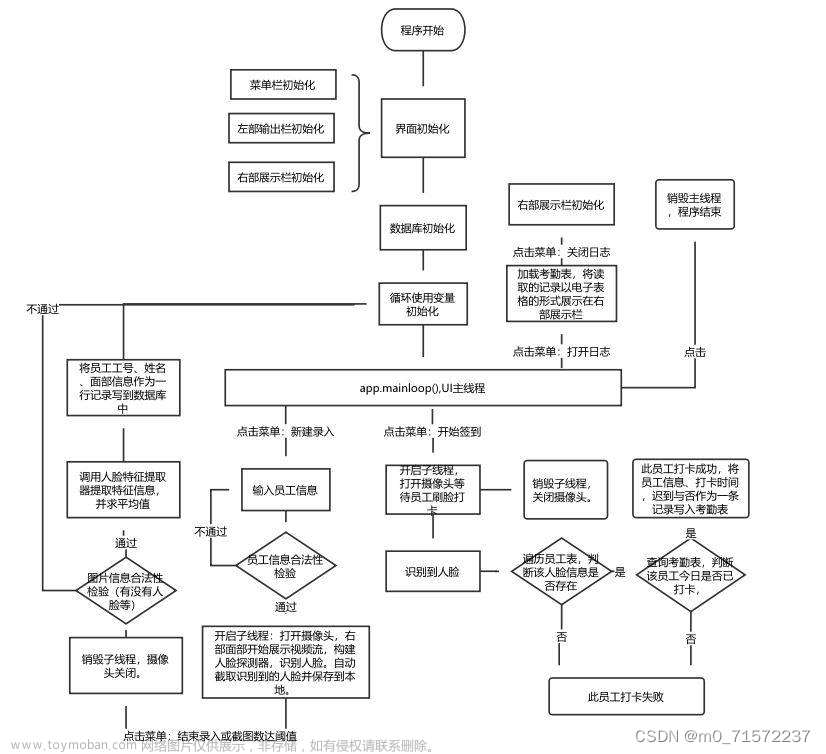
1. 系统介绍
本系统是一个基于OpenCV和 Qt Designer 的人脸识别考勤系统,主要功能是自动识别摄像头中的人脸,并把人脸对应的姓名和打卡时间存储到数据库中,方便管理人员进行考勤管理。本系统使用 face_recognition 库进行人脸识别,使用 PyQt5 开发界面,然后把界面与代码进行整合。
2. 系统架构
系统主要由以下几个模块组成:
用户界面:使用 PyQt5 设计界面,包括摄像头画面、人脸识别结果、打卡时间等。
摄像头模块:使用 OpenCV 库获取摄像头视频流,实时显示在用户界面中。
人脸识别模块:使用 face_recognition 库进行人脸识别,并将结果显示在用户界面中。
数据库模块:使用 sqlite3 库进行数据存储,把人脸对应的姓名和打卡时间存储到数据库中。
3. 开发步骤
3.1 安装必要的库
本系统需要的主要库有:
PyQt5:用于设计用户界面。
OpenCV:用于获取摄像头视频流。
face_recognition:用于进行人脸识别。
sqlite3:用于进行数据存储。
可以通过以下命令安装:
pip install pyqt5 opencv-python face_recognition sqlite3
3.2 设计用户界面
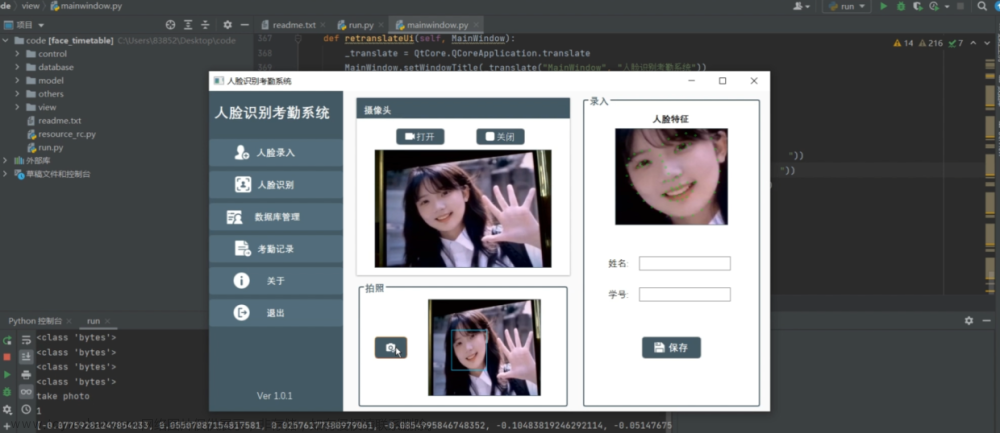
使用 Qt Designer 设计用户界面。用户界面应该包括以下几个部分:
摄像头画面:用于实时显示摄像头视频流。
人脸识别结果:用于显示识别出的人脸及对应的姓名。
打卡时间:用于显示打卡时间。
打卡按钮:用于手动打卡。
可以参考下面的截图:
 文章来源:https://www.toymoban.com/news/detail-459508.html
3.3 编写代码
3.3.1 导入库
import sys
import cv2
import face_recognition
import sqlite3
from PyQt5.QtCore import Qt, QTimer
from PyQt5.QtGui import QImage, QPixmap
from PyQt5.QtWidgets import QApplication, QDialog, QLabel, QPushButton
3.3.2 连接数据库
conn = sqlite3.connect('attendance.db')
c = conn.cursor()
c.execute('''CREATE TABLE IF NOT EXISTS attendance
             (name TEXT, time TEXT)''')
conn.commit()
3.3.3 定义主窗口类
class MainWindow(QDialog):
    def __init__(self):
        super().__init__()

        self.camera_label = QLabel(self)
        self.camera_label.resize(640, 480)
        self.camera_label.move(20, 20)

        self.result_label = QLabel(self)
        self.result_label.resize(300, 300)
        self.result_label.move(700, 20)

        self.time_label = QLabel(self)
        self.time_label.resize(300, 50)
        self.time_label.move(700, 350)

        self.button = QPushButton('打卡', self)
        self.button.resize(100, 50)
        self.button.move(700, 420)
        self.button.clicked.connect(self.check_attendance)

        self.timer = QTimer(self)
        self.timer.timeout.connect(self.show_camera)
        self.timer.start(30)

        self.video_capture = cv2.VideoCapture(0)

        self.setGeometry(100, 100, 1024, 480)
        self.setWindowTitle('人脸识别考勤系统')
3.3.4 实时显示摄像头画面
 def show_camera(self):
        ret, frame = self.video_capture.read()
        frame = cv2.flip(frame, 1)
        rgb_frame = cv2.cvtColor(frame, cv2.COLOR_BGR2RGB)
        self.display_image(rgb_frame, self.camera_label)
3.3.5 进行人脸识别
  def face_recognition(self, frame):
        face_locations = face_recognition.face_locations(frame)
        face_encodings = face_recognition.face_encodings(frame, face_locations)

        for face_encoding in face_encodings:
            matches = face_recognition.compare_faces(known_faces, face_encoding)
            name = "Unknown"

            face_distances = face_recognition.face_distance(known_faces, face_encoding)
            best_match_index = np.argmin(face_distances)

            if matches[best_match_index]:
                name = known_names[best_match_index]

            self.display_image(frame, self.result_label)
            self.result_label.setText(name)

            if name != 'Unknown':
                c.execute("INSERT INTO attendance VALUES (?, datetime('now', 'localtime'))", (name,))
                conn.commit()
3.3.6 手动打卡
  def check_attendance(self):
        name = self.result_label.text()
        if name != 'Unknown':
            c.execute("INSERT INTO attendance VALUES (?, datetime('now', 'localtime'))", (name,))

            conn.commit()
3.3.7 显示打卡时间
 def show_time(self):
        c.execute("SELECT * FROM attendance ORDER BY time DESC")
        result = c.fetchone()
        if result:
            name, time = result
            self.time_label.setText(f"{name} 打卡时间:{time}")
3.3.8 显示图片
  def display_image(self, img, label):
        qformat = QImage.Format_Indexed8
        if len(img.shape) == 3:
            if img.shape[2] == 4:
                qformat = QImage.Format_RGBA8888
            else:
                qformat = QImage.Format_RGB888
        img = QImage(img, img.shape[1], img.shape[0], qformat)
        img = img.rgbSwapped()
        label.setPixmap(QPixmap.fromImage(img))
        label.setAlignment(Qt.AlignHCenter | Qt.AlignVCenter)
3.3.9 运行主程序
if __name__ == '__main__':
    app = QApplication(sys.argv)
    window = MainWindow()
    window.show()
    sys.exit(app.exec_())
4. 总结
本文介绍了如何使用 Python 和 Qt Designer 开发人脸识别考勤系统。该系统可以自动识别摄像头中的人脸,并把人脸对应的姓名和打卡时间存储到数据库中,方便管理人员进行考勤管理。希望本文对您有所帮助。文章来源地址https://www.toymoban.com/news/detail-459508.html
到了这里,关于OpenCV+ Qt Designer 开发人脸识别考勤系统的文章就介绍完了。如果您还想了解更多内容,请在右上角搜索TOY模板网以前的文章或继续浏览下面的相关文章,希望大家以后多多支持TOY模板网!


