1 什么是LaTex?
- LaTeX \LaTeX LATEX是一种基于ΤΕΧ的排版系统,由美国计算机学家Leslie Lamport开发。
- LaTeX \LaTeX LATEX使用户在没有排版和程序设计的知识也可以在几天、甚至几小时内生成很多具有书籍质量的印刷品。对于生成复杂表格和数学公式,这一点表现得尤为突出。因此它非常适用于生成高印刷质量的科技和数学类文档。这个系统同样适用于生成从简单的信件到完整书籍的所有其他种类的文档。

2 安装textLive
-
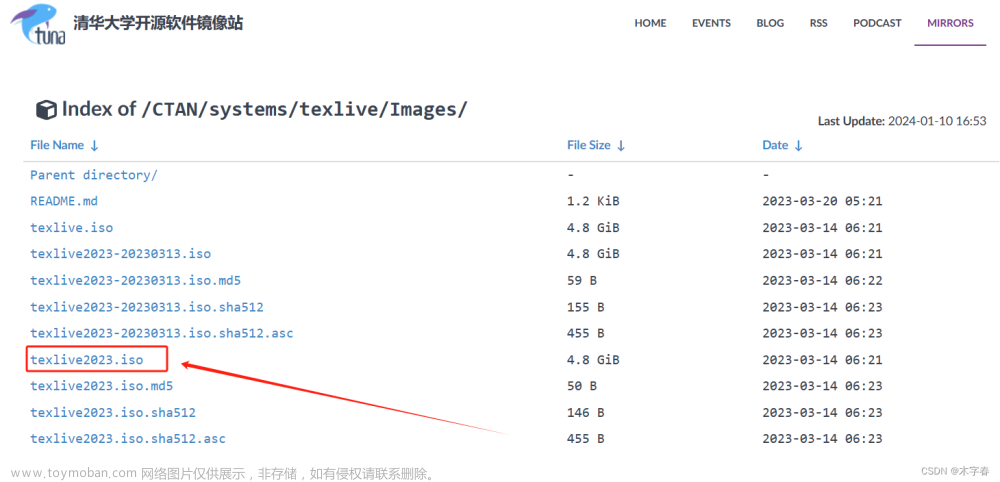
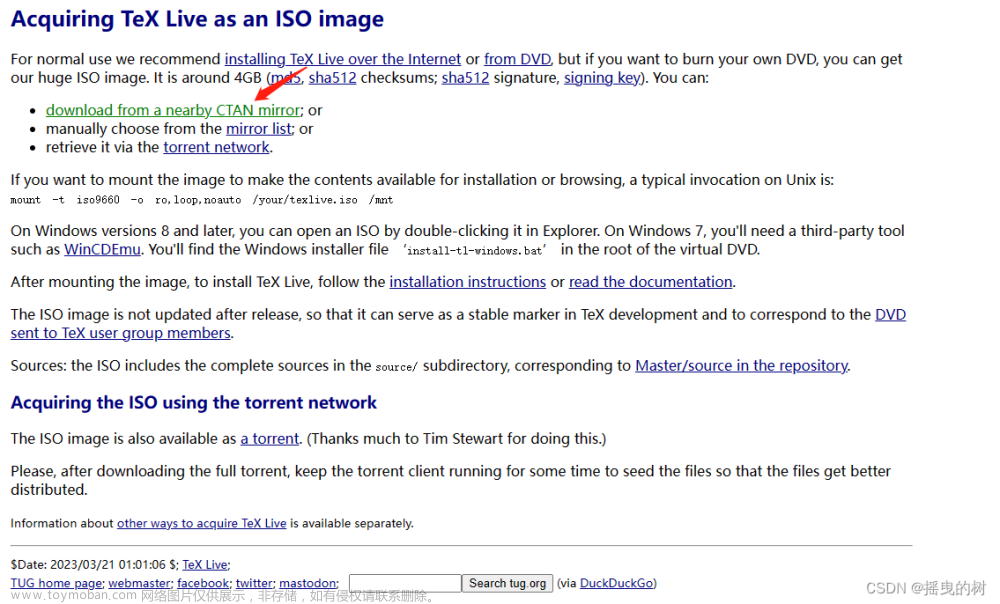
进入阿里云镜像下载
textlive.iso镜像文件,下载完成后双击镜像。
-
点击
install-tl-windows.bat启动安装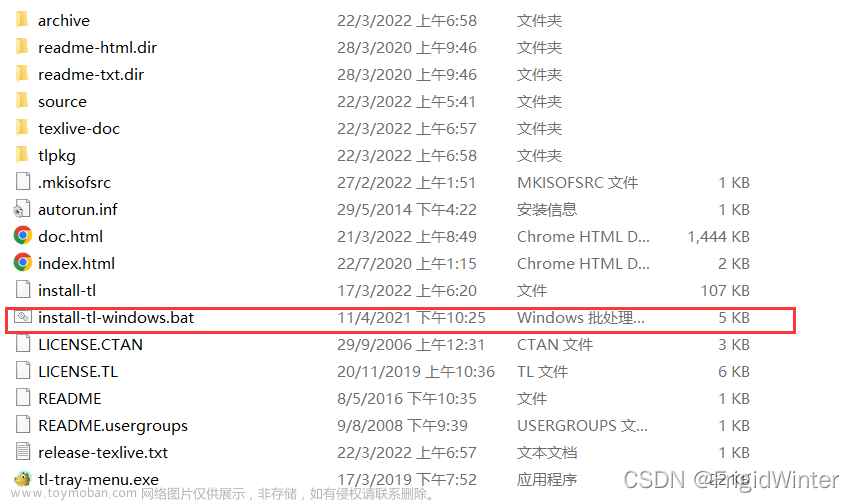
-
点击
Advanced进入高级安装配置,删除不需要的语言包,配置 LaTeX \LaTeX LATEX安装目录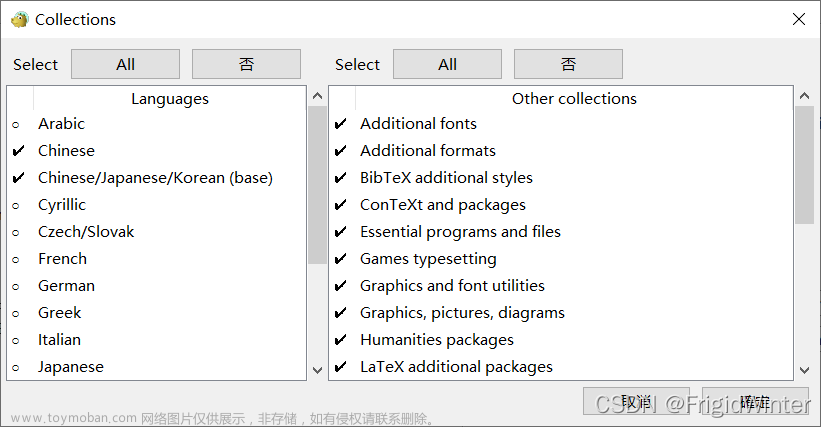
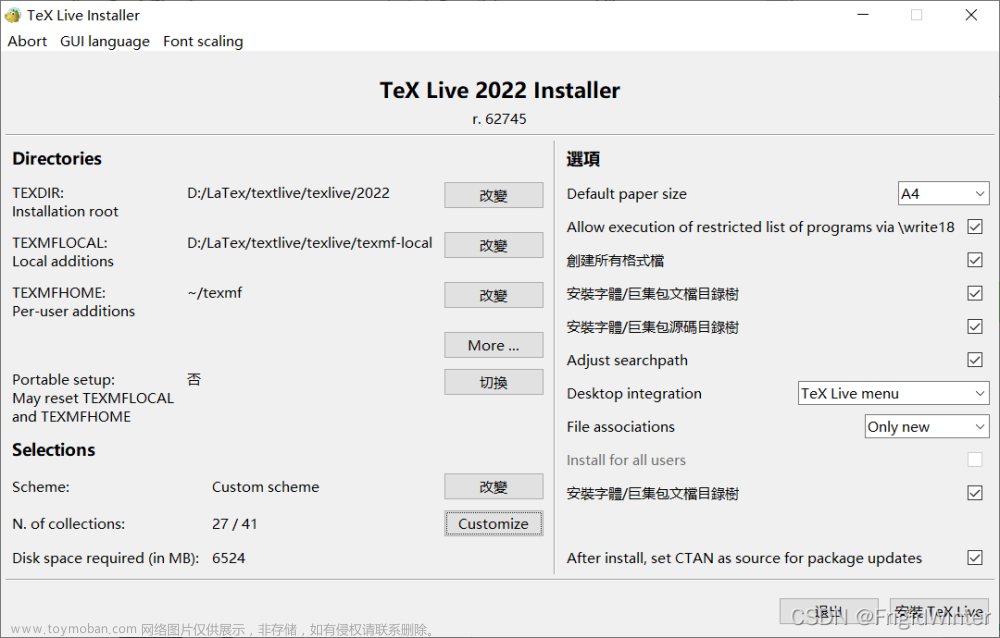
-
安装
textLive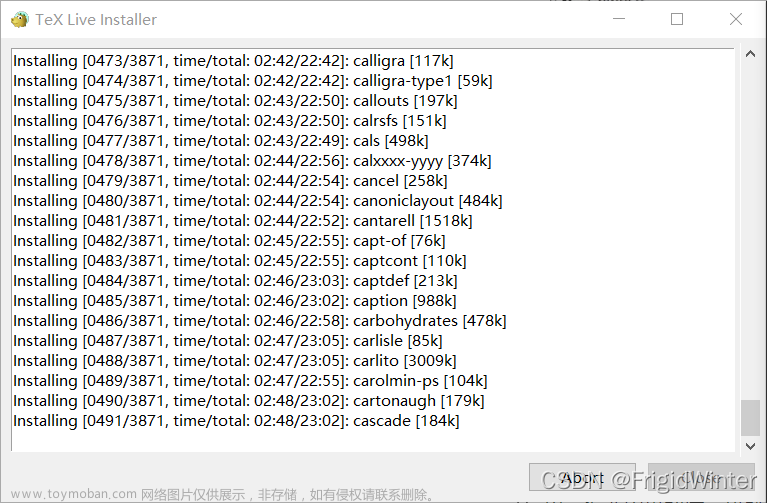
3 安装外部PDF预览器
LaTeX \LaTeX LATEX有内置PDF预览,但其不具有外部预览丰富的功能——例如书签目录等,且字体较小。
因此建议安装外部PDF预览器,这里选择Sumatra PDF,该软件的优点在于在具有 pdf 阅读功能的同时很轻量且支持双向同步功能。通过调整其与 vscode 的窗口位置,能够在拥有这些优势的同时,达到与内置ODF查看具有相同的效果。
进入官网免费安装即可:Sumatra PDF官网

4 VSCode配置
-
安装 LaTeX \LaTeX LATEX插件

-
打开VSCode
setting.json追加以下配置{ // 设置是否自动编译 "latex-workshop.latex.autoBuild.run":"onFileChange", //右键菜单 "latex-workshop.showContextMenu":true, //从使用的包中自动补全命令和环境 "latex-workshop.intellisense.package.enabled": true, //编译出错时设置是否弹出气泡设置 "latex-workshop.message.error.show": false, "latex-workshop.message.warning.show": false, // 编译工具和命令 "latex-workshop.latex.tools": [ { "name": "xelatex", "command": "xelatex", "args": [ "-synctex=1", "-interaction=nonstopmode", "-file-line-error", "%DOCFILE%" ] }, { "name": "pdflatex", "command": "pdflatex", "args": [ "-synctex=1", "-interaction=nonstopmode", "-file-line-error", "%DOCFILE%" ] }, { "name": "latexmk", "command": "latexmk", "args": [ "-synctex=1", "-interaction=nonstopmode", "-file-line-error", "-pdf", "-outdir=%OUTDIR%", "%DOCFILE%" ] }, { "name": "bibtex", "command": "bibtex", "args": [ "%DOCFILE%" ] } ], // 用于配置编译链 "latex-workshop.latex.recipes": [ { "name": "XeLaTeX", "tools": [ "xelatex" ] }, { "name": "PDFLaTeX", "tools": [ "pdflatex" ] }, { "name": "BibTeX", "tools": [ "bibtex" ] }, { "name": "LaTeXmk", "tools": [ "latexmk" ] }, { "name": "xelatex -> bibtex -> xelatex*2", "tools": [ "xelatex", "bibtex", "xelatex", "xelatex" ] }, { "name": "pdflatex -> bibtex -> pdflatex*2", "tools": [ "pdflatex", "bibtex", "pdflatex", "pdflatex" ] } ], //文件清理。此属性必须是字符串数组 "latex-workshop.latex.clean.fileTypes": [ "*.aux", "*.bbl", "*.blg", "*.idx", "*.ind", "*.lof", "*.lot", "*.out", "*.toc", "*.acn", "*.acr", "*.alg", "*.glg", "*.glo", "*.gls", "*.ist", "*.fls", "*.log", "*.fdb_latexmk" ], //设置为onFaild 在构建失败后清除辅助文件 "latex-workshop.latex.autoClean.run": "onFailed", // 使用上次的recipe编译组合 "latex-workshop.latex.recipe.default": "lastUsed", // 用于反向同步的内部查看器的键绑定。ctrl/cmd +点击(默认)或双击 "latex-workshop.view.pdf.internal.synctex.keybinding": "double-click", //使用 SumatraPDF 预览编译好的PDF文件 // 设置VScode内部查看生成的pdf文件 "latex-workshop.view.pdf.viewer": "external", // PDF查看器用于在\ref上的[View on PDF]链接 "latex-workshop.view.pdf.ref.viewer":"auto", "latex-workshop.view.pdf.external.viewer.command": "D:/LaTex/textlive/pdfViewer/SumatraPDF/SumatraPDF.exe", "latex-workshop.view.pdf.external.viewer.args": [ "%PDF%" ], "latex-workshop.view.pdf.external.synctex.command": "D:/LaTex/textlive/pdfViewer/SumatraPDF/SumatraPDF.exe", "latex-workshop.view.pdf.external.synctex.args": [ "-forward-search", "%TEX%", "%LINE%", "-reuse-instance", "-inverse-search", "\"D:/Vscode/Microsoft VS Code/Code.exe\" \"D:/Vscode/Microsoft VS Code/resources/app/out/cli.js\" --ms-enable-electron-run-as-node -r -g \"%f:%l\"", "%PDF%" ] }注意:其中涉及到VSCode与外部PDF软件的路径需要修改为自己本地的路径。
5 配置正反向搜索
所谓正反向搜索指的是:
- 正向搜索:从代码定位到PDF页面相应位置
- 反向搜索:从PDF页面定位到代码相应位置
正向搜索功能在VSCode中已经配置过,具体为
"latex-workshop.view.pdf.ref.viewer":"auto",
"latex-workshop.view.pdf.external.viewer.command": "D:/LaTex/textlive/pdfViewer/SumatraPDF/SumatraPDF.exe",
"latex-workshop.view.pdf.external.viewer.args": [
   "%PDF%"
],
"latex-workshop.view.pdf.external.synctex.command": "D:/LaTex/textlive/pdfViewer/SumatraPDF/SumatraPDF.exe",
"latex-workshop.view.pdf.external.synctex.args": [
   "-forward-search",
   "%TEX%",
   "%LINE%",
   "-reuse-instance",
   "-inverse-search",
   "\"D:/Vscode/Microsoft VS Code/Code.exe\" \"D:/Vscode/Microsoft VS Code/resources/app/out/cli.js\" --ms-enable-electron-run-as-node -r -g \"%f:%l\"",
   "%PDF%"
]
默认快捷键为Ctrl+Alt+J

Sumatra PDF的反向搜索与VSCode
LaTeX
\LaTeX
LATEX插件有兼容问题,最新的解决方案是在Sumatra PDF中进行高级设置,输入
InverseSearchCmdLine = "D:/Vscode/Microsoft VS Code/Code.exe" "D:/Vscode/Microsoft VS Code/resources/app/out/cli.js"  --ms-enable-electron-run-as-node -r -g "%f:%l"
EnableTeXEnhancements = true
即可解决反向搜索问题。文章来源:https://www.toymoban.com/news/detail-460561.html
6 快捷键模板
将下面的命令插入keysettings.json中即可文章来源地址https://www.toymoban.com/news/detail-460561.html
{
        "key": "ctrl",
        "command": "latex-workshop.synctex",
        "when": "config.latex-workshop.bind.altKeymap.enabled && editorTextFocus && editorLangId == 'latex'"
    },
        {
        "key": "ctrl+m",
        "command": "editor.action.insertSnippet",
        "when": "editorTextFocus",
        "args": {
            "snippet": "$$\n\t${TM_SELECTED_TEXT}$1\n$$ $0"
        }
    },
    {
        "key": "ctrl+shift+m",
        "command": "editor.action.insertSnippet",
        "when": "editorTextFocus",
        "args": {
            "snippet": "$ ${TM_SELECTED_TEXT}$1 $ $0"
        }
    },
    {
        "key": "ctrl+shift+d",
        "command": "editor.action.insertSnippet",
        "when": "editorTextFocus",
        "args": {
            "snippet": "_{$1} $0"
        }
    },
    {
        "key": "ctrl+shift+u",
        "command": "editor.action.insertSnippet",
        "when": "editorTextFocus",
        "args": {
            "snippet": "^{$1} $0"
        }
    },
    {
        "key": "ctrl+shift+q",
        "command": "editor.action.insertSnippet",
        "when": "editorTextFocus",
        "args": {
            "snippet": "\\sqrt{$1} $0"
        }
    },
    {
        "key": "ctrl+f",
        "command": "editor.action.insertSnippet",
        "when": "editorTextFocus",
        "args": {
            "snippet": "\\frac{$1}{$2}$3"
        }
    },
    {
        "key": "ctrl+d",
        "command": "editor.action.insertSnippet",
        "when": "editorTextFocus",
        "args": {
            "snippet": "\\mathrm{d}"
        }
    },
    {
        "key": "ctrl+e",
        "command": "editor.action.insertSnippet",
        "when": "editorTextFocus",
        "args": {
            "snippet": "\\mathrm{e}"
        }
    },
    {
        "key": "ctrl+i",
        "command": "editor.action.insertSnippet",
        "when": "editorTextFocus",
        "args": {
            "snippet": "\\mathrm{i}"
        }
    },
    {
        "key": "ctrl+r",
        "command": "editor.action.insertSnippet",
        "when": "editorTextFocus",
        "args": {
            "snippet": "\\mathbb{R}"
        }
    },
    {
        "key": "ctrl+k",
        "command": "editor.action.insertSnippet",
        "when": "editorTextFocus",
        "args": {
            "snippet": "\\mathbb{K}"
        }
    },
    {
        "key": "ctrl+p",
        "command": "editor.action.insertSnippet",
        "when": "editorTextFocus",
        "args": {
            "snippet": "\\partial "
        }
    }
到了这里,关于论文排版神器VSCode+LaTeX最新保姆级图文配置教程的文章就介绍完了。如果您还想了解更多内容,请在右上角搜索TOY模板网以前的文章或继续浏览下面的相关文章,希望大家以后多多支持TOY模板网!

