1 创建一个分支
Create a new directory and initialize a Git repository. We are going to create a directory named “tutorial”.
$ mkdir tutorial
$ cd tutorial
$ git init
Initialized empty Git repository in /Users/eguchi/Desktop/tutorial/.git/
进入这个tutorial文件夹,创建一个文件“myfile.txt”,在其中添加如下文本:
Git commands even a monkey can understand
然后执行如下的add和commit命令:
$ git add myfile.txt
$ git commit -m "first commit"
[master (root-commit) a73ae49] first commit
1 files changed, 1 insertions(+), 0 deletions(-)
create mode 100644 myfile.txt
At this point, the history tree should look like this.

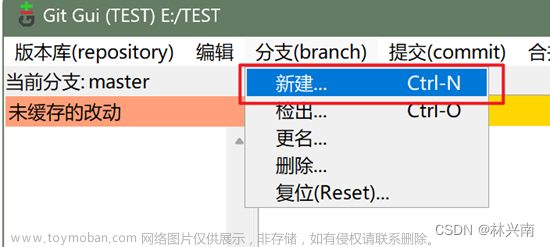
Let’s create a new branch with the name “issue1”.
$ git branch issue1
If you do not specify any parameters, the branch command will list all branches that correspond to this repository. The asterisk indicates the current active branch.
$ git branch
      issue1
      * master
At this point, the history tree should look like this.

2 切换分支
Switch over to the branch “issue1” when you want to add new commits to it.
$ git checkout issue1
Switched to branch 'issue1'
This history tree should look like this at the moment.

Once you are on the “issue1” branch, you can start adding commits to it.
编辑我们刚才创建的myfile.txt文件,在其中添加一行,使得整个文件变为如下两行:
Git commands even a monkey can understand
add: Register a change in an index
Let’s add the bold text below to myfile.txt and commit the change.
$ git add myfile.txt
$ git commit -m "append description of the add command"
[issue1 b2b23c4] append description of the add command1 files changed, 1 insertions(+), 0 deletions(-)
Our history tree will now look like this.

3 分支合并
Let’s merge “issue1” with “master”
我们可以使用如下的命令来合并分支:
$ git merge
By running the command above, the specified commit will be merged to the current active branch. Most of the time, you will want to merge a branch with the current active branch and you can do so by passing in the branch name in .
To merge commits into the master branch, let’s now switch over to the master branch.
$ git checkout master
Switched to branch 'master'
在合并前,查看myfile.txt文件,可以看到其内容如下:
Git commands even a monkey can understand
可以发现,我们在issue1分支上进行的修改并没有出现master分支上的myfile.txt中。
此时,我们执行merge操作:
$ git merge issue1
Updating 1257027..b2b23c4
Fast-forward
myfile.txt |    1 +
1 files changed, 1 insertions(+), 0 deletions(-)
The position of the master branch will now move over to that of “issue1”. A fast-forward merge has been executed here.

此时,查看myfile.txt文件:
Git commands even a monkey can understand
add: Register a change in an index
此时可以看到,我们应用在issue1分支上的修改出现在了master分支上。
4 删除分支
Now that “issue1” has been successfully merged with “master”, we can delete it.
We can delete a branch by calling the branch command and passing in the -d option, followed by the branch name. 如下的命令可以删除issue1分支:
$ git branch -d issue1
Deleted branch issue1 (was b2b23c4).
5 并行操作
Branching allows us to work in multiple parallel workspaces.
Let’s create two branches. Create one with the name “issue2″ and another with the name”issue3”, then switch over to “issue2”.
$ git branch issue2
$ git branch issue3
$ git checkout issue2
Switched to branch 'issue2'
$ git branch
  * issue2
    issue3
    master

修改myfile.txt文件,在下面添加一行,使得其内容变为:
Git commands even a monkey can understand
add: Register a change in an index
commit: Save the status of an index
然后执行如下操作:
$ git add myfile.txt
$ git commit -m "append description of the commit command"
[issue2 8f7aa27] append description of the commit command
1 files changed, 2 insertions(+), 0 deletions(-)
此时各分支状态如下:

我们切换到issue3分支:
$ git checkout issue3
Switched to branch 'issue3'
“issue3” currently has the same history/content as the master branch. It will not include the recent change that we have just made. This is because the recent change has been commited to the “issue2” branch.
此时修改myfile.txt文件,添加一行修改为:
Git commands even a monkey can understand
add: Register a change in an index
pull: Obtain the content of the remote repository
然后提交这次修改:
$ git add myfile.txt
$ git commit -m "append description of the pull command"
[issue3 e5f91ac] append description of the pull command
1 files changed, 2 insertions(+), 0 deletions(-)
此时分支状态如下:

We have now added two different line of texts to two different branches in parallel.
6 解决分支冲突
Now let’s merge branches “issue2” and “issue3” into the master branch.
We will switch over to “master” and merge “issue2” with it.
$ git checkout master
Switched to branch 'master'

$ git merge issue2
Updating b2b23c4..8f7aa27
Fast-forward
myfile.txt |    2 ++
1 files changed, 2 insertions(+), 0 deletions(-)
A fast-forward merge has now been executed.

Let’s try to merge “issue3” into “master”.
$ git merge issue3
Auto-merging myfile.txt
CONFLICT (content): Merge conflict in myfile.txt
Automatic merge failed; fix conflicts and then commit the result.
Git has identified a conflict and will not allow you to automatically merge “issue3” with “master”. The conflict here pertains to the same line on myfile.txt with different content on both branches.
由于我们尝试合并时发生的conflict,此时myfile.txt文件变为如下内容:
Git commands even a monkey can understand
add: Register a change in an index
<<<<<<< HEAD
commit: Save the status of an index
=======
pull: Obtain the content of a remote repository
>>>>>>> issue3
You will find some strange markers being added to myfile.txt. These markers were added by Git, giving us information regarding which line of the file is related to the conflict.
我们可以手动修改冲突,将myfile.txt文件修改为如下内容:
Git commands even a monkey can understand
add: Register a change in an index
commit: Save the status of an index
pull: Obtain the content of a remote repository
Once we are done with resolving the conflict, let’s commit the change.
$ git add myfile.txt
$ git commit -m "merge issue3 branch"
# On branch master
nothing to commit (working directory clean)
此时文件内容为:
Git commands even a monkey can understand
add: Register a change in an index
commit: Save the status of an index
pull: Obtain the content of a remote repository
The revision history will now look like the one below. A new merge commit has been created as a result of the conflict resolution. The master branch is now pointing to the latest merge commit. This is a non fast-forward merge.

整个rebase的过程是错误的,需要重新整理
7 Rebase a branch
Another approach we can take to integrate “issue3” branch into the master branch is by using the rebase command. Using rebase, we can streamline and clean our history tree just like how we have described earlier.
Let’s start by undoing the previous merge.
$ git reset --hard HEAD~

Switch over to “issue3” branch and rebase onto the master branch.
$ git checkout issue3
Switched to branch 'issue3'

$ git rebase master
  First, rewinding head to replay your work on top of it...
  Applying: append description of the pull command
  Using index info to reconstruct a base tree...
  :13: new blank line at EOF.
  +
  warning: 1 line adds whitespace errors.
  Falling back to patching base and 3-way merge...
  Auto-merging myfile.txt
  CONFLICT (content): Merge conflict in myfile.txt
  Failed to merge in the changes.
  Patch failed at 0001 append description of the pull command

  When you have resolved this problem run "git rebase --continue".
  If you would prefer to skip this patch, instead run "git rebase --skip".
  To check out the original branch and stop rebasing run "git rebase --abort".
When a conflict occurs during the rebase, you will have to resolve it immediately in order to resume the rebase operation.
此时myfile.txt文件内容如下:
Git commands even a monkey can understand
add: Register a change in an index
<<<<<<< HEAD
commit: Save the status of an index
=======
pull: Obtain the content of a remote repository
>>>>>>> issue3
Once the conflict is resolved, you can resume rebase with the –continue option. If you wish to quit and rollback the rebase operation, you can do so by passing in the –abort option.
此时我们可以将文件修改为:
Git commands even a monkey can understand
add: Register a change in an index
commit: Save the status of an index
pull: Obtain the content of a remote repository
然后执行:
$ git add myfile.txt
$ git rebase --continue
Applying: append description of the pull command

With the “issue3” branch rebased onto “master”, we can now issue a fast-forward merge.
Switch over to the master branch and merge “issue3” with “master”.
$ git checkout master
Switched to branch 'master'

$ git merge issue3
Updating 8f7aa27..96a0ff0
Fast-forward
myfile.txt |    1 +
1 files changed, 1 insertions(+), 0 deletions(-)
The content of myfile.txt should now be identical to the one that we got from the previous merge. The revision history now should look like the following.文章来源:https://www.toymoban.com/news/detail-460773.html
 文章来源地址https://www.toymoban.com/news/detail-460773.html
到了这里,关于Git 分支相关操作的文章就介绍完了。如果您还想了解更多内容,请在右上角搜索TOY模板网以前的文章或继续浏览下面的相关文章,希望大家以后多多支持TOY模板网!


