笔者前面写了两篇关于Visual Studio 2022使用MinGW的博文:《Visual Studio 2022使用MinGW来编译调试C/C++程序》、《Visual Studio 2022 CMake+MinGW+GDB 调试目标程序》,这两篇博文都是介绍的是GCC+GDB的编译与调试,本文笔者介绍的则是Clang+LLDB的编译与调试。读完本文,读者可以在GCC、Clang与GDB、LLDB之间进行随意组合。
GCC与GDB的编译调试组合在Linux下是默认组合,像Linux内核以及Linux的绝大多数软件都是使用GCC来编译,使用GDB来调试的。Clang+LLDB是作为新秀存在的,在近年来的MacOS中却是作为默认的编译调试组合。Clang作为编译器的新秀,是有许多优点的,比如Clang的编译速度比GCC快许多,编译出的错误提示非常友好,模块化比GCC做得好等等;LLDB调试器也有许多优点,比如下面一段代码,引用笔者前面的博文《对C++变长参数中的字符串进行转义》
template<typename ... Args>
string FormatSQL(const char* fmt, Args&& ... args)
{
	vector<char*> vct;
	size_t len = strlen(fmt);
	string str;
	Concat(str, len, fmt, EscapeArg(len, vct, args)...);
	for (auto iter : vct)
		delete[] iter;
	return str;
}
在调试到Concat(str, len, fmt, EscapeArg(len, vct, args)...);时,默认情况下,使用GDB进入EscapeArg函数执行到最后一句时,在VS中按F10执行逐过程,就会跳过Concat函数,即不会进入Concat函数,需要按F11执行逐语句,才会进入Concat函数,这个行为与VC的调试器不一致,而LLDB就与VC的调试器的行为一致,按F10执行逐过程可以进入Concat函数。GDB的这种行为不知道是否可以配置,有知道的读者可以在评论区留言或者讨论。
一、在MinGW中安装Clang和LLDB
MinGW的安装这里就不再赘述了,直接去MSYS2官网就可以下载最新的MinGW安装包安装就可以了。
安装好MinGW后,在MinGW终端使用下面的命令安装Clang和LLDB:
pacman -S mingw-w64-x86_64-clang
pacman -S mingw-w64-x86_64-clang-tools-extra
pacman -S mingw-w64-x86_64-clang-analyzer
pacman -S mingw-w64-x86_64-lldb
pacman -S mingw-w64-x86_64-lldb-mi
二、Visual Studio 2022配置
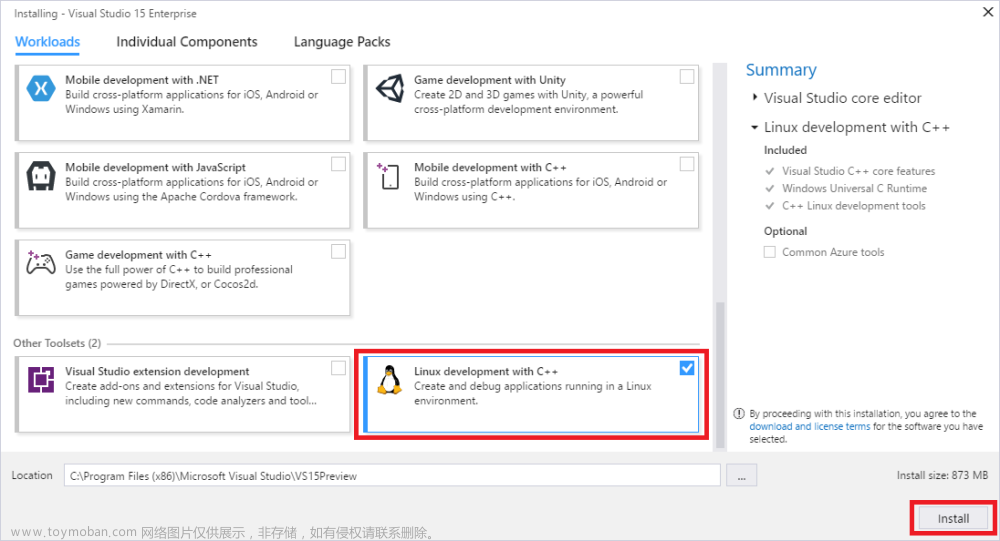
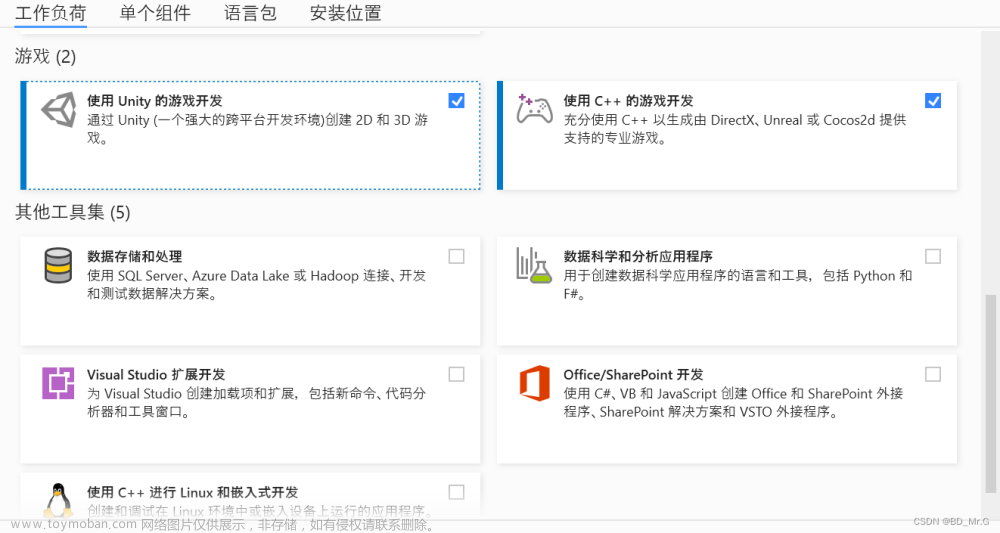
Visual Studio 2022有一系列的CMake模板配置,有本机VC的,有WSL的、有MinGW的,有ARM的,也有Linux远程的:

这些模板配置位于Visual Studio 2022的安装目录C:\Program Files\Microsoft Visual Studio\2022\Enterprise\Common7\IDE\CommonExtensions\Microsoft\CMake\CMakeSettingsTemplates,该目录下有许多json文件:
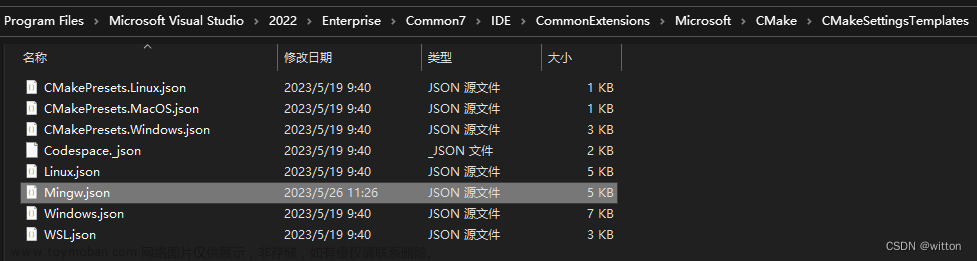
MinGW的相关配置就在MinGW.json中,内容如下:
{
  "configurations": [
    {
      // Test Comment
      "environments": [
        {
          "MINGW64_ROOT": "C:/msys64/mingw64",
          "BIN_ROOT": "${env.MINGW64_ROOT}/bin",
          "FLAVOR": "x86_64-w64-mingw32",
          "TOOLSET_VERSION": "9.1.0",
          "PATH": "${env.MINGW64_ROOT}/bin;${env.MINGW64_ROOT}/../usr/local/bin;${env.MINGW64_ROOT}/../usr/bin;${env.MINGW64_ROOT}/../bin;${env.PATH}",
          "INCLUDE": "${env.INCLUDE};${env.MINGW64_ROOT}/include/c++/${env.TOOLSET_VERSION};${env.MINGW64_ROOT}/include/c++/${env.TOOLSET_VERSION}/tr1;${env.MINGW64_ROOT}/include/c++/${env.TOOLSET_VERSION}/${env.FLAVOR}",
          "environment": "mingw_64"
        }
      ],
      "name": "Mingw64-Debug",
      "description": "TemplateDescription_Localize_Mingw64Debug",
      "generator": "Ninja",
      "configurationType": "Debug",
      "inheritEnvironments": [
        "mingw_64"
      ],
      "buildRoot": "${projectDir}\\out\\build\\${name}",
      "installRoot": "${projectDir}\\out\\install\\${name}",
      "cmakeCommandArgs": "",
      "buildCommandArgs": "-v",
      "ctestCommandArgs": "",
      "intelliSenseMode": "linux-gcc-x64",
      "variables": [
        {
          "name": "CMAKE_C_COMPILER",
          "value": "${env.BIN_ROOT}/gcc.exe"
        },
        {
          "name": "CMAKE_CXX_COMPILER",
          "value": "${env.BIN_ROOT}/g++.exe"
        }
      ]
    },
    {
      "environments": [
        {
          "MINGW64_ROOT": "C:/msys64/mingw64",
          "BIN_ROOT": "${env.MINGW64_ROOT}/bin",
          "FLAVOR": "x86_64-w64-mingw32",
          "TOOLSET_VERSION": "9.1.0",
          "PATH": "${env.MINGW64_ROOT}/bin;${env.MINGW64_ROOT}/../usr/local/bin;${env.MINGW64_ROOT}/../usr/bin;${env.MINGW64_ROOT}/../bin;${env.PATH}",
          "INCLUDE": "${env.INCLUDE};${env.MINGW64_ROOT}/include/c++/${env.TOOLSET_VERSION};${env.MINGW64_ROOT}/include/c++/${env.TOOLSET_VERSION}/tr1;${env.MINGW64_ROOT}/include/c++/${env.TOOLSET_VERSION}/${env.FLAVOR}",
          "environment": "mingw_64"
        }
      ],
      "name": "Mingw64-Release",
      "description": "TemplateDescription_Localize_Mingw64Release",
      "generator": "Ninja",
      "configurationType": "RelWithDebInfo",
      "inheritEnvironments": [
        "mingw_64"
      ],
      "buildRoot": "${projectDir}\\out\\build\\${name}",
      "installRoot": "${projectDir}\\out\\install\\${name}",
      "cmakeCommandArgs": "",
      "buildCommandArgs": "-v",
      "ctestCommandArgs": "",
      "intelliSenseMode": "linux-gcc-x64",
      "variables": [
        {
          "name": "CMAKE_C_COMPILER",
          "value": "${env.BIN_ROOT}/gcc.exe"
        },
        {
          "name": "CMAKE_CXX_COMPILER",
          "value": "${env.BIN_ROOT}/g++.exe"
        }
      ]
    }
  ]
}
(一)、GCC配置
1.配置MinGW根目录和TOOLSET_VERSION
可以看到MinGW中分别配置了Mingw64-Debug和Mingw64-Release,里面配置了MinGW的环境变量,使用的编译器,编译目录、安装目录等等。MinGW的安装目录默认为C:/msys64/mingw64,可以根据自己的实际情况更改安装目录以及TOOLSET_VERSION,比如笔者的GCC目前已经更新到13.1.0了,所以需要把TOOLSET_VERSION修改为13.1.0,否则可能会在VS中无法打开头文件。
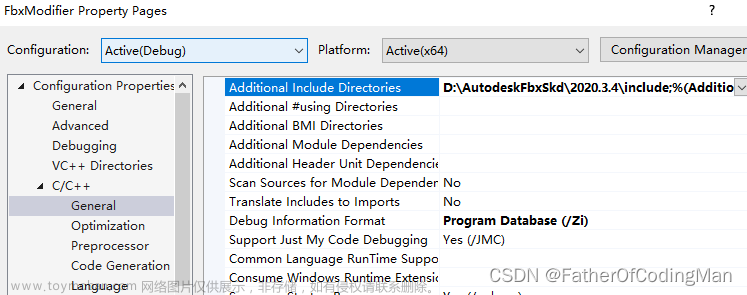
2.配置调试格式
GCC与Clang在编译时添加调试信息的参数默认都是-g,但是各自生成的调试格式是不一定相同的。
GCC的官方文档解释-g:
-g
Produce debugging information in the operating system’s native format (stabs, COFF, XCOFF, or DWARF). GDB can work with this debugging information.
On most systems that use stabs format, -g enables use of extra debugging information that only GDB can use; this extra information makes debugging work better in GDB but probably makes other debuggers crash or refuse to read the program. If you want to control for certain whether to generate the extra information, use -gvms (see below).
即使用的操作系统本地的调试格式,可能是stabs或者COFF或者XCOFF或者 DWARF,GDB是可以识别这些调试格式的。
Clang的官方文档:
-g
Generate complete debug info.
Controlling Debugger “Tuning”
While Clang generally emits standard DWARF debug info (http://dwarfstd.org), different debuggers may know how to take advantage of different specific DWARF features. You can “tune” the debug info for one of several different debuggers.
-ggdb, -glldb, -gsce, -gdbx
Tune the debug info for the gdb, lldb, Sony PlayStation® debugger, or dbx, respectively. Each of these options implies -g. (Therefore, if you want both -gline-tables-only and debugger tuning, the tuning option must come first.)
即默认是使用标准的DWARF格式,GDB是可以识别的,所以GCC与Clang使用参数-g生成的程序,都可以使用GDB来调试。
而LLDB官方文档中提到的功能说明:
Debug symbol file parsers to incrementally extract debug information from object files. Support currently includes DWARF & Mach-O symbol tables.
即目前LLDB只支持DWARF和Mach-O符号表,那MinGW中就只能是DWARF了。DWARF格式目前已经发展到第5个版本了,LLDB目前只支持到第4个版本。
所以为了让GDB与LLDB都能进行调试,在使用GCC编译时需要指定调试格式为DWARF,即需要使用参数-gdwarf-4。
前面的json文件中variables部分添加CMAKE_C_FLAGS_DEBUG和CMAKE_CXX_FLAGS_DEBUG变量,如下配置:
"variables": [
        {
          "name": "CMAKE_C_COMPILER",
          "value": "${env.BIN_ROOT}/gcc.exe"
        },
        {
          "name": "CMAKE_CXX_COMPILER",
          "value": "${env.BIN_ROOT}/g++.exe"
        },
		{
          "name": "CMAKE_C_FLAGS_DEBUG",
          "value": "-gdwarf-4",
          "type": "STRING"
        },
		{
          "name": "CMAKE_CXX_FLAGS_DEBUG",
          "value": "-gdwarf-4",
          "type": "STRING"
        }
      ]
(二)、Clang配置
Clang编译器可以使用GCC的库libstdc++,也可以使用Clang自己的C++库libc++(参见笔者之前的博文《CentOS 6.X安装GCC 9.1和LLVM/Clang 8.0》中的CLANG_DEFAULT_CXX_STDLIB说明),Clang的libc++库头文件是在v1目录中,所以配置时需要让Clang可以查找到GCC的头文件以及Clang的头文件目录。TOOLSET_VERSION还是填写MinGW中当前安装的GCC的版本号,然后在environments的INCLUDE中添加${env.MINGW64_ROOT}/include/c++/v1。variables设置编译器为clang.exe以及clang++.exe:
"variables": [
        {
          "name": "CMAKE_C_COMPILER",
          "value": "${env.BIN_ROOT}/clang.exe"
        },
        {
          "name": "CMAKE_CXX_COMPILER",
          "value": "${env.BIN_ROOT}/clang++.exe"
        }
      ]
由于Clang在MinGW默认就是使用的dwarf格式,所以可以不用指定,也可以指定。为了不与原来的文件混用,我们在原Mingw.json的基础上复制一个MingwClang.json文件来修改,并保存在相同的目录,下面列出完整配置:
{
  "configurations": [
    {
      // Test Comment
      "environments": [
        {
          "MINGW64_ROOT": "G:/msys64/mingw64",
          "BIN_ROOT": "${env.MINGW64_ROOT}/bin",
          "FLAVOR": "x86_64-w64-mingw32",
          "TOOLSET_VERSION": "13.1.0",
          "PATH": "${env.MINGW64_ROOT}/bin;${env.MINGW64_ROOT}/../usr/local/bin;${env.MINGW64_ROOT}/../usr/bin;${env.MINGW64_ROOT}/../bin;${env.PATH}",
          "INCLUDE": "${env.INCLUDE};${env.MINGW64_ROOT}/include/c++/v1;${env.MINGW64_ROOT}/include/c++/${env.TOOLSET_VERSION};${env.MINGW64_ROOT}/include/c++/${env.TOOLSET_VERSION}/tr1;${env.MINGW64_ROOT}/include/c++/${env.TOOLSET_VERSION}/${env.FLAVOR}",
          "environment": "mingw_64"
        }
      ],
      "name": "Mingw64-Clang-Debug",
      "description": "TemplateDescription_Localize_Mingw64Debug",
      "generator": "Ninja",
      "configurationType": "Debug",
      "inheritEnvironments": [
        "mingw_64"
      ],
      "buildRoot": "${projectDir}\\out\\build\\${name}",
      "installRoot": "${projectDir}\\out\\install\\${name}",
      "cmakeCommandArgs": "",
      "buildCommandArgs": "-v",
      "ctestCommandArgs": "",
      "intelliSenseMode": "windows-clang-x64",
      "variables": [
        {
          "name": "CMAKE_C_COMPILER",
          "value": "${env.BIN_ROOT}/clang.exe"
        },
        {
          "name": "CMAKE_CXX_COMPILER",
          "value": "${env.BIN_ROOT}/clang++.exe"
        },
        {
          "name": "CMAKE_C_FLAGS_DEBUG",
          "value": "-gdwarf-4",
          "type": "STRING"
        },
        {
          "name": "CMAKE_CXX_FLAGS_DEBUG",
          "value": "-gdwarf-4",
          "type": "STRING"
        }
      ]
    },
    {
      "environments": [
        {
          "MINGW64_ROOT": "G:/msys64/mingw64",
          "BIN_ROOT": "${env.MINGW64_ROOT}/bin",
          "FLAVOR": "x86_64-w64-mingw32",
          "TOOLSET_VERSION": "13.1.0",
          "PATH": "${env.MINGW64_ROOT}/bin;${env.MINGW64_ROOT}/../usr/local/bin;${env.MINGW64_ROOT}/../usr/bin;${env.MINGW64_ROOT}/../bin;${env.PATH}",
          "INCLUDE": "${env.INCLUDE};${env.MINGW64_ROOT}/include/c++/v1;${env.MINGW64_ROOT}/include/c++/${env.TOOLSET_VERSION};${env.MINGW64_ROOT}/include/c++/${env.TOOLSET_VERSION}/tr1;${env.MINGW64_ROOT}/include/c++/${env.TOOLSET_VERSION}/${env.FLAVOR}",
          "environment": "mingw_64"
        }
      ],
      "name": "Mingw64-Clang-Release",
      "description": "TemplateDescription_Localize_Mingw64Release",
      "generator": "Ninja",
      "configurationType": "RelWithDebInfo",
      "inheritEnvironments": [
        "mingw_64"
      ],
      "buildRoot": "${projectDir}\\out\\build\\${name}",
      "installRoot": "${projectDir}\\out\\install\\${name}",
      "cmakeCommandArgs": "",
      "buildCommandArgs": "-v",
      "ctestCommandArgs": "",
      "intelliSenseMode": "windows-clang-x64",
      "variables": [
        {
          "name": "CMAKE_C_COMPILER",
          "value": "${env.BIN_ROOT}/clang.exe"
        },
        {
          "name": "CMAKE_CXX_COMPILER",
          "value": "${env.BIN_ROOT}/clang++.exe"
        }
      ]
    }
  ]
}
配置好后可以在CMakeSettings对话框中看到:
如果要使用Clang的libc++库,CMakeLists.txt中添加下面两句:
add_compile_options("-stdlib=libc++")
link_libraries(c++)
(三)、GDB调试配置
下面直接列出一个简单的配置:
{
      "type": "cppdbg",
      "name": "CMakeLists.gdb",
      "project": "CMakeLists.txt",
      "projectTarget": "t.exe",
      "cwd": "${workspaceRoot}",
      "program": "${debugInfo.target}",
      "MIMode": "gdb",
      "miDebuggerPath": "${env.MINGW_PREFIX}\\bin\\gdb.exe",
      "externalConsole": true,
      "setupCommands": [
        {
          "description": "为 gdb 启用整齐打印",
          "text": "-enable-pretty-printing",
          "ignoreFailures": true
        },
        {
          "description": "将反汇编风格设置为 Intel",
          "text": "set disassembly-flavor intel",
          "ignoreFailures": true
        }
      ]
    }
可以参见:《Visual Studio 2022使用MinGW来编译调试C/C++程序》、《Visual Studio 2022 CMake+MinGW+GDB 调试目标程序》
如果每次都添加setupCommands命令,也比较烦,我们可以在USERPROFILE环境变量所指目录中添加一个.gdbinit文件,将上面的命令放在里面,每次GDB启动时都会去执行里面的命令:
set disassembly-flavor intel
(四)、LLDB配置
LLDB配置与GDB配置类似:
{
      "type": "cppdbg",
      "name": "CMakeLists.lldb",
      "project": "CMakeLists.txt",
      "projectTarget": "t.exe",
      "cwd": "${workspaceRoot}",
      "program": "${debugInfo.target}",
      "MIMode": "lldb",
      "miDebuggerPath": "${env.MINGW_PREFIX}\\bin\\lldb-mi.exe",
      "externalConsole": true,
      "setupCommands": [
        {
          "description": "为 gdb 启用整齐打印",
          "text": "-enable-pretty-printing",
          "ignoreFailures": true
        },
        {
          "description": "将反汇编风格设置为 Intel",
          "text": "setting set target.x86-disassembly-flavor intel",
          "ignoreFailures": true
        }
      ]
    }
只需要把MIMode改为lldb,miDebuggerPath设置为lldb-mi.exe,如果反汇编格式使用Intel格式的命令为setting set target.x86-disassembly-flavor intel。同样地,为了方便省事,可以在USERPROFILE环境变量所指目录中添加一个.lldbinit文件,将命令放在里面,每次LLDB启动时都会去执行里面的命令:
setting set target.x86-disassembly-flavor intel
Btw:目前Visual Studio 2022使用LLDB调试器对源码反汇编还有Bug,期待新版本能快速修复。VSCode目前也可以使用LLDB进行调试,但是反汇编也是有Bug的。文章来源:https://www.toymoban.com/news/detail-463008.html
若对你有所帮助,欢迎点赞收藏!文章来源地址https://www.toymoban.com/news/detail-463008.html
到了这里,关于Visual Studio 2022使用CMake+MinGW+Clang+LLDB作为开发环境的文章就介绍完了。如果您还想了解更多内容,请在右上角搜索TOY模板网以前的文章或继续浏览下面的相关文章,希望大家以后多多支持TOY模板网!