项目所需
node:https://nodejs.org/en/
git:https://git-scm.com/
vue:https://v2.cn.vuejs.org/v2/guide/installation.html
element-ui:https://element.eleme.cn/#/zh-CN/component/installation
项目所需:https://pan.baidu.com/s/1ua0jp9YCtPH6slE49HDUBw
提取码:kkkk
新建项目
在node和vue都调试、配置好的情况下使用vscode 在终端中输入命令
npm i -g @vue/cli 安装vue脚手架
安装成功后通过vue --version 可以查看版本
vue create 项目名 新建项目
vue create control
空格为取消选项 回车为选中


根据个人习惯选择css样式 本人喜欢使用sass


一路回车等待创建

此界面为创建成功

cd control 来到项目的目录 进行启动 (git命令自行学习)

此界面为开启成功

项目初始化
将以下标记全部删除

router/index.js最终页面

将views中文件全部删除,并新建Login.vue 和 Register.vue 文件,修改App.vue

Login 、 Register 和 App.vue 文件代码
// Login、Register和App.vue 文件代码
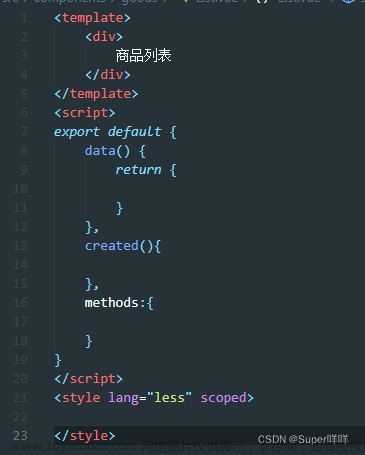
<template>
<div>
Login // Register
</div>
</template>
<script>
export default {}
</script>
<style lang="scss" scoped>
</style>在router/index.js中配置路由信息

在App.vue中添加路由出口 <router-view></router-view>

此时打开在浏览器打开项目 为此界面即为成功

页面部署
引入element-ui

element-ui 哪里需要引哪里
代码
router/index.js
//router/index.js
import Vue from "vue";
import VueRouter from "vue-router";

Vue.use(VueRouter);

const router = new VueRouter({
  mode: "history",
  base: process.env.BASE_URL,
  routes:[
    {path:'/login',component:()=>import('../views/Login.vue')},
    {
      path:'/home',
      component:()=>import('../views/Home.vue'),
      children:[
        {path:'/home/one-one',component:()=>import('../views/OneOne.vue')},
        {path:'/home/one-two',component:()=>import('../views/OneTwo.vue')},
        {path:'/home/one-thr',component:()=>import('../views/OneThr.vue')},
        {path:'/home/',redirect:'/home/one-one'}
      ]
    },
    {path:'/register',component:()=>import('../views/Register.vue')},
    {path:'/',redirect:'/login'}
  ]
});

export default router;
main.js
import Vue from 'vue'
import App from './App.vue'
import router from './router'
import store from './store'
import ElementUI from 'element-ui'
import 'element-ui/lib/theme-chalk/index.css';

Vue.config.productionTip = false
Vue.use(ElementUI);

new Vue({
  router,
  store,
  el: '#app',
  render: h => h(App)
}).$mount('#app')
Home.vue
<template>
  <div class="control">

    <div class="tit">
      <div class="userName">
        <h4>{{ $store.state.username }}</h4>
        <span>欢迎您</span>
      </div>
      <div class="userInfo">
        <div class="userImg" @click="changeImg" @mouseover="close">
          <img src="" alt="">
        </div>
      </div>

    </div>

    <div class="banner">
      <div class="left">
        <div class="menu">
          <el-radio-group v-model="isCollapse" style="margin-bottom: 20px;">
            <el-radio-button :label="false">展开</el-radio-button>
            <el-radio-button :label="true">收起</el-radio-button>
          </el-radio-group>
          <el-menu default-active="1-4-1" class="el-menu-vertical-demo" @open="handleOpen" @close="handleClose"
            :collapse="isCollapse">
            <el-submenu index="1">
              <template slot="title">
                <i class="el-icon-location"></i>
                <span slot="title">导航一</span>
              </template>
              <el-menu-item-group>
                <span slot="title">分组一</span>
                <el-menu-item index="1-1" @click="option(11)">选项1</el-menu-item>
                <el-menu-item index="1-2" @click="option(12)">选项2</el-menu-item>
              </el-menu-item-group>
              <el-menu-item-group title="分组2">
                <el-menu-item index="1-3" @click="option(13)">选项3</el-menu-item>
              </el-menu-item-group>
              <el-submenu index="1-4">
                <span slot="title">选项4</span>
                <el-menu-item index="1-4-1">选项1</el-menu-item>
              </el-submenu>
            </el-submenu>
            <el-menu-item index="2">
              <i class="el-icon-menu"></i>
              <span slot="title">导航二</span>
            </el-menu-item>
            <el-menu-item index="3" disabled>
              <i class="el-icon-document"></i>
              <span slot="title">导航三</span>
            </el-menu-item>
            <el-menu-item index="4">
              <i class="el-icon-setting"></i>
              <span slot="title">导航四</span>
            </el-menu-item>
          </el-menu>
        </div>
      </div>
      <div class="right">
        <router-view></router-view>
      </div>
    </div>

    <div class="ImgMenu" v-if="show" @mouseover="changeImg('self')" @mouseout="close">
      <el-upload class="avatar-uploader" action="https://jsonplaceholder.typicode.com/posts/" :show-file-list="false"
        :on-success="handleAvatarSuccess" :before-upload="beforeAvatarUpload">
        <img v-if="imageUrl" :src="imageUrl" class="avatar">
        <i v-else class="el-icon-plus avatar-uploader-icon"></i>
      </el-upload>
      <div class="switch">
        <ul class="conList">
          <li @click="changeUser">
            切换账号
          </li>
        </ul>
      </div>
    </div>

  </div>
</template>

<script>


export default {
  data() {
    return {
      isCollapse: true,
      show: false,
      imageUrl: '',
      t: null
    };
  },
  methods: {
    changeImg(key) {
      if (key == 'self') {
        this.show = true
        clearTimeout(this.t)
      } else {
        this.show = this.show ? false : true
      }

    },
    close() {
      let that = this
      this.t = setTimeout(() => {
        that.show = false
      }, 3000);
    },
    changeUser() {
      this.$router.push('/login')
    },
    handleOpen(key, keyPath) {
      console.log(key, keyPath);
    },
    handleClose(key, keyPath) {
      console.log(key, keyPath);
    },
    handleAvatarSuccess(res, file) {
      this.imageUrl = URL.createObjectURL(file.raw);
    },
    beforeAvatarUpload(file) {
      const isJPG = file.type === 'image/jpeg';
      const isLt2M = file.size / 1024 / 1024 < 2;

      if (!isJPG) {
        this.$message.error('上传头像图片只能是 JPG 格式!');
      }
      if (!isLt2M) {
        this.$message.error('上传头像图片大小不能超过 2MB!');
      }
      return isJPG && isLt2M;
    },

    // 切换选项
    option(key) {
      switch (key) {
        case 11:
          this.$router.push('/home/one-one')
          break;
        case 12:
          this.$router.push('/home/one-two')
          break;
        case 13:
          this.$router.push('/home/one-thr')
          break;
      }
    }

  },
  mounted() {
    this.$store.state.username = localStorage.getItem('username')
  },
  beforeRouteLeave(to, from, next) {
    localStorage.clear()
    next()
  }
}
</script>

<style lang="scss" scoped>
ul {
  list-style: none;
}

.control {
  width: 100%;
  height: 100%;
  display: flex;
  flex-direction: column;
  justify-content: space-between;
}

.conList {
  display: flex;
  flex-direction: column;
  justify-content: center;
  align-items: center;
}

.tit {
  width: 100%;
  height: 50px;
  background-color: rgb(27, 101, 237);
  display: flex;
  justify-content: right;

  .userInfo {
    width: 50px;
    height: 50px;
    margin-right: 30px;

    .userImg {
      width: 100%;
      height: 100%;
      border-radius: 50%;
      background-color: rgb(11, 144, 100);
    }
  }
}

.el-menu-vertical-demo:not(.el-menu--collapse) {
  width: 200px;
  min-height: 400px;
}

.avatar-uploader .el-upload {
  border: 1px dashed #d9d9d9;
  border-radius: 6px;
  cursor: pointer;
  position: relative;
  overflow: hidden;
}

.avatar-uploader .el-upload:hover {
  border-color: #409EFF;
}

.avatar-uploader-icon {
  font-size: 28px;
  color: #8c939d;
  width: 178px;
  height: 178px;
  line-height: 178px;
  text-align: center;
}

.avatar {
  width: 178px;
  height: 178px;
  display: block;
}

.ImgMenu {
  width: 200px;
  height: 400px;
  border-radius: 10px;
  position: absolute;
  right: 30px;
  top: 70px;
  background-color: rgba(155, 150, 150, .3);
}

.userName {
  width: 200px;
  height: 50px;
  display: flex;
  justify-content: space-around;
  align-items: center;
}

.banner {
  width: 100%;
  display: flex;
  justify-content: space-between;
  flex: 1;
}

.left {
  width: 15%;
  height: 100%;
}

.right {
  width: 85%;
  height: 100%;
}
</style>
Login.vue
<template>
  <div class="login">
    <el-form :model="admin" ref="login" :rules="rules" @keyup.enter.native="login">
      <el-form-item prop="username">
        <el-input placeholder="请输入用户名" v-model="admin.username"></el-input>
      </el-form-item>
      <el-form-item prop="password">
        <el-input placeholder="请输入密码" type="password" v-model="admin.password"></el-input>
      </el-form-item>
      <el-button @click="login">
        登录
      </el-button>
      <el-button>
        <router-link to="/register">注册</router-link>
      </el-button>
    </el-form>
  </div>
</template>

<script>
export default {
  data() {
    return {
      admin: {
        username: "",
        password: ""
      },
      rules: {
        username: [
          { required: true, message: "用户名格式错误", trigger: "blur" },
          { min: 3, max: 15, message: "长度在 3 到 15 个字符", trigger: "blur" }
        ],
        password: [
          { required: true, message: "密码格式错误", trigger: "blur" },
          { min: 3, max: 15, message: "长度在 3 到 15 个字符", trigger: "blur" }
        ]
      }
    };
  },
  methods: {
    login() {
      let that = this
      this.$refs.login.validate((valid) => {
        if (valid) {
          that.$router.push('/home')
        }
        else {
          console.log("error submit!!");
          return false;
        }
      });
    }
  },
  beforeRouteLeave(to, from, next) {
    this.$store.state.username = this.admin.username
    localStorage.setItem('username', this.admin.username)
    next()
  }
}
</script>

<style lang="scss" scoped>
.login {
  width: 620px;
  height: 349px;
  position: absolute;
  top: 50%;
  left: 50%;
  transform: translate(-50%, -50%);
  padding: 20px 30px;
  border-radius: 20px;
  box-shadow: 5px 5px 20px rgb(39, 38, 38);
  background-image: linear-gradient(skyblue,orange);
}
</style>OneOne.vue文章来源:https://www.toymoban.com/news/detail-464239.html
<template>
  <div class="one-two">
    <h2>1-1</h2>
    <ul class="dataList">
      <li v-for="item in oneData">
       {{ item }}
      </li>
    </ul>
  </div>
</template>

<script>
  export default {
    data(){
      return{
        oneData:['111','222','333','444']
      }
    }

  }
</script>

<style lang="scss" scoped>
*{
  margin: 0;
  padding: 0;
}
ul{
  list-style: none;
}
.one-two{
  width: 100%;
  height: 100%;
}
.dataList{
  display: flex;
  justify-content: space-around;
  flex-wrap: wrap;
}
.dataList li{
  width: 533px;
  height: 300px;
  img{
    width: 100%;
  }
}
</style>自己动手丰衣足食!!!文章来源地址https://www.toymoban.com/news/detail-464239.html
到了这里,关于Vue2+element-ui后台管理系统(静态页面)的文章就介绍完了。如果您还想了解更多内容,请在右上角搜索TOY模板网以前的文章或继续浏览下面的相关文章,希望大家以后多多支持TOY模板网!