pytest
pytest是python的一种单元测试框架,同自带的unit test测试框架类似,但pytest更简洁高效。
单元测试:
- 测试 函数、类、方法能不能正常运行
- 测试的结果是否符合我们的预期结果
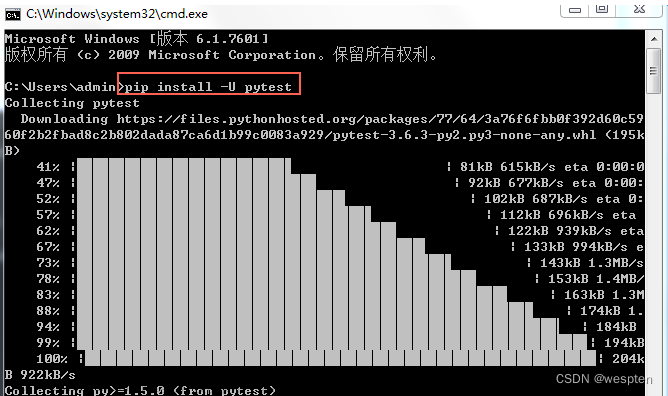
安装
pip install -U pytest
基本使用
- 通过pytest包使用
import pytest


def test_a():
    print("test_a")
    return 1 + 0


def test_b():
    print("test_b")
    return 1 / 0


if __name__ == '__main__':
    pytest.main()
默认情况下:在main中直接使用pytest的main()方法,会把文件中所有test_*开头的方法执行一遍。
- 通过终端的命令使用,到所在目录下执行
# pytest或加参数都可
pytest -s
单量执行测试文件
import pytest

def test_1():
    print("test_1+++")
    return 1 + 0

def test_2():
    print("test_2--------")
    return 1 / 0

if __name__ == '__main__':
	# 只运行 test_py2.py文件中的测试方法
    pytest.main(["-s", "test_py2.py"])
配置文件
测试自动触发规则:
-
在测试目录中或当前的目录中寻找
-
名称为
test_*.py或*_test.py的文件 -
Test开头的类,且没有初始化
__init__方法 -
以上目录或类中,test开头的函数或方法
-
会执行uinit test的测试用例类
运行pytest时,自动读取所在目录中的配置文件pytest.ini。在测试文件所在目录下创建一个pytest.ini
内容如下:注意:以下内容请将 中文全部删掉,否则可能出问题,这里只是为了解释配置的。
[pytest]
; ini文件中的英文分号,都是注释
addopts = -s   ;选项参数

testpaths = ./   ;测试模块所在目录

python_files = test_*.py *test.py  ;测试文件名称

python_classes = Test_*  ;测试类名称规则

python_functions = test_*  ;测试函数或者方法命名规则
假如我把python_functions修改为demo_*,那么只有以demo_函数名命名的函数才会被执行。
断言
import pytest


def test_1():
    print("test_1+++")
    assert 20 == 20


def test_2():
    print("test_2--------")
    assert "a" in "hello"


if __name__ == '__main__':
    pytest.main(["-s", "test_py2.py"])
标记
标记跳过测试
- 标记跳过(装饰器)
- 标记失败(装饰器)
@pytest.mark.skip("跳过")
def test_2():
    print("test_2--------")
    return 1 / 0


@pytest.mark.xfail(raises=ZeroDivisionError)
def test_3():
    print("test_3--------")
    return 1 / 0
参数化
比如写了一个函数需要模拟一些参数进行调用,那么可以使用:
parametrize装饰器:
- [“a”, “b”],列表中定义的方法参数名
- [(1, 2), (2, 2), (50, 51)],三组测试数据,表示此方法会被调用3次
import pytest


@pytest.mark.parametrize(["a", "b"], [(1, 2), (2, 2), (50, 51)])
def test_1(a, b):
    print("test_1+++++++")
    assert a + b > 100


if __name__ == '__main__':
    pytest.main(["-s", "test_py3.py"])
夹具
在测试之前和之后执行,用于固定测试环境,及清理回收测试资源。
setup_...和teardown_...
-
模块的夹具:
setup_module()和teardown_module(),在python文件加载前和文件内容结束后执行import pytest def setup_module(args): print("setup_module", args) def teardown_module(args): print("teardown_module", args) def test_fun_a(): print("------------", "test_fun_a") def test_fun_b(): print("------------", "test_fun_b") class TestOne: def test_1(self): print("------", "test_1") def test_2(self): print("------", "test_2") if __name__ == '__main__': pytest.main(["-s", "test_py4.py"]) ###################################################结果######################## test_py4.py setup_module <module 'test_py4' from 'D:\\environment\\python-workspace\\androidTest\\pytest\\test_py4.py'> ------------ test_fun_a .------------ test_fun_b .------ test_1 .------ test_2 .teardown_module <module 'test_py4' from 'D:\\environment\\python-workspace\\androidTest\\pytest\\test_py4.py'> -
函数的夹具:
setup_function()和teardown_function(),py中函数执行前和执行后执行(注意是函数,不是类中的方法)import pytest def setup_function(args): print("setup_function", args) def teardown_function(args): print("teardown_function", args) def test_fun_a(): print("------------", "test_fun_a") def test_fun_b(): print("------------", "test_fun_b") class TestOne: def test_1(self): print("------", "test_1") def test_2(self): print("------", "test_2") if __name__ == '__main__': pytest.main(["-s", "test_py4.py"]) ###################################################结果######################## test_py4.py setup_function <function test_fun_a at 0x000001ED1D8C31F8> ------------ test_fun_a .teardown_function <function test_fun_a at 0x000001ED1D8C31F8> setup_function <function test_fun_b at 0x000001ED1D8C3288> ------------ test_fun_b .teardown_function <function test_fun_b at 0x000001ED1D8C3288> ------ test_1 .------ test_2 -
类的夹具:
setup_class()和teardown_class(),类被加载前和销毁后执行class TestOne: def setup_class(self): print("------", "setup___test_1") def teardown_class(self): print("------", "teardown___test_1") def test_1(self): print("------", "test_1") def test_2(self): print("------", "test_2") if __name__ == '__main__': pytest.main(["-s", "test_py4.py"]) ###################################################结果######################## ------ setup___test_1 ------ test_1 .------ test_2 .------ teardown___test_1 -
方法的夹具:
setup_method()和teardown_method(),类被加载前和销毁后执行class TestOne: def setup_class(self): print("------", "setup___test_1") def teardown_class(self): print("------", "teardown___test_1") def setup_method(self, args): print("------", "setup_methods___test_1", args) def teardown_method(self, args): print("------", "teardown_methods___test_1", args) def test_1(self): print("------", "test_1") def test_2(self): print("------", "test_2") if __name__ == '__main__': pytest.main(["-s", "test_py4.py"]) ###################################################结果######################## setup___test_1 ------ setup_methods___test_1 <bound method TestOne.test_1 of <test_py4.TestOne object at 0x000001D972FB28C8>> ------ test_1 .------ teardown_methods___test_1 <bound method TestOne.test_1 of <test_py4.TestOne object at 0x000001D972FB28C8>> ------ setup_methods___test_1 <bound method TestOne.test_2 of <test_py4.TestOne object at 0x000001D972FB2988>> ------ test_2 .------ teardown_methods___test_1 <bound method TestOne.test_2 of <test_py4.TestOne object at 0x000001D972FB2988>> ------ teardown___test_1
fixture装饰器夹具
import pytest

# 设置夹具
@pytest.fixture()
def before():
    print("before")

# 使用夹具
@pytest.mark.usefixtures("before")
def test_1():
    print("test_1执行")

# 设置夹具 有返回值
@pytest.fixture()
def login():
    print("login")
    return "user"

# 使用夹具 入参
def test_2(login):
    print("test_2执行")
    print(login)

@pytest.fixture(params=[1, 2, 3])
def init_data(request):
    # params中有三个元素,那么此方法将执行三遍
    print("参数:", request.param)
    return request.param

def test_data(init_data):
    assert init_data > 2

if __name__ == '__main__':
    pytest.main(["-s", "test_py5.py"])
###################################################结果################################
test_py5.py 参数: 1
F参数: 2
F参数: 3
.before
test_1执行
.login
test_2执行
user


================================== FAILURES ===================================
________________________________ test_data[1] _________________________________

init_data = 1

    def test_data(init_data):
>       assert init_data > 2
E       assert 1 > 2

test_py5.py:24: AssertionError
________________________________ test_data[2] _________________________________

init_data = 2

    def test_data(init_data):
>       assert init_data > 2
E       assert 2 > 2

test_py5.py:24: AssertionError
=========================== short test summary info ===========================
FAILED test_py5.py::test_data[1] - assert 1 > 2
FAILED test_py5.py::test_data[2] - assert 2 > 2
========================= 2 failed, 3 passed in 0.03s =========================
pytest插件
html报告
-
安装插件
pip install pytest-html -
使用
-
命令行方式
pytest --html=存储路径/report.html -
配置文件方式
[pytest]
addopts = -s --html=./report.html
-
指定运行顺序
-
安装插件
pip install pytest-ordering -
使用
添加装饰器
@pytest.mark.run(order=x)到测试函数或者方法上。优先级:
- 0和正整数 > 没有标记 > 负整数标记
- 且在各个阶段,数越小运行优先级越高
import pytest

@pytest.mark.run(order=0)
def test_1():
    print("1")

@pytest.mark.run(order=-3)
def test_2():
    print("2")

@pytest.mark.run(order=3)
def test_3():
    print("3")

@pytest.mark.run(order=2)
def test_4():
    print("4")

@pytest.mark.run(order=1)
def test_5():
    print("5")

if __name__ == '__main__':
    pytest.main(["-s", "test_py6.py"])

###################################################结果###############################
test_py6.py 1
.5
.4
.3
.2
失败重试
-
安装插件
pip install pytest-rerunfailures -
使用文章来源:https://www.toymoban.com/news/detail-464711.html
配置,
--reruns 5重试5次文章来源地址https://www.toymoban.com/news/detail-464711.html[pytest] addopts = -s --reruns 5
到了这里,关于软测入门(六)pytest单元测试的文章就介绍完了。如果您还想了解更多内容,请在右上角搜索TOY模板网以前的文章或继续浏览下面的相关文章,希望大家以后多多支持TOY模板网!


