一. 前言
学习了SpringSecurity的使用,以及跟着源码分析了一遍认证流程,掌握了这个登录认证流程,才能更方便我们做自定义操作。
下面我们来学习下怎么实现多种登录方式,比如新增加一种邮箱验证码登录的形式,但SpringSecurity默认的Usernamepassword方式不影响。
二. 自定义邮件验证码认证
0. 说明
自定义一个邮箱验证码的认证,将邮箱号码作为key,验证码作为value存放到Redis中缓存。
1. 回顾
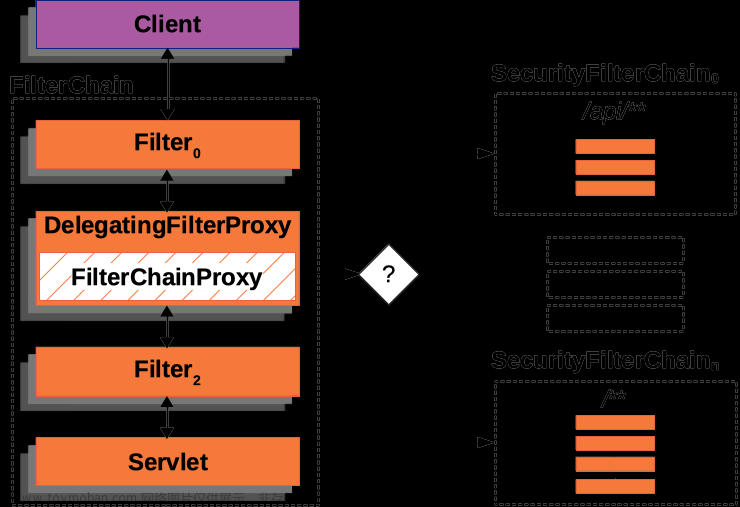
首先回顾下之前源码分析的认证流程,如下图:

2. 设计思路
-
首先前端是填写邮箱,点击获取验证码
-
输入获取到的验证码,点击登录按钮,发送登录接口(/emial/login,此处不能使用默认的
/login,因为我们属于扩展) -
自定义过滤器
EmailCodeAuthenticationFilter(类似UsernamepasswordAuthenticationFilter),获取邮箱号码与验证码 -
将邮箱号码与验证码封装为一个需要认证的自定义
Authentication对象EmailCodeAuthenticationToken(类似UsernamepasswordAuthenticationToken) -
将
EmailCodeAuthenticationToken传给AuthenticationManager接口的authenticate方法认证 -
因为
AuthenticationManager的默认实现类为ProviderManager,而ProviderManager又是委托给了AuthenticationProvider,因此自定义一个
AuthenticationProvider接口的实现类EmailCodeAuthenticationProvider,实现authenticate方法认证 -
认证成功与认证失败的处理:一种是直接在过滤器
EmailCodeAuthenticationFilter中重写successfulAuthentication和unsuccessfulAuthentication,另一种是实现AuthenticationSuccessHandler和AuthenticationFailureHandler进行处理 -
总归一句:照猫画瓢
总结:
需要实现以下几个类:
- 过滤器EmailCodeAuthenticationFilter
- Authentication对象EmailCodeAuthenticationToken
- AuthenticationProvider类EmailCodeAuthenticationProvider
- 自定义认证成功与认证失败的Handler
3. 代码实现
-
自定义Authentication对象(这里是EmailCodeAuthenticationToken)
public class EmailCodeAuthenticationToken extends AbstractAuthenticationToken {

    private static final long serialVersionUID = SpringSecurityCoreVersion.SERIAL_VERSION_UID;
    // 邮箱账号
    private final Object principal;
    // 邮箱验证码
    private Object credentials;

    /**
     * 没有经过验证时,权限位空,setAuthenticated设置为不可信令牌
     * @param principal
     * @param credentials
     */
    public EmailCodeAuthenticationToken(Object principal, Object credentials) {
        super(null);
        this.principal = principal;
        this.credentials = credentials;
        setAuthenticated(false);
    }

    /**
     * 已认证后,将权限加上,setAuthenticated设置为可信令牌
     * @param principal
     * @param credentials
     * @param authorities
     */
    public EmailCodeAuthenticationToken(Object principal, Object credentials, Collection<? extends GrantedAuthority> authorities) {
        super(authorities);
        this.principal = principal;
        this.credentials = credentials;
        super.setAuthenticated(true);
    }

    @Override
    public Object getCredentials() {
        return this.credentials;
    }

    @Override
    public Object getPrincipal() {
        return this.principal;
    }

    @Override
    public void setAuthenticated(boolean isAuthenticated) throws IllegalArgumentException {
        Assert.isTrue(!isAuthenticated,
                      "Cannot set this token to trusted - use constructor which takes a GrantedAuthority list instead");
        super.setAuthenticated(false);
    }

    @Override
    public void eraseCredentials() {
        super.eraseCredentials();
        this.credentials = null;
    }
}
说明:
模仿UsernamepasswordAuthenticationToken定义,继承AbstractAuthenticationToken,这里注意的是要定义两个构造器,分别对应未认证和已认证的Token,已认证的调用
super.setAuthenticated(true); -
自定义Filter(这里是EmailCodeAuthenticationFilter)
public class EmailCodeAuthenticationFilter extends AbstractAuthenticationProcessingFilter {
    // 前端传来的参数名
    private final String SPRING_SECURITY_EMAIL_KEY = "email";
    private final String SPRING_SECURITY_EMAIL_CODE_KEY = "email_code";

    // 自定义的路径匹配器,拦截Url为:/email/login
    private static final AntPathRequestMatcher DEFAULT_ANT_PATH_REQUEST_MATCHER = new AntPathRequestMatcher("/email/login",
                                                                                                            "POST");

    // 是否仅POST方式
    private boolean postOnly = true;

    public EmailCodeAuthenticationFilter() {
        super(DEFAULT_ANT_PATH_REQUEST_MATCHER);
    }

    /**
     * 认证方法,在父类的doFilter中调用
     * @param request
     * @param response
     * @return
     * @throws AuthenticationException
     * @throws IOException
     * @throws ServletException
     */
    @Override
    public Authentication attemptAuthentication(HttpServletRequest request, HttpServletResponse response) throws AuthenticationException, IOException, ServletException {
        if (this.postOnly && !request.getMethod().equals("POST")) {
            throw new AuthenticationServiceException("Authentication method not support : " + request.getMethod());
        }
        System.out.println("email attemptAuthentication");
        // 获取邮箱号码
        String email = obtainEmail(request);
        email = (email != null) ? email : "";
        email = email.trim();
        // 获取邮箱验证码
        String emailCode = obtainEmailCode(request);
        emailCode = (emailCode != null) ? emailCode : "";
        // 构造Token
        EmailCodeAuthenticationToken authRequest = new EmailCodeAuthenticationToken(email, emailCode);
        setDetails(request, authRequest);
        // 使用AuthenticationManager来进行认证
        return this.getAuthenticationManager().authenticate(authRequest);
    }

    /**
     * 获取请求中email参数
     * @param request
     * @return
     */
    @Nullable
    protected String obtainEmail(HttpServletRequest request) {
        return request.getParameter(this.SPRING_SECURITY_EMAIL_KEY);
    }

    /**
     * 获取请求中验证码参数email_code
     * @param request
     * @return
     */
    @Nullable
    protected String obtainEmailCode(HttpServletRequest request) {
        return request.getParameter(this.SPRING_SECURITY_EMAIL_CODE_KEY);
    }

    protected void setDetails(HttpServletRequest request, EmailCodeAuthenticationToken authRequest) {
        authRequest.setDetails(this.authenticationDetailsSource.buildDetails(request));
    }
}
说明:
模仿UsernamepasswordAuthentionFilter实现自定义的过滤器,核心是attemptAuthentication方法.
-
自定义AuthenticationProvider(这里是EmailCodeAuthenticationProvider)
public class EmailCodeAuthenticationProvider implements AuthenticationProvider {
    protected MessageSourceAccessor messages = SpringSecurityMessageSource.getAccessor();

    private  EmailCodeUserDetailsService emailCodeUserDetailsService;

    @Override
    public Authentication authenticate(Authentication authentication) throws AuthenticationException {
        Assert.isInstanceOf(EmailCodeAuthenticationToken.class, authentication,
                            () -> this.messages.getMessage("AbstractUserDetailsAuthenticationProvider.onlySupports",
                                                           "Only UsernamePasswordAuthenticationToken is supported"));
        // 此时的authentication还没认证,获取邮箱号码
        EmailCodeAuthenticationToken unAuthenticationToken = (EmailCodeAuthenticationToken) authentication;
        // 做校验
        UserDetails user = this.emailCodeUserDetailsService.loadUserByEmail(unAuthenticationToken);
        if (user == null) {
            throw new InternalAuthenticationServiceException("EmailCodeUserDetailsService returned null, which is an interface contract violation");
        }
        System.out.println("authentication successful!");

        Object principalToReturn = user;
        return createSuccessAuthentication(principalToReturn, authentication, user);
    }

    @Override
    public boolean supports(Class<?> authentication) {
        return EmailCodeAuthenticationToken.class.isAssignableFrom(authentication);
    }

    protected Authentication createSuccessAuthentication(Object principal, Authentication authentication, UserDetails user) {
        EmailCodeAuthenticationToken result = new EmailCodeAuthenticationToken(principal,
                                                                               authentication.getCredentials(), user.getAuthorities());
        result.setDetails(authentication.getDetails());
        return result;
    }

    public void setEmailCodeUserDetailsService(EmailCodeUserDetailsService emailCodeUserDetailsService) {
        this.emailCodeUserDetailsService = emailCodeUserDetailsService;
    }
}
说明:
Provider是真正做认证的地方,这里调用emailCodeUserDetailsService服务去执行验证,因为要用到这个Service,所以提供了一个set方法setEmailCodeUserDetailsService用于注入。这里的这个service是我们自定义的,可以不用实现UserDetailsService, Service里的逻辑可以自定义
-
自定义认证成功与失败的Handler
public class EmailCodeAuthenticationSuccessHandler implements AuthenticationSuccessHandler {
    @Override
    public void onAuthenticationSuccess(HttpServletRequest request, HttpServletResponse response, Authentication authentication) throws IOException, ServletException {
        response.setContentType("text/plain;charset=UTF-8");
        response.getWriter().write(authentication.getName());
    }
}

public class EmailCodeAuthenticationFailureHandler implements AuthenticationFailureHandler {
    @Override
    public void onAuthenticationFailure(HttpServletRequest request, HttpServletResponse response, AuthenticationException exception) throws IOException, ServletException {
        response.setContentType("text/plain;charset=UTF-8");
        response.getWriter().write("邮箱验证码错误!");
    }
}
说明:
这里的是认证成功或失败后的处理,需要实现对应的接口以及方法。这里的逻辑只是简单测试,具体逻辑以后根据业务逻辑去编写。
-
添加自定义认证的配置
为了让我们自定义的认证生效,需要将我们的Filter和Provider加入到SpringSecurity的配置中。这里我们使用
apply这个方法将其他一些配置合并到SpringSecurity的配置中,形成插件化。比如:httpSecurity.apply(new xxxxConfig()); 因此我们可以将我们的配置单独放到一个配置类中。
public class EmailCodeAuthenticationSecurityConfig extends SecurityConfigurerAdapter<DefaultSecurityFilterChain, HttpSecurity> {

    // 注入email验证服务
    @Autowired
    private EmailCodeUserDetailsService emailCodeUserDetailsService;

    @Override
    public void configure(HttpSecurity http) {
        // 配置Filter
        EmailCodeAuthenticationFilter emailCodeAuthenticationFilter = new EmailCodeAuthenticationFilter();
        // 设置AuthenticationManager
        emailCodeAuthenticationFilter.setAuthenticationManager(http.getSharedObject(AuthenticationManager.class));
        // 设置认证成功处理Handler
        emailCodeAuthenticationFilter.setAuthenticationSuccessHandler(new EmailCodeAuthenticationSuccessHandler());
        // 设置认证失败处理Handler
        emailCodeAuthenticationFilter.setAuthenticationFailureHandler(new EmailCodeAuthenticationFailureHandler());

        // 配置Provider
        EmailCodeAuthenticationProvider emailCodeAuthenticationProvider = new EmailCodeAuthenticationProvider();
        // 设置email验证服务
        emailCodeAuthenticationProvider.setEmailCodeUserDetailsService(emailCodeUserDetailsService);

        // 将过滤器添加到过滤器链路中
        http.authenticationProvider(emailCodeAuthenticationProvider).addFilterAfter(emailCodeAuthenticationFilter, UsernamePasswordAuthenticationFilter.class);
    }
}
注意:
这里需要注意的是,一定要将
AuthenticationManager提供给Filter,如果没有这一步,那么在Filter中进行认证的时候无法找到对应的Provider,因为AuthenticationManger就是管理Provider的。
http.getSharedObject(AuthenticationManager.class)解释:
SharedObject是在配置中进行共享的一些对象,HttpSecurity共享了一些非常有用的对象可以供外部使用,比如AuthenticationManager最后在SpringSecurity的主配置中加入我们的自定义配置:
@Configuration
public class MySecurityConfig extends WebSecurityConfigurerAdapter {

    @Autowired
    private EmailCodeAuthenticationSecurityConfig emailCodeAuthenticationSecurityConfig;

    @Autowired
    private DefaultUserDetailsService defaultUserDetailsService;

    @Bean
    public PasswordEncoder passwordEncoder() {
        return new BCryptPasswordEncoder();
    }

    @Bean
    @Override
    protected AuthenticationManager authenticationManager() throws Exception {
        return super.authenticationManager();
    }

    @Override
    protected void configure(AuthenticationManagerBuilder auth) throws Exception {
        auth.userDetailsService(defaultUserDetailsService);
    }

    @Override
    public void configure(WebSecurity web) throws Exception {
        web.ignoring().antMatchers("/getEmailCode", "/**/*.html");
    }

    @Override
    protected void configure(HttpSecurity http) throws Exception {
        http.authorizeRequests()
            .anyRequest()
            .authenticated()
            .and()
            .formLogin()
            .loginPage("/login.html")
            .loginProcessingUrl("/login")
            .permitAll()
            .and()
            .logout()
            .logoutUrl("/logout")
            .and()
            .apply(emailCodeAuthenticationSecurityConfig)
            .and()
            .csrf()
            .disable();
    }
}
说明:
因为这里使用了数据库保存用户信息,所以在SpringSecurity的默认表单登录里,修改了UserDetailService,在这里进行校验,所以在主配置中要设置UserDetailService:
auth.userDetailsService(defaultUserDetailsService); -
其他一些文件
查看我上传的gitee源码吧,整个工程都上传了。
-
前端页面实现
<!DOCTYPE html>
<html lang="en">
    <head>
        <meta charset="UTF-8">
        <meta http-equiv="X-UA-Compatible" content="IE=edge">
        <meta name="viewport" content="width=device-width, initial-scale=1.0">
        <title>登录</title>

        <!-- 最新版本的 Bootstrap 核心 CSS 文件 -->
        <link rel="stylesheet" href="https://stackpath.bootstrapcdn.com/bootstrap/3.4.1/css/bootstrap.min.css" integrity="sha384-HSMxcRTRxnN+Bdg0JdbxYKrThecOKuH5zCYotlSAcp1+c8xmyTe9GYg1l9a69psu" crossorigin="anonymous">
        <script src="http://libs.baidu.com/jquery/2.1.4/jquery.min.js"></script>
        <!-- 最新的 Bootstrap 核心 JavaScript 文件 -->
        <script src="https://stackpath.bootstrapcdn.com/bootstrap/3.4.1/js/bootstrap.min.js" integrity="sha384-aJ21OjlMXNL5UyIl/XNwTMqvzeRMZH2w8c5cRVpzpU8Y5bApTppSuUkhZXN0VxHd" crossorigin="anonymous"></script>

        <style>
            body {
                background-color: gray;
            }
            .login-div {
                width: 400px;
                /* height: 200px; */
                margin: 0 auto;
                margin-top: 200px;
                border: 1px solid black;
                padding: 10px;
            }
        </style>
    </head>
    <body>
        <div class="login-div">
            <ul class="nav nav-tabs" role="tablist">
                <li class="active">
                    <a href="#usernameLogin"   data-toggle="tab">用户名登录</a>
                </li>
                <li>
                    <a href="#emailLogin" data-toggle="tab">邮箱验证码登录</a>
                </li>
            </ul>

            <!-- 用户名登录 -->
            <div class="tab-content">
                <div class="tab-pane active" id="usernameLogin">
                    <form action="/login" method="POST">
                        <div class="form-group">
                            <label>用户名</label>
                            <input type="text" class="form-control" placeholder="Username" name="username">
                        </div>
                        <div class="form-group">
                            <label>密码</label>
                            <input type="password" class="form-control"  placeholder="Password" name="password">
                        </div>

                        <div class="checkbox">
                            <label>
                                <input type="checkbox" name="rememberType"> 记住我
                            </label>
                        </div>
                        <button type="submit" class="btn btn-default">登录</button>
                    </form>
                </div>
                <!-- 邮箱登录 -->
                <div class="tab-pane" id="emailLogin">
                    <form action="/email/login" method="POST">
                        <div class="form-group" >
                            <label>邮箱地址</label>
                            <input type="email" class="form-control" placeholder="Email" name="email" id="email">
                        </div>
                        <div class="form-group">
                            <label>验证码</label>
                            <input type="text" class="form-control"  placeholder="Code" name="email_code">
                        </div>

                        <div class="form-group">
                            <label>
                                <button type="button" class="btn btn-default" id="getCode">获取验证码</button>
                                <span id="showCode" style="margin-left: 20px;"></span>
                            </label>
                        </div>
                        <button type="submit" class="btn btn-default">登录</button>
                    </form>
                </div>
            </div>

        </div>

        <script>
            $('#nav a').on('click', function(e) {
                e.preventDefault();
                $(this).tab('show');
            });

            $('#getCode').on('click', function() {
                $.ajax({
                    type: "GET",
                    url: "/getEmailCode",
                    data: {
                        email: $('#email').val()
                    },
                    // dataType: "dataType",
                    success: function (response) {
                        $('#showCode').text(response);
                    }
                });
            });
        </script>
    </body>
</html>
说明:
前端页面只是简单的显示使用两种方式来登录的操作,一些输入校验什么的没有详细实现,所以这里默认各位大佬都是正常操作哈。
这个前端支持两种登录方式,用户名密码登录方式使用的SpringSecurity默认的UsernamepasswordAuthenticationFilter,邮箱验证码使用的是自定义的EmailCodeAuthenticationFilter,在邮箱登录页面,点击获取验证码按钮,会请求服务器获取一个随机的字符串作为验证码,并且存入Redis中,有效期60s(记住我功能在这里没有实现)


-
数据库操作
因为目前只是自定义认证,不涉及授权,所以只有一个用户表文章来源:https://www.toymoban.com/news/detail-470240.html
CREATE TABLE `user` ( `id` INT(11) NOT NULL AUTO_INCREMENT, `username` VARCHAR(32) DEFAULT NULL, `password` VARCHAR(255) DEFAULT NULL, `email` VARCHAR(255) DEFAULT NULL, `enabled` TINYINT(1) DEFAULT NULL, PRIMARY KEY (`id`) ) ENGINE=INNODB AUTO_INCREMENT=0 DEFAULT CHARSET=utf8; INSERT INTO `user` VALUES ('1', 'root', '$2a$10$RMuFXGQ5AtH4wOvkUqyvuecpqUSeoxZYqilXzbz50dceRsga.WYiq','123456@qq.com', '1');随便插入一个用户,密码是123,数据库的是经过加密的。文章来源地址https://www.toymoban.com/news/detail-470240.html
到了这里,关于SpringSecurity自定义认证的文章就介绍完了。如果您还想了解更多内容,请在右上角搜索TOY模板网以前的文章或继续浏览下面的相关文章,希望大家以后多多支持TOY模板网!


