前言
在调用OpenAI GPT接口时,如果不使用流式(stream:true)参数,接口会等待所有数据生成完成后一次返回。这个等待时间可能会很长,给用户带来不良体验。
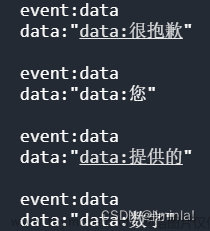
为了提升用户体验,我们需要使用流式调用方式。在这篇文章中,我们将介绍如何使用Spring Boot和Vue对接OpenAI GPT接口,并实现类似ChatGPT逐字输出的效果。
一、效果
PC端
移动端
二、Springboot后端
1.封装请求OpenAI接口的客户端
官方给的Example request:
curl https://api.openai.com/v1/chat/completions \
  -H "Content-Type: application/json" \
  -H "Authorization: Bearer $OPENAI_API_KEY" \
  -d '{
    "model": "gpt-3.5-turbo",
    "messages": [{"role": "user", "content": "Hello!"}]
  }'
根据官方示例,用java封装请求接口的客户端。本文选择使用OkHttpClient作为http请求客户端。
注意:接口调用需要魔法文章来源:https://www.toymoban.com/news/detail-470356.html
GtpClient.java文章来源地址https://www.toymoban.com/news/detail-470356.html
@Component
public class GptClient {

    private final String COMPLETION_ENDPOINT = "https://api.openai.com/v1/chat/completions";
	// OpenAI的API key
    @Value("${gpt.api-key}")
    private String apiKey;
    // 魔法服务器地址
    @Value("${network.proxy-host}")
    private String proxyHost;
    // 魔法服务器端口
    @Value("${network.proxy-port}")
    private int proxyPort;

    OkHttpClient client = new OkHttpClient();
    MediaType mediaType;
    Request.Builder requestBuilder;

    @PostConstruct
    private void init() {

        client.setProxy(new Proxy(Proxy.Type.HTTP, new InetSocketAddress(proxyHost, proxyPort)));
        client.setConnectTimeout(60, TimeUnit.SECONDS);
        client.setReadTimeout(60, TimeUnit.SECONDS);
        mediaType = MediaType.parse("application/json; charset=utf-8");
        requestBuilder = new Request.Builder()
                .url(COMPLETION_ENDPOINT)
                .header("Content-Type", "application/json")
                .header("Authorization", "Bearer " + apiKey);
    }

    /**
     * 聊天接口
     * @param requestBody 聊天接口请求体
     * @return 接口请求响应
     */
    public Response chat(ChatRequestBody requestBody) throws ChatException {

        RequestBody bodyOk = RequestBody.create(mediaType, requestBody.toString())<
到了这里,关于springboot+vue实现ChatGPT逐字输出打字效果的文章就介绍完了。如果您还想了解更多内容,请在右上角搜索TOY模板网以前的文章或继续浏览下面的相关文章,希望大家以后多多支持TOY模板网!


