一、下载软件
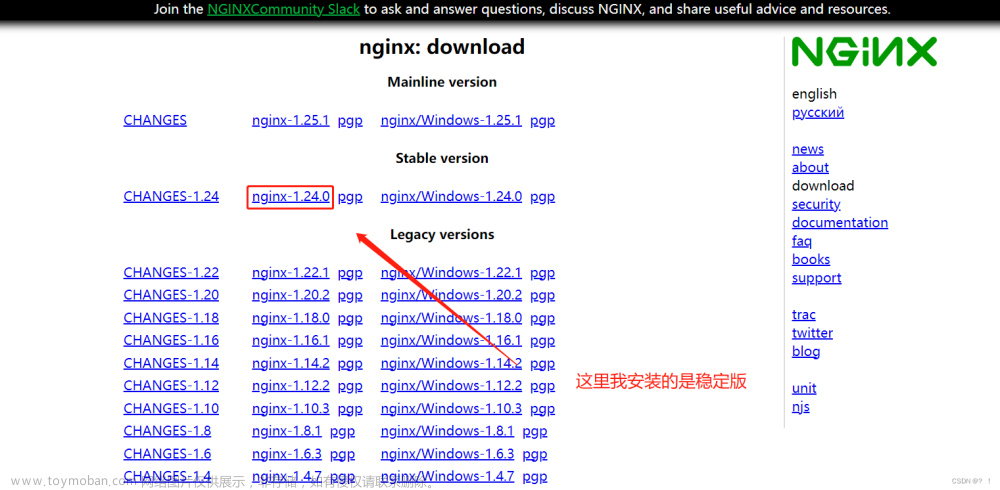
nginx
下载地址 http://nginx.org/en/download.html 下载最新版的即可
PHP
这里使用PHP7.4 下载地址 https://windows.php.net/download#php-7.4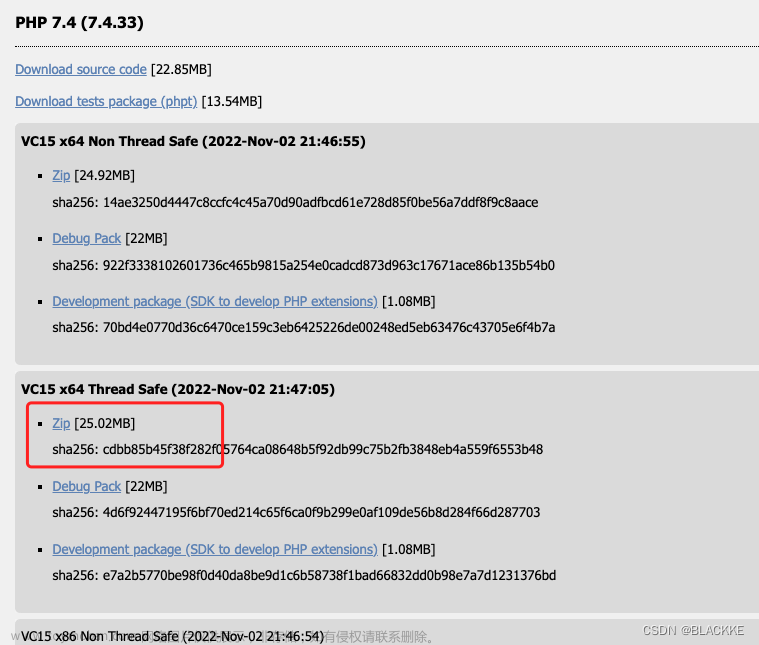
二、安装
下载好的nginx和php解压即可
三、配置
Nginx增加如下配置
server {
        listen       80;
        server_name  自己的域名;
	    access_log  logs/access.log  main;

        # 默认网站根目录
        root   D:/site/php/cms;
	    index index.html index.htm index.php;

        location / {
	     try_files $uri $uri/ /index.php$uri?$query_string;
        }

        error_page 404 /404.html;
            location = /40x.html {
        }

        error_page 500 502 503 504 /50x.html;
            location = /50x.html {
        }

        # PHP 脚本请求全部转发到 FastCGI处理. 使用FastCGI协议默认配置.
        # Fastcgi服务器和程序(PHP,Python)沟通的协议.
        location ~ \.php {
	    	 fastcgi_split_path_info ^(.+\.php)(.*)$;
	   		 fastcgi_param PATH_INFO $fastcgi_path_info;
            # 设置监听端口
            fastcgi_pass   127.0.0.1:9000;
            # 设置nginx的默认首页文件(上面已经设置过了,可以删除)
            fastcgi_index  index.php;
            # 设置脚本文件请求的路径
            fastcgi_param  SCRIPT_FILENAME  $document_root$fastcgi_script_name;
            # 引入fastcgi的配置文件
            include        fastcgi_params;
        }
}
PHP的配置
进入解压后的php根目录,找到php.ini.* 这样的文件,随便修改一个重命名文件为php.ini
打开php.ini大约在759行,删除前面的分号,修改你的php所在路径,给PHP指定可加载扩展模块的位置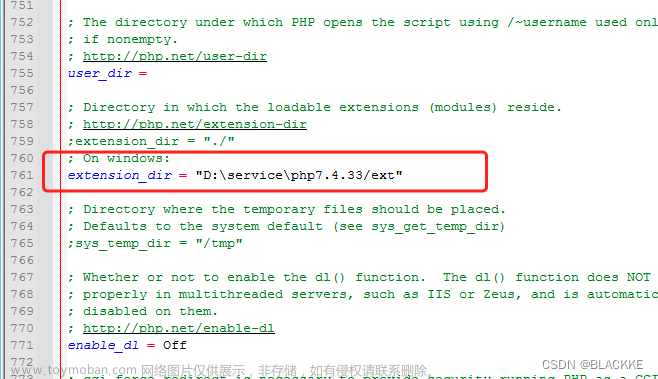
配置nginx的支持,大约在798行,删除前面的分号
配置mysql数据库支持,大概在926行,同时去掉extension=mysqli和extension=pdo_mysql前的分号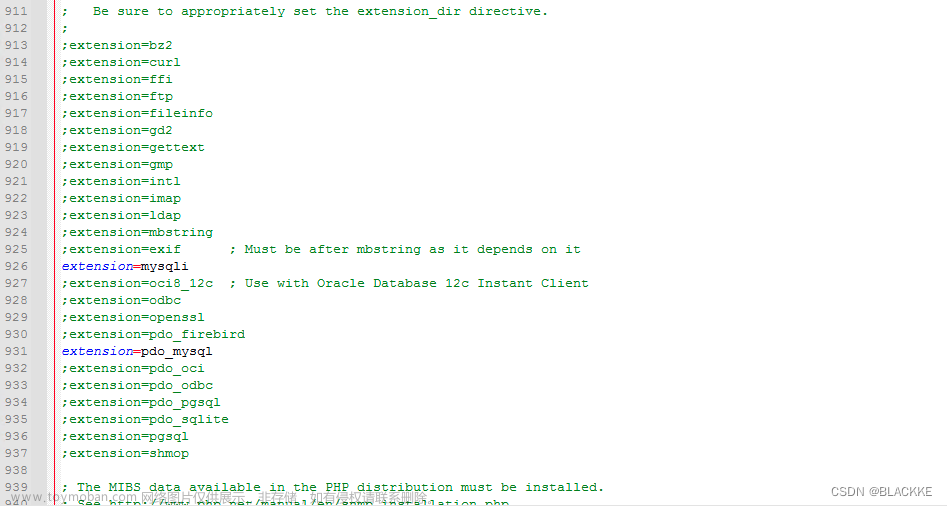
四、启动nginx和php
#nginx启动(进入nginx根目录)
start nginx.exe
#php启动(cmd窗口即可)
在cmd窗口进入到php根目录,运行以下命令
php-cgi.exe -b 127.0.0.1:9000 -c php.ini
回车,没有报错说明php启动成功。
现在可以访问php项目啦。文章来源:https://www.toymoban.com/news/detail-474183.html
文章来源地址https://www.toymoban.com/news/detail-474183.html
到了这里,关于Windows 上Nginx+PHP 的安装与配置的文章就介绍完了。如果您还想了解更多内容,请在右上角搜索TOY模板网以前的文章或继续浏览下面的相关文章,希望大家以后多多支持TOY模板网!

