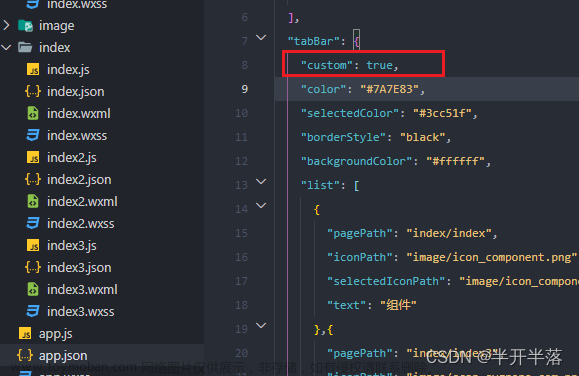
一、按照小程序官方文档配置 TabBar(app.json文件内)
{
  "pages": [
    "pages/home/index",
    "pages/curriculum/index"
  ],
  "tabBar": {
    "custom": true,
    "list": [
      {
        "pagePath": "pages/home/index",
        "text": "首页"
      },
      {
        "pagePath": "pages/curriculum/index",
        "text": "课程"
      }
    ]
  }
}
二、在小程序根目录(与 pages 平级)新建 custom-tab-bar(必须使用此名称) 文件夹

三、右击 custom-tab-bar 文件夹 > 新建 Component (新建名称必须为 index)

四、custom-tab-bar > index.wxml
<t-tab-bar value="{{value}}" bindchange="onChange" theme="tag" split="{{false}}">
    <t-tab-bar-item wx:for="{{tabBar}}" wx:for-item="item" wx:for-index="index" wx:key="index" icon="{{item.icon}}" value="{{item.value}}">
        {{item.label}}
    </t-tab-bar-item>
</t-tab-bar>
五、custom-tab-bar > index.ts
Component({
  //  组件的属性列表
  properties: { },
  //  组件的初始数据
  data: {
    value: '/pages/home/index',
    tabBar: [{
      value: '/pages/home/index',
      icon: 'home',
      label: '首页',
    }, {
      value: '/pages/curriculum/index',
      icon: 'file',
      label: '课程',
    }]
  },
  //  组件的方法列表
  methods: {
    onChange(e: any) {
      wx.switchTab({
        url: e.detail.value
      });
    }
  }
})
六、custom-tab-bar > index.josn
{
    "component": true,
    "usingComponents": {
      "t-tab-bar": "tdesign-miniprogram/tab-bar/tab-bar",
      "t-tab-bar-item": "tdesign-miniprogram/tab-bar-item/tab-bar-item"
    }
}
七、实现 tabBar 选中态
根据 微信官方文档 描述,每个 tab 页下的自定义 tabBar 组件实例是不同的;
如需实现 tab 选中态,要在当前页面下,通过 getTabBar 接口获取组件实例,并调用 setData 更新选中态文章来源:https://www.toymoban.com/news/detail-475462.html
在使用到 TabBar 的页面中加入以下代码文章来源地址https://www.toymoban.com/news/detail-475462.html
onShow() {
  if (typeof this.getTabBar === 'function' && this.getTabBar()) {
    const page: any = getCurrentPages().pop();
    this.getTabBar().setData({
      value: '/' + page.route
    })
  }
}
🎉🎉🎉至此,自定义 TabBar 结束🎉🎉🎉
到了这里,关于微信小程序中使用 TDesign 自定义 TabBar的文章就介绍完了。如果您还想了解更多内容,请在右上角搜索TOY模板网以前的文章或继续浏览下面的相关文章,希望大家以后多多支持TOY模板网!


