一、基于XML配置与注解的方式使用Spring MVC
1、创建Maven项目
Maven项目 - SpringMvcDemo01
单击【Finish】按钮
2、添加相关依赖
在pom.xml文件里添加支持Spring MVC的相关依赖
<?xml version="1.0" encoding="UTF-8"?>
<project xmlns="http://maven.apache.org/POM/4.0.0"
         xmlns:xsi="http://www.w3.org/2001/XMLSchema-instance"
         xsi:schemaLocation="http://maven.apache.org/POM/4.0.0
         http://maven.apache.org/xsd/maven-4.0.0.xsd">
    <modelVersion>4.0.0</modelVersion>

    <groupId>net.hf.spring</groupId>
    <artifactId>SpringMvcDemo01</artifactId>
    <version>1.0-SNAPSHOT</version>

    <properties>
        <!-- spring.version -->
        <spring.version>5.3.25</spring.version>
    </properties>

    <dependencies>
        <!--Spring核心-->
        <dependency>
            <groupId>org.springframework</groupId>
            <artifactId>spring-core</artifactId>
            <version>${spring.version}</version>
        </dependency>
        <!--Spring Bean实体-->
        <dependency>
            <groupId>org.springframework</groupId>
            <artifactId>spring-beans</artifactId>
            <version>${spring.version}</version>
        </dependency>
        <!--Spring容器-->
        <dependency>
            <groupId>org.springframework</groupId>
            <artifactId>spring-context</artifactId>
            <version>${spring.version}</version>
        </dependency>
        <!--Spring测试-->
        <dependency>
            <groupId>org.springframework</groupId>
            <artifactId>spring-test</artifactId>
            <version>${spring.version}</version>
        </dependency>
        <!--Spring Web功能-->
        <dependency>
            <groupId>org.springframework</groupId>
            <artifactId>spring-web</artifactId>
            <version>${spring.version}</version>
        </dependency>
        <!--Spring MVC框架-->
        <dependency>
            <groupId>org.springframework</groupId>
            <artifactId>spring-webmvc</artifactId>
            <version>${spring.version}</version>
        </dependency>
        <!--JSP标准标签库-->
        <dependency>
            <groupId>javax.servlet</groupId>
            <artifactId>jstl</artifactId>
            <version>1.2</version>
        </dependency>
        <!--Servlet -->
        <dependency>
            <groupId>javax.servlet</groupId>
            <artifactId>javax.servlet-api</artifactId>
            <version>3.1.0</version>
            <scope>provided</scope>
        </dependency>
        <!--日志框架-->
        <dependency>
            <groupId>log4j</groupId>
            <artifactId>log4j</artifactId>
            <version>1.2.17</version>
        </dependency>
        <!--单元测试-->
        <dependency>
            <groupId>junit</groupId>
            <artifactId>junit</artifactId>
            <version>4.13.2</version>
            <scope>test</scope>
        </dependency>
    </dependencies>
</project>
3、给项目添加Web功能
打开项目结构窗口,在列表里选择【Modules】
单击【+】按钮,添加Web功能

单击【Create Artifact】按钮,将名称改为“SpringMvcDemo01”

单击【OK】按钮,可以看到项目多了一个web目录

4、创建三个页面
在WEB-INF里创建views子目录(存放JSP页面)
(1)创建登录页面
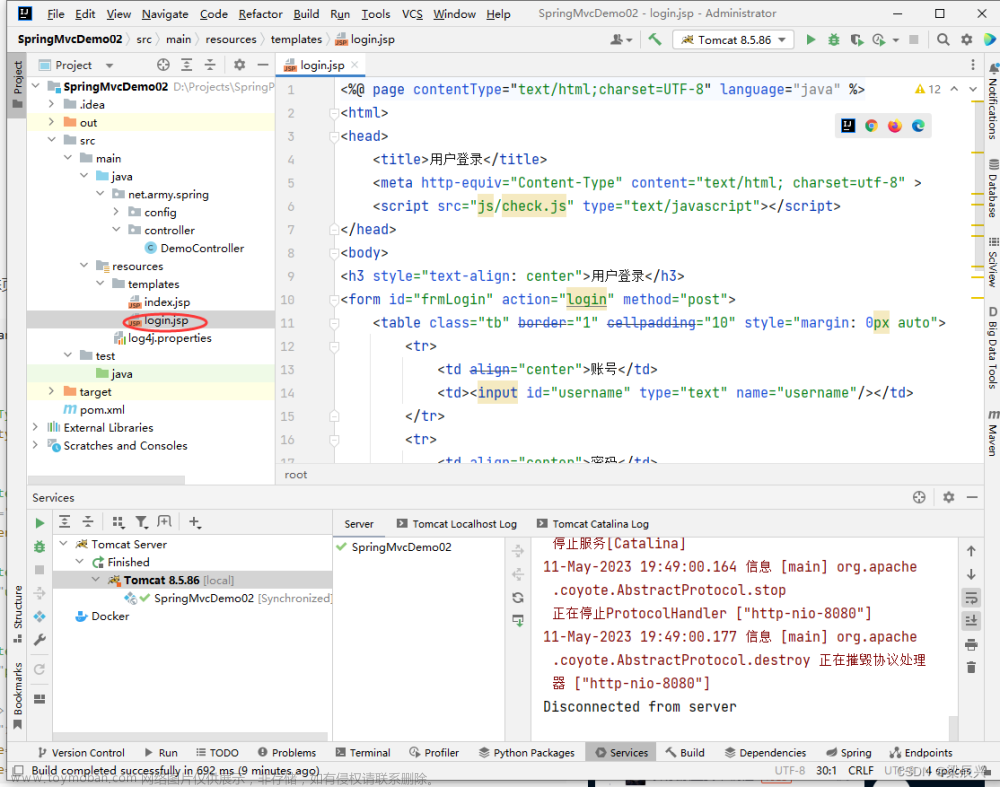
在views目录里创建登录页面 - login.jsp
<%--
  Created by IntelliJ IDEA.
  User: Administrator
  Date: 2023/3/14
  Time: 9:08
  To change this template use File | Settings | File Templates.
--%>
<%@ page contentType="text/html;charset=UTF-8" language="java" %>
<html>
<head>
  <title>用户登录</title>
  <meta http-equiv="Content-Type" content="text/html; charset=utf-8" >
  <script src="js/check.js"></script>
</head>
<body>
<h3 style="text-align: center">用户登录</h3>
<form id="frmLogin" action="login" method="post">
  <table class="tb" border="1" cellpadding="10" style="margin: 0px auto">
    <tr>
      <td align="center">账号</td>
      <td><input id="username" type="text" name="username"/></td>
    </tr>
    <tr>
      <td align="center">密码</td>
      <td><input id="password" type="password" name="password"/></td>
    </tr>
    <tr align="center">
      <td colspan="2">
        <input type="submit" value="登录" onclick="return checkLoginForm()"/>
        <input type="reset" value="重置"/>
      </td>
    </tr>
  </table>
</form>
</body>
</html>
(2)创建登录成功页面
在views目录里创建登录成功页面 - success.jsp
<%--
  Created by IntelliJ IDEA.
  User: Administrator
  Date: 2023/3/14
  Time: 9:09
  To change this template use File | Settings | File Templates.
--%>
<%@ page contentType="text/html;charset=UTF-8" language="java" %>
<%@taglib prefix="c" uri="http://java.sun.com/jsp/jstl/core" %>
<html>
    <head>
        <title>登录成功</title>
    </head>
    <body>
        <h1>${username},登录成功!</h1>
    </body>
</html>
(3)创建登录失败页面
在views目录里创建登录失败页面 - failure.jsp
<%--
  Created by IntelliJ IDEA.
  User: Administrator
  Date: 2023/3/14
  Time: 9:11
  To change this template use File | Settings | File Templates.
--%>
<%@ page contentType="text/html;charset=UTF-8" language="java" %>
<%@taglib prefix="c" uri="http://java.sun.com/jsp/jstl/core" %>
<html>
    <head>
        <title>登录失败</title>
    </head>
    <body>
        <h1>${username},登录失败!</h1>
    </body>
</html>
5、创建登录控制器
创建net.hf.spring.controller包,然后在包里创建LoginController类
package net.hf.spring.controller;

import org.springframework.stereotype.Controller;
import org.springframework.web.bind.annotation.PostMapping;
import org.springframework.web.bind.annotation.RequestParam;

import javax.servlet.http.HttpSession;

/**
 * 功能:登录控制器
 * 作者:hf
 * 日期:2023年03月08日
 */
@Controller // 交给Spring容器来管理
public class LoginController {
    @PostMapping("/login")  // 可用@RequestMapping("/login")
    public String login(@RequestParam("username") String username,
                        @RequestParam("password") String password,
                        HttpSession session) {
        // 将登录表单提交的用户名写入会话
        session.setAttribute("username", username);
        // 判断用户是否登录成功
        if (username.equals("hf") && password.equals("123456")) {
            // 返回逻辑视图名success,表明跳转到登录成功页面
            return "success";
        }

        // 返回逻辑视图名failure,表明跳转到登录失败页面
        return "failure";
    }
}
6、创建Spring配置文件
在resources里创建mvc子目录,然后在子目录里创建spring-config.xml
<?xml version="1.0" encoding="UTF-8"?>
<beans xmlns="http://www.springframework.org/schema/beans"
       xmlns:xsi="http://www.w3.org/2001/XMLSchema-instance"
       xmlns:context="http://www.springframework.org/schema/context"
       xsi:schemaLocation="http://www.springframework.org/schema/beans
       http://www.springframework.org/schema/beans/spring-beans.xsd
       http://www.springframework.org/schema/context
       https://www.springframework.org/schema/context/spring-context.xsd">

    <!--组件扫描-->
    <context:component-scan base-package="net.hf.spring" />

</beans>
7、创建Spring MVC配置文件
在resources/mvc目录里创建spring-mvc-config.xml
<?xml version="1.0" encoding="UTF-8"?>
<beans xmlns="http://www.springframework.org/schema/beans"
       xmlns:xsi="http://www.w3.org/2001/XMLSchema-instance"
       xmlns:context="http://www.springframework.org/schema/context"
       xmlns:mvc="http://www.springframework.org/schema/mvc"
       xsi:schemaLocation="http://www.springframework.org/schema/beans
       http://www.springframework.org/schema/beans/spring-beans.xsd
       http://www.springframework.org/schema/context
       https://www.springframework.org/schema/context/spring-context.xsd
       http://www.springframework.org/schema/mvc
       https://www.springframework.org/schema/mvc/spring-mvc.xsd">

    <!--采用注解驱动-->
    <mvc:annotation-driven/>

    <!--扫描控制器-->
    <context:component-scan base-package="net.hf.spring.controller"/>

    <!--定义内部资源视图解析器:负责解析控制器里从逻辑视图到物理页面的映射-->
    <bean class="org.springframework.web.servlet.view.InternalResourceViewResolver">
        <property name="viewClass" value="org.springframework.web.servlet.view.JstlView"/>
        <property name="prefix" value="/WEB-INF/views/"/> <!--路径-->
        <property name="suffix" value=".jsp"/> <!--扩展名-->
    </bean>
</beans>
8、修改Web部署描述文件
一个Web项目启动时最先要读取web.xml文件
在web/WEB-INF目录里打开web.xml文件
<?xml version="1.0" encoding="UTF-8"?>
<web-app xmlns="http://xmlns.jcp.org/xml/ns/javaee"
         xmlns:xsi="http://www.w3.org/2001/XMLSchema-instance"
         xsi:schemaLocation="http://xmlns.jcp.org/xml/ns/javaee
         http://xmlns.jcp.org/xml/ns/javaee/web-app_4_0.xsd"
         version="4.0">
    <!--设置启动首页-->
    <welcome-file-list>
        <welcome-file>/WEB-INF/views/login.jsp</welcome-file>
    </welcome-file-list>

    <!--Spring容器加载监听器,让Spring随着Web项目启动而初始化-->
    <listener>
        <listener-class>org.springframework.web.context.ContextLoaderListener</listener-class>
    </listener>

    <!--指定Spring配置文件位置-->
    <context-param>
        <param-name>contextConfigLocation</param-name>
        <param-value>classpath:mvc/spring-config.xml</param-value>
    </context-param>

    <!--注册Spring前端控制器,加载Spring MVC配置文件-->
    <servlet>
        <servlet-name>DispatcherServlet</servlet-name>
        <servlet-class>org.springframework.web.servlet.DispatcherServlet</servlet-class>
        <init-param>
            <param-name>contextConfigLocation</param-name>
            <param-value>classpath:mvc/spring-mvc-config.xml</param-value>
        </init-param>
        <load-on-startup>1</load-on-startup> <!--数字越小,启动级别越高-->
    </servlet>

    <servlet-mapping>
        <servlet-name>DispatcherServlet</servlet-name>
        <url-pattern>/</url-pattern>  <!--“/”表明拦截一切请求-->
    </servlet-mapping>

    <!--设置字符编码过滤器-->
    <filter>
        <filter-name>Character Encoding</filter-name>
        <filter-class>org.springframework.web.filter.CharacterEncodingFilter</filter-class>
        <init-param>
            <param-name>encoding</param-name>
            <param-value>utf-8</param-value>
        </init-param>
    </filter>
    <filter-mapping>
        <filter-name>Character Encoding</filter-name>
        <url-pattern>/*</url-pattern> <!--/*表明过滤一切请求-->
    </filter-mapping>
</web-app>
对应关系图
9、配置Tomcat服务器
单击工具栏上的【Curren File】

弹出【Run/Debug Configurations】窗口
添加本地的Tomcat服务器
对服务器进行设置(配置应用服务器,部署Web项目)

注意项目的URL
单击【OK】按钮
10、添加项目对Tomcat的依赖
打开【Project Structure】窗口,选择Modules对应的Dependencies,单击【+】按钮
添加应用服务器库 - Tomcat 8.5.86
单击【Add Selected】按钮
单击【OK】按钮
11、启动Tomcat服务器
单击工具栏上绿色的运行按钮
启动失败,输出目录没有项目运行所需的jar包
配置Artifacts,添加项目正常运行所需的jar包
单击【Put into /WEB-INF/lib】菜单项
单击【OK】按钮
启动服务器,查看结果

12、测试登录功能
登录成功
登录失败

二、实战练习
任务1、设置项目首页 - index.jsp
页面显示内容 - Welcome to Spring MVC World!与系统当前日期时间
1、修改web.xml文件
注释掉“设置启动首页”元素(删除也可以)
2、创建首页文件
在views目录里创建首页文件 - index.jsp
<%@ page import="java.util.Date" %>
<%@ page contentType="text/html;charset=UTF-8" language="java" %>
<html>
    <head>
        <title>首页</title>
    </head>
    <body>
        <h1>Welcome to Spring MVC World~</h1>
        <h3><%= new Date() %></h3> <!--JSP表达式元素-->
    </body>
</html>
此时,启动服务器,查看效果
3、修改登录控制器
在登录控制器里LoginController里添加一个方法能够跳转到首页
4、启动服务器,查看效果
访问http://localhost:8080/SpringMvcDemo01/
任务2、首页添加登录链接,单击跳转到登录页面
1、修改首页文件
添加一个超链接,跳转到登录页面
启动服务器
单击【跳转到登录页面】超链接
修改超链接元素
2、修改登录控制器
在LoginController里添加一个跳转到登录页面的方法toLogin()
3、启动服务器,查看效果
显示首页
单击【跳转到登录页面】超链接
任务3、利用Spring MVC配置文件实现快捷页面跳转
1、修改Spring MVC配置文件
定义两个视图控制器来负责页面跳转
<?xml version="1.0" encoding="UTF-8"?>
<beans xmlns="http://www.springframework.org/schema/beans"
       xmlns:xsi="http://www.w3.org/2001/XMLSchema-instance"
       xmlns:context="http://www.springframework.org/schema/context"
       xmlns:mvc="http://www.springframework.org/schema/mvc"
       xsi:schemaLocation="http://www.springframework.org/schema/beans
       http://www.springframework.org/schema/beans/spring-beans.xsd
       http://www.springframework.org/schema/context
       https://www.springframework.org/schema/context/spring-context.xsd
       http://www.springframework.org/schema/mvc
       https://www.springframework.org/schema/mvc/spring-mvc.xsd">

    <!--采用注解驱动-->
    <mvc:annotation-driven/>

    <!--扫描控制器-->
    <context:component-scan base-package="net.hf.spring.controller"/>

    <!--定义内部资源视图解析器-->
    <bean class="org.springframework.web.servlet.view.InternalResourceViewResolver">
        <property name="viewClass" value="org.springframework.web.servlet.view.JstlView"/>
        <property name="prefix" value="/WEB-INF/views/"/>
        <property name="suffix" value=".jsp"/>
    </bean>

    <!--定义视图控制器-->
    <mvc:view-controller path="/" view-name="index"/>
    <mvc:view-controller path="/toLogin" view-name="login"/>
</beans>
2、修改登录控制器
删除或者注释两个负责页面跳转的方法:index()、toLogin()
3、启动服务器,查看效果
显示首页(说明Spring MVC配置文件里的第一个视图控制器生效)
单击【跳转到登录页面】超链接,跳转到了登录页面(说明Spring MVC配置文件里的第二个视图控制器也生效了)
任务4、添加静态资源,让Spring MVC正确处理
1、添加一张图片
在WEB-INF里创建images目录,将图片gingko.jpg拷贝进来
2、修改首页文件
增加显示图片的元素
3、启动服务器,查看效果
首页无法正常显示图片,也就是说明应用无法访问静态的图片资源
4、修改Spring MVC配置文件
单独处理静态资源
5、修改首页文件
图片源采用虚拟路径,由配置文件负责映射到真实路径
6、重启服务器,查看效果

课堂练习
(1)添加CSS样式表
在WEB-INF里创建css目录,在里面创建样式文件index.css,负责首页的样式(元素全部居中,设置页面背景颜色,去掉超链接的下划线……)


(2)添加JavaScript脚本
在WEB-INF里创建js目录,在里面创建脚本文件check.js,负责登录页面的非空校验(先进行用户名非空校验,后进行密码非空校验)


任务5、请求服务器端返回的简单字符串
1、创建获取字符串控制器
获取字符串控制器 - GetStringController
package net.hf.spring.controller;

import org.springframework.stereotype.Controller;
import org.springframework.web.bind.annotation.GetMapping;
import org.springframework.web.bind.annotation.ResponseBody;

/**
 * 功能:获取字符串控制器
 * 作者:hf
 * 日期:2023年03月21日
 */
@Controller
public class GetStringController {
    @GetMapping("/getString")
    @ResponseBody // 响应正文注解,表明返回普通字符串而不是返回逻辑视图名
    public String getString() {
        return "Spring MVC真好玩~";
    }
}
2、启动服务器,查看效果
访问http://localhost:8080/SpringMvcDemo01/getString
3、修改获取字符串控制器
设置返回字符串采用的编码
4、重启服务器,查看效果
访问http://localhost:8080/SpringMvcDemo01/getString
思考题:能否让返回字符串有点样式?
设置返回普通文本,返回字符串不认网页标签
设置返回网页文本,返回字符串才认网页标签
任务6、请求服务器端返回的JSON数据
1、创建用户实体类
创建net.hf.spring.bean包,然后在包里创建User类
用户实体类对应用户表
package net.hf.spring.bean;

import java.util.Date;

/**
 * 功能:用户实体类
 * 作者:hf
 * 日期:2023年03月21日
 */
public class User {
    private int id;
    private String username;
    private String password;
    private String telephone;
    private Date registerTime;
    private int popedom;

    public int getId() {
        return id;
    }

    public void setId(int id) {
        this.id = id;
    }

    public String getUsername() {
        return username;
    }

    public void setUsername(String username) {
        this.username = username;
    }

    public String getPassword() {
        return password;
    }

    public void setPassword(String password) {
        this.password = password;
    }

    public String getTelephone() {
        return telephone;
    }

    public void setTelephone(String telephone) {
        this.telephone = telephone;
    }

    public Date getRegisterTime() {
        return registerTime;
    }

    public void setRegisterTime(Date registerTime) {
        this.registerTime = registerTime;
    }

    public int getPopedom() {
        return popedom;
    }

    public void setPopedom(int popedom) {
        this.popedom = popedom;
    }

    @Override
    public String toString() {
        return "User{" +
                "id=" + id +
                ", username='" + username + '\'' +
                ", password='" + password + '\'' +
                ", telephone='" + telephone + '\'' +
                ", registerTime=" + registerTime +
                ", popedom=" + popedom +
                '}';
    }
}
2、创建获取JSON控制器
获取JSON控制器 - GetJsonController
package net.hf.spring.controller;

import net.hf.spring.bean.User;
import org.springframework.web.bind.annotation.GetMapping;
import org.springframework.web.bind.annotation.RestController;

import java.util.ArrayList;
import java.util.Date;
import java.util.List;

/**
 * 功能:获取JSON控制器
 * 作者:hf
 * 日期:2023年03月21日
 */
@RestController // @RestController是@Controller和@ResponseBody的结合
public class GetJsonController {
    @GetMapping(value = "/getJson", produces = "application/json; charset=utf-8")
    public User getJson() {
        // 创建用户对象
        User user = new User();
        // 设置用户对象属性
        user.setId(1);
        user.setUsername("萌萌哒");
        user.setPassword("123456");
        user.setTelephone("13890903456");
        user.setRegisterTime(new Date());
        user.setPopedom(1);
        // 返回用户对象(按照请求映射注解的参数设置转换成JSON)
        return user;
    }

    @GetMapping(value = "/getJsonArray", produces = "application/json; charset=utf-8")
    public List<User> getJsonArray() {
        // 创建用户列表
        List<User> users = new ArrayList<>();

        // 创建第1个用户
        User user = new User();
        user.setId(1);
        user.setUsername("萌萌哒");
        user.setPassword("123456");
        user.setTelephone("13890903456");
        user.setRegisterTime(new Date());
        user.setPopedom(1);
        // 将用户添加到用户列表
        users.add(user);

        // 创建第2个用户
        user = new User();
        user.setId(2);
        user.setUsername("康科德");
        user.setPassword("222222");
        user.setTelephone("13856567890");
        user.setRegisterTime(new Date());
        user.setPopedom(1);
        // 将用户添加到用户列表
        users.add(user);

        // 创建第3个用户
        user = new User();
        user.setId(3);
        user.setUsername("娃哈哈");
        user.setPassword("333333");
        user.setTelephone("15890905678");
        user.setRegisterTime(new Date());
        user.setPopedom(1);
        // 将用户添加到用户列表
        users.add(user);

        // 返回用户列表
        return users;
    }
}
3、给项目添加JSON依赖
在pom.xml文件里添加对json的支持
<!--对json的支持-->
<dependency>
    <groupId>com.fasterxml.jackson.core</groupId>
    <artifactId>jackson-core</artifactId>
    <version>2.9.7</version>
</dependency>
<dependency>
    <groupId>com.fasterxml.jackson.core</groupId>
    <artifactId>jackson-databind</artifactId>
    <version>2.9.7</version>
</dependency>
<dependency>
    <groupId>com.fasterxml.jackson.core</groupId>
    <artifactId>jackson-annotations</artifactId>
    <version>2.9.7</version>
</dependency>
4、启动服务器,查看结果
访问http://localhost:8080/SpringMvcDemo01/getJson
需要将刚才新添加的依赖要放到输出目录
添加之后,lib里就有了对json支持的依赖包
重启服务器,再次访问,查看效果
访问http://localhost:8080/SpringMVCDemo01/getJsonArray
任务7、请求服务器端返回的XML数据
1、创建获取XML控制器
获取XML控制器 - GetXmlController

package net.hf.spring.controller;

import net.hf.spring.bean.User;
import org.springframework.web.bind.annotation.GetMapping;
import org.springframework.web.bind.annotation.RestController;

import java.util.ArrayList;
import java.util.Date;
import java.util.List;

/**
 * 功能:获取XML控制器
 * 作者:hf
 * 日期:2023年03月21日
 */
@RestController
public class GetXmlController {
    @GetMapping(value = "/getXml", produces = "application/xml; charset=utf-8")
    public List<User> getXml() {
        // 创建用户列表
        List<User> users = new ArrayList<>();

        // 创建第1个用户
        User user = new User();
        user.setId(1);
        user.setUsername("萌萌哒");
        user.setPassword("123456");
        user.setTelephone("13890903456");
        user.setRegisterTime(new Date());
        user.setPopedom(1);
        // 将用户添加到用户列表
        users.add(user);

        // 创建第2个用户
        user = new User();
        user.setId(2);
        user.setUsername("康科德");
        user.setPassword("222222");
        user.setTelephone("13856567890");
        user.setRegisterTime(new Date());
        user.setPopedom(1);
        // 将用户添加到用户列表
        users.add(user);

        // 创建第3个用户
        user = new User();
        user.setId(3);
        user.setUsername("娃哈哈");
        user.setPassword("333333");
        user.setTelephone("15890905678");
        user.setRegisterTime(new Date());
        user.setPopedom(1);
        // 将用户添加到用户列表
        users.add(user);

        // 返回用户列表
        return users;
    }
}
2、项目添加XML的依赖
在pom.xml文件里添加对xml的支持
<!--对xml的支持-->
<dependency>
    <groupId>com.fasterxml.jackson.dataformat</groupId>
    <artifactId>jackson-dataformat-xml</artifactId>
    <version>2.5.3</version>
</dependency>
3、将依赖添加到输出目录
在项目结构窗口里将依赖添加到输出目录
添加之后的情况 文章来源:https://www.toymoban.com/news/detail-476801.html
4、启动服务器,查看效果
访问http://localhost:8080/SpringMvcDemo01/getXml文章来源地址https://www.toymoban.com/news/detail-476801.html
到了这里,关于1.7 基于XML配置方式使用Spring MVC的文章就介绍完了。如果您还想了解更多内容,请在右上角搜索TOY模板网以前的文章或继续浏览下面的相关文章,希望大家以后多多支持TOY模板网!