1、背景
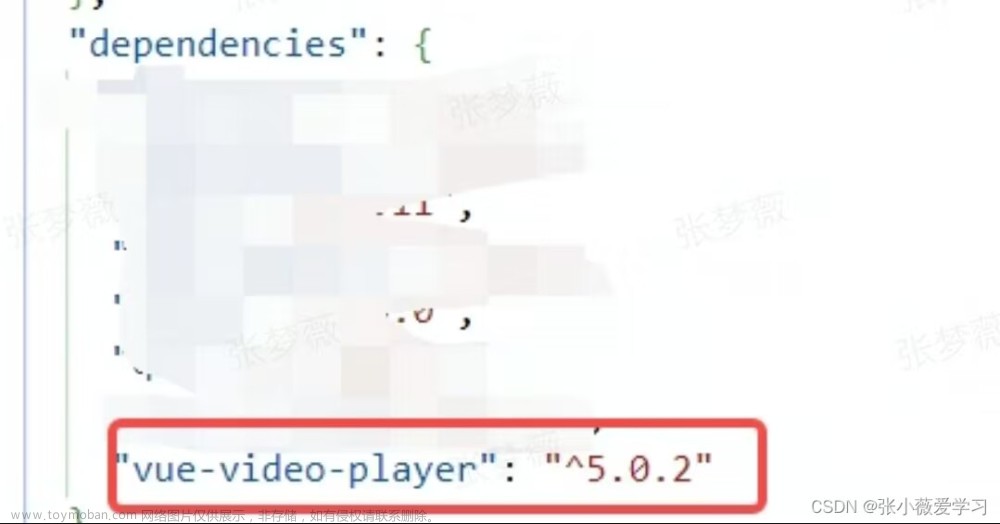
项目中有涉及视频播放的需求,并且UI设计了样式,与原生的视频video组件有差异,所以使用了vue-video-player插件,并对vue-video-player进行样式改造,自定义播放暂停按钮、全屏按钮、时间进度条样式等,自动播放设置、设置一开始全屏播放视频、监听全屏事件等。
2、效果图
这是样式处理后的效果:
这是未处理样式的效果:
3、代码实现
3.1 安装插件
我安装的是指定版本
npm install vue-video-player@5.0.1 --save,因为我直接安装最新版本npm install vue-video-player --save项目就会报错,如果你们安装最新版本没报错也可以安装最新版。
安装vue-video-player插件后不需要再安装videojs插件,因为vue-video-player已经包含有videojs在里面了
3.2 引入、注册插件
在main.js文件中,填入以下代码
import VideoPlayer from 'vue-video-player/src'
import 'vue-video-player/src/custom-theme.css'
import 'video.js/dist/video-js.css'
Vue.use(VideoPlayer)
3.3 创建组件
在components文件夹下(随意位置,导入的时候更改文件路径就行),新建testVideo.vue文件,填入以下代码
<template>
    <div class="video">
    	<!-- 使用组件 -->
      <video-player  class="video-player vjs-custom-skin"
           ref="videoPlayer"
           :playsinline="true"
           :options="playerOptions"
      ></video-player>
    </div>
</template>
<script>
// 以下三行一定要引入
import { videoPlayer } from 'vue-video-player'
import 'video.js/dist/video-js.css'
import 'vue-video-player/src/custom-theme.css'
// import 'video.js/dist/lang/zh-CN'

export default {
	// name: 'videoplayer',
	components: { // 必需引入
		videoPlayer
  },
  props: [ // 接收父组件的数据
    'mp4Pic',
    'mp4Url'
  ],
	data () {
		return {
			fileAreaHeight: 675,
			fileType: 'mp4', // 资源的类型
		}
	},
	computed: { // 使用计算属性
	    playerOptions () {
	      const playerOptionsObj = {
	        playbackRates: [0.7, 1.0, 1.5, 2.0], //视频播放速度
	        autoplay: false, // 如果true,浏览器准备好时开始回放。
	        muted: false, // 默认情况下将会消除任何音频。
	        loop: false, // 导致视频一结束就重新开始。
	        // preload: 'auto', // 建议浏览器在<video>加载元素后是否应该开始下载视频数据。auto浏览器选择最佳行为,立即开始加载视频(如果浏览器支持)。
	        language: 'zh-CN',
	        // aspectRatio: '16:9', // 将播放器置于流畅模式,并在计算播放器的动态大小时使用该值。值应该代表一个比例 - 用冒号分隔的两个数字(例如"16:9"或"4:3")。
	        fluid: false, // 当true时,Video.js player将拥有流体大小。换句话说,它将按比例缩放以适应其容器。
	        sources: [{
	          type: 'video/' + this.fileType,	// 资源格式写法:'video/mp4',否则控制台会出现notSupportedMessage设置的错误。
	          src: this.mp4Url // 视频url地址
	        }],
	        poster: this.mp4Pic, // 视频封面地址
	        // width: document.documentElement.clientWidth,
          width: 1200,
	        height: this.fileAreaHeight,	// 设置高度,fluid需要设置成flase
	        notSupportedMessage: '此视频暂无法播放...', // 允许覆盖Video.js无法播放媒体源时显示的默认信息。
	        controlBar: {
	          timeDivider: true, // 当前时间和持续时间的分隔符
	          durationDisplay: true,  // 显示持续时间
	          remainingTimeDisplay: false,  // 是否显示剩余时间功能
	          fullscreenToggle: true  //全屏按钮
	        }
	      }
	      return playerOptionsObj
      }
    },
    watch: {

    }
  }
</script>
<style>
  .video /*可不设置*/
  {
    margin: 48px 0;
  }
  .vjs-poster {
    background-color: #aaaaaa00;
  }

/*播放按钮设置成宽高一致,圆形,居中*/
.vjs-custom-skin > .video-js .vjs-big-play-button {
  outline: none;
  border: none;
  width: 66px;
  height: 66px !important;
  background-color: rgba(0,0,0,0) !important;
}

.video-js .vjs-big-play-button .vjs-icon-placeholder:before {
  content: '';
  width: 66px;
  height: 66px;
  background: url('../assets/icon_stop@2x.png') no-repeat;
  background-size: 100% 100%;
}


/*control-bar布局时flex,通过order调整剩余时间的位置到进度条右边*/
.vjs-custom-skin > .video-js .vjs-control-bar .vjs-remaining-time{
  order:3 !important;
}

/* 进度条下面的播放按钮 */
.vjs-custom-skin > .video-js .vjs-control-bar .vjs-play-control {
  margin: 0;
  line-height: 20px;
  height: 94px;
  padding: 50px 0 24px 0;
}
.vjs-custom-skin > .video-js .vjs-control-bar .vjs-play-control .vjs-icon-placeholder:before {
  position: absolute;
  font-size: 20px;
  top: 44px;
  left: 24px;
  width: 20px;
  height: 20px;
}

/** 时间组件 */
.vjs-custom-skin > .video-js .vjs-control-bar .vjs-time-control {
  margin: 0;
  line-height: 20px;
  height: 94px;
  padding: 50px 0 24px 0;
  min-width: auto;
}
/* 时间-左 */
.video-js .vjs-current-time, .vjs-no-flex .vjs-current-time {
  min-width: 32px;
  font-size: 12px;
  font-family: PingFangSC-Regular, PingFang SC;
  font-weight: 400;
  color: #FFFFFF;
  line-height: 20px;
  margin: 0 0 0 24px !important;
}
/* 下面控件的时间分割线 */
.vjs-custom-skin > .video-js .vjs-control-bar .vjs-time-divider {
  min-width: 6px;
  margin: 0 8px !important;
  font-size: 12px;
  font-family: PingFangSC-Regular, PingFang SC;
  font-weight: 400;
  color: rgba(255,255,255,0.2);
  line-height: 20px;
}
/* 时间-右 */
.video-js .vjs-duration, .vjs-no-flex .vjs-duration {
  font-size: 12px;
  font-family: PingFangSC-Regular, PingFang SC;
  font-weight: 400;
  color: #FFFFFF;
  line-height: 20px;
}
.video-js .vjs-control-bar {
  height: 94px;
  background: linear-gradient(180deg, rgba(0,0,0,0) 0%, rgba(0,0,0,0.7) 100%)
}
/*进度条单独放置一行*/
.vjs-custom-skin > .video-js .vjs-progress-control.vjs-control{
  position: absolute;
  left: 0;
  right: 0;
  bottom: 68px;
  width: 100%;
  height: 2px;
  padding: 0 24px;
}
/* 进度条背景轨道 */
.video-js .vjs-slider{
  border-radius: 1em;
  background-color: rgba(255,255,255,0.2);
}
/* 加载进度条背景色 */
.video-js .vjs-load-progress {
  background: rgba(255,255,255,0.1);
}
/* 进度条进度 */
.vjs-custom-skin > .video-js .vjs-play-progress, .vjs-custom-skin > .video-js .vjs-volume-level{
  border-radius: 1px;
  background: #FFFFFF;
}

/*鼠标进入播放器后,播放按钮颜色会变*/
.video-js:hover .vjs-big-play-button, .vjs-custom-skin>.video-js .vjs-big-play-button:active, .vjs-custom-skin>.video-js .vjs-big-play-button:focus{
  background-color: rgba(0,0,0,0) !important;
}

/*control bar*/
.video-js .vjs-control-bar{
  background-color: rgba(0,0,0,0.2) !important;
}

/*点击按钮时不显示蓝色边框*/
.video-js .vjs-control-bar button{
  outline: none;
}
.vjs-volume-panel .vjs-control .vjs-volume-panel-horizontal {
  width: 0;
  display: none;
}
/** 隐藏倍速 */
.vjs-custom-skin > .video-js .vjs-control-bar .vjs-playback-rate {
  display: none;
}
/** 音量按钮 */
.video-js .vjs-volume-panel {
  /* display: none; */
  position: absolute;
  right: 48px;
  bottom: 24px;
  width: 20px;
  height: 20px;
}
.vjs-icon-volume-high:before, .video-js .vjs-mute-control .vjs-icon-placeholder:before {
  font-size: 20px;
  width: 20px;
  height: 20px;
  line-height: 20px;
  color: rgba(255,255,255,0.9);
}
.video-js .vjs-volume-bar {
  margin: 8px 16px 8px 0;
}
.video-js .vjs-volume-level {
  left: -21px;
}
/* 全屏组件 */
.vjs-custom-skin > .video-js .vjs-control-bar .vjs-fullscreen-control {
  position: absolute;
  right: 24px;
  bottom: 24px;
  width: 20px;
  height: 20px;
}
.video-js .vjs-big-play-button .vjs-icon-placeholder:before, .vjs-button > .vjs-icon-placeholder:before {
  text-align: right;
}
/* 全屏按钮图标 */
.vjs-icon-fullscreen-enter:before, .video-js .vjs-fullscreen-control .vjs-icon-placeholder:before {
  content: '';
  width: 20px;
  height: 20px;
  background: url('../assets/icon_full@2x.png') no-repeat;
  background-size: 100% 100%;
}
/* 全屏播放后隐藏自定义全屏图标 */
.vjs-icon-fullscreen-exit:before, .video-js.vjs-fullscreen .vjs-fullscreen-control .vjs-icon-placeholder:before {
  background: url('');
  line-height: 20px;
  margin-right: 10px;
}
</style>
样式文件里的图片及路径,大家根据自己的实际情况进行调整
3.4 完成效果图!其实最重要的就是样式调整这里。。。
4、设置自动播放
1、将
muted属性设置为true
2、调用视频播放事件
// 设置自动播放事件中,将下面的代码放进去
this.$refs.videoPlayer.player.load()
this.$refs.videoPlayer.player.play()
5、设置一开始全屏播放视频
在全屏播放事件中,将下面的代码放进去文章来源:https://www.toymoban.com/news/detail-477809.html
this.$refs.videoPlayer.player.requestFullscreen()
6、监听视频的全屏事件
视频的全屏事件,在网上查了好久的资料,都没有找到解决办法,查chatGPT也是报错,最后结合网上的例子,一个一个试出来,暂时没发现有问题,可以获取到视频是否全屏状态。文章来源地址https://www.toymoban.com/news/detail-477809.html
<video-player
   class="video-player vjs-custom-skin"
   ref="videoPlayer"
   :playsinline="true"
   :options="playerOptions"
   @loadeddata="onLoadedData"
 ></video-player>
methods: {
   /** 监听视频 */
   onLoadedData(player) {
     player.on('fullscreenchange', () => {
       // player.isFullscreen_就是全屏的状态,true为全屏,false为不全屏
       // 在这里处理你的需求
     })
   },
 }
到了这里,关于vue 视频播放插件vue-video-player自定义样式、自动播放设置、设置一开始全屏播放视频、监听全屏事件的文章就介绍完了。如果您还想了解更多内容,请在右上角搜索TOY模板网以前的文章或继续浏览下面的相关文章,希望大家以后多多支持TOY模板网!


