目录
前言
一、STM32CubeMX配置
二、修改代码
三、硬件测试
总结
前言
该工程应用的以太网芯片是LAN8720,代码是基于STM32CUbeMx6.2.1配置生成的,在CubeMx中配置了ETH和LWIP,还有串口1和FREERTOS,最后通过创建任务函数实现udp的以太网数据收发功能。在测试中,可以在电脑的DOS窗口ping通在LWIP设置的单片机开发板的ip地址,通过网络调试助手可以实现数据的收发功能。
一、STM32CubeMX配置
1、选择STM32F407VET6芯片创建工程,首先配置RCC和SYS,再配置时钟,配置界面如下


2、配置ETH,配置界面如下


3、配FREERTOS和LWIP,配置界面如下


4、分配中断优先级,配置界面如下(如果需配置串口,先配置一下串口)


5、到这里,CubeMX就算配置完成了,就可以生成代码了

二、修改代码
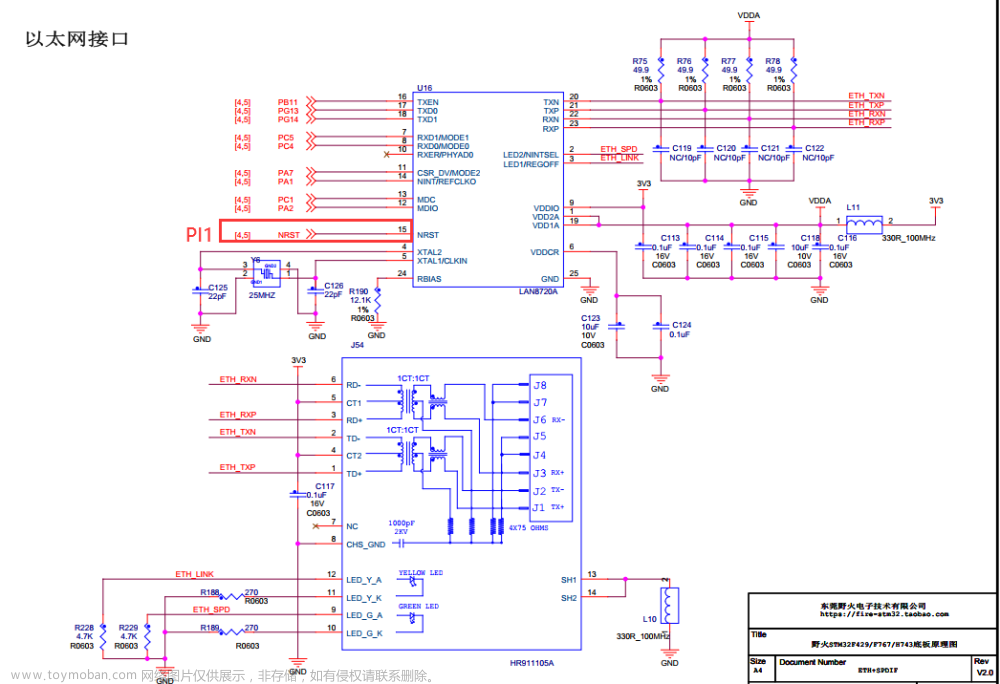
1、打开生成的工程文件,找到HAL_ETH_MspInit函数,在最下面添加芯片复位的三行代码(作用是在芯片初始化时,对芯片复位一下,该芯片复位引脚对应我单片机开发板上的PA3)


2、在main.c中添加修改函数,首先是包含的文件,然后是创建任务函数,
#include "main.h"
#include "cmsis_os.h"
#include "lwip.h"
#include "usart.h"
#include "gpio.h"

/* Private includes ----------------------------------------------------------*/
/* USER CODE BEGIN Includes */

#include "stdio.h"
#include "udp_echoserver.h"
/* USER CODE END Includes */
/* USER CODE BEGIN 0 */
void controlTask(void * param)
{
MX_LWIP_Init();
vTaskDelete( NULL );
}
void commandTask(void * param)
{
udp_echoserver_init();
while(1)
{
vTaskDelay(2);
}
}
TaskHandle_t StartTaskHandle;
void StartTask(void * arg)
{
taskENTER_CRITICAL();
xTaskCreate(controlTask, "controlTask", 200,NULL,4,NULL);
xTaskCreate(commandTask, "commandTask", 200,NULL,4,NULL);
vTaskDelete(StartTaskHandle);
taskEXIT_CRITICAL();
}
/* USER CODE END 0 */
/**
* @brief The application entry point.
* @retval int
*/
int main(void)
{
/* USER CODE BEGIN 1 */
/* USER CODE END 1 */
/* MCU Configuration--------------------------------------------------------*/
/* Reset of all peripherals, Initializes the Flash interface and the Systick. */
HAL_Init();
/* USER CODE BEGIN Init */
/* USER CODE END Init */
/* Configure the system clock */
SystemClock_Config();
/* USER CODE BEGIN SysInit */
/* USER CODE END SysInit */
/* Initialize all configured peripherals */
MX_GPIO_Init();
MX_USART1_UART_Init();
/* USER CODE BEGIN 2 */
printf("³õʼ»¯Íê±Ï");
xTaskCreate(StartTask,"commanderTask",200,NULL,2,&StartTaskHandle);
vTaskStartScheduler();
/* USER CODE END 2 */
/* Call init function for freertos objects (in freertos.c) */
MX_FREERTOS_Init();
/* Start scheduler */
osKernelStart();
/* We should never get here as control is now taken by the scheduler */
/* Infinite loop */
/* USER CODE BEGIN WHILE */
while (1)
{
/* USER CODE END WHILE */
/* USER CODE BEGIN 3 */
}
/* USER CODE END 3 */
}2、此时在电脑上是能够PING通在CubeMx中配置的ip地址的,如果需要实现udp数据收发功能,还需要创建功能文件,代码如下

void udp_echoserver_init(void)
{
   struct udp_pcb *upcb;
   err_t err;

   /* Create a new UDP control block  */
   upcb = udp_new();

   if (upcb)
   {
     /* Bind the upcb to the UDP_PORT port */
     /* Using IP_ADDR_ANY allow the upcb to be used by any local interface */
      err = udp_bind(upcb, IP_ADDR_ANY, UDP_SERVER_PORT);

      if(err == ERR_OK)
      {
        /* Set a receive callback for the upcb */
        udp_recv(upcb, udp_echoserver_receive_callback, NULL);
      }
      else
      {
        udp_remove(upcb);
       // printf("can not bind pcb");
      }
   }
   else
   {
    // printf("can not create pcb");
   }
}
uint8_t receivebuf[30] = {0};
//uint8_t send_buf[2] = {0x01,0x02};
uint8_t send_buf[] = "ÒѾÊÕµ½Êý¾Ý";
int receivelen = 0;
void udp_echoserver_receive_callback(void *arg, struct udp_pcb *upcb, struct pbuf *p,const struct ip4_addr *addr, u16_t port)
{
struct pbuf *pq; //´´½¨Ò»¸ö½á¹¹Ìå±äÁ¿
receivelen = p->len;
memcpy(receivebuf,p->payload,p->len);//p->payloadÖ¸½ÓÊÕµ½µÄʵ¼ÊÊý¾Ý£pp->lenÊÇÖ¸½ÓÊÕµ½µÄÊý¾Ý³¤¶È£»£»½«p±äÁ¿½ÓÊÕµ½µÄÊý¾Ý¸´ÖƵ½receivebufÀïÃæ
pbuf_free(p);//ÊÍ·Åp
udp_connect(upcb, addr, UDP_CLIENT_PORT); //½¨Á¢udpÁ¬½Ó
pq = pbuf_alloc(PBUF_TRANSPORT,14,PBUF_POOL);//allocate memory 14Ï൱ÓÚ·ÖÅä14¸ö×Ö½Ú
pbuf_take(pq,(char*)receivebuf,14);//copy data to buf
udp_send(upcb,pq);//send udp data
memset(receivebuf,0x00,30); //Çå³ý»º´æ
udp_disconnect(upcb);
pbuf_free(pq);
// /* Connect to the remote client */
// udp_connect(upcb, addr, UDP_CLIENT_PORT);
//
// /* Tell the client that we have accepted it */
// udp_send(upcb, p);
// /* free the UDP connection, so we can accept new clients */
// udp_disconnect(upcb);
//
// /* Free the p buffer */
// pbuf_free(p);
}三、硬件测试
1、用网线将开发板和电脑网口连接上,配置电脑的ip地址,然后可以在电脑的DOS串口ping通开发板的IP地址,测试界面如下


2、用网线将开发板和电脑网口连接上,打开网络调试助手,测试数据收发功能


总结
以上是我对LAN8720以太网芯片的应用,希望对大家有帮助文章来源:https://www.toymoban.com/news/detail-477997.html
整个工程代码下载:https://download.csdn.net/download/weixin_64705314/87672487?spm=1001.2014.3001.5503文章来源地址https://www.toymoban.com/news/detail-477997.html
到了这里,关于STM32CubeMX+STM32F407+FreeRTos+LAN8720 以太网通信实现数据收发功能的文章就介绍完了。如果您还想了解更多内容,请在右上角搜索TOY模板网以前的文章或继续浏览下面的相关文章,希望大家以后多多支持TOY模板网!

