一、安装docker
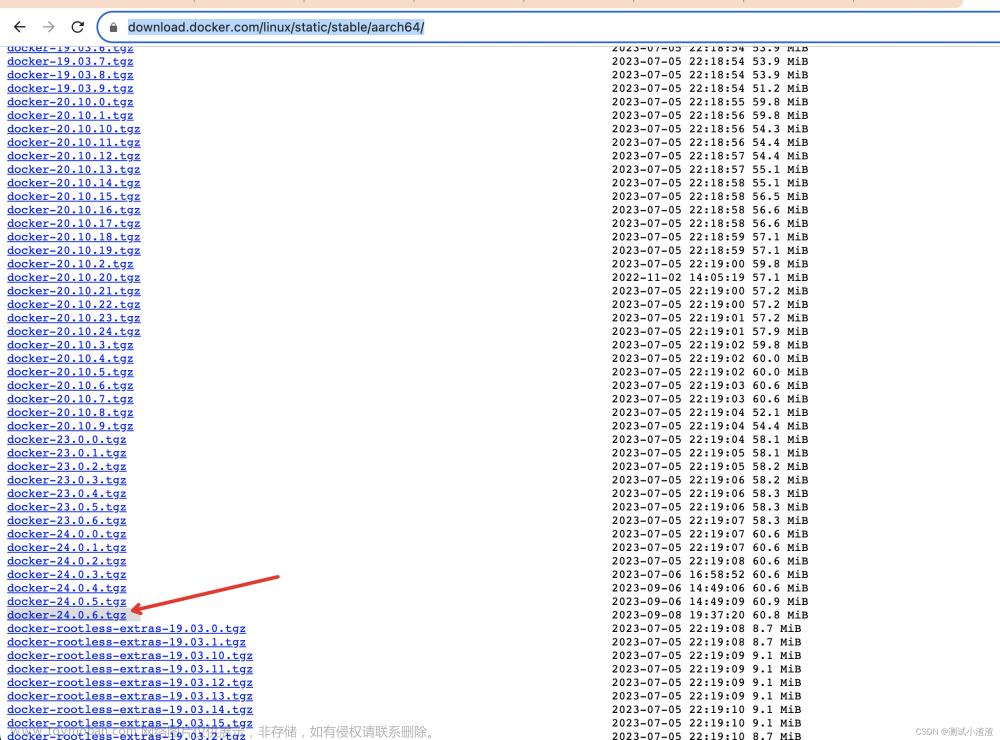
1.1.离线安装docker
- docker网址:https://download.docker.com/linux/static/stable/x86_64/
[root@VM-16-15-centos ~]# mkdir docker_install
[root@VM-16-15-centos ~]# cd docker_install/
[root@VM-16-15-centos docker_install]# vim docker.service
[Unit]
Description=Docker Application Container Engine
Documentation=https://docs.docker.com
After=network-online.target firewalld.service
Wants=network-online.target

[Service]
Type=notify
# the default is not to use systemd for cgroups because the delegate issues still
# exists and systemd currently does not support the cgroup feature set required
# for containers run by docker
ExecStart=/usr/bin/dockerd
ExecReload=/bin/kill -s HUP $MAINPID
# Having non-zero Limit*s causes performance problems due to accounting overhead
# in the kernel. We recommend using cgroups to do container-local accounting.
LimitNOFILE=infinity
LimitNPROC=infinity
LimitCORE=infinity
# Uncomment TasksMax if your systemd version supports it.
# Only systemd 226 and above support this version.
#TasksMax=infinity
TimeoutStartSec=0
# set delegate yes so that systemd does not reset the cgroups of docker containers
Delegate=yes
# kill only the docker process, not all processes in the cgroup
KillMode=process
# restart the docker process if it exits prematurely
Restart=on-failure
StartLimitBurst=3
StartLimitInterval=60s

[Install]
WantedBy=multi-user.target
[root@VM-16-15-centos docker_install]# vim install.sh
#!/bin/sh
tar -xvf ./$1
cp ./docker/* /usr/bin/
cp ./docker.service /usr/lib/systemd/system/
chmod +x /usr/lib/systemd/system/docker.service
systemctl daemon-reload
systemctl start docker
systemctl enable docker.service
docker -v
1.2 安装docker
[root@VM-16-15-centos docker_install]# ls
docker-23.0.3.tgz  docker.service   install.sh
[root@VM-16-15-centos docker_install]# ./install.sh docker-23.0.3.tgz
Docker version 23.0.3, build 3e7cbfd
1.3 更改数据默认存储位置
[root@VM-16-15-centos ~]# cat /etc/docker/daemon.json
{
  "registry-mirrors": ["http://hub-mirror.c.163.com"],
  "data-root": "/home/docker"
}
- data-root /graph:取决于具体的系统版本或者kernel版本决定要用data-root还是graph
1.4 查看更改信息
#更改前:
[root@VM-16-15-centos ~]# docker info  | grep "Docker Root Dir"
 Docker Root Dir: /var/lib/docker
#更改后:
[root@VM-16-15-centos ~]# docker info  | grep "Docker Root Dir"
  Docker Root Dir: /home/docker
二、部署docker-zabbix
2.1 拉取镜像
[root@VM-16-15-centos ~]# docker pull zabbix/zabbix-web-nginx-mysql:alpine-6.4-latest
[root@VM-16-15-centos ~]# docker pull zabbix/zabbix-server-mysql:alpine-6.4-latest
[root@VM-16-15-centos ~]# docker pull mysql:8.0
2.2 启动容器
PS:默认情况下,容器的网卡都是经过 NAT 的,为了保证相关服务可以正常被外部访问,容器都使用主机模式的网络(
--network=host),即端口连接、端口监听都使用物理机的地址。
#docker网络
[root@VM-16-15-centos ~]# docker network create --subnet 172.20.0.0/16 --ip-range 172.20.240.0/20 zabbix-net
#zb-mysql
[root@VM-16-15-centos ~]# mkdir -p /u01/zabbix_mount/mysql/data   /u01/zabbix_mount/mysql/conf
[root@VM-16-15-centos ~]# cd /u01/zabbix_mount/mysql/conf
#提前创建my.cnf配置文件
[root@VM-16-15-centos ~]# vim my.cnf
[mysqld]
skip-host-cache
skip-name-resolve
datadir=/var/lib/mysql
socket=/var/run/mysqld/mysqld.sock
secure-file-priv=/var/lib/mysql-files
user=mysql
max_connections=40960

character-set-server = utf8mb4
collation-server = utf8mb4_general_ci
init_connect='SET NAMES utf8mb4'
#lower_case_table_names = 1
explicit_defaults_for_timestamp = true
max_connect_errors = 600
back_log = 110
table_open_cache = 600
table_definition_cache = 700
table_open_cache_instances = 64
thread_stack = 512K
external-locking = FALSE
thread_cache_size = 20
interactive_timeout = 1800
#wait_timeout = 1800
#lock_wait_timeout = 3600
skip-log-bin


pid-file=/var/run/mysqld/mysqld.pid
[client]
socket=/var/run/mysqld/mysqld.sock

!includedir /etc/mysql/conf.d/

[root@VM-16-15-centos ~]#  docker run --name mysql-server -itd \
--restart always  \
-p 10001:3306 \
-v /u01/zabbix_mount/mysql/data:/var/lib/mysql   \
-v /u01/zabbix_mount/mysql/conf/my.cnf:/etc/my.cnf
-e MYSQL_DATABASE="zabbix"      \
-e MYSQL_USER="zabbix"      \
-e MYSQL_PASSWORD="zabbix_pwd"    \
-e MYSQL_ROOT_PASSWORD="root_pwd"   \
--network=zabbix-net   \
mysql:8.0    \
--character-set-server=utf8 \
--collation-server=utf8_bin \
--default-authentication-plugin=mysql_native_password

#server
#创建一个zabbix—server容器把配置文件cp出来用于挂载
[root@VM-16-15-centos ~]# mkdir -p /u01/zabbix_mount/zabbix/conf
[root@VM-16-15-centos ~]# cd /u01/zabbix_mount/zabbix/conf
[root@VM-16-15-centos conf]# docker run -itd --name test-zabbix zabbix/zabbix-server-mysql:alpine-6.4-latest
d22596ab51f3d9cbec758b97f5b22dd64ab1660491bb58580e59f32c02a0574b
[root@VM-16-15-centos conf]# docker cp test-zabbix:/etc/zabbix/zabbix_server.conf ./
[root@VM-16-15-centos conf]# ls
zabbix_server.conf
#cp之后就可以删除了
[root@VM-16-15-centos conf]#  docker rm -f test-zabbix
test-zabbix
[root@VM-16-15-centos conf]# docker run --name zabbix-server -itd  \
--restart always  \
-e DB_SERVER_HOST="mysql-server"   \
-e MYSQL_DATABASE="zabbix" \
-e MYSQL_USER="zabbix"  \
-e MYSQL_PASSWORD="zabbix_pwd" \
-e MYSQL_ROOT_PASSWORD="root_pwd" \
--network=zabbix-net   \
-v /u01/zabbix_mount/zabbix/conf/zabbix_server.conf:/etc/zabbix/zabbix_server.conf \
-p 10051:10051  \
zabbix/zabbix-server-mysql:alpine-6.4-latest

#web
#如上把nginx的配置文件cp出来
[root@VM-16-15-centos ~]# mkdir -p /u01/zabbix_mount/nginx/conf
[root@VM-16-15-centos ~]# cd /u01/zabbix_mount/nginx/conf
[root@VM-16-15-centos conf]# docker run -itd --name test-nginx zabbix/zabbix-web-nginx-mysql:alpine-6.4-latest
d22596ab51f3d9cbec758b97f5b22dd64ab1660491bb5812359f32c02a01234
[root@VM-16-15-centos conf]# docker cp test-nginx:/etc/zabbix/nginx.conf ./
[root@VM-16-15-centos conf]# ls
nginx.conf
[root@VM-16-15-centos conf]#  docker rm -f test-nginx
test-nginx
[root@VM-16-15-centos ~]# docker run --name zabbix-web-nginx-mysql -itd \
--restart always  \
-e ZBX_SERVER_HOST="zabbix-server-mysql"  \
-e DB_SERVER_HOST="mysql-server"  \
-e MYSQL_DATABASE="zabbix"  \
-e MYSQL_USER="zabbix"   \
-e MYSQL_PASSWORD="zabbix_pwd" \
-e ZBX_SERVER_NAME="运维系统平台" \
-e MYSQL_ROOT_PASSWORD="root_pwd"  \
--network=zabbix-net \
-p 10002:8080 \
-v /u01/zabbix_mount/nginx/conf/nginx.conf:/etc/zabbix/nginx.conf
zabbix/zabbix-web-nginx-mysql:alpine-6.4-latest
- ZBX_SERVER_NAME:启动web设置前端页面名称只能设置一次,目前没有找到修改方法;
- 启动容器后需修改每个容器内时间,否则页面数据展示时间不正常;
2.3 查看
[root@VM-16-15-centos ~]# docker ps -a
CONTAINER ID   IMAGE                                             COMMAND                   CREATED       STATUS        PORTS                                                    NAMES
7c219dc4c4d5   zabbix/zabbix-server-mysql:alpine-6.4-latest      "/sbin/tini -- /usr/…"   3 weeks ago   Up 21 hours   0.0.0.0:10051->10051/tcp, :::10051->10051/tcp            zabbix-server-mysql
9f2b9810914b   zabbix/zabbix-web-nginx-mysql:alpine-6.4-latest   "docker-entrypoint.sh"    3 weeks ago   Up 12 days    8443/tcp, 0.0.0.0:10002->8080/tcp, :::10002->8080/tcp    zabbix-web-nginx-mysql
043bc2106096   mysql:8.0                                         "docker-entrypoint.s…"   3 weeks ago   Up 11 days    33060/tcp, 0.0.0.0:10001->3306/tcp, :::10001->3306/tcp   mysql-server
2.4 访问
-
IP+10002
-
默认用户名/密码是:
Admin/zabbix文章来源:https://www.toymoban.com/news/detail-481875.html

PS:目前版本是官网最新版本;部署过程如有错误请指出。文章来源地址https://www.toymoban.com/news/detail-481875.html
到了这里,关于Docker 部署 Zabbix6.4的文章就介绍完了。如果您还想了解更多内容,请在右上角搜索TOY模板网以前的文章或继续浏览下面的相关文章,希望大家以后多多支持TOY模板网!


