网站在线预览
参考文档:
- VitePress
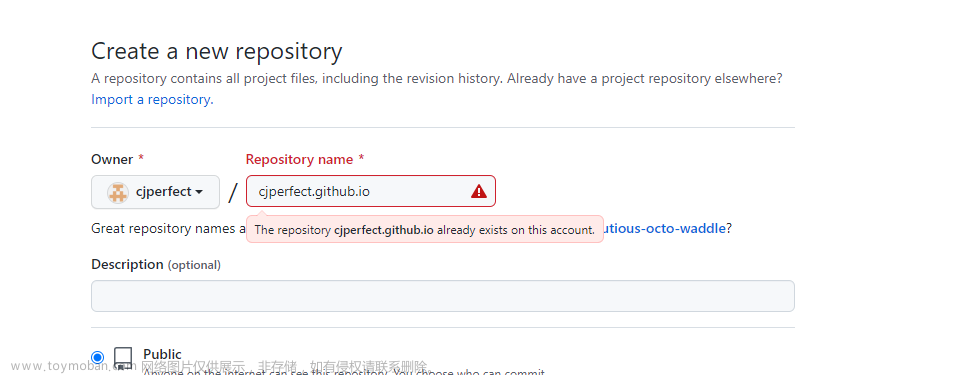
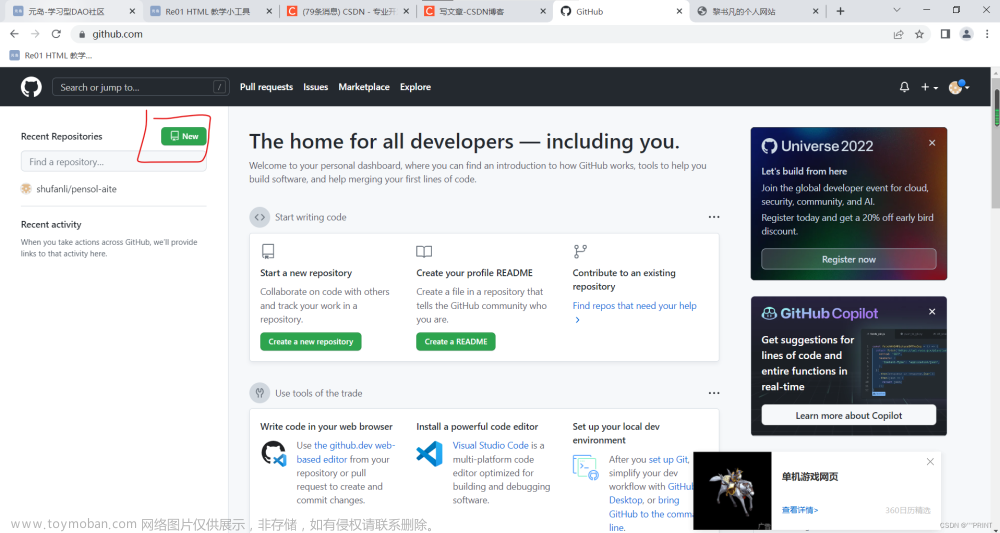
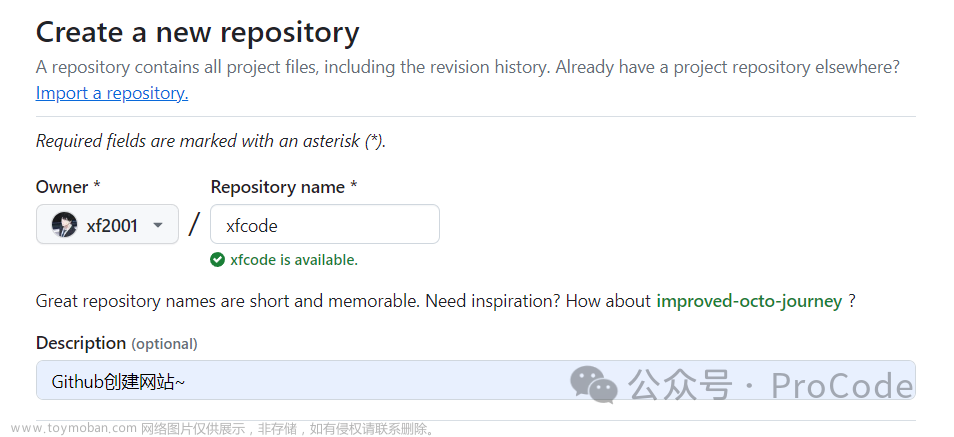
创建 GitHub 远程仓库

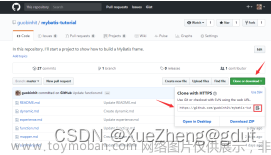
克隆远程仓库到本地
git clone git@github.com:themusecatcher/front-end-notes.git
进入
front-end-notes/目录,添加 README.md 并建立分支跟踪
echo "# front-end-notes" >> README.md
git init
git add README.md
git commit -m "first commit"
git branch -M master
git remote add origin git@github.com:themusecatcher/front-end-notes.git
git push -u origin master
安装 vitepress
推荐使用
pnpm:
npm install -g pnpm
安装
vitepress:
pnpm add -D vitepress
# or
yarn add -D vitepress
使用脚手架初始化文档项目
pnpm exec vitepress init

启动项目,查看网站
pnpm docs:dev
初始化
package.json文件,填写相关信息
npm init
完整
package.json文件如下:
{
  "name": "front-end-notes",
  "version": "0.0.1",
  "scripts": {
    "docs:dev": "vitepress dev docs --open",
    "docs:build": "vitepress build docs",
    "docs:preview": "vitepress preview docs",
    "docs:deploy": "sh deploy.sh"
  },
  "devDependencies": {
    "less": "^4.1.3",
    "vitepress": "1.0.0-beta.1"
  },
  "description": "前端笔记",
  "directories": {
    "doc": "docs"
  },
  "repository": {
    "type": "git",
    "url": "git+https://github.com/themusecatcher/front-end-notes.git"
  },
  "keywords": [
    "front-end",
    "notes"
  ],
  "author": "themusecatcher",
  "license": "ISC",
  "bugs": {
    "url": "https://github.com/themusecatcher/front-end-notes/issues"
  },
  "homepage": "https://github.com/themusecatcher/front-end-notes#readme"
}
编写网站首页
首页配置参考文档
在
docs/index.md中编写首页,其中fetchVersion()自定义方法用于在首页tagline后添加项目版本标签
---
layout: home

title: Front-end Notes
titleTemplate: Library

hero:
  name: Front-end Notes
  text: ''
  tagline: 前端笔记文档
  image:
    src: /logo-with-shadow.png
    alt: Front-end Notes
  actions:
    - theme: brand
      text: Get Started
      link: /guide/started
    - theme: alt
      text: View on GitHub
      link: https://github.com/themusecatcher/front-end-notes
---

<script setup lang="ts">
import { onMounted } from 'vue'
import { fetchVersion } from './.vitepress/utils/fetchVersion'

onMounted(() => {
  fetchVersion()
})
</script>
在
docs/.vitepress/utils/中创建fetchVersion.ts文件
/*
  远程读取 github 仓库中 package.json 文件中的 version 版本号
  方式一:
  读取规则:https://api.github.com/repos/<username>/<repo>/contents/<file>?ref=<branch 可选,默认master>
  return fetch('https://api.github.com/repos/themusecatcher/front-end-notes/contents/package.json?ref=master', {
    headers: {
      // See https://docs.github.com/en/rest/overview/media-types
      Accept: 'application/vnd.github.v3.raw',
      // See https://docs.github.com/en/rest/guides/getting-started-with-the-rest-api#authentication
      // Authorization: 'token ${GITHUB_TOKEN}',
    }
  })
  方式二:
  读取规则:https://raw.githubusercontent.com/<username>/<repo>/<branch>/<file>
  return fetch('https://raw.githubusercontent.com/themusecatcher/front-end-notes/master/package.json')
*/
export function fetchVersion () {
  return fetch('https://api.github.com/repos/themusecatcher/front-end-notes/contents/package.json?ref=master', {
    headers: {
      // See https://docs.github.com/en/rest/overview/media-types
      Accept: 'application/vnd.github.v3.raw',
      // See https://docs.github.com/en/rest/guides/getting-started-with-the-rest-api#authentication
      // Authorization: 'token ${GITHUB_TOKEN}',
    }
  }).then(res => res.json())
    .then(json => json.version ?? '')
    .then(version => {
      if (!version) return
      const tagLineParagragh = document.querySelector('div.VPHero.has-image.VPHomeHero > div > div.main > p.tagline')
      const docsVersionSpan = document.createElement('samp')
      docsVersionSpan.classList.add('version-tag')
      docsVersionSpan.innerText = version
      tagLineParagragh?.appendChild(docsVersionSpan)
    })
}
在
docs/.vitepress/theme/global.less中写入标签样式
.version-tag {
  font-size: 14px;
  line-height: 1.571;
  font-weight: bold;
  padding: 4px 6px;
  margin-left: 6px;
  background: #bd34fe;
  color: #FFF;
  border-radius: 10px;
  display: inline-block;
  vertical-align: top;
  margin-top: 4px;
}
由于文档使用
less,因此需要安装 less 预处理器: 相关文档
pnpm add less -D
效果如下图,版本标签:
0.0.1

在
global.less中编写文档全局样式,其中样式皆源自 vite官网 中使用的全局样式,并稍加修改:
/**
 * Colors
 * -------------------------------------------------------------------------- */

 :root {
  --vp-c-brand: #646cff;
  --vp-c-brand-light: #747bff;
  --vp-c-brand-lighter: #9499ff;
  --vp-c-brand-lightest: #bcc0ff;
  --vp-c-brand-dark: #535bf2;
  --vp-c-brand-darker: #454ce1;
  --vp-c-brand-dimm: rgba(100, 108, 255, 0.08);
  --c-brand: #646cff;
  --c-brand-light: #747bff;
}

/**
 * Component: Button
 * -------------------------------------------------------------------------- */

:root {
  --vp-button-brand-border: var(--vp-c-brand-light);
  --vp-button-brand-text: var(--vp-c-white);
  --vp-button-brand-bg: var(--vp-c-brand);
  --vp-button-brand-hover-border: var(--vp-c-brand-light);
  --vp-button-brand-hover-text: var(--vp-c-white);
  --vp-button-brand-hover-bg: var(--vp-c-brand-light);
  --vp-button-brand-active-border: var(--vp-c-brand-light);
  --vp-button-brand-active-text: var(--vp-c-white);
  --vp-button-brand-active-bg: var(--vp-button-brand-bg);
}

/**
 * Component: Home
 * -------------------------------------------------------------------------- */

:root {
  --vp-home-hero-name-color: transparent;
  --vp-home-hero-name-background: -webkit-linear-gradient(
    120deg,
    #bd34fe 30%,
    #41d1ff
  );

  --vp-home-hero-image-background-image: linear-gradient(
    -45deg,
    #bd34fe 50%,
    #47caff 50%
  );
  --vp-home-hero-image-filter: blur(40px);
}

@media (min-width: 640px) {
  :root {
    --vp-home-hero-image-filter: blur(56px);
  }
}

@media (min-width: 960px) {
  :root {
    --vp-home-hero-image-filter: blur(72px);
  }
}

/**
 * Component: Custom Block
 * -------------------------------------------------------------------------- */

:root {
  --vp-custom-block-tip-border: var(--vp-c-brand);
  --vp-custom-block-tip-text: var(--vp-c-brand-darker);
  --vp-custom-block-tip-bg: var(--vp-c-brand-dimm);
}

.dark {
  --vp-custom-block-tip-border: var(--vp-c-brand);
  --vp-custom-block-tip-text: var(--vp-c-brand-lightest);
  --vp-custom-block-tip-bg: var(--vp-c-brand-dimm);
}

/**
 * Component: Algolia
 * -------------------------------------------------------------------------- */

.DocSearch {
  --docsearch-primary-color: var(--vp-c-brand) !important;
}

/**
 * VitePress: Custom fix
 * -------------------------------------------------------------------------- */

/*
  Use lighter colors for links in dark mode for a11y.
  Also specify some classes twice to have higher specificity
  over scoped class data attribute.
*/
.dark .vp-doc a,
.dark .vp-doc a > code,
.dark .VPNavBarMenuLink.VPNavBarMenuLink:hover,
.dark .VPNavBarMenuLink.VPNavBarMenuLink.active,
.dark .link.link:hover,
.dark .link.link.active,
.dark .edit-link-button.edit-link-button,
.dark .pager-link .title {
  color: var(--vp-c-brand-lighter);
}

.dark .vp-doc a:hover,
.dark .vp-doc a > code:hover {
  color: var(--vp-c-brand-lightest);
  opacity: 1;
}
.vp-doc a {
  font-weight: normal;
}
.vp-doc p {
  margin: 0;
}
/* Transition by color instead of opacity */
.dark .vp-doc .custom-block a {
  transition: color 0.25s;
}
a:hover {
  text-decoration: none !important;
}
summary {
  font-weight: 600;
  &:hover {
    cursor: pointer;
    color: var(--vp-c-brand-lighter);
  }
}
svg {
  fill: var(--vp-c-text-1);
}
.VPNavBarTitle .title {
  transition: all 0.25s;
  &:hover {
    color: var(--vp-c-brand);
  }
}
.version-tag {
  font-size: 14px;
  line-height: 1.571;
  font-weight: bold;
  padding: 4px 6px;
  margin-left: 6px;
  background: #bd34fe;
  color: #FFF;
  border-radius: 10px;
  display: inline-block;
  vertical-align: top;
  margin-top: 4px;
}
引入默认主题与全局样式
在
theme/index.ts中引入默认主题与全局样式
import DefaultTheme from 'vitepress/theme'
import './global.less' // global less

export default {
  extends: DefaultTheme // or ...DefaultTheme
}
配置网站
在
docs/.vitepress/config.ts中对网站进行整体配置
import { defineConfig } from 'vitepress'

export default defineConfig({
  title: `Front-end Notes`,
  description: '前端笔记文档',
  base: '/front-end-notes/',

  head: [ // 网站图标
    ['link', { rel: 'icon', type: 'image/svg+xml', href: 'logo.svg' }],
    // ['link', { rel: 'icon', type: 'image/x-icon', href: 'favicon.ico' }],
  ],
  appearance: true, // 默认 true,设为 false 则无法切换dark/light主题,可选 'dark' true false
  markdown: {
    lineNumbers: false // 是否显示行数,默认false
  },
  themeConfig: {
    logo: '/logo.svg',

    editLink: {
      pattern: 'https://github.com/themusecatcher/front-end-notes/tree/master/docs/:path',
      text: 'Suggest changes to this page',
    },
    // 默认支持icon包括:'discord'|'facebook'|'github'|'instagram'|'linkedin'|'mastodon'|'slack'|'twitter'|'youtube'
    socialLinks: [
      { icon: 'github', link: 'https://github.com/themusecatcher/front-end-notes' },
      // 自定义icon
      // {
      //   icon: {
      //     svg: '<svg role="img" viewBox="0 0 24 24" xmlns="http://www.w3.org/2000/svg"><title>Dribbble</title><path d="M12...6.38z"/></svg>'
      //   },
      //   link: 'https://www.npmjs.com/package/front-end-notes'
      // }
    ],

    // search: { // vitepress 内置 search
    //   provider: 'local'
    // },

    algolia: { // algolia 搜索服务 与 内置 search 可二选一
      appId: 'LPTNA0E8HM',
      apiKey: '8f1b68dfab6b0320adef728a1c3a77cc',
      indexName: 'themusecatcher_front-end'
    },

    footer: {
      message: 'Released under the MIT License.',
      copyright: 'Copyright © 2023-present The Muse Catcher',
    },

    nav: [
      { text: 'Vue2 Notes', link: '/vue2/note-1', activeMatch: '/vue2/' },
      { text: 'Vue3 Notes', link: '/vue3/note-1', activeMatch: '/vue3/' },
      {
        text: 'links',
        items: [
          { text: 'My Github', link: 'https://github.com/themusecatcher' },
          { text: 'My CSDN', link: 'https://blog.csdn.net/Dandrose?type=blog' },
          {
            items: [
              {
                text: 'Vue 2 Docs',
                link: 'https://v2.cn.vuejs.org/v2/guide/',
              },
              {
                text: 'Vue 3 Docs',
                link: 'https://cn.vuejs.org/guide/introduction.html',
              },
              {
                text: 'TypeScript Docs',
                link: 'https://www.tslang.cn/docs/home.html',
              },
              {
                text: 'MDN Web Docs',
                link: 'https://developer.mozilla.org/zh-CN/',
              }
            ]
          },
          {
            items: [
              {
                text: 'npm',
                link: 'https://www.npmjs.com/',
              },
              {
                text: 'vite',
                link: 'https://cn.vitejs.dev/',
              },
              {
                text: 'markdown',
                link: 'https://markdown.com.cn/',
              },
              {
                text: 'vitepress',
                link: 'https://vitepress.dev/',
              }
            ]
          }
        ]
      }
    ],

    sidebar: {
      '/vue2/': [
        {
          text: '指引',
          items: [
            {
              text: '开始',
              link: '/vue2/started'
            }
          ]
        },
        {
          text: 'Vue2 Notes',
          items: [
            {
              text: 'note-1',
              link: '/vue2/note-1'
            },
            {
              text: 'note-2',
              link: '/vue2/note-2'
            },
            {
              text: 'note-3',
              link: '/vue2/note-3'
            },
            {
              text: 'note-4',
              link: '/vue2/note-4'
            },
            {
              text: 'note-5',
              link: '/vue2/note-5'
            },
            {
              text: 'note-6',
              link: '/vue2/note-6'
            }
          ]
        }
      ],
      '/vue3/': [
        {
          text: '指引',
          items: [
            {
              text: '开始',
              link: '/vue3/started'
            }
          ]
        },
        {
          text: 'Vue3 Notes',
          items: [
            {
              text: 'note-1',
              link: '/vue3/note-1'
            },
            {
              text: 'note-2',
              link: '/vue3/note-2'
            },
            {
              text: 'note-3',
              link: '/vue3/note-3'
            },
            {
              text: 'note-4',
              link: '/vue3/note-4'
            },
            {
              text: 'note-5',
              link: '/vue3/note-5'
            },
            {
              text: 'note-6',
              link: '/vue3/note-6'
            }
          ]
        }
      ]
    }
  }
})
创建网站内容目录
在
docs/下新建网站目录,例如:vue2/、vue3/
注意:目录结构需要与
docs/.vitepress/config.ts配置文件中的sidebar属性相对应
在
vue2/、vue3下按自己需要创建目录或文件
打包静态网站并部署到 GitHub
编写打包部署脚本
在项目根目录创建
deploy.sh脚本,用于自动化打包、部署流程
deploy.sh 文件:
# /bin/bash

# 确保脚本抛出遇到的错误
set -e

# 打包生成静态文件
pnpm docs:build

# 进入待发布的 dist/ 目录
cd docs/.vitepress/dist

# 提交打包静态网站到 github-pages 分支
git init
git add .
git commit -m 'deploy'

# 部署到 https://<username>.github.io/<repo>
git push -f git@github.com:themusecatcher/front-end-notes.git master:github-pages

# 提交所有代码到github
cd ../../../
git add .
git cm -m 'update'
git push
在
package.json添加指令
"scripts": {
    "docs:deploy": "sh deploy.sh"
}
打包部署
pnpm docs:deploy
# or
sh deploy.sh
配置 github pages

查看网站
save 成功之后,点击 Visit site 打开查看网站:

配置 Algolia 搜索(可选内置 search)
申请搜索服务
申请地址
填写部署到公网的网站地址、邮箱和代码仓库地址,全部勾选,然后提交!

等待申请通过的邮件

回复邮件
I am the maintainer of the website, I can modify the code ~

等待回复邮件
获取
appId、apiKey、indexName

配置并引入 algolia 搜索服务
在
docs/.vitepress/config.ts中写入以下配置
import { defineConfig } from 'vitepress'

export default defineConfig({
  themeConfig: {
    algolia: {
      appId: 'LPTNA0E8HM',
      apiKey: '8f1b68dfab6b0320adef728a1c3a77cc',
      indexName: 'themusecatcher_front-end'
    }
  }
})
algolia 搜索效果如下图:

内置 search 搜索效果如下图:

网站整体目录结构如下图:文章来源:https://www.toymoban.com/news/detail-481971.html
 文章来源地址https://www.toymoban.com/news/detail-481971.html
到了这里,关于使用VitePress创建个人网站并部署到GitHub的文章就介绍完了。如果您还想了解更多内容,请在右上角搜索TOY模板网以前的文章或继续浏览下面的相关文章,希望大家以后多多支持TOY模板网!


