6.将rtt nano的源码放置在工程本地目录
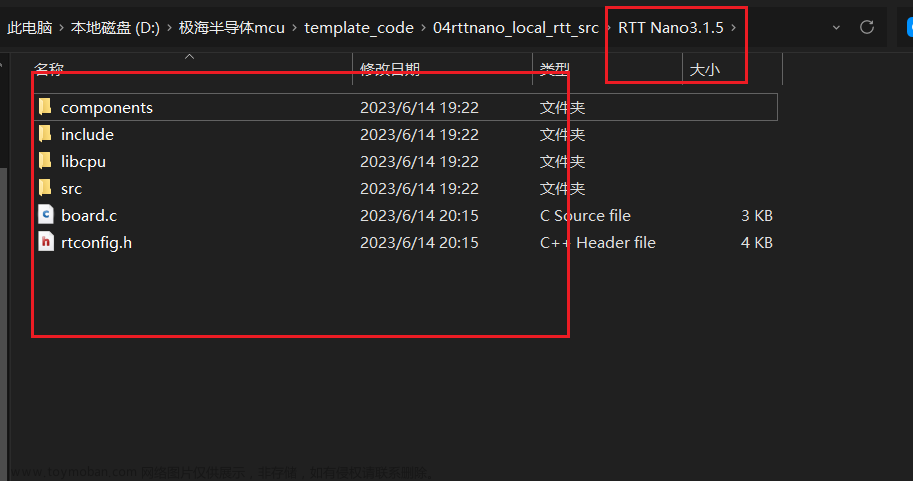
1.复制源码到本地
复制内容有bsp任意板子的rtconfig.h board.c 文件到 rtt nano目录,复制组件文件夹,头文件夹,源码文件夹,平台先关的libcpu文件夹
2.在mdk中添加分组
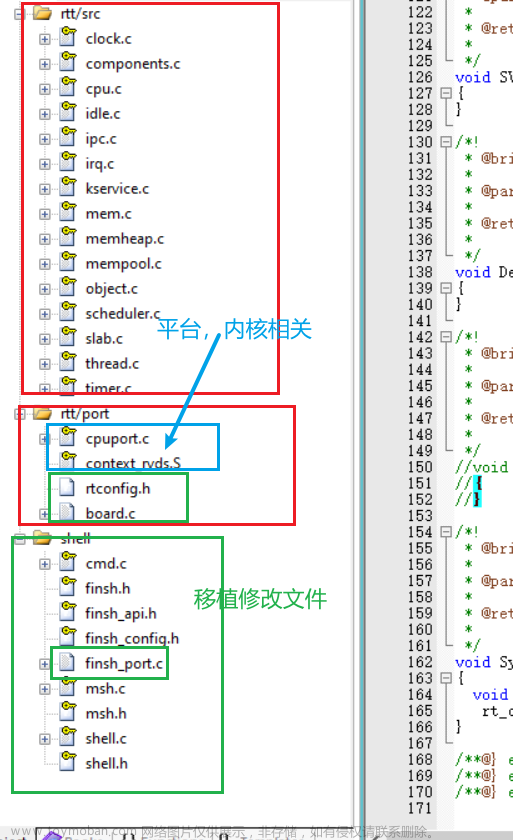
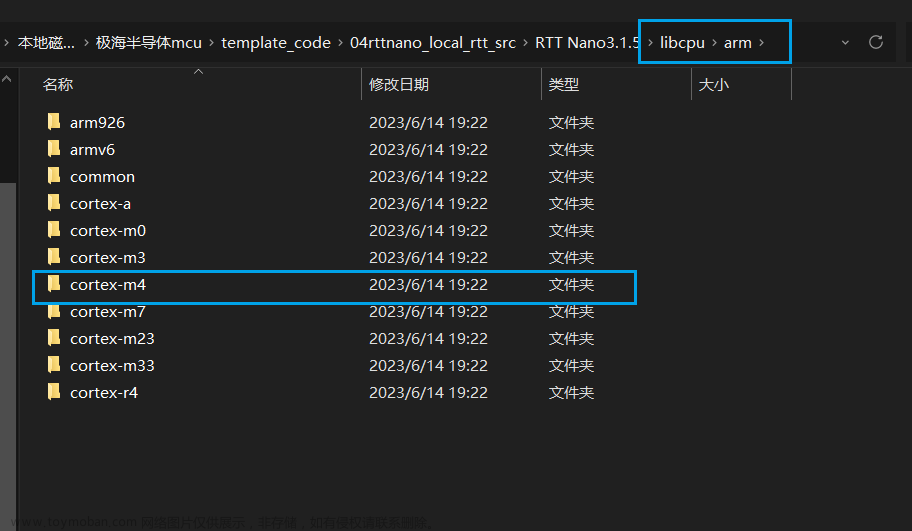
极海的这个mcu是M4的平台,的context_rvds 和 cpuport.c
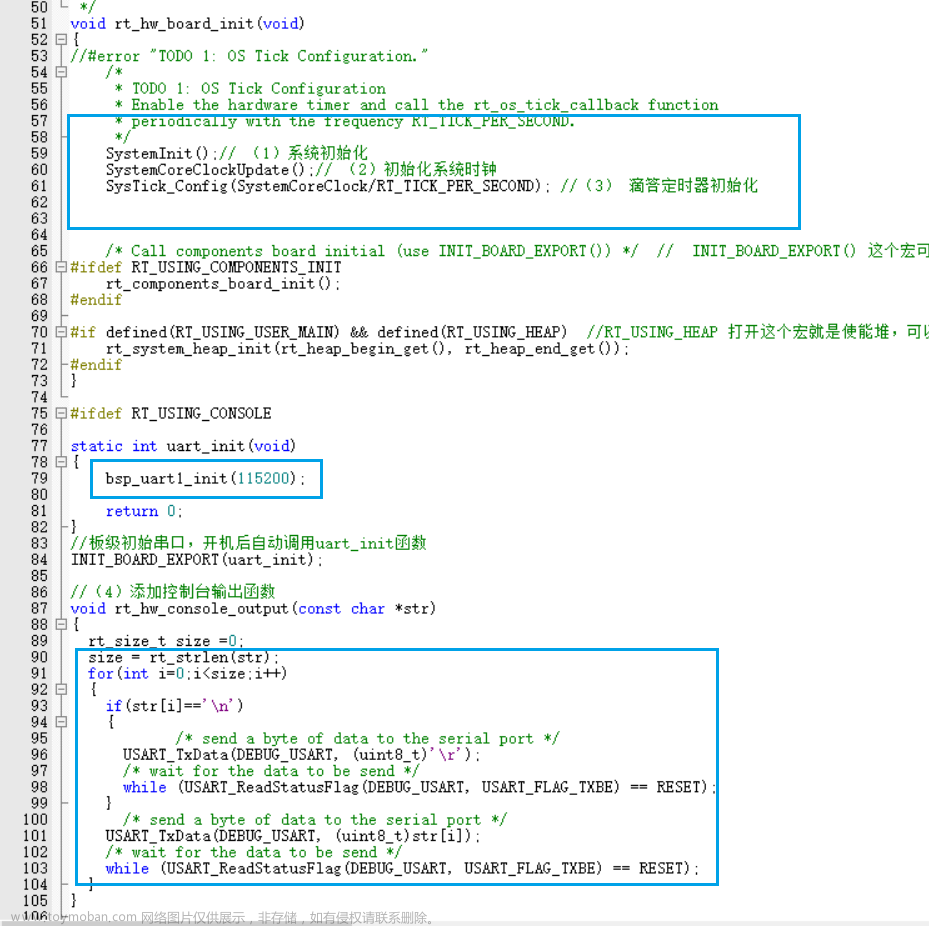
3.修改board.c 的文件
修改地方
/*
 * Copyright (c) 2006-2019, RT-Thread Development Team
 *
 * SPDX-License-Identifier: Apache-2.0
 *
 * Change Logs:
 * Date           Author       Notes
 * 2021-05-24                  the first version
 */

#include <rthw.h>
#include <rtthread.h>
//添加头文件
#include "apm32f4xx.h"
#include "bsp_usart.h"

#if defined(RT_USING_USER_MAIN) && defined(RT_USING_HEAP)
/*
 * Please modify RT_HEAP_SIZE if you enable RT_USING_HEAP
 * the RT_HEAP_SIZE max value = (sram size - ZI size), 1024 means 1024 bytes
 */
// 这里是堆得大小
#define RT_HEAP_SIZE (15*1024)


static rt_uint8_t rt_heap[RT_HEAP_SIZE];
//获取堆得首地址
RT_WEAK void *rt_heap_begin_get(void)
{
    return rt_heap;
}
//获取堆得结束地址
RT_WEAK void *rt_heap_end_get(void)
{
    return rt_heap + RT_HEAP_SIZE;
}
#endif

void rt_os_tick_callback(void)
{
    rt_interrupt_enter();

    rt_tick_increase();//系统滴答自动增加

    rt_interrupt_leave();
}

/**
 * This function will initial your board.
 */
void rt_hw_board_init(void)
{
//#error "TODO 1: OS Tick Configuration."
    /*
     * TODO 1: OS Tick Configuration
     * Enable the hardware timer and call the rt_os_tick_callback function
     * periodically with the frequency RT_TICK_PER_SECOND.
     */
		SystemInit();// (1)系统初始化
		SystemCoreClockUpdate();// (2)初始化系统时钟
		SysTick_Config(SystemCoreClock/RT_TICK_PER_SECOND); //(3) 滴答定时器初始化


    /* Call components board initial (use INIT_BOARD_EXPORT()) */  //  INIT_BOARD_EXPORT() 这个宏可以初始化板级外设,如串口,IIC等
#ifdef RT_USING_COMPONENTS_INIT
    rt_components_board_init();
#endif

#if defined(RT_USING_USER_MAIN) && defined(RT_USING_HEAP)  //RT_USING_HEAP 打开这个宏就是使能堆,可以动态创建对象
    rt_system_heap_init(rt_heap_begin_get(), rt_heap_end_get());
#endif
}

#ifdef RT_USING_CONSOLE

static int uart_init(void)
{
		bsp_uart1_init(115200);

    return 0;
}
//板级初始串口,开机后自动调用uart_init函数
INIT_BOARD_EXPORT(uart_init);

//(4)添加控制台输出函数
void rt_hw_console_output(const char *str)
{
	rt_size_t size =0;
	size = rt_strlen(str);
	for(int i=0;i<size;i++)
	{
		if(str[i]=='\n')
		{
						/* send a byte of data to the serial port */
			USART_TxData(DEBUG_USART, (uint8_t)'\r');
			/* wait for the data to be send */
			while (USART_ReadStatusFlag(DEBUG_USART, USART_FLAG_TXBE) == RESET);
		}
		  /* send a byte of data to the serial port */
    USART_TxData(DEBUG_USART, (uint8_t)str[i]);
    /* wait for the data to be send */
    while (USART_ReadStatusFlag(DEBUG_USART, USART_FLAG_TXBE) == RESET);
	}
}

#endif
4.注释rttconfig.h 文件
这里没有改,添加了注释文章来源:https://www.toymoban.com/news/detail-482678.html
/* RT-Thread config file */

#ifndef __RTTHREAD_CFG_H__
#define __RTTHREAD_CFG_H__

// <<< Use Configuration Wizard in Context Menu >>>

// RT_THREAD_PRIORITY_MAX 这个宏表示 RT-Thread 支持多少个优先级,取值范围为 8~256,默认为 32。
#define RT_THREAD_PRIORITY_MAX  32

//RT_TICK_PER_SECOND 表示操作系统每秒钟有多少个 tick,tick 即是操作系统的时钟周期,默认为 1000
#define RT_TICK_PER_SECOND  1000

// 表示 CPU 处理的数据需要多少个字节对齐,默认为 4 个字节
#define RT_ALIGN_SIZE   4

// 内核对象名字的最大长度,取值范围为 2~16,默认为 8。
#define RT_NAME_MAX    8

// 使用 RT-Thread 组件初始化,默认使能
#define RT_USING_COMPONENTS_INIT

// 使用用户 main 函数,默认打开
#define RT_USING_USER_MAIN

// main 线程栈大小,取值范围为 1~4086,单位为字节,默认为512。
#define RT_MAIN_THREAD_STACK_SIZE     256

// </h>

// 调试配置
// <c1>enable kernel debug configuration
//  <i>Default: enable kernel debug configuration
//#define RT_DEBUG
// </c>
// <o>enable components initialization debug configuration<0-1>
//  <i>Default: 0
#define RT_DEBUG_INIT 0
// <c1>thread stack over flow detect
//  <i> Diable Thread stack over flow detect
//#define RT_USING_OVERFLOW_CHECK
// </c>
// </h>

// 钩子函数配置,目前全部关闭。
// <c1>using hook
//  <i>using hook
//#define RT_USING_HOOK
// </c>
// <c1>using idle hook
//  <i>using idle hook
//#define RT_USING_IDLE_HOOK
// </c>
// </h>

// 软件定时器配置,目前关闭,不使用软件定时器。
#define RT_USING_TIMER_SOFT         0
#if RT_USING_TIMER_SOFT == 0
    #undef RT_USING_TIMER_SOFT
#endif
// <o>The priority level of timer thread <0-31>
//  <i>Default: 4
#define RT_TIMER_THREAD_PRIO        4
// <o>The stack size of timer thread <0-8192>
//  <i>Default: 512
#define RT_TIMER_THREAD_STACK_SIZE  512
// </e>


// 内部通信配置,包括信号量、互斥量、事件、邮箱和消息队列,根据需要配置
#define RT_USING_SEMAPHORE
// 互斥量
//#define RT_USING_MUTEX
// 事件
//#define RT_USING_EVENT
// 邮箱
#define RT_USING_MAILBOX
// 消息队列
//#define RT_USING_MESSAGEQUEUE
// </c>
// </h>

//内存管理配置。
// 这个宏用于表示是否使用内存池,目前关闭,不使用内存池。
//#define RT_USING_MEMPOOL

// 于表示是否堆,目前关闭,不使用堆
/*
	通过使能或者失能 RT_USING_HEAP 这个宏来选择
	使用静态或者动态内存。无论是使用静态还是动态内存方案,使用的都是内部的 SRAM,
	区别是使用的内存是在程序编译的时候分配还是在运行的时候分配。
*/
#define RT_USING_HEAP
#define RT_USING_SMALL_MEM
// </c>
// <c1>using tiny size of memory
//  <i>using tiny size of memory
//#define RT_USING_TINY_SIZE
// </c>
// </h>

// 控制台配置。控制台即是 rt_kprintf()函数调试输出的设备,通常使用串口
#define RT_USING_CONSOLE
//控制台缓存大小
#define RT_CONSOLEBUF_SIZE          256
// </h>

//FINSH  shell 配置
#include "finsh_config.h"
// </c>
// </h>

// <h>Device Configuration
// <c1>using device framework
//  <i>using device framework
//#define RT_USING_DEVICE
// </c>
// </h>

// <<< end of configuration section >>>

#endif
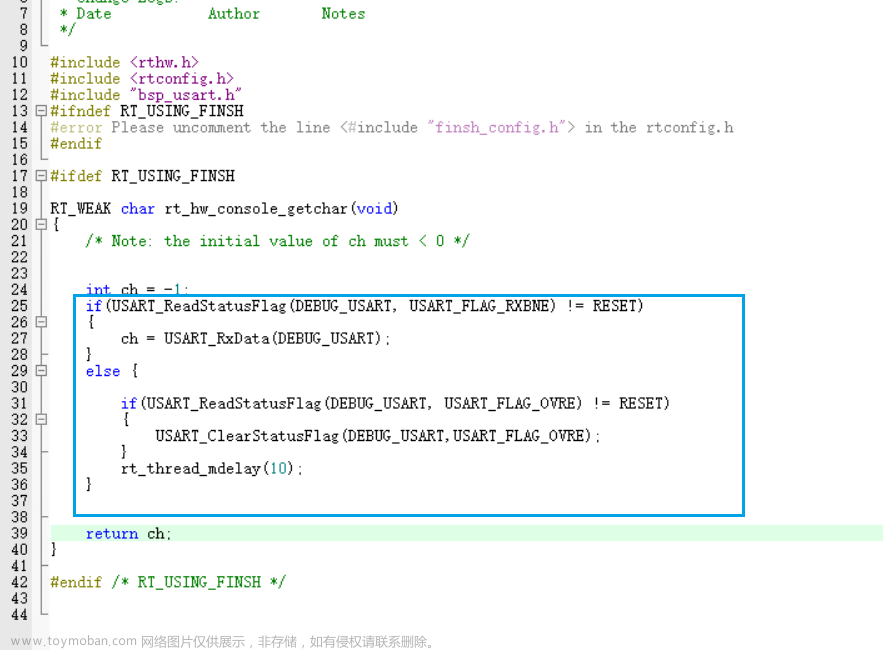
5.修改 finsh_port.c–添加串口数据获取
/*
 * Copyright (c) 2006-2021, RT-Thread Development Team
 *
 * SPDX-License-Identifier: Apache-2.0
 *
 * Change Logs:
 * Date           Author       Notes
 */

#include <rthw.h>
#include <rtconfig.h>
#include "bsp_usart.h"
#ifndef RT_USING_FINSH
#error Please uncomment the line <#include "finsh_config.h"> in the rtconfig.h
#endif

#ifdef RT_USING_FINSH

RT_WEAK char rt_hw_console_getchar(void)
{
    /* Note: the initial value of ch must < 0 */


    int ch = -1;
    if(USART_ReadStatusFlag(DEBUG_USART, USART_FLAG_RXBNE) != RESET)
    {
        ch = USART_RxData(DEBUG_USART);
    }
    else {

        if(USART_ReadStatusFlag(DEBUG_USART, USART_FLAG_OVRE) != RESET)
        {
            USART_ClearStatusFlag(DEBUG_USART,USART_FLAG_OVRE);
        }
        rt_thread_mdelay(10);
    }


    return ch;
}

#endif /* RT_USING_FINSH */
 文章来源地址https://www.toymoban.com/news/detail-482678.html
6.测试函数
static rt_thread_t tid1 = RT_NULL;

/* 线程 1 的入口函数 */
static void thread1_entry(void *parameter)
{
    rt_uint32_t count = 0;

    while (1)
    {
        /* 线程 1 采用低优先级运行,一直打印计数值 */
        //  rt_kprintf("thread1 count: %d\n", count ++);
        led_toggle(LED1);
        rt_thread_delay(1000);
        // led_toggle(LED0);
    }
}

#define THREAD_PRIORITY         25
#define THREAD_STACK_SIZE       512
#define THREAD_TIMESLICE        5

int main(void)
{
    led_init(LED0);
    led_init(LED1);

    /* 创建线程 1,名称是 thread1,入口是 thread1_entry*/
    tid1 = rt_thread_create("thread1",
                            thread1_entry, RT_NULL,
                            THREAD_STACK_SIZE,
                            THREAD_PRIORITY, THREAD_TIMESLICE);

    /* 如果获得线程控制块,启动这个线程 */
    if (tid1 != RT_NULL)
        rt_thread_startup(tid1);

    init_key_btn();
    while (1)
    {
        rt_thread_mdelay(500);
        led_toggle(LED0);
        //  rt_kprintf("hello\n") ;
        key_lib_buttons_process();

    }
}
到了这里,关于【极海APM32F4xx Tiny】学习笔记06-移植 RTT NANO工程,源码放在自己工程下的移植的文章就介绍完了。如果您还想了解更多内容,请在右上角搜索TOY模板网以前的文章或继续浏览下面的相关文章,希望大家以后多多支持TOY模板网!


![[GD32F4]基于GD32固件库移植cherryusb[STM32F4]](https://imgs.yssmx.com/Uploads/2024/02/736610-1.png)

