由于之前在学习油管的视频的时候,发现没有字幕,自己的口语听力又不太好,所以,打算开发一个能够语音或者视频里面,提取出字幕的软件。
在寻找了很多的开源仓库,发现了openai早期发布的whisper
原仓库链接如下
openai/whisper: Robust Speech Recognition via Large-Scale Weak Supervision (github.com)https://github.com/openai/whisper首先下载这个仓库,解压后如下图所示:

另外由于,需要对音频进行处理,所以我们还需要下载一个ffempg
然后解压,将bin的文件路径放到环境变量里面去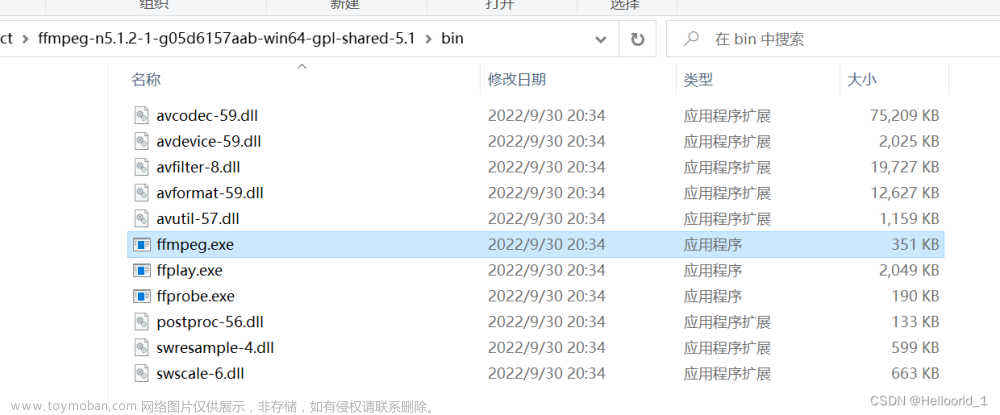
安装环境我用的anconda的方式去安装的,
一键部署环境可以参考我上传的资源(1积分)
用于whisper的python配置,里面包含environment.yaml文件,可以帮助下载者,快速部署环境资源-CSDN文库
使用conda env create -f environment.yaml,就可以快速创建一个conda的虚拟环境了!
也可以使用以下方法配置配置:
首先是
pip install -U openai-whisper然后再安装
pip install git+https://github.com/openai/whisper.git 希望能帮到大家。里面还包含了一个python文件运行,代码如下:
import whisper
import io
import time
import os
import json
import pathlib
import torch

# Choose model to use by uncommenting
#modelName = "tiny.en"
#modelName = "base.en"
#modelName = "small.en"
#modelName = "medium.en"
"""在下面这句修改"""
modelName = "model/large-v2.pt"
# device=torch.device('cuda:0'if torch.cuda.is_available() else "cpu")
torch.cuda.empty_cache()
#todo 设置cpu
device=torch.device("cpu")
# Other Variables
exportTimestampData =False # (bool) Whether to export the segment data to a json file. Will include word level timestamps if word_timestamps is True.
outputFolder = "Output"
exportTimevtt=True

#  ----- Select variables for transcribe method  -----
# audio: path to audio file
verbose = False # (bool): Whether to display the text being decoded to the console. If True, displays all the details, If False, displays minimal details. If None, does not display anything
language="Chinese" # Language of audio file
word_timestamps=False # (bool): Extract word-level timestamps using the cross-attention pattern and dynamic time warping, and include the timestamps for each word in each segment.
#initial_prompt="" # (optional str): Optional text to provide as a prompt for the first window. This can be used to provide, or "prompt-engineer" a context for transcription, e.g. custom vocabularies or proper nouns to make it more likely to predict those word correctly.

#  -------------------------------------------------------------------------
print(f"Using Model: {modelName}")
# filePath = input("Path to File Being Transcribed: ")
# filePath = filePath.strip("\"")

filePath = r"F:\CloudMusic\1.mp3"
if not os.path.exists(filePath):
	print("Problem Getting File...")
	input("Press Enter to Exit...")
	exit()

# If output folder does not exist, create it
if not os.path.exists(outputFolder):
	os.makedirs(outputFolder)
	print("Created Output Folder.\n")

# Get filename stem using pathlib (filename without extension)
fileNameStem = pathlib.Path(filePath).stem

vttFileName=f"{fileNameStem}.vtt"
resultFileName = f"{fileNameStem}.txt"
jsonFileName = f"{fileNameStem}.json"

model = whisper.load_model(modelName,device)
start = time.time()

#  ---------------------------------------------------
result = model.transcribe(audio=filePath, language=language, word_timestamps=word_timestamps, verbose=verbose,fp16=False)#将一段MP3分割成多段30s的间隔的视频
#  ---------------------------------------------------

end = time.time()
elapsed = float(end - start)#总的时间
print(result["segments"]) # 保存为.srt文件
# Save transcription text to file
print("\nWriting transcription to file...")
with open(os.path.join(outputFolder, resultFileName), "w", encoding="utf-8") as file:
	file.write(result["text"])
print("Finished writing transcription file.")

# Save the segments data to json file
#if word_timestamps == True:
if exportTimestampData == True:
	print("\nWriting segment data to file...")
	with open(os.path.join(outputFolder, jsonFileName), "w", encoding="utf-8") as file:
		segmentsData = result["segments"]
		json.dump(segmentsData, file, indent=4)
	print("Finished writing segment data file.")
if exportTimevtt==True:
	print("\nWriting segment data to vtt file...")
	with open(os.path.join(outputFolder, vttFileName), "w", encoding="utf-8") as f:
		# 写入第一行
		# f.write("WEBVTT\n\n")
		# 遍历字典中的每个提示
		for cue in result["segments"]:
			# 获取开始时间和结束时间,并转换成vtt格式
			start = cue["start"]
			end = cue["end"]
			start_h = int(start // 3600)
			start_m = int((start % 3600) // 60)
			start_s = int(start % 60)
			start_ms = int((start % 1) * 1000)
			end_h = int(end // 3600)
			end_m = int((end % 3600) // 60)
			end_s = int(end % 60)
			end_ms = int((end % 1) * 1000)
			start_str = f"{start_h:02}:{start_m:02}:{start_s:02}.{start_ms:03}"
			end_str = f"{end_h:02}:{end_m:02}:{end_s:02}.{end_ms:03}"
			# 获取文本内容,并去掉空格和换行符
			text = cue["text"].strip().replace("\n", " ")
			# 写入时间标记和文本内容,并加上空行
			f.write(f"{start_str} --> {end_str}\n")
			f.write(f"{text}\n\n")
	print("Finished writing segment vtt data file.")

elapsedMinutes = str(round(elapsed/60, 2))
print(f"\nElapsed Time With {modelName} Model: {elapsedMinutes} Minutes")

# input("Press Enter to exit...")
exit()
上述可以根据自己需要修改cpu,gpu来运行。
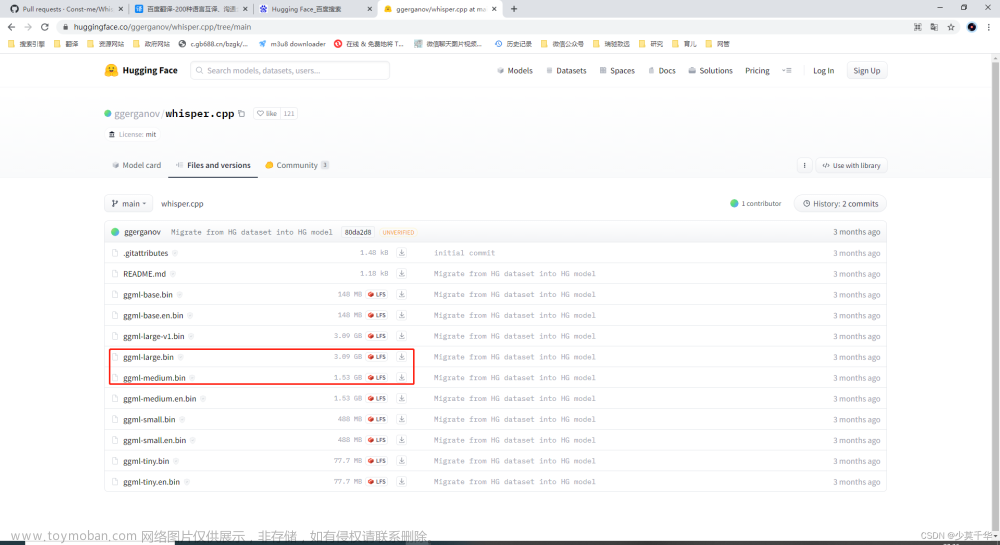
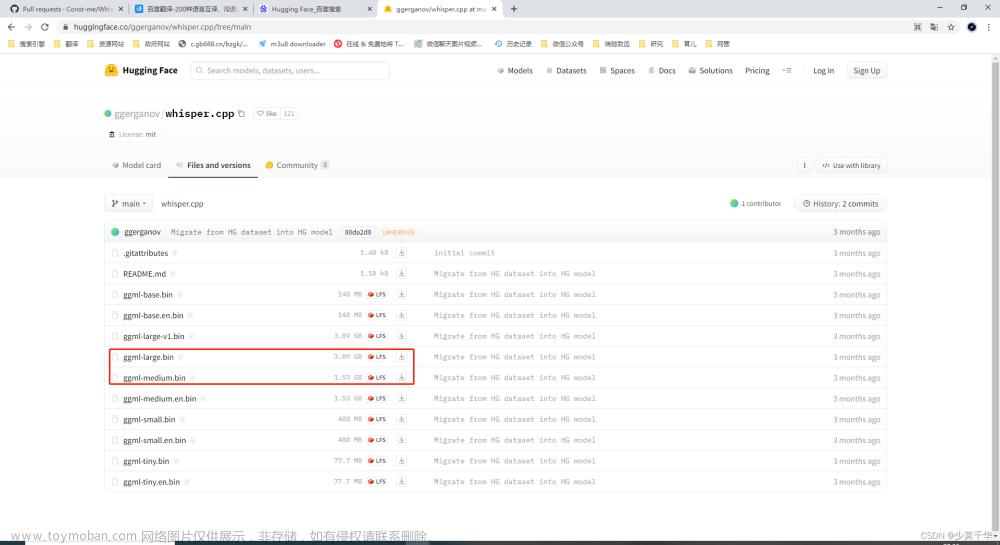
还需要下载模型,是可以在仓库链接里面可以找到的!
方式一、可以修改上面的代码,为large-v2.pt就会开始下载模型,默认是下载到C:\Users\Lenovo\.cache\whisper这个文件夹下面的。
方式二、还可以就是利用cmd命令,(在当前目录下,打开conda的python环境)
然后输入以下指令
whisper audio.mp3 audio.wav --model base --model_dir 指定模型下载路径经过测试进行了测试,可以实现中文,英文的语音识别,另外还测试了mp4和mp3的语音识别。
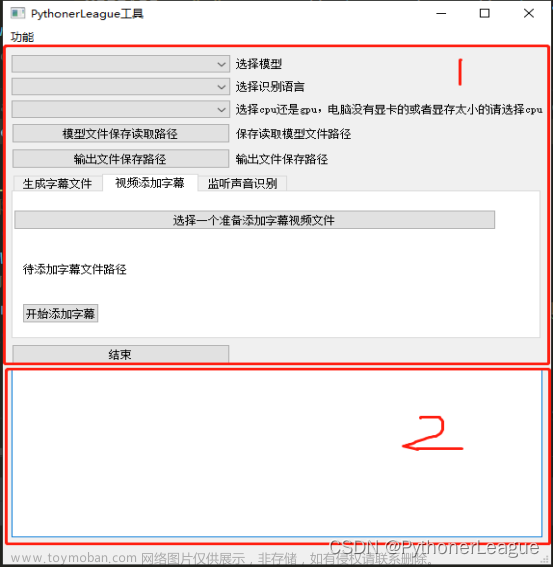
在whisper的基础上进行延伸的exe(非原创),效果如下:
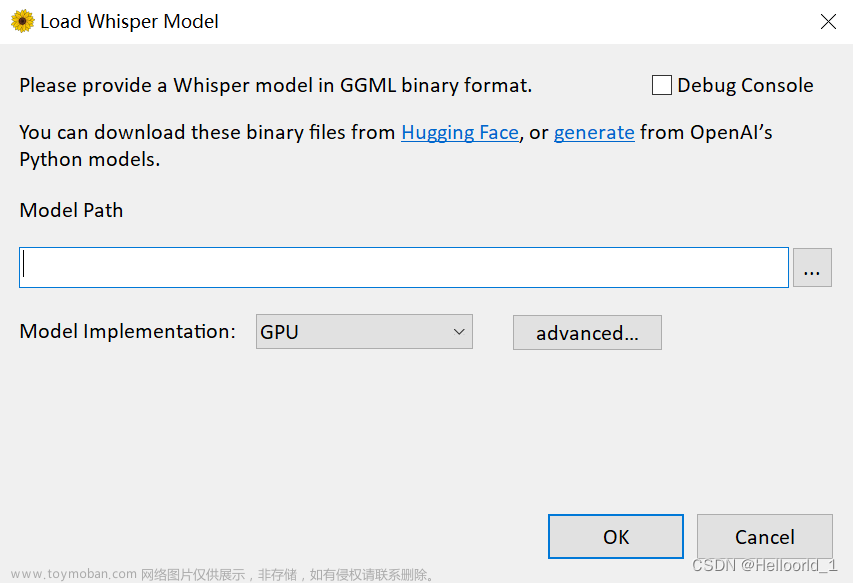
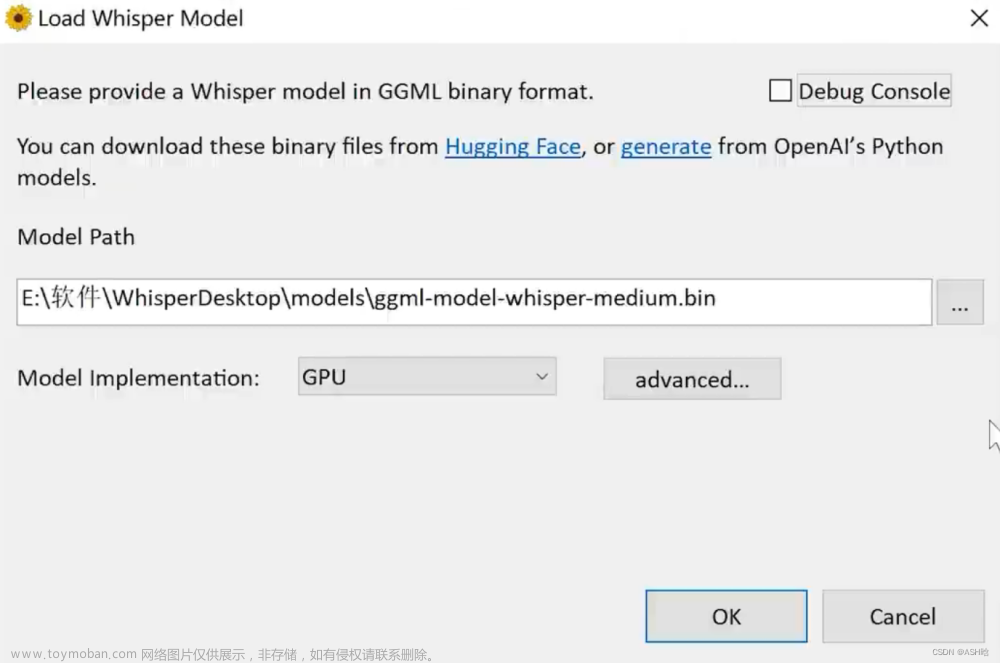
初始化,配置模型位置的界面
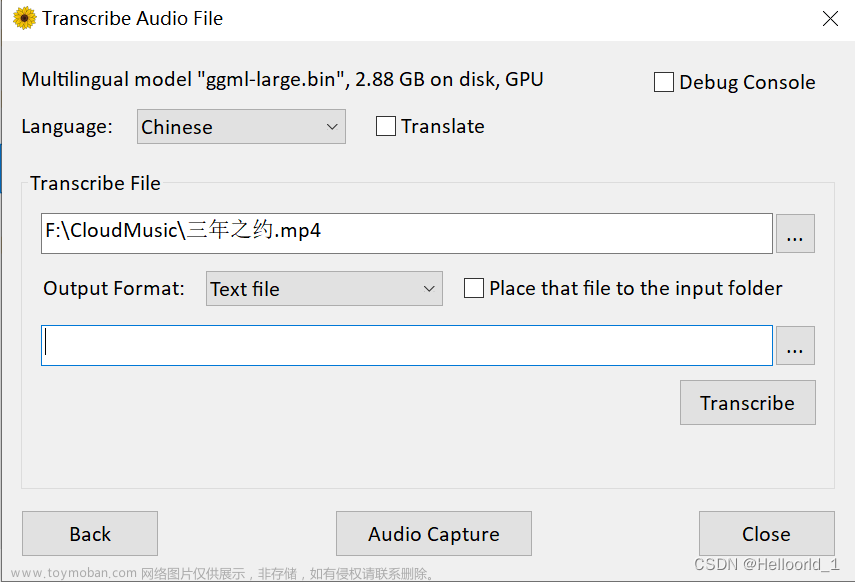
这个是音频转文字的界面
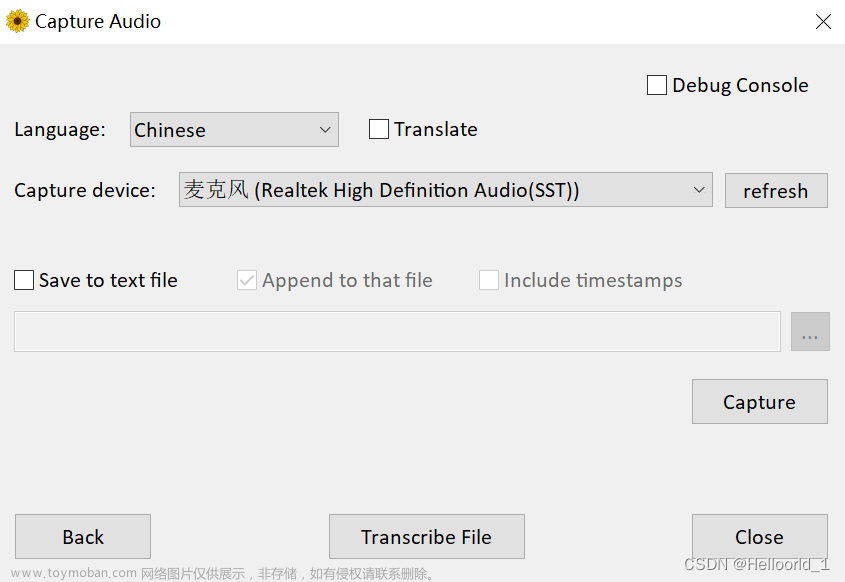
这个是麦克风输入,转文字的界面。
这个exe的文件,我上传到csdn有需要的自取。
whisper的Exe文件资源-CSDN文库
需要加载模型文件(按照下面仓库链接下载模型文件)文章来源:https://www.toymoban.com/news/detail-482745.html
whisper.cpp/models at master · ggerganov/whisper.cpp (github.com)文章来源地址https://www.toymoban.com/news/detail-482745.html
到了这里,关于基于whisper的语音转文字(视频字幕)的文章就介绍完了。如果您还想了解更多内容,请在右上角搜索TOY模板网以前的文章或继续浏览下面的相关文章,希望大家以后多多支持TOY模板网!

