目录
1.简介
1.1定时程序设计
1.2颜色选择程序设计
2.使用Lambda表达式
3.建立含图像的功能按钮
4.简易计算器按钮设计
5.设计鼠标光标在功能按钮上的的形状
1.简介
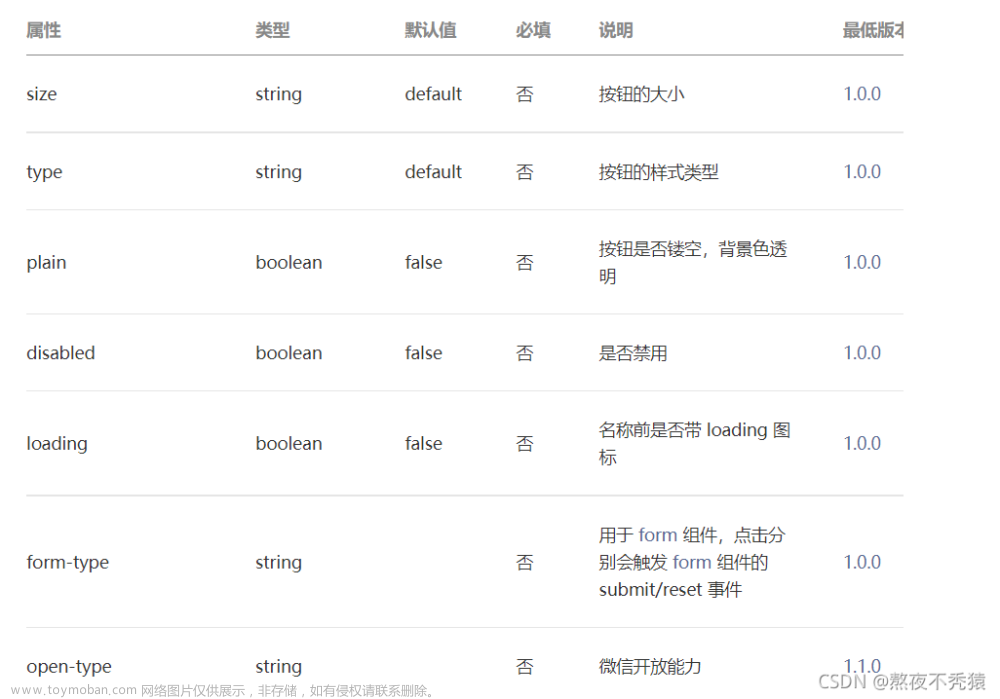
功能按钮也称为按钮,在窗口组件中可以设计在单击功能按钮时,执行某一个特定的动作,这个动作也称为callback方法,也就是说我们可以将功能按钮当作用户与程序沟通的桥梁。功能按钮上面可以有文字,或是和标签一样可以有图像,如果是文字样式的功能按钮,可以设定此文字的字形。它的语法格式如下:
Button(父对象, options, ……)Button()方法的第一个参数是父对象,表示这个功能按钮将建立在哪一个窗口内。下列是Button()方法内其他常用的options参数。
| borderwidth或bd | 边界宽度默认是两个像素 |
| bg或background | 背景颜色 |
| command | 单机功能按钮时,执行此方法 |
| cursor |
当鼠标光标移至按钮上时的形状 |
| fg或foreground |
前景颜色 |
| font |
字形 |
| height |
高,单位是字符 |
| highlightbackground |
当前功能按钮取得焦点时的背景颜色 |
| highlightcolor |
当功能按钮取得焦点时的颜色 |
| image |
功能钮上的图像 |
| justify |
当有多行文字时,最后一行文字的对齐方式 |
| padx |
默认是1,可设置功能按钮与文字的间隔 |
| pady |
默认是1,可设置功能按钮的上下的间距 |
| relief |
默认是relief=FLAT,可由此控制文字外框 |
| state |
默认是state=NORMAL,若设置为DISABLED则以灰阶显示功能按钮,表示暂时无法使用 |
| text |
功能按钮名称 |
| underline |
可以设置第几个文字有下划线,从0开始算起,默认是-1表示无下划线 |
| width |
宽,单位是字符 |
| wraplength |
限制每行的文字数,默认是0,表示只有”\n”才会换行 |
当单机功能按钮时可以显示字符串”Hello world”,底色是浅黄色,字符串颜色是黑色
from tkinter import *

def msgShow():
	label["text"] = "Hello world"
	label["bg"] = "lightyellow"
	label["fg"] = "black"

root = Tk()
label = Label(root)     # 创建label标签
btn = Button(root, text = "打印消息", command = msgShow)

label.pack()
btn.pack()
root.mainloop()

上述程序是先建立一个不含属性的标签对象label,然后建立一个功能按钮。单机按钮时,会启动msgShow函数,然后此函数会执行标签label的内容。也可以用config()方法一次性设置所有的label属性:
label.config(text = "Hello world", bg = "lightyellow", fg = "black")下面新增按钮功能
btn1 = Button(root, text = "结束", width = 20, command = root.destroy)root.destroy可以关闭root窗口对象,同时结束程序。另一个常用方法是quit,可以让Python Shell内执行的程序结束,但是root窗口则继续执行。

1.1定时程序设计
from tkinter import *

counter = 0                                  # 计数的初始值
def run_counter(digit):                      # 数字变量内容的变动
	def counting():                          # 变动数字方法
		global counter                       # 定义这是全局变量
		counter += 1
		digit.config(text = str(counter))    # 显示数字内容
		digit.after(1000, counting)          # 隔一次后调用counting
	counting()                                 # 持续调用

root = Tk()
digit = Label(root, bg = "lightyellow", fg = "black",
	height = 3, width = 10,
	font = "黑体 20 bold")

digit.pack()
run_counter(digit)
btn = Button(root, text ="结束", width = 15, command = root.destroy)

btn.pack()
root.mainloop()


1.2颜色选择程序设计
from tkinter import *

def yellow():                                  # 自定义颜色背景
	root.config(bg = "yellow")
def blue():
	root.config(bg = "blue")
def red():
	root.config(bg = "red")

root = Tk()
root.geometry("500x500")
yellowbtn = Button(root, text = "yellow", command = yellow)
bluebtn = Button(root, text = "blue", command = blue)
redbtn = Button(root, text = "red", command = red)
exitbtn = Button(root, text = "Exit", command = root.destroy)

yellowbtn.pack(anchor = S, side = RIGHT, padx = 10, pady = 10)
bluebtn.pack(anchor = S, side = RIGHT, padx = 10, pady = 10)
redbtn.pack(anchor = S, side = RIGHT, padx = 10, pady = 10)
exitbtn.pack(anchor = S, side = RIGHT, padx = 10, pady = 10)
root.mainloop()


2.使用Lambda表达式
在前文程序中,Yellow按钮和Blue按钮执行相同的工作,但是传递的颜色参数不同,其实这是使用Lambda表达式的好时机。我们可以通过Lambda表达式调用相同的方法,但是传递不同参数的方式简化设计
def bColor(bgColor):
	root.config(bg = bgColor)

exitbtn = Button(root, text = "Exit", command = root.destroy)
bluebtn = Button(root, text = "blue", command = lambda:bColor("blue"))
yellowbtn = Button(root, text = "yellow", command = lambda:bColor("yellow"))
redbtn = Button(root, text = "red", command = lambda:bColor("red"))
(效果和之前是一样的)
3.建立含图像的功能按钮
一般功能按钮是用文字当作按钮名称,也可以用图像当作按钮名称。若是使用图像当作按钮,在Button()内可以省略text参数设置按钮名称,但在Button()内要增加images参数设置图像对象。
from tkinter import *

def msgShow():
	label.config(text = "Hello world", bg = "lightyellow", fg = "blue")

root = Tk()
label = Label(root)
image = PhotoImage(file = "2.png")
btn = Button(root, image = image, command = msgShow)
label.pack()
btn.pack()
root.mainloop()


4.简易计算器按钮设计
from tkinter import *

root = Tk()

lab = Label(root, text ="", bg = "yellow", width = 20)
btn7 = Button(root, text = "7", width = 3)
btn8 = Button(root, text = "8", width = 3)
btn9 = Button(root, text = "9", width = 3)
btnc = Button(root, text = "*", width = 3)
btn4 = Button(root, text = "4", width = 3)
btn5 = Button(root, text = "5", width = 3)
btn6 = Button(root, text = "6", width = 3)
btnj = Button(root, text = "-", width = 3)
btn1 = Button(root, text = "1", width = 3)
btn2 = Button(root, text = "2", width = 3)
btn3 = Button(root, text = "3", width = 3)
btna = Button(root, text = "+", width = 3)
btn0 = Button(root, text = "0", width = 8)
btnd = Button(root, text = ".", width = 3)
btne = Button(root, text = "=", width = 3)

lab.grid(row = 0, column = 0, columnspan = 4)
btn7.grid(row =1, column = 0, padx = 5)
btn8.grid(row =1, column = 1, padx = 5)
btn9.grid(row =1, column = 2, padx = 5)
btnc.grid(row =1, column = 3, padx = 5)
btn4.grid(row =2, column = 0, padx = 5)
btn5.grid(row =2, column = 1, padx = 5)
btn6.grid(row =2, column = 2, padx = 5)
btnj.grid(row =2, column = 3, padx = 5)
btn1.grid(row =3, column = 0, padx = 5)
btn2.grid(row =3, column = 1, padx = 5)
btn3.grid(row =3, column = 2, padx = 5)
btna.grid(row =3, column = 3, padx = 5)
btn0.grid(row =4, column = 0, padx = 5, columnspan = 2)
btnd.grid(row =4, column = 2, padx = 5)
btne.grid(row =4, column = 3, padx = 5)

root.mainloop()

5.设计鼠标光标在功能按钮上的的形状
from tkinter import *

def msgShow():
	label.config(text = "Hello world", bg = "lightyellow", fg = "blue")

root = Tk()
label = Label(root)

image = PhotoImage(file = "2.png")
btn = Button(root, image = image, command = msgShow,
	cursor = "plus")

label.pack()
btn.pack()
root.mainloop()
 文章来源:https://www.toymoban.com/news/detail-484158.html
参考文献:《Python GUI设计tkinter菜鸟编程》洪锦魁著文章来源地址https://www.toymoban.com/news/detail-484158.html
到了这里,关于Python GUI设计——Button功能按钮的文章就介绍完了。如果您还想了解更多内容,请在右上角搜索TOY模板网以前的文章或继续浏览下面的相关文章,希望大家以后多多支持TOY模板网!


