连续折腾了多个晚上,又趁周末又花了一天时间,终于把powerlink协议移植成功到单片机上啦。本想放弃,但想了下不管我能不能用上,结个尾吧,分享给有需要的人。放弃并不难,但坚持一定很酷。为了移植测试这个协议花了不少血本。stm32开发板就买了两套,其中第一套板子在移植过程中发现内存不够用,型号买小啦,最后买了stm32F407ZGT6的开发板。
前言
STM32F407ZGT6芯片资源1M的falsh,192k的内存够用了。买的第一套Alientek的miniSTM32开发板芯片型号stm32F103RCT6,芯片资源256k的flash,48k的ram不够用(主要是ram不够用)。因为移植过程中发现这powerlink协议栈挺占内存的,rom倒是占的不大。
汇总下资源占用情况,分享给有需要的人参考。(资源包含嵌入式系统RTX内核源码和从站demo功能源码在内)
Program Size: Code=94008 RO-data=15352 RW-data=4204 ZI-data=62212
RW-data+ZI-data 内存占用 4204+62212 = 66416,超过60K了,主要是字典文件占用内存大。Rom占用:94k。
项目开源,欢迎测试评测。开源地址:powerlink-stm32: powerlink-stm32
GitHub - yangyongzhen/powerlink-stm32: openPOWERLINK stack on stm32 mcu transplant
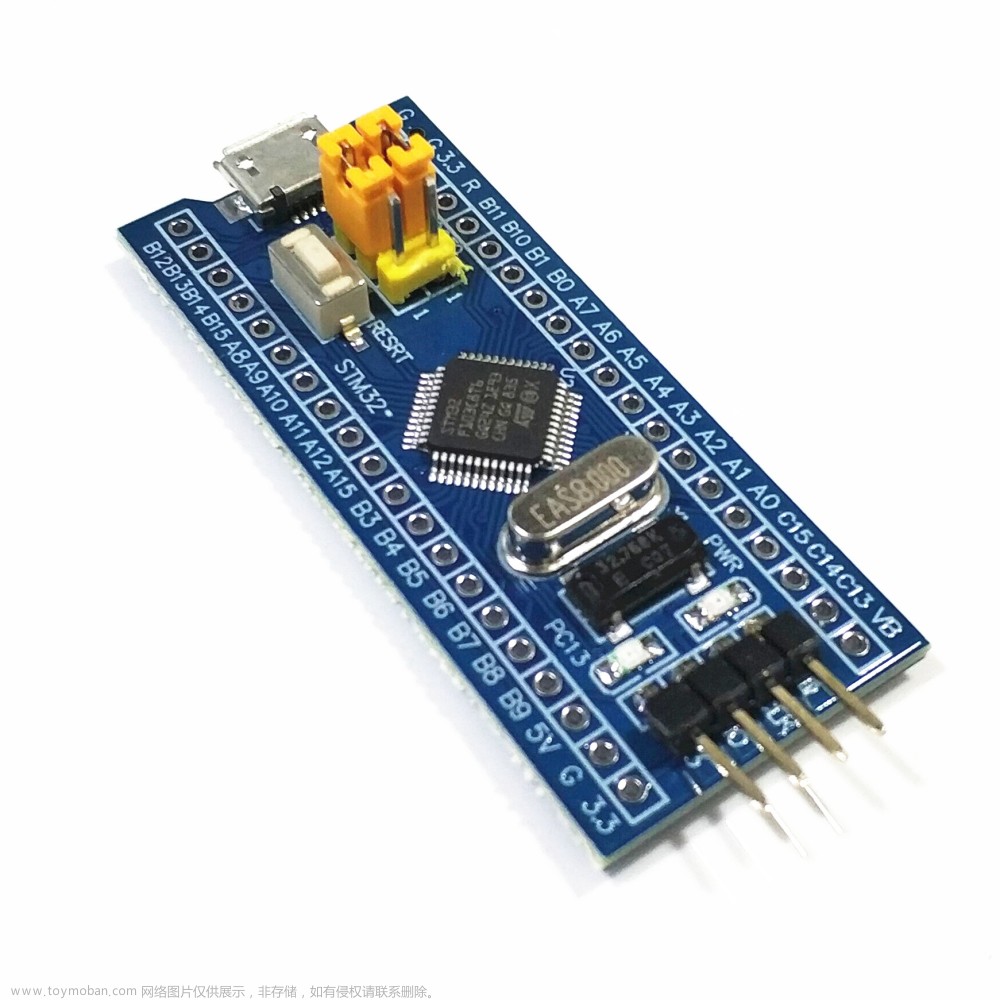
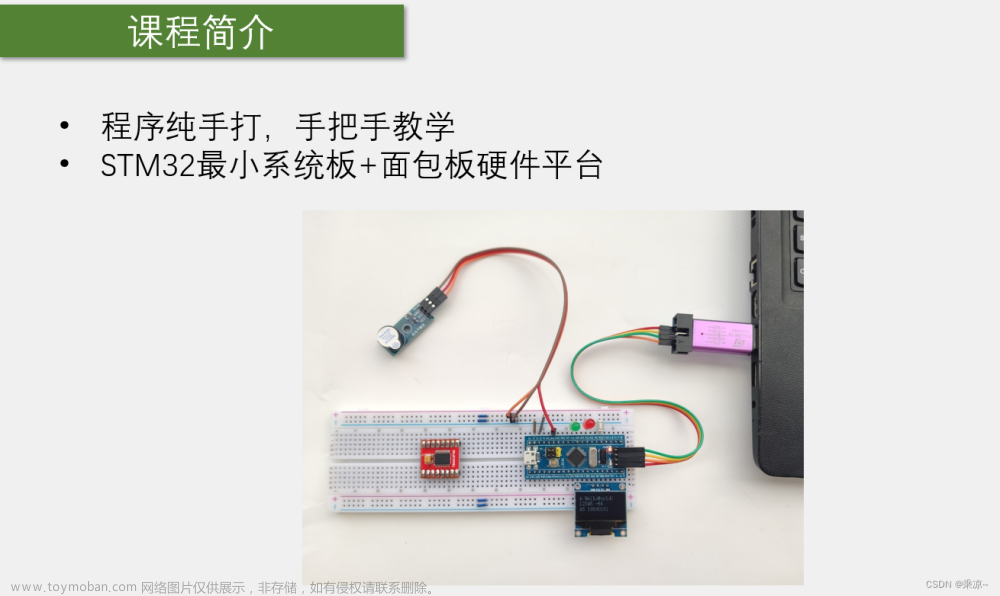
我使用的开发板如下图所示长这样:

移植工程结构:

从工程结构上看,我把涉及改动的文件都单独放到port文件夹了。里面涉及的文件挺多的,不过好在代码量不太大。使用Keil自带的RTX嵌入式内核系统的相关特性,移植不算难。
移植过程
协议栈移植
移植过程参考之前分享的一篇文章《POWERLINK协议源码(最新)在stm32单片机上的移植指南》POWERLINK协议源码(最新)在stm32单片机上的移植指南,把涉及的相关文件摘出来。
屏蔽掉跟系统或驱动相关的接口和编译错误,建立工程目录结构。
netif-stm32.c和target-stm32.c代码量不大,很好移植。
target-stm32.c中主要涉及target_msleep,target_enableGlobalInterrupt,target_getTickCount等的实现。使用RTX系统的相关api实现即可。target_setIpAdrs接口不需要,留空即可。
target-mutex.c文件移植:
/**
\brief  Create Mutex

The function creates a mutex.

\param[in]      mutexName_p         The name of the mutex to create.
\param[out]     pMutex_p            Pointer to store the created mutex.

\return The function returns a tOplkError error code.
\retval kErrorOk                    Mutex was successfully created.
\retval kErrorNoFreeInstance        An error occurred while creating the mutex.

\ingroup module_target
*/
//------------------------------------------------------------------------------
tOplkError target_createMutex(const char* mutexName_p,
                              OPLK_MUTEX_T* pMutex_p)
{

  UNUSED_PARAMETER(mutexName_p);
	pMutex_p =  osMutexNew(NULL);
	return kErrorOk;
}

//------------------------------------------------------------------------------
/**
\brief  Destroy Mutex

The function destroys a mutex.

\param[in]      mutexId_p           The ID of the mutex to destroy.

\ingroup module_target
*/
//------------------------------------------------------------------------------
void target_destroyMutex(OPLK_MUTEX_T mutexId_p)
{
//CloseHandle(mutexId_p);
	if(mutexId_p != NULL){
		osMutexDelete(mutexId_p);
	}
}

//------------------------------------------------------------------------------
/**
\brief  Lock Mutex

The function locks a mutex.

\param[in]      mutexId_p           The ID of the mutex to lock.

\return The function returns a tOplkError error code.
\retval kErrorOk                    Mutex was successfully locked.
\retval kErrorNoFreeInstance        An error occurred while locking the mutex.

\ingroup module_target
*/
//------------------------------------------------------------------------------
tOplkError target_lockMutex(OPLK_MUTEX_T mutexId_p)
{

    tOplkError  ret;
	  osStatus_t status;

    ret = kErrorOk;
		if (mutexId_p != NULL) {
			status = osMutexAcquire(mutexId_p, osWaitForever);
			if (status != osOK)  {
				// handle failure code
			}
		}
    return ret;
}

//------------------------------------------------------------------------------
/**
\brief  Unlock Mutex

The function unlocks a mutex.

\param[in]      mutexId_p           The ID of the mutex to unlock.

\ingroup module_target
*/
//------------------------------------------------------------------------------
void target_unlockMutex(OPLK_MUTEX_T mutexId_p)
{
    //ReleaseMutex(mutexId_p);
	osStatus_t status;

  if (mutexId_p != NULL)  {
    status = osMutexRelease(mutexId_p);
    if (status != osOK)  {
      // handle failure code
    }
  }
}

int target_lock(void)
{
    target_enableGlobalInterrupt(FALSE);

    return 0;
}
int target_unlock(void)
{
    target_enableGlobalInterrupt(TRUE);

    return 0;
}
使用RTX的Mutex互斥量api接口,这部分很容易移植。
circbuf-stm32.c文件中,主要涉及加锁和解锁,也好移植。
//------------------------------------------------------------------------------
/**
\brief  Lock circular buffer

The function enters a locked section of the circular buffer.

\param[in]      pInstance_p         Pointer to circular buffer instance.

\ingroup module_lib_circbuf
*/
//------------------------------------------------------------------------------
void circbuf_lock(tCircBufInstance* pInstance_p)
{
    osStatus_t              waitResult;
    tCircBufArchInstance*   pArchInstance;

    // Check parameter validity
    ASSERT(pInstance_p != NULL);

    pArchInstance = (tCircBufArchInstance*)pInstance_p->pCircBufArchInstance;
	  waitResult = osMutexAcquire(pArchInstance->lockMutex, osWaitForever);
		switch (waitResult) {
				case osOK:
					break;
				default:
					DEBUG_LVL_ERROR_TRACE("%s() Mutex wait unknown error! Error:%ld\n",
                                  __func__);
					break;
			}
}

//------------------------------------------------------------------------------
/**
\brief  Unlock circular buffer

The function leaves a locked section of the circular buffer.

\param[in]      pInstance_p         Pointer to circular buffer instance.

\ingroup module_lib_circbuf
*/
//------------------------------------------------------------------------------
void circbuf_unlock(tCircBufInstance* pInstance_p)
{
    tCircBufArchInstance* pArchInstance;

    // Check parameter validity
    ASSERT(pInstance_p != NULL);

    pArchInstance = (tCircBufArchInstance*)pInstance_p->pCircBufArchInstance;
    osMutexRelease(pArchInstance->lockMutex);
}
eventkcal-stm32.c文件移植:
这个参考了eventkcal-win32.c的实现,比 eventkcal-linux.c的简单些。使用RTX的信号量机制,实现替代也不难。
//------------------------------------------------------------------------------
/**
\brief  Ethernet driver initialization

This function initializes the Ethernet driver.

\param[in]      pEdrvInitParam_p    Edrv initialization parameters

\return The function returns a tOplkError error code.

\ingroup module_edrv
*/
//------------------------------------------------------------------------------
tOplkError edrv_init(const tEdrvInitParam* pEdrvInitParam_p)
{

    // Check parameter validity
    ASSERT(pEdrvInitParam_p != NULL);

    // Clear instance structure
    OPLK_MEMSET(&edrvInstance_l, 0, sizeof(edrvInstance_l));

    if (pEdrvInitParam_p->pDevName == NULL)
        return kErrorEdrvInit;

    // Save the init data
    edrvInstance_l.initParam = *pEdrvInitParam_p;

    edrvInstance_l.fStartCommunication = TRUE;
    edrvInstance_l.fThreadIsExited = FALSE;

    // If no MAC address was specified read MAC address of used
    // Ethernet interface
    if ((edrvInstance_l.initParam.aMacAddr[0] == 0) &&
        (edrvInstance_l.initParam.aMacAddr[1] == 0) &&
        (edrvInstance_l.initParam.aMacAddr[2] == 0) &&
        (edrvInstance_l.initParam.aMacAddr[3] == 0) &&
        (edrvInstance_l.initParam.aMacAddr[4] == 0) &&
        (edrvInstance_l.initParam.aMacAddr[5] == 0))
    {   // read MAC address from controller
        getMacAdrs(edrvInstance_l.initParam.pDevName,
                   edrvInstance_l.initParam.aMacAddr);
    }

	edrvInstance_l.sock = socket(0, Sn_MR_MACRAW, 0,0);
    if (edrvInstance_l.sock < 0)
    {
        DEBUG_LVL_ERROR_TRACE("%s() cannot open socket\n", __func__);
        return kErrorEdrvInit;
    }

    edrvInstance_l.hThread = osThreadNew(workerThread,&edrvInstance_l,NULL);
//    // wait until thread is started
//    sem_wait(&edrvInstance_l.syncSem);

    return kErrorOk;
}
//------------------------------------------------------------------------------
/**
\brief Event handler thread function
This function contains the main function for the event handler thread.
\param[in] arg Thread parameter. Used to get the instance structure.
\return The function returns the thread exit code.
*/
//------------------------------------------------------------------------------
static void eventThread(void* arg)
{
const tEventkCalInstance* pInstance = (const tEventkCalInstance*)arg;
osStatus_t waitResult;
DEBUG_LVL_EVENTK_TRACE("Kernel event thread %d waiting for events...\n", GetCurrentThreadId());
while (!pInstance->fStopThread)
{
waitResult = osSemaphoreAcquire(pInstance->semKernelData, 100UL); // wait for max. 10 ticks for semaphore token to get available
switch (waitResult) {
case osOK:
if (eventkcal_getEventCountCircbuf(kEventQueueKInt) > 0)
{
eventkcal_processEventCircbuf(kEventQueueKInt);
}
else
{
if (eventkcal_getEventCountCircbuf(kEventQueueU2K) > 0)
{
eventkcal_processEventCircbuf(kEventQueueU2K);
}
}
break;
case osErrorResource:
DEBUG_LVL_ERROR_TRACE("kernel event osErrorResource!\n");
break;
case osErrorParameter:
DEBUG_LVL_ERROR_TRACE("kernel event osErrorParameter!\n");
break;
case osErrorTimeout:
DEBUG_LVL_ERROR_TRACE("kernel event timeout!\n");
break;
default:
DEBUG_LVL_ERROR_TRACE("%s() Semaphore wait unknown error! \n",
__func__);
break;
}
}
DEBUG_LVL_EVENTK_TRACE("Kernel event thread is exiting!\n");
}edrv-rawsock_stm32.c文件移植:
这个很重要,网格底层通信相关的都在这个文件里。使用w5500模块提供的api,操作原始MAC报文帧的方式实现。pthread_mutex_lock和sem_post这些linux系统的互斥量和信号量等,都用RTX提供的相关接口替换。
//------------------------------------------------------------------------------
/**
\brief  Send Tx buffer

This function sends the Tx buffer.

\param[in,out]  pBuffer_p           Tx buffer descriptor

\return The function returns a tOplkError error code.

\ingroup module_edrv
*/
//------------------------------------------------------------------------------
tOplkError edrv_sendTxBuffer(tEdrvTxBuffer* pBuffer_p)
{
    int    sockRet;

    // Check parameter validity
    ASSERT(pBuffer_p != NULL);

    FTRACE_MARKER("%s", __func__);

    if (pBuffer_p->txBufferNumber.pArg != NULL)
        return kErrorInvalidOperation;

    if (getLinkStatus(edrvInstance_l.initParam.pDevName) == FALSE)
    {
        /* If there is no link, we pretend that the packet is sent and immediately call
         * tx handler. Otherwise the stack would hang! */
        if (pBuffer_p->pfnTxHandler != NULL)
        {
            pBuffer_p->pfnTxHandler(pBuffer_p);
        }
    }
    else
    {
        //pthread_mutex_lock(&edrvInstance_l.mutex);
			  osMutexAcquire(edrvInstance_l.mutex,osWaitForever);
        if (edrvInstance_l.pTransmittedTxBufferLastEntry == NULL)
        {
            edrvInstance_l.pTransmittedTxBufferLastEntry = pBuffer_p;
            edrvInstance_l.pTransmittedTxBufferFirstEntry = pBuffer_p;
        }
        else
        {
            edrvInstance_l.pTransmittedTxBufferLastEntry->txBufferNumber.pArg = pBuffer_p;
            edrvInstance_l.pTransmittedTxBufferLastEntry = pBuffer_p;
        }
        //pthread_mutex_unlock(&edrvInstance_l.mutex);
				osMutexRelease(edrvInstance_l.mutex);

        sockRet = send(edrvInstance_l.sock, (u_char*)pBuffer_p->pBuffer, (int)pBuffer_p->txFrameSize);
        if (sockRet < 0)
        {
            DEBUG_LVL_EDRV_TRACE("%s() send() returned %d\n", __func__, sockRet);
            return kErrorInvalidOperation;
        }
        else
        {
            packetHandler((u_char*)&edrvInstance_l, sockRet, pBuffer_p->pBuffer);
        }
    }

    return kErrorOk;
}
//------------------------------------------------------------------------------
/**
\brief Edrv worker thread
This function implements the edrv worker thread. It is responsible to receive frames
\param[in,out] pArgument_p User specific pointer pointing to the instance structure
\return The function returns a thread error code.
*/
//------------------------------------------------------------------------------
static void workerThread(void* pArgument_p)
{
tEdrvInstance* pInstance = (tEdrvInstance*)pArgument_p;
int rawSockRet;
u_char aBuffer[EDRV_MAX_FRAME_SIZE];
DEBUG_LVL_EDRV_TRACE("%s(): ThreadId:%ld\n", __func__, syscall(SYS_gettid));
// signal that thread is successfully started
//sem_post(&pInstance->syncSem);
osSemaphoreRelease(pInstance->syncSem);
while (edrvInstance_l.fStartCommunication)
{
rawSockRet = recvfrom(edrvInstance_l.sock, aBuffer, EDRV_MAX_FRAME_SIZE, 0, 0);
if (rawSockRet > 0)
{
packetHandler(pInstance, rawSockRet, aBuffer);
}
}
edrvInstance_l.fThreadIsExited = TRUE;
}从站demo移植
移植从站的demo, demo_cn_console文件夹里的从站demo,在上述协议栈成功移植的基础上,这部分从站demo移植很简单。文章来源:https://www.toymoban.com/news/detail-484283.html
/*
** main function
**
**  Arguments:
**      none
**
*/
int main (int argc, char* argv[])
{
  tOplkError  ret = kErrorOk;
	tOptions    opts;

	// System Initialization
  SystemCoreClockUpdate();

  if (getOptions(argc, argv, &opts) < 0)
     return 0;

  LED_Initialize();
	uart_init();
	//stdout_init();
	printf("hello test\r\n");
	LED_On(2);
	spi_init();

	reset_w5500();
	set_w5500_mac();
	set_w5500_ip();

	eventlog_init(opts.logFormat,
                  opts.logLevel,
                  opts.logCategory,
                  (tEventlogOutputCb)console_printlogadd);

	initEvents(&fGsOff_l);

	printf("----------------------------------------------------\n");
	printf("openPOWERLINK console CN DEMO application\n");
	printf("Using openPOWERLINK stack: %s\n", oplk_getVersionString());
	printf("----------------------------------------------------\n");

	eventlog_printMessage(kEventlogLevelInfo,
												kEventlogCategoryGeneric,
												"demo_cn_console: Stack version:%s Stack configuration:0x%08X",
												oplk_getVersionString(),
												oplk_getStackConfiguration());

	ret = initPowerlink(CYCLE_LEN,
											opts.devName,
											aMacAddr_l,
											opts.nodeId);
	if (ret != kErrorOk)
			goto Exit;

	ret = initApp();
	if (ret != kErrorOk)
			goto Exit;

  osKernelInitialize();                       // Initialize CMSIS-RTOS
  osThreadNew(Main_Loop_Thread, NULL, NULL);   // Create application main thread
  osThreadNew(LED_Blink_PortE, NULL, NULL);   // Create application test thread
  osKernelStart();                            // Start thread execution
  for (;;)
  {
    //Dummy infinite for loop.
  }
Exit:
	 printf("openPOWERLINK console Exit\n");
	 shutdownApp();
   shutdownPowerlink();
	 return 0;
}
如何使用
完成上述移植过程后,需要下载到板子上运行。需要配置好串口管脚,方便串口输出日志调试看。spi的管脚也需要根据板子上的实际资源配置好。然后接上网线,先运行起来主站,然后运行从站,结合串口打印日志调试。文章来源地址https://www.toymoban.com/news/detail-484283.html
到了这里,关于POWERLINK协议在stm32单片机+w5500移植成功经验分享的文章就介绍完了。如果您还想了解更多内容,请在右上角搜索TOY模板网以前的文章或继续浏览下面的相关文章,希望大家以后多多支持TOY模板网!