介绍
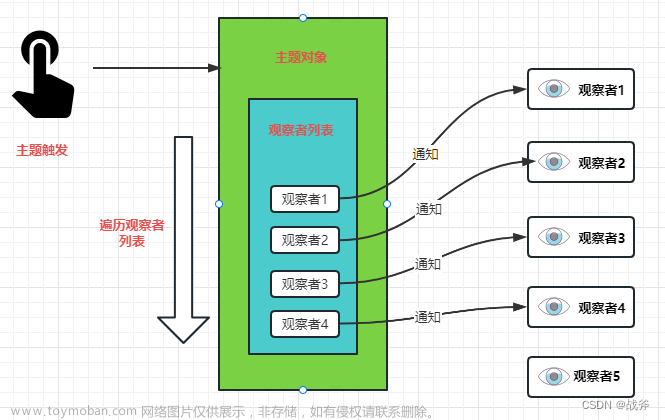
Spring的监听器也可以说是一种观察者模式,它能实现事件与事件监听者直接的解耦,在Spring中监听器的实现主要有一下重要组件:
- ApplicationListener:事件监听者,观察者;
- ApplicationEvent:Spring 事件,记录事件源、事件内容、时间等数据;
- 有些场景事件主体主要是String或基本类型,4.2版本之后,不再强制要求继承ApplicationEvent,非ApplicationEvent子类的对象将被包装成PayloadApplicationEvent
- @EventListener:除了实现ApplicationListener接口注册监听器,也可以使用注解的方式
- ApplicationEventPublisher:发布事件;
事件监听4种方式
springboot进行事件监听有四种方式:
- 手工向ApplicationContext中添加监听器
- 使用注解将监听器装载入spring容器
- 在application.properties中配置监听器
- 通过@EventListener注解实现事件监听
讲到事件监听,这里我们说下自定义事件和自定义监听器类的实现方式:
-
自定义事件:继承自
ApplicationEvent抽象类,然后定义自己的构造器 -
自定义监听:实现
ApplicationListener<T>接口,然后实现onApplicationEvent方法。注意:该接口的实现类必须放到IOC容器中,否者不会起作用。
自定义事件
import org.springframework.context.ApplicationEvent;

/**
 * created at 2023/4/18 10:43
 *
 * @author somnuszpli
 */
public class MyEvent extends ApplicationEvent {

    private Long id;

    private String name;

    public MyEvent(Long id, String name) {
        super(id);
        this.name = name;
    }

    public Long getId() {
        return id;
    }

    public void setId(Long id) {
        this.id = id;
    }

    public String getName() {
        return name;
    }

    public void setName(String name) {
        this.name = name;
    }
}
发布事件
import org.springframework.beans.factory.annotation.Autowired;
import org.springframework.context.ApplicationEventPublisher;
import org.springframework.stereotype.Component;

/**
 * created at 2023/4/18 10:52
 *
 * @author somnuszpli
 */
@Component
public class MyEventPublisher {

    @Autowired
    private ApplicationEventPublisher applicationEventPublisher;

    public void publishEvent(Long id, String name) {
        MyEvent event = new MyEvent(id,name);
        applicationEventPublisher.publishEvent(event);
    }
}
1. 手工向ApplicationContext中添加监听器
首先创建MyListener1类
public class MyListener1 implements ApplicationListener<MyEvent>{
	Logger logger = Logger.getLogger(MyListener1.class);

	public void onApplicationEvent(MyEvent event){
		logger.info(String.format("%s监听到事件源:%s.", MyListener1.class.getName(), event.getSource()));
	}
}
然后在springboot应用启动类中获取ConfigurableApplicationContext上下文,装载监听
@SpringBootApplication
public class LisenterApplication{
	public static void main(String[] args){
		ConfigurableApplicationContext context = SpringApplication.run(LisenterApplication.class, args);
		//装载监听
		context.addApplicationListener(new MyListener1());
	}
}
2. 使用注解将监听器装载入spring容器
创建MyListener2类,并使用@Component注解将该类装载入spring容器中
@Component
public class MyListener2 implements ApplicationListener<MyEvent>{
	Logger logger = Logger.getLogger(MyListener2.class);

	public void onApplicationEvent(MyEvent event){
		logger.info(String.format("%s监听到事件源:%s.", MyListener2.class.getName(), event.getSource()));
	}
}
3. 在application.properties中配置监听器
首先创建MyListener3类
public class MyListener3 implements ApplicationListener<MyEvent>{
	Logger logger = Logger.getLogger(MyListener3.class);

	public void onApplicationEvent(MyEvent event){
		logger.info(String.format("%s监听到事件源:%s.", MyListener3.class.getName(), event.getSource()));
	}
}
然后在application.properties中配置监听
context.listener.classes=com.listener.MyListener3
4. 通过@EventListener注解实现事件监听
创建MyListener4类,该类无需实现ApplicationListener接口,使用@EventListener装饰具体方法
@Component
public class MyListener4{
	Logger logger = Logger.getLogger(MyListener4.class);

  // @EventListener 注解支持根据Event参数类型进行匹配
	@EventListener
	public void listener(MyEvent event){
		logger.info(String.format("%s监听到事件源:%s.", MyListener4.class.getName(), event.getSource()));
	}
}
PayloadApplicationEvent
有些时候我们事件传递的对象是一些简单的对象,比如一个字符串,不想继承ApplicationEvent对象,可以使用PayloadApplicationEvent文章来源:https://www.toymoban.com/news/detail-485096.html
@Component
public class PayloadApplicationListener implements ApplicationListener<PayloadApplicationEvent<String>> {

    @Override
    public void onApplicationEvent(PayloadApplicationEvent<String> event) {
        System.out.println(event.getPayload());
    }
}
    public static void main(String[] args) {
        ApplicationContext applicationContext = new AnnotationConfigApplicationContext(AppConfig.class);

        //applicationContext.publishEvent(new InitializePost(applicationContext, "Y"));
        applicationContext.publishEvent("hello world");
        //applicationContext.publishEvent(new C());
    }
运行结果文章来源地址https://www.toymoban.com/news/detail-485096.html
hello world
到了这里,关于SpringBoot 监听器的文章就介绍完了。如果您还想了解更多内容,请在右上角搜索TOY模板网以前的文章或继续浏览下面的相关文章,希望大家以后多多支持TOY模板网!