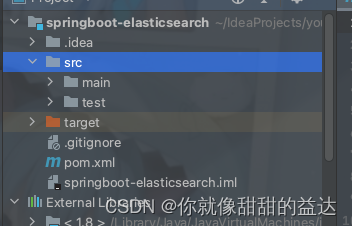
创建springboot整合es项目


一定要修改对应es版本
修改es版本,我的pom文件:
<?xml version="1.0" encoding="UTF-8"?>
<project xmlns="http://maven.apache.org/POM/4.0.0" xmlns:xsi="http://www.w3.org/2001/XMLSchema-instance"
xsi:schemaLocation="http://maven.apache.org/POM/4.0.0 https://maven.apache.org/xsd/maven-4.0.0.xsd">
<modelVersion>4.0.0</modelVersion>
<parent>
<groupId>org.springframework.boot</groupId>
<artifactId>spring-boot-starter-parent</artifactId>
<version>2.2.5.RELEASE</version>
<relativePath/> <!-- lookup parent from repository -->
</parent>
<groupId>com.example</groupId>
<artifactId>springboot-es</artifactId>
<version>0.0.1-SNAPSHOT</version>
<name>springboot-es</name>
<description>Demo project for Spring Boot</description>
<properties>
<java.version>1.8</java.version>
<elasticsearch.version>7.6.1</elasticsearch.version>
</properties>
<dependencies>
<dependency>
<groupId>org.springframework.boot</groupId>
<artifactId>spring-boot-starter-data-elasticsearch</artifactId>
</dependency>
<dependency>
<groupId>org.springframework.boot</groupId>
<artifactId>spring-boot-starter-web</artifactId>
</dependency>
<dependency>
<groupId>org.springframework.boot</groupId>
<artifactId>spring-boot-configuration-processor</artifactId>
<optional>true</optional>
</dependency>
<dependency>
<groupId>org.projectlombok</groupId>
<artifactId>lombok</artifactId>
<optional>true</optional>
</dependency>
<dependency>
<groupId>org.springframework.boot</groupId>
<artifactId>spring-boot-starter-test</artifactId>
<scope>test</scope>
</dependency>
<dependency>
<groupId>com.alibaba</groupId>
<artifactId>fastjson</artifactId>
<version>1.2.70</version>
</dependency>
</dependencies>
<build>
<plugins>
<plugin>
<groupId>org.springframework.boot</groupId>
<artifactId>spring-boot-maven-plugin</artifactId>
<configuration>
<excludes>
<exclude>
<groupId>org.projectlombok</groupId>
<artifactId>lombok</artifactId>
</exclude>
</excludes>
</configuration>
</plugin>
</plugins>
</build>
</project>

记得把没用文件删掉.mvn,和一些mvn的配置文件,要不然可能会导致项目编译不通过
配置HighLevelClient
注: 在ElasticSearch 7以后,Spring data建议采用High-level REST client。
import org.apache.http.HttpHost;
import org.elasticsearch.client.RestClient;
import org.elasticsearch.client.RestHighLevelClient;
import org.springframework.context.annotation.Bean;
import org.springframework.context.annotation.Configuration;

@Configuration
public class ElasticSearchConfig {
    // 注册 rest高级客户端
    @Bean
    public RestHighLevelClient restHighLevelClient(){
        RestHighLevelClient client = new RestHighLevelClient(
                RestClient.builder(
                        new HttpHost("127.0.0.1",9200,"http")
                )
        );
        return client;
    }
}
索引增删改查操作
在测试类进行测试,测试类中直接注入restHighLevelClient即可使用;
@SpringBootTest
@RunWith(SpringJUnit4ClassRunner.class)  //使用junit4进行测试
public class SpringbootEsApplicationTests {

    @Autowired
    public RestHighLevelClient restHighLevelClient;

    // 创建索引
    @Test
    public void createIndex() throws IOException {
        org.elasticsearch.client.indices.CreateIndexRequest yida = new org.elasticsearch.client.indices.CreateIndexRequest("yida");
        org.elasticsearch.client.indices.CreateIndexResponse createIndexResponse = restHighLevelClient.indices().create(yida, RequestOptions.DEFAULT);
        System.out.println(JSONObject.toJSONString(createIndexResponse));
        restHighLevelClient.close();
    }

    // 测试获取索引,并判断其是否存在
    @Test
    public void testIndexIsExists() throws IOException {
        GetIndexRequest request = new GetIndexRequest("yida");
        boolean exists = restHighLevelClient.indices().exists(request, RequestOptions.DEFAULT);
        System.out.println(exists);// 索引是否存在
        restHighLevelClient.close();
    }

    // 删除索引
    @Test
    public void testDeleteIndex() throws IOException {
        DeleteIndexRequest request = new DeleteIndexRequest("yida");
        AcknowledgedResponse response = restHighLevelClient.indices().delete(request, RequestOptions.DEFAULT);
        System.out.println(response.isAcknowledged());// 是否删除成功
        restHighLevelClient.close();
    }

}
文档的基本操作
文档的增删改查;
  // 测试添加文档(先创建一个User实体类,添加fastjson依赖)
    @Test
    public void testAddDocument() throws IOException {
        // 创建一个User对象
        User yida = new User("yida", 18);
        // 创建请求
        IndexRequest request = new IndexRequest("yida");
        // 制定规则 PUT /yida_index/_doc/1
        request.id("1");// 设置文档ID
        request.timeout(TimeValue.timeValueMillis(1000));// request.timeout("1s")
        // 将我们的数据放入请求中
        request.source(JSON.toJSONString(yida), XContentType.JSON);
        // 客户端发送请求,获取响应的结果
        IndexResponse response = restHighLevelClient.index(request, RequestOptions.DEFAULT);
        System.out.println(response.status());// 获取建立索引的状态信息 CREATED
        System.out.println(response);// 查看返回内容 IndexResponse[index=yida_index,type=_doc,id=1,version=1,result=created,seqNo=0,primaryTerm=1,shards={"total":2,"successful":1,"failed":0}]
    }

    // 获取文档,判断是否存在 get /yida/_doc/1
    @Test
    public void testDocumentIsExists() throws IOException {
        GetRequest request = new GetRequest("yida", "1");
        // 不获取返回的 _source的上下文了
        request.fetchSourceContext(new FetchSourceContext(false));
        request.storedFields("_none_");
        boolean exists = restHighLevelClient.exists(request, RequestOptions.DEFAULT);
        System.out.println(exists);
        restHighLevelClient.close();
    }


    // 测试更新文档内容
    @Test
    public void testUpdateDocument() throws IOException {
        UpdateRequest request = new UpdateRequest("yida", "1");
        User user = new User("doudou",11);
        request.doc(JSON.toJSONString(user),XContentType.JSON);
        UpdateResponse response = restHighLevelClient.update(request, RequestOptions.DEFAULT);
        System.out.println(response.status()); // OK
        restHighLevelClient.close();
    }

    // 测试删除文档
    @Test
    public void testDeleteDocument() throws IOException {
        DeleteRequest request = new DeleteRequest("yida", "1");
        request.timeout("1s");
        DeleteResponse response = restHighLevelClient.delete(request, RequestOptions.DEFAULT);
        System.out.println(response.status());// OK
    }

    // 测试获得文档信息
    @Test
    public void testGetDocument() throws IOException {
        GetRequest request = new GetRequest("yida","1");
        GetResponse response = restHighLevelClient.get(request, RequestOptions.DEFAULT);
        System.out.println(response.getSourceAsString());// 打印文档内容
        System.out.println(request);// 返回的全部内容和命令是一样的
        restHighLevelClient.close();
    }
文档的复杂查询
  // 查询
// SearchRequest 搜索请求
// SearchSourceBuilder 条件构造
// HighlightBuilder 高亮
// TermQueryBuilder 精确查询
// MatchAllQueryBuilder
// xxxQueryBuilder ...
    @Test
    public void testSearch() throws IOException {
        // 1.创建查询请求对象
        SearchRequest searchRequest = new SearchRequest("yida");
        // 2.构建搜索条件
        SearchSourceBuilder searchSourceBuilder = new SearchSourceBuilder();
        // (1)查询条件 使用QueryBuilders工具类创建
        // 精确查询
        TermQueryBuilder termQueryBuilder = QueryBuilders.termQuery("name", "张");
        //        // 匹配查询
        //        MatchAllQueryBuilder matchAllQueryBuilder = QueryBuilders.matchAllQuery();
        // (2)其他<可有可无>:(可以参考 SearchSourceBuilder 的字段部分)
        // 设置高亮
        HighlightBuilder highlightBuilder = new HighlightBuilder();
        highlightBuilder = highlightBuilder.requireFieldMatch(false).field("*").preTags("<font color='red'>").postTags("</font>");
        searchSourceBuilder.highlighter(highlightBuilder);
        //        // 分页
        //        searchSourceBuilder.from();
        //        searchSourceBuilder.size();
        searchSourceBuilder.timeout(new TimeValue(60, TimeUnit.SECONDS));
        // (3)条件投入
        searchSourceBuilder.query(termQueryBuilder);
        // 3.添加条件到请求
        searchRequest.source(searchSourceBuilder);
        // 4.客户端查询请求
        SearchResponse search = restHighLevelClient.search(searchRequest, RequestOptions.DEFAULT);
        // 5.查看返回结果
        SearchHits hits = search.getHits();
        System.out.println(JSON.toJSONString(hits));
        System.out.println("=======================");

        for (SearchHit documentFields : hits.getHits()) {
            System.out.println(documentFields.getSourceAsMap());
            // 使用新的字段值(高亮),覆盖旧的字段值
            Map<String, Object> sourceAsMap = documentFields.getSourceAsMap();
            // 高亮字段
            Map<String, HighlightField> highlightFields = documentFields.getHighlightFields();
            HighlightField name = highlightFields.get("name");
            // 替换
            if (name != null){
                Text[] fragments = name.fragments();
                StringBuilder new_name = new StringBuilder();
                for (Text text : fragments) {
                    new_name.append(text);
                }
                sourceAsMap.put("name",new_name.toString());
            }
            System.out.println("替换高亮的字段"+JSONObject.toJSON(sourceAsMap));
        }

    }
文档的批量操作
bulk语法
bulk对JSON串的有着严格的要求。每个JSON串不能换行,只能放在同一行,同时,相邻的JSON串之间必须要有换行。bulk的每个操作必须要一对JSON串(delete语法除外)
例如若增加一个文档如下所示:
## 批量操作

POST _bulk
{"create": {"_index": "yida", "_id": 11}}
{"name": "test_bulk", "age":"100"}

## 批量删除
POST _bulk
{"delete": {"_index": "yida","_id": "1"}}
{"delete": {"_index": "yida","_id": "2"}}
{"delete": {"_index": "yida","_id": "3"}}
{"delete": {"_index": "yida","_id": "4"}}

## 可以又新增又删除
POST _bulk
{"index": {"_index": "yida","_id": 11}}
{"name": "test_bulk", "age":"101"}
{"index": {"_index": "yida","_id": 12}}
{"name": "test_bulk", "age":"101"}
{"delete": {"_index": "yida","_id": "11"}}
{"delete": {"_index": "yida","_id": "12"}}
操作类型文章来源:https://www.toymoban.com/news/detail-485368.html
- create 如果文档不存在就创建,但如果文档存在就返回错误
- index 如果文档不存在就创建,如果文档存在就更新
- update 更新一个文档,如果文档不存在就返回错误
- delete 删除一个文档,如果要删除的文档id不存在,就返回错误
从以上可以看出index是比较常用的,因为bulk操作失败不会影响其他文档操作,我们可以从他的返回结果中查看失败的详细原因。
对应的代码操作也是跟命令一样:文章来源地址https://www.toymoban.com/news/detail-485368.html
  // 批量插入数据
    @Test
    public void testBulkAdd() throws IOException {
        BulkRequest bulkRequest = new BulkRequest();
        bulkRequest.timeout("10s");
        ArrayList<User> users = new ArrayList<>();
        users.add(new User("张益达-1",1));
        users.add(new User("张益达-2",2));
        users.add(new User("张益达-3",3));
        users.add(new User("张益达-4",4));
        users.add(new User("张益达-5",5));
        users.add(new User("张益达-6",6));
        // 批量请求处理
        for (int i = 0; i < users.size(); i++) {
            bulkRequest.add(
                    // 这里是数据信息
                    new IndexRequest("yida")
                            .id(""+(i + 1)) // 没有设置id 会自定生成一个随机id
                            .source(JSON.toJSONString(users.get(i)),XContentType.JSON)
            );
        }
        BulkResponse bulk = restHighLevelClient.bulk(bulkRequest, RequestOptions.DEFAULT);
        System.out.println(bulk.status());// ok
    }

    @Test
    public void testBulkUpdate() throws IOException {
        BulkRequest bulkRequest = new BulkRequest();
        bulkRequest.timeout("10s");
        ArrayList<User> users = new ArrayList<>();
        users.add(new User("张益达-1-update1",1));
        users.add(new User("张益达-2-update1",2));
        users.add(new User("张益达-3-update",3));
        users.add(new User("张益达-4-update",4));
        users.add(new User("张益达-5-update",5));
        users.add(new User("张益达-6-update",6));
        // 批量请求处理
        for (int i = 0; i < users.size(); i++) {

            Map map = JSON.parseObject(JSONObject.toJSONString(users.get(i)), Map.class);
            bulkRequest.add(
                    new UpdateRequest("yida", "" + (i + 1))
                            .doc(map)
                            // 不存在就插入
                            .upsert(JSON.toJSONString(users.get(i)),XContentType.JSON)
            );
        }
        BulkResponse bulk = restHighLevelClient.bulk(bulkRequest, RequestOptions.DEFAULT);
        System.out.println(bulk.status());// ok
    }

    @Test
    public void testBulkDelete() throws IOException {
        BulkRequest bulkRequest = new BulkRequest();
        bulkRequest.timeout("10s");
        ArrayList<User> users = new ArrayList<>();
        users.add(new User("张益达-1",1));
        users.add(new User("张益达-2",2));
        users.add(new User("张益达-3",3));
        users.add(new User("张益达-4",4));
        users.add(new User("张益达-5",5));
        users.add(new User("张益达-6",6));
        // 批量请求处理
        for (int i = 0; i < users.size(); i++) {
            bulkRequest.add(
                    // 这里是数据信息
                    new DeleteRequest("yida")
                            .id("" + (i + 1))

            );
        }
        BulkResponse bulk = restHighLevelClient.bulk(bulkRequest, RequestOptions.DEFAULT);
        System.out.println(bulk.status());// ok
    }
到了这里,关于springboot操作es的文章就介绍完了。如果您还想了解更多内容,请在右上角搜索TOY模板网以前的文章或继续浏览下面的相关文章,希望大家以后多多支持TOY模板网!


