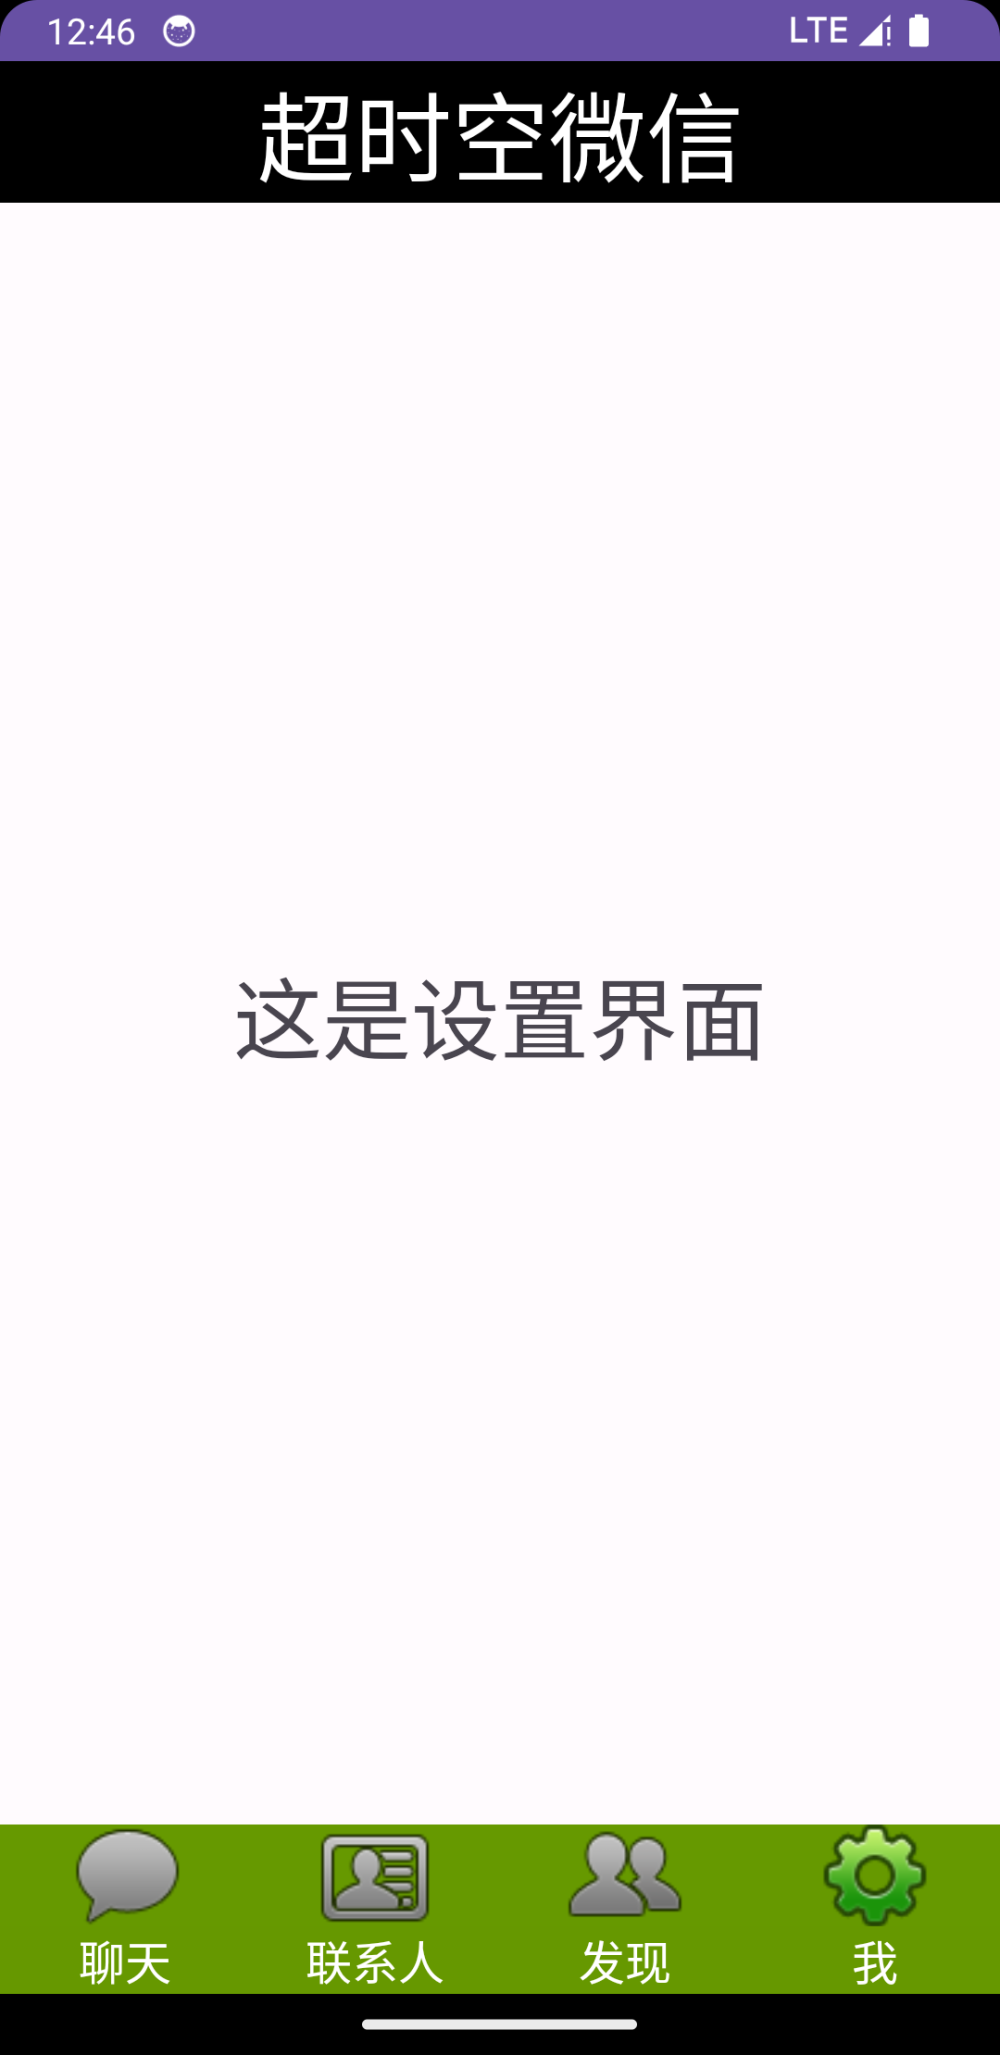
主界面
上一篇文章的链接:
Android Studio 制作微信界面 上_nazonomaster的博客-CSDN博客https://blog.csdn.net/nazonomaster/article/details/124456716
接下来创建fragment的Java文件
首先是WeixinFragment.java
在包内创建一个名为fragment的文件夹,在该文件夹中创建新的Java类并命名为WeixinFragment
public class WeixinFragment extends Fragment {
    private List<Weixin> weiList = new ArrayList<>();
    @Nullable
    @Override
    public View onCreateView(@NonNull LayoutInflater inflater, @Nullable ViewGroup container,
                             @Nullable Bundle savedInstanceState) {
        return inflater.inflate(R.layout.weixin_fragment,container,false);
    }
        @Override
        public void onActivityCreated(@Nullable Bundle savedInstanceState) {
            super.onActivityCreated(savedInstanceState);
            inints();

            WeixinAdapter adapter = new WeixinAdapter(this.getContext(),R.layout.weixin_content_item,
                    weiList);
            ListView listView = getView().findViewById(R.id.weixin_listview);
            listView.setAdapter(adapter);

            listView.setOnItemClickListener(new AdapterView.OnItemClickListener() {
                @Override
                public void onItemClick(AdapterView<?> parent, View view, int position, long id) {
                    Weixin weixin = weiList.get(position);
                    if (weixin.getName()=="笨笨"){
                        Intent intent = new Intent(getActivity(), ChatActivity.class);
                        startActivity(intent);
                    }else {
                        Toast.makeText(getActivity(),"不是通讯录里的联系人( ´_ゝ`)", Toast.LENGTH_SHORT).show();
                    }
                }
            });


        }

    private void inints() {
        for (int i=0; i<2;i++){
            Weixin w1 = new Weixin();
            w1.setImageId(R.mipmap.dingyuehao);
            w1.setName("订阅号服务");
            w1.setNeirong("重庆科技学院:今晚,重科人用歌声献礼建党100周年!");
            weiList.add(w1);

            Weixin w2 = new Weixin();
            w2.setImageId(R.mipmap.yundong);
            w2.setName("运动健康");
            w2.setNeirong("[应用消息]");
            weiList.add(w2);

            Weixin w3 = new Weixin();
            w3.setImageId(R.mipmap.weixinzhifu);
            w3.setName("微信支付");
            w3.setNeirong("微信支付凭证");
            weiList.add(w3);

            Weixin w4 = new Weixin();
            w4.setImageId(R.mipmap.jizhangben);
            w4.setName("微信记账本");
            w4.setNeirong("昨日记账日报,点击查看详情");
            weiList.add(w4);

            Weixin w5 = new Weixin();
            w5.setImageId(R.mipmap.youxiang);
            w5.setName("QQ邮箱提醒");
            w5.setNeirong("Nintendo (Hongkong) Limited:最后召集! ...");
            weiList.add(w5);

            Weixin w6 = new Weixin();
            w6.setImageId(R.mipmap.haer);
            w6.setName("笨笨");
            w6.setNeirong("long may the sunshine!");
            weiList.add(w6);
        }

    }
}
第二个是TongxunluFragment.java
在fragment文件夹中创建新的Java类并命名为TongxunluFragment
public class TongxunluFragment extends Fragment {
    private List<Tongxunlu> tongxunluList = new ArrayList<>();

    @Nullable
    @Override
    public View onCreateView(@NonNull LayoutInflater inflater, @Nullable ViewGroup container,
                             @Nullable Bundle savedInstanceState) {
        return inflater.inflate(R.layout.tongxunlu_fragment,container,false);
    }

    @Override

        public void onActivityCreated(@Nullable Bundle savedInstanceState) {
            super.onActivityCreated(savedInstanceState);
            inints();

            TongxunluAdapter adapter = new TongxunluAdapter(this.getContext(),R.layout.txl_content_item,
                    tongxunluList);
            ListView listView = getView().findViewById(R.id.txl_listview);
            listView.setAdapter(adapter);
        }

    private void inints() {
        Tongxunlu t1 = new Tongxunlu();
        t1.setImageId(R.mipmap.newf);
        t1.setName("新的朋友");
        tongxunluList.add(t1);

        Tongxunlu t2 = new Tongxunlu();
        t2.setImageId(R.mipmap.qunchat);
        t2.setName("群聊");
        tongxunluList.add(t2);

        Tongxunlu t3 = new Tongxunlu();
        t3.setImageId(R.mipmap.biaoqian);
        t3.setName("标签");
        tongxunluList.add(t3);

        Tongxunlu t4 = new Tongxunlu();
        t4.setImageId(R.mipmap.gongzhonghao);
        t4.setName("公众号");
        tongxunluList.add(t4);

        for (int i=0;i<2;i++){
            Tongxunlu t5 = new Tongxunlu();
            t5.setImageId(R.mipmap.t_tx01);
            t5.setName("笨笨");
            tongxunluList.add(t5);

            Tongxunlu t6 = new Tongxunlu();
            t6.setImageId(R.mipmap.t_tx02);
            t6.setName(" d=( ゚∀。)-好耶");
            tongxunluList.add(t6);

            Tongxunlu t7 = new Tongxunlu();
            t7.setImageId(R.mipmap.t_tx03);
            t7.setName("Hollow Knight");
            tongxunluList.add(t7);

            Tongxunlu t8 = new Tongxunlu();
            t8.setImageId(R.mipmap.t_tx05);
            t8.setName("Mr_Quin");
            tongxunluList.add(t8);

            Tongxunlu t9 = new Tongxunlu();
            t9.setImageId(R.mipmap.t_tx04);
            t9.setName("是acc啦");
            tongxunluList.add(t9);

            Tongxunlu t10 = new Tongxunlu();
            t10.setImageId(R.mipmap.tx_kenny);
            t10.setName("机智的肯尼");
            tongxunluList.add(t10);
        }


    }

}
第三个是FaxianFragment.java
在fragment文件夹中创建新的Java类并命名为FaxianFragment
public class FaxianFragment extends Fragment  {
    private LinearLayout linearLayout;
    @Nullable
    @Override
    public View onCreateView(@NonNull LayoutInflater inflater, @Nullable ViewGroup container,
                             @Nullable Bundle savedInstanceState) {
        View view = inflater.inflate(R.layout.faxian_fragment, container, false);

        RelativeLayout relativeLayout = view.findViewById(R.id.pyquan_click);
        relativeLayout.setOnClickListener(new View.OnClickListener() {
            @Override
            public void onClick(View v) {
                Intent intent = new Intent(getActivity(),PyquanActivity.class);
                startActivity(intent);
            }
        });;
        return view;

    }

}
最后是WodeFragemnt.java
在fragment文件夹中创建新的Java类并命名为WodeFragemnt
public class WodeFragemnt extends Fragment {
    @Nullable
    @Override
    public View onCreateView(@NonNull LayoutInflater inflater, @Nullable ViewGroup container,
                             @Nullable Bundle savedInstanceState) {
        return inflater.inflate(R.layout.wode_fragment,container,false);
    }
}
菜单按钮布局
menu_weixin_icon_selector.xml
首先是第一个按钮的布局文件,在main\res\drawable中创建一个新的布局文件并命名为menu_weixin_icon_selector.xml
<?xml version="1.0" encoding="utf-8"?>
<selector xmlns:android="http://schemas.android.com/apk/res/android">
    <item android:drawable="@mipmap/faxian02" android:state_pressed="true"/>
    <item android:drawable="@mipmap/faxian02" android:state_selected="true"/>
    <item android:drawable="@mipmap/faxian01"/>
</selector>
menu_tongxunlu_icon_selector.xml
第二个按钮的布局文件,在main\res\drawable中创建一个新的布局文件并命名为menu_tongxunlu_icon_selector.xml
<?xml version="1.0" encoding="utf-8"?>
<selector xmlns:android="http://schemas.android.com/apk/res/android">
    <item android:drawable="@mipmap/tongxunlu02" android:state_pressed="true"/>
    <item android:drawable="@mipmap/tongxunlu02" android:state_selected="true"/>
    <item android:drawable="@mipmap/tongxunlu01"/>
</selector>
menu_faxian_icon_selector.xml
第三个按钮的布局文件,在main\res\drawable中创建一个新的布局文件并命名为menu_faxian_icon_selector.xml
<?xml version="1.0" encoding="utf-8"?>
<selector xmlns:android="http://schemas.android.com/apk/res/android">
    <item android:drawable="@mipmap/faxian02" android:state_pressed="true"/>
    <item android:drawable="@mipmap/faxian02" android:state_selected="true"/>
    <item android:drawable="@mipmap/faxian01"/>
</selector>
menu_wode_icon_selector.xml
第四个按钮的布局文件,在main\res\drawable中创建一个新的布局文件并命名为menu_wode_icon_selector.xml
<?xml version="1.0" encoding="utf-8"?>
<selector xmlns:android="http://schemas.android.com/apk/res/android">
    <item android:drawable="@mipmap/wode02" android:state_pressed="true"/>
    <item android:drawable="@mipmap/wode02" android:state_selected="true"/>
    <item android:drawable="@mipmap/wode01"/>
</selector>
首页界面
布局文件weixin_content_item.xml
<?xml version="1.0" encoding="utf-8"?>
<LinearLayout
    xmlns:android="http://schemas.android.com/apk/res/android"
    xmlns:tools="http://schemas.android.com/tools"
    android:layout_width="match_parent"
    android:layout_height="match_parent"
    android:orientation="vertical"
    tools:ignore="MissingDefaultResource">
    <LinearLayout
        android:layout_width="match_parent"
        android:layout_height="wrap_content"
        android:orientation="horizontal"
        android:gravity="center"
        android:layout_marginTop="5dp">
        <ImageView
            android:id="@+id/weixin_content_img"
            android:layout_width="48dp"
            android:layout_height="48dp"
            android:src="@mipmap/dingyuehao"
            android:layout_marginLeft="10dp"/>
        <LinearLayout
            android:layout_width="match_parent"
            android:layout_height="wrap_content"
            android:layout_gravity="center"
            android:layout_marginLeft="10dp"
            android:orientation="vertical">
            <TextView
                android:id="@+id/weixin_content_txt1"
                android:layout_width="wrap_content"
                android:layout_height="wrap_content"
                android:text="订阅号消息"
                android:textSize="24sp"
                android:textColor="#000000"
                />
            <TextView
                android:id="@+id/weixin_content_txt2"
                android:layout_width="wrap_content"
                android:layout_height="wrap_content"
                android:text="重庆科技学院:今晚,重科人用歌声献..."
                android:textSize="15sp"
                />
            <View
                android:layout_width="match_parent"
                android:layout_height="2dp"
                android:background="#d8dde1"
                android:layout_marginTop="10dp"
                android:layout_marginRight="10dp"/>
        </LinearLayout>
    </LinearLayout>
</LinearLayout>
Weixin.java
在包内创建一个新的文件夹entity,在该文件夹中创建新的Java类,命名为Weixin
public class Weixin {
    private String name;
    private String neirong;
    private int imageId;

    public String getName() {
        return name;
    }
    public void setName(String name) {
        this.name = name;
    }

    public String getNeirong() {
        return neirong;
    }
    public void setNeirong(String neirong) {
        this.neirong = neirong;
    }

    public int getImageId() {
        return imageId;
    }
    public void setImageId(int imageId) {
        this.imageId = imageId;
    }
}
WeixinAdapter.java
在包内创建一个新的文件夹adapter,在该文件夹中创建新的Java类,命名为WeixinAdapter
public class WeixinAdapter extends ArrayAdapter<Weixin> {
    private int resourceId;
    private static final String TAG = "WeixinAdapter";
    private List<Weixin> list;

    public WeixinAdapter(@NonNull Context context, int resource, @NonNull List<Weixin> objects) {
        super(context, resource, objects);
        resourceId = resource;
    }

    @NonNull
    @Override
    public View getView(int position, @Nullable View convertView, @NonNull ViewGroup parent)
    {
        Weixin weixin = getItem(position);
        View view = LayoutInflater.from(getContext()).inflate(resourceId,
                parent, false);
        ImageView fruitImage = view.findViewById(R.id.weixin_content_img);
        TextView fruitName = view.findViewById(R.id.weixin_content_txt1);
        TextView fruitNr = view.findViewById(R.id.weixin_content_txt2);

        fruitImage.setImageResource(weixin.getImageId());
        fruitName.setText(weixin.getName());
        fruitNr.setText(weixin.getNeirong());
        return view;
    }
}
这样首页部分就完成了。
通讯录界面
布局文件txl_content_item.xml
在layout文件夹中创建一个名为txl_content_item的布局文件。
<?xml version="1.0" encoding="utf-8"?>
<LinearLayout xmlns:android="http://schemas.android.com/apk/res/android"
    android:layout_width="match_parent"
    android:layout_height="match_parent">
    <LinearLayout
        android:layout_width="match_parent"
        android:layout_height="wrap_content"
        android:orientation="horizontal">
        <ImageView
            android:id="@+id/t_tx"
            android:layout_width="40dp"
            android:layout_height="40dp"
            android:background="@mipmap/newf"
            android:layout_marginTop="5dp"
            android:layout_marginLeft="10dp"/>
        <LinearLayout
            android:layout_width="match_parent"
            android:layout_height="wrap_content"
            android:orientation="vertical"
            android:layout_marginLeft="10dp">
            <TextView
                android:id="@+id/t_name"
                android:layout_width="wrap_content"
                android:layout_height="wrap_content"
                android:text="新的朋友"
                android:textSize="19dp"
                android:textColor="#000000"
                android:layout_marginTop="10dp"/>
            <View
                android:layout_width="match_parent"
                android:layout_height="1dp"
                android:layout_marginTop="20dp"
                android:background="#e0e0e0"/>

        </LinearLayout>

    </LinearLayout>


</LinearLayout>
Tongxunlu.java
在entity文件夹中创建一个名为Tongxunlu的Java类文件
public class Tongxunlu {
    private String name;
    private int imageId;

    public String getName(){
        return name;
    }
    public void setName(String name){
        this.name = name;
    }

    public int getImageId(){
        return imageId;
    }
    public void setImageId(int imageId) {
        this.imageId = imageId;
    }
}
TongxunluAdapter.java
在adapter文件夹中创建一个名为TongxunluAdapter的Java类文件
public class TongxunluAdapter extends ArrayAdapter<Tongxunlu> {
    private int resourceId;
    private static final String TAG = "TongxunluAdapter";
    private List<Tongxunlu> list;

    public TongxunluAdapter(@NonNull Context context, int resource, @NonNull List<Tongxunlu> objects) {
        super(context, resource, objects);
        resourceId = resource;
    }

    @NonNull
    @Override
    public View getView(int position, @Nullable View convertView, @NonNull ViewGroup parent)
    {
        Tongxunlu tongxunlu = getItem(position);
        View view = LayoutInflater.from(getContext()).inflate(resourceId,
                parent, false);

        ImageView t_tx = view.findViewById(R.id.t_tx);
        TextView t_name = view.findViewById(R.id.t_name);

        t_tx.setImageResource(tongxunlu.getImageId());
        t_name.setText(tongxunlu.getName());

        return view;
    }
}
聊天功能的实现
聊天界面布局activity_chat.xml
在layout文件夹中创建一个名为activity_chat的布局文件
<?xml version="1.0" encoding="utf-8"?>
<LinearLayout xmlns:android="http://schemas.android.com/apk/res/android"
    xmlns:app="http://schemas.android.com/apk/res-auto"
    xmlns:tools="http://schemas.android.com/tools"
    android:layout_width="match_parent"
    android:layout_height="match_parent"
    android:orientation="vertical"
    android:background="#d8e0e8"
    tools:context=".ChatActivity">
    <RelativeLayout
        android:layout_width="match_parent"
        android:layout_height="70dp"
        android:background="#f2f2f2">

        <Button
            android:id="@+id/weixin_back"
            android:layout_width="40dp"
            android:layout_height="40dp"
            android:layout_alignParentLeft="true"
            android:layout_marginLeft="10dp"
            android:layout_marginTop="12dp"
            android:background="@mipmap/back" />

        <TextView
            android:id="@+id/chat_name"
            android:layout_width="wrap_content"
            android:layout_height="wrap_content"
            android:text="笨笨"
            android:textSize="25dp"
            android:textColor="#000000"
            android:layout_centerHorizontal="true"
            android:layout_marginTop="15dp"/>
        <Button
            android:layout_width="40dp"
            android:layout_height="40dp"
            android:background="@mipmap/ddd"
            android:layout_alignParentRight="true"
            android:layout_marginTop="12dp"
            android:layout_marginRight="10dp"/>

    </RelativeLayout>

    <androidx.recyclerview.widget.RecyclerView
        android:id="@+id/msg_recycler_view"
        android:layout_width="match_parent"
        android:layout_height="0dp"
        android:layout_weight="1"/>

    <RelativeLayout
        android:layout_width="match_parent"
        android:layout_height="60dp"
        android:orientation="horizontal"
        android:background="#f2f2f2">
        <Button
            android:id="@+id/yuyin"
            android:layout_width="40dp"
            android:layout_height="40dp"
            android:background="@mipmap/yuyin"
            android:layout_marginTop="10dp"
            android:layout_marginLeft="10dp"/>

        <EditText
            android:id="@+id/input_txt"
            android:layout_width="0dp"
            android:layout_height="42dp"
            android:layout_marginLeft="20dp"
            android:layout_marginTop="10dp"
            android:layout_toRightOf="@+id/yuyin"
            android:layout_toLeftOf="@+id/send_emoji"
            android:layout_marginRight="10dp"
            android:background="#ffffff" />
        <Button
            android:id="@+id/send_emoji"
            android:layout_width="40dp"
            android:layout_height="40dp"
            android:background="@mipmap/fabiaoqing"
            android:layout_marginTop="10dp"
            android:layout_marginRight="5dp"
            android:layout_toLeftOf="@+id/btn_send"/>
        <Button
            android:id="@+id/btn_send"
            android:layout_width="60dp"
            android:layout_height="40dp"
            android:text="发送"
            android:textColor="#ffffff"
            android:textSize="20sp"
            android:background="#32dc60"
            android:layout_alignParentRight="true"
            android:layout_marginTop="10dp"
            android:layout_marginRight="10dp"/>

    </RelativeLayout>


</LinearLayout>
聊天框的布局msg_item.xml
在layout文件夹中创建一个名为msg_item的布局文件
代码中涉及到聊天框的图片和路径,图片文件保存在res/mipmap_hdpi中
<?xml version="1.0" encoding="utf-8"?>
<LinearLayout
    xmlns:android="http://schemas.android.com/apk/res/android"
    android:orientation="vertical"
    android:layout_width="match_parent"
    android:layout_height="wrap_content"
    android:padding="10dp">

    <LinearLayout
        android:id="@+id/left_layout"
        android:layout_gravity="left"
        android:layout_width="wrap_content"
        android:layout_height="wrap_content"
        android:orientation="horizontal"
        android:background="@mipmap/message_left">

        <TextView
            android:id="@+id/left_msg"
            android:layout_width="wrap_content"
            android:layout_height="wrap_content"
            android:layout_gravity="center"
            android:layout_margin="10dp"
            android:textColor="#fff"
            android:text="你好,小明"/>
    </LinearLayout>

    <LinearLayout
        android:id="@+id/right_layout"
        android:orientation="horizontal"
        android:layout_width="wrap_content"
        android:layout_height="wrap_content"
        android:background="@mipmap/message_right"
        android:layout_gravity="right">

        <TextView
            android:id="@+id/right_msg"
            android:layout_width="wrap_content"
            android:layout_height="wrap_content"
            android:layout_gravity="center"
            android:layout_margin="10dp"
            android:text="口口口口"
            />
    </LinearLayout>
</LinearLayout>
Msg.java
在entity文件夹中创建一个名为Msg的Java类文件
public class Msg {
    public static final int TYPE_RECEIVED = 0;
    public static final int TYPE_SENT = 1;
    // 消息内容
    private String content;
    // 消息类型
    private int type;

    public Msg(String content,int type){
        this.content = content;
        this.type = type;
    }

    public int getType(){
        return type;
    }

    public String getContent(){
        return content;
    }

    public void setContent(String content){
        this.content = content;
    }

    public void setType(int type){
        this.type = type;
    }
}
MsgAdapter.java
在adapter文件夹中创建一个名为MsgAdapter的Java类文件
public class MsgAdapter extends RecyclerView.Adapter<MsgAdapter.ViewHolder> {
    private List<Msg> mMsgList;
    static class ViewHolder extends RecyclerView.ViewHolder{
        LinearLayout leftLayout;
        LinearLayout rightLayout;
        TextView leftMsg;
        TextView rightMsg;
        public ViewHolder(View view){
            super(view);
            leftLayout = (LinearLayout) view.findViewById(R.id.left_layout);
            rightLayout = (LinearLayout) view.findViewById(R.id.right_layout);
            leftMsg = (TextView) view.findViewById(R.id.left_msg);
            rightMsg = (TextView) view.findViewById(R.id.right_msg);
        }
    }

    public MsgAdapter(List<Msg> msgList){
        mMsgList = msgList;
    }

    @Override
    public ViewHolder onCreateViewHolder(ViewGroup parent, int viewType){
        View view = LayoutInflater.from(parent.getContext()).inflate(R.layout.msg_item,parent,false);
        return new ViewHolder(view);
    }

    @Override
    public void onBindViewHolder(ViewHolder holder,int position){
        Msg msg = mMsgList.get(position);
        if (msg.getType() == Msg.TYPE_RECEIVED) {
            holder.leftLayout.setVisibility(View.VISIBLE);
            holder.rightLayout.setVisibility(View.GONE);
            holder.leftMsg.setText(msg.getContent());
        }else if (msg.getType() == Msg.TYPE_SENT){
            holder.rightLayout.setVisibility(View.VISIBLE);
            holder.leftLayout.setVisibility(View.GONE);
            holder.rightMsg.setText(msg.getContent());
        }
    }

    @Override
    public int getItemCount() {
        return mMsgList.size();
    }
}
ChatActivity.java
在包内创建一个名为ChatActivity的Java类文件
public class ChatActivity extends AppCompatActivity {
    private Handler mHandler = new Handler();

    private List<Msg> msgList = new ArrayList<>();
    private EditText inputText;
    private Button send;
    private RecyclerView msgRecyclerView;
    private MsgAdapter adapter;
    @Override
    protected void onCreate(Bundle savedInstanceState) {
        super.onCreate(savedInstanceState);
        setContentView(R.layout.activity_chat);

        //设置返回按钮
        Button back = (Button) findViewById(R.id.weixin_back) ;
        back.setOnClickListener(new View.OnClickListener() {
            @Override
            public void onClick(View view) {
                finish();
            }
        });

        //聊天功能
        inintMsgs();
        inputText = (EditText) findViewById(R.id.input_txt);
        send = (Button) findViewById(R.id.btn_send);
        msgRecyclerView = (RecyclerView) findViewById(R.id.msg_recycler_view);
        LinearLayoutManager layoutManager = new LinearLayoutManager(this);
        msgRecyclerView.setLayoutManager(layoutManager);
        adapter = new MsgAdapter(msgList);
        msgRecyclerView.setAdapter(adapter);
        send.setOnClickListener(new View.OnClickListener() {
            @Override
            public void onClick(View v) {
                String content = inputText.getText().toString();
                if (!"".equals(content)){
                    Msg msg = new Msg(content,Msg.TYPE_SENT);
                    msgList.add(msg);
                    adapter.notifyItemInserted(msgList.size() - 1);
                    msgRecyclerView.scrollToPosition(msgList.size() - 1);
                    inputText.setText("");
                    recrive();
                }else {
                    Toast.makeText(ChatActivity.this,"请输入",Toast.LENGTH_SHORT).show();
                }
            }
        });
    }

    private void inintMsgs() {
        Msg msg1 = new Msg("Hello",Msg.TYPE_RECEIVED);
        msgList.add(msg1);
        Msg msg2 = new Msg("Never Mind the Slander and Lies",Msg.TYPE_SENT);
        msgList.add(msg2);
        Msg msg3 = new Msg("long may the sunshine!",Msg.TYPE_RECEIVED);
        msgList.add(msg3);
    }
    private void recrive(){
        Msg msg1 = new Msg("you are dragon,more dragon than me",Msg.TYPE_RECEIVED);
        msgList.add(msg1);
    }
}
朋友圈功能的实现
activity_pyquan.xml
在layout文件夹中创建一个名为activity_pyquan的布局文件
<?xml version="1.0" encoding="utf-8"?>
<LinearLayout
    xmlns:android="http://schemas.android.com/apk/res/android"
    android:layout_width="match_parent"
    android:layout_height="match_parent"
    android:orientation="vertical"
    android:background="#ffffff">
    <RelativeLayout
        android:layout_width="match_parent"
        android:layout_height="70dp"
        android:background="#f2f2f2">

        <Button
            android:id="@+id/pyquan_back"
            android:layout_width="40dp"
            android:layout_height="40dp"
            android:layout_alignParentLeft="true"
            android:layout_marginLeft="10dp"
            android:layout_marginTop="12dp"
            android:background="@mipmap/back" />
        <TextView
            android:layout_width="wrap_content"
            android:layout_height="wrap_content"
            android:text="朋友圈"
            android:textSize="25dp"
            android:textColor="#000000"
            android:layout_centerHorizontal="true"
            android:layout_marginTop="15dp"/>
        <Button
            android:layout_width="40dp"
            android:layout_height="40dp"
            android:background="@mipmap/zhaoxiang"
            android:layout_alignParentRight="true"
            android:layout_marginTop="12dp"
            android:layout_marginRight="10dp"/>
    </RelativeLayout>

    <ListView
        android:id="@+id/pyquan_listview"
        android:layout_width="match_parent"
        android:layout_height="match_parent"
        android:background="#ffffff"
        android:overScrollMode="never"/>
</LinearLayout>
pyquan_content_item.xml
在layout文件夹中创建一个名为pyquan_content_item的布局文件
<?xml version="1.0" encoding="utf-8"?>
<LinearLayout
    xmlns:android="http://schemas.android.com/apk/res/android"
    xmlns:tools="http://schemas.android.com/tools"
    android:layout_width="match_parent"
    android:layout_height="match_parent"
    android:orientation="vertical"
    tools:ignore="MissingDefaultResource">
    <LinearLayout
        android:layout_width="match_parent"
        android:layout_height="wrap_content"
        android:orientation="horizontal"
        android:layout_marginBottom="5dp">
        <!--头像-->
        <ImageView
            android:id="@+id/pyquan_touxiang"
            android:layout_width="60dp"
            android:layout_height="60dp"
            android:background="@mipmap/touxiang"
            android:layout_marginLeft="15dp"
            android:layout_marginTop="15dp"/>
        <!--内容-->
        <LinearLayout
            android:layout_width="match_parent"
            android:layout_height="wrap_content"
            android:orientation="vertical"
            android:layout_marginLeft="10dp">
            <TextView
                android:id="@+id/pyquan_name"
                android:layout_width="wrap_content"
                android:layout_height="wrap_content"
                android:text="所长的肚子"
                android:textSize="20sp"
                android:textColor="#2999ce"
                android:layout_marginTop="15dp"/>
            <TextView
                android:id="@+id/pyquan_txt"
                android:layout_width="wrap_content"
                android:layout_height="wrap_content"
                android:text="所若干黑色和人格拉尔感觉到开发了的概率较大了开长大ad管理卡带回来卡迪夫辣豆腐静安寺电话费拉收到货了咖啡机阿拉斯加代理费"
                android:textSize="17dp"
                android:textColor="#000000"/>
            <ImageView
                android:id="@+id/pyquan_peitu"
                android:layout_width="wrap_content"
                android:layout_height="wrap_content"
                android:src="@mipmap/photo"
                android:layout_marginTop="5dp"/>
            <RelativeLayout
                android:layout_width="match_parent"
                android:layout_height="wrap_content"
                android:layout_marginTop="5dp">
                <TextView
                    android:id="@+id/pyquan_time"
                    android:layout_width="wrap_content"
                    android:layout_height="wrap_content"
                    android:text="2"
                    android:textColor="#b5b5b5"/>
                <TextView
                    android:layout_width="wrap_content"
                    android:layout_height="wrap_content"
                    android:layout_toRightOf="@+id/pyquan_time"
                    android:text="小时前"
                    android:textColor="#b5b5b5"/>
                <ImageView
                    android:layout_width="40dp"
                    android:layout_height="20dp"
                    android:background="@mipmap/dian"
                    android:layout_alignParentRight="true"
                    android:layout_marginRight="10dp"
                    />
            </RelativeLayout>

        </LinearLayout>
    </LinearLayout>
</LinearLayout>
Pyquan.java
在entity文件夹中创建一个名为Pyquan的Java类文件
public class Pyquan {
    private String name;
    private String txt;
    private String time;
    private int imageId1;
    private int imageId2;

    public String getName() {
        return name;
    }
    public void setName(String name) {
        this.name = name;
    }

    public String getTxt() {
        return txt;
    }
    public void setTxt(String txt) {
        this.txt = txt;
    }

    public String getTime() {
        return time;
    }
    public void setTime(String time) {
        this.time = time;
    }

    public int getImageId1() {
        return imageId1;
    }
    public void setImageId1(int imageId1) {
        this.imageId1 = imageId1;
    }

    public int getImageId2() {
        return imageId2;
    }
    public void setImageId2(int imageId2) {
        this.imageId2 = imageId2;
    }
}
PyquanAdapter.java
在adapter文件夹中创建一个名为PyquanAdapter的Java类文件
public class PyquanAdapter extends ArrayAdapter<Pyquan> {
    private int resourceId;
    private static final String TAG = "PyquanAdapter";
    private List<Pyquan> list;

    public PyquanAdapter(@NonNull Context context, int resource, @NonNull List<Pyquan> objects) {
        super(context, resource, objects);
        resourceId = resource;
    }

    @NonNull
    @Override
    public View getView(int position, @Nullable View convertView, @NonNull ViewGroup parent)
    {
        Pyquan pyquan = getItem(position);
        View view = LayoutInflater.from(getContext()).inflate(resourceId,
                parent, false);

        ImageView touxiang = view.findViewById(R.id.pyquan_touxiang);
        TextView mingcheng = view.findViewById(R.id.pyquan_name);
        TextView neirong = view.findViewById(R.id.pyquan_txt);
        TextView time = view.findViewById(R.id.pyquan_time);
        ImageView peitu = view.findViewById(R.id.pyquan_peitu);

        touxiang.setImageResource(pyquan.getImageId1());
        peitu.setImageResource(pyquan.getImageId2());
        mingcheng.setText(pyquan.getName());
        neirong.setText(pyquan.getTxt());
        time.setText(pyquan.getTime());

        return view;
    }
}
PyquanActivity.java
在包内创建一个名为PyquanActivity的Java类文件
public class PyquanActivity extends AppCompatActivity {

    private List<Pyquan> pyquanList = new ArrayList<>();

    @Override
    protected void onCreate(Bundle savedInstanceState) {
        super.onCreate(savedInstanceState);
        setContentView(R.layout.activity_pyquan);

        //设置back按钮
        Button back = (Button) findViewById(R.id.pyquan_back) ;
        back.setOnClickListener(new View.OnClickListener() {
            @Override
            public void onClick(View view) {
                finish();
            }
        });

        inints();

        PyquanAdapter adapter = new PyquanAdapter(getApplicationContext(),R.layout.pyquan_content_item,pyquanList);
        ListView listView = findViewById(R.id.pyquan_listview);
        listView.setAdapter(adapter);
    }

    private void inints() {
        Pyquan p1 = new Pyquan();
        p1.setImageId1(R.mipmap.touxiang);
        p1.setImageId2(R.mipmap.photo);
        p1.setName("所长的肚子");
        p1.setTxt("所长的肚子所长的肚子所长的肚子所长的牛子所长的肚子所长的肚子所长的肚子所长的肚子");
        p1.setTime("2");
        pyquanList.add(p1);

        Pyquan p2 = new Pyquan();
        p2.setImageId1(R.mipmap.t_tx05);
        p2.setImageId2(R.mipmap.py02);
        p2.setName("Mr_Quin");
        p2.setTxt("分享图片");
        p2.setTime("5");
        pyquanList.add(p2);

        Pyquan p3 = new Pyquan();
        p3.setImageId1(R.mipmap.tx_kenny);
        p3.setImageId2(R.mipmap.py03);
        p3.setName("机智的肯尼");
        p3.setTxt("9494");
        p3.setTime("6");
        pyquanList.add(p3);

        Pyquan p4 = new Pyquan();
        p4.setImageId1(R.mipmap.t_tx04);
        p4.setImageId2(R.mipmap.py05);
        p4.setName("是acc啦");
        p4.setTxt("歇了");
        p4.setTime("7");
        pyquanList.add(p4);

        Pyquan p5 = new Pyquan();
        p5.setImageId1(R.mipmap.t_tx05);
        p5.setImageId2(R.mipmap.py04);
        p5.setName("Mr_Quin");
        p5.setTxt("都怪小樱");
        p5.setTime("8");
        pyquanList.add(p5);

        Pyquan p6 = new Pyquan();
        p6.setImageId1(R.mipmap.t_tx01);
        p6.setImageId2(R.mipmap.py06);
        p6.setName("笨笨");
        p6.setTxt("不列颠传说中的王。也被誉为骑士王。阿尔托莉雅是幼名,自从当上国王之后,就开始被称为亚瑟王了。在骑士道凋零的时代,手持圣剑,给不列颠带来了短暂的和平与最后的繁荣。史实上虽为男性,但在这个世界内却似乎是男装丽人。");
        p6.setTime("9");
        pyquanList.add(p6);

    }


}
工程文件
这是这整个工程的文件,需要的话可以通过积分下载。
用AndroidStudio制作微信的界面-Android文档类资源-CSDN下载这是一个我用AndroidStudio模仿制作微信界面的工程文件的压缩包更多下载资源、学习资料请访问CSDN下载频道.https://download.csdn.net/download/nazonomaster/85232385
############# 2023/7/20更新,优化了界面 #################
对应的工程文件我也进行了更新

 文章来源:https://www.toymoban.com/news/detail-486631.html

 文章来源地址https://www.toymoban.com/news/detail-486631.html
到了这里,关于Android Studio 制作微信界面 下的文章就介绍完了。如果您还想了解更多内容,请在右上角搜索TOY模板网以前的文章或继续浏览下面的相关文章,希望大家以后多多支持TOY模板网!


